# Synchronous flows
Flows configured as synchronous flows are executed with feedback. This enables you to show an info box in the ELO client once a flow has been completed, for example.
All flows are asynchronous by default. This means that the flows are executed without final feedback. This may make sense if you want to prevent the user interface from being blocked, for example.
In this section, you'll learn how to recognize whether synchronous feedback is supported and what configuration options are available for the query results.
# User actions with synchronous feedback
Please note
You cannot use synchronous flows with multi-activities. A user action can only return synchronous feedback with an asynchronous flow.
For more information on activities for user actions, refer to User actions > Select activities in the documentation.
For user actions, you enable synchronous feedback in the node configuration for the manual trigger.
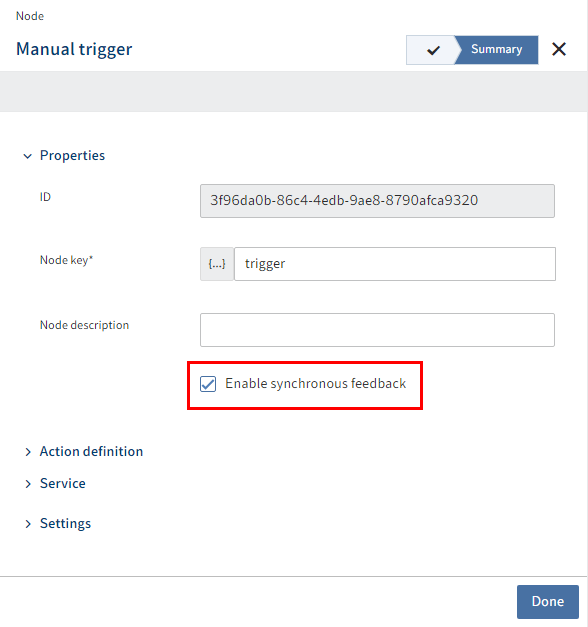
In the configuration for the manual trigger, check the Enable synchronous feedback check box in the Summary step.
Finish your configuration.
An end node (button with flag icon) appears in the flow designer.
Open the node configuration for the end node.
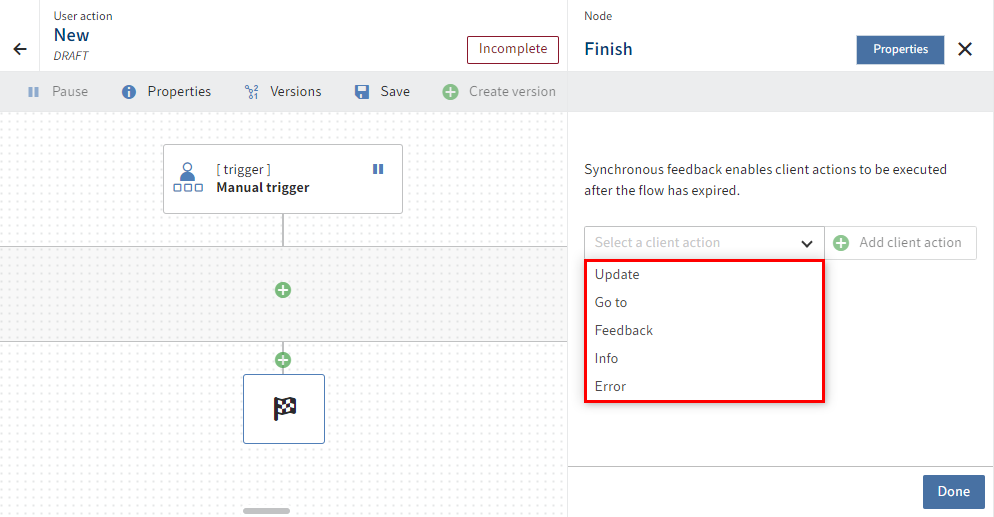
You can add different client actions via a drop-down menu here:
- Refresh: Refreshes the ELO client once the flow is processed.
- Go to: The ELO client goes to the configured object.
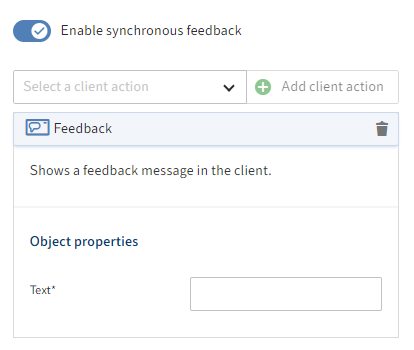
- Feedback: The ELO client shows a toast with the configured message.
- Info: The ELO client shows an info box with the configured message.
- Error: The ELO client shows an error box with the configured message.
Select an action.
Select Add client action.
Information
You can link multiple client actions.
However, not all combinations make sense.
Example: A Go to action implies a Refresh action. So, you don't have to link them.
Configure the desired object properties.
Select Done.

The selected action(s) are linked with the flow. The flag icon changes, indicating that client actions have been configured.
Save the flow.
The status display changes to Active.
# Data queries and automations with synchronous feedback
Data queries are always based on triggers with synchronous feedback.
With automations, like with user actions, there are triggers that support synchronous feedback.
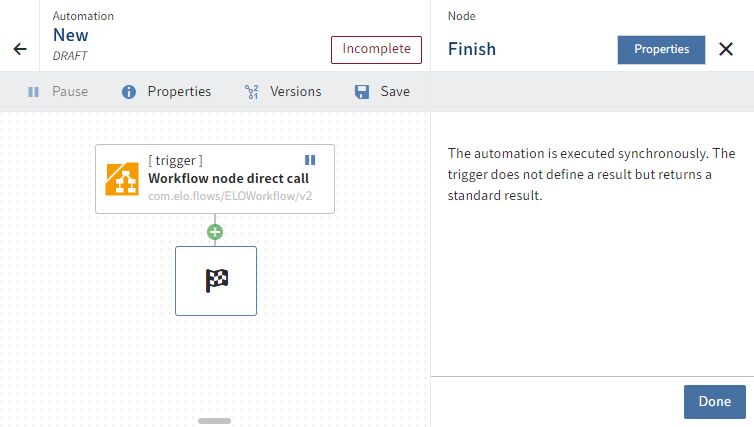
The end node automatically appears as a flag icon in the flow designer for triggers that support synchronous feedback.
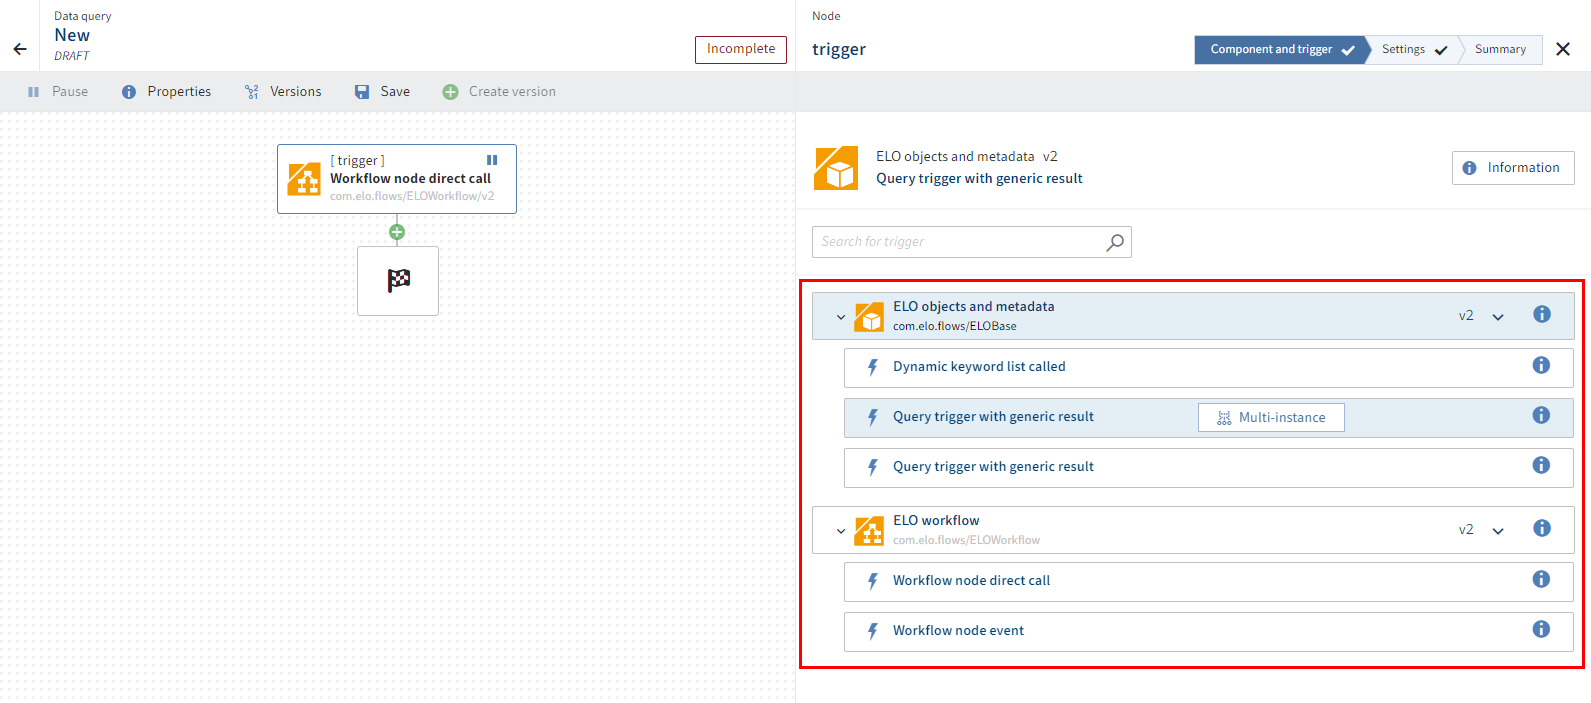
You can view or configure result definitions in the end node.
The ELO metadata and objects component provides the Query trigger with generic result (single-instance trigger and multi-instance trigger) and Dynamic keyword list called triggers with synchronous feedback. The following configuration options are available depending on the type of feedback:
- Result definition via 'GenericQueryResult'
- Result definition via 'SimpleDynKwlColumnsResult'
- Result definition via 'DynKwlColumnsResult'
You'll find more information on the ELO metadata and objects component under Components > ELO objects and metadata.
Information
With some automatic triggers, there is no option to configure properties for synchronous feedback. In this case, the trigger defines the result. In this case, the flag icon is only intended as an indicator that there is a configuration.
The Workflow node direct call trigger in the ELO workflow component is an example of execution of synchronous feedback.
You'll find more information on the ELO workflow component under Components > ELO workflow.