# User actions
Flows under User actions consist of a manual trigger and of at least one or more services. Optionally, you can make flows more complex by using branches.
# Manual trigger
You need to define manual triggers for user actions. These manual triggers provide a button in the ELO client that starts the flow manually.
The manual trigger configuration consists of the Action definition and Summary steps.
Please note
The button is only shown if the status of the flow is Active. You have to define at least one service.
# Select manual trigger
Open the trigger in the node editor by selecting the trigger node.
The Action definition step opens.
Complete at least the mandatory fields.
Select Next to confirm your entries.
Select Done to finish configuring the trigger.
Please note
With the Done action, the configurations are only saved in the configuration area and are not yet applied to the flow.
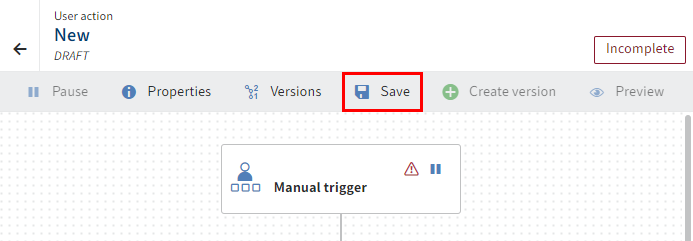
In the flow designer, select Save to apply the entries in the configuration area to the flow.
# 'Action definition' overview
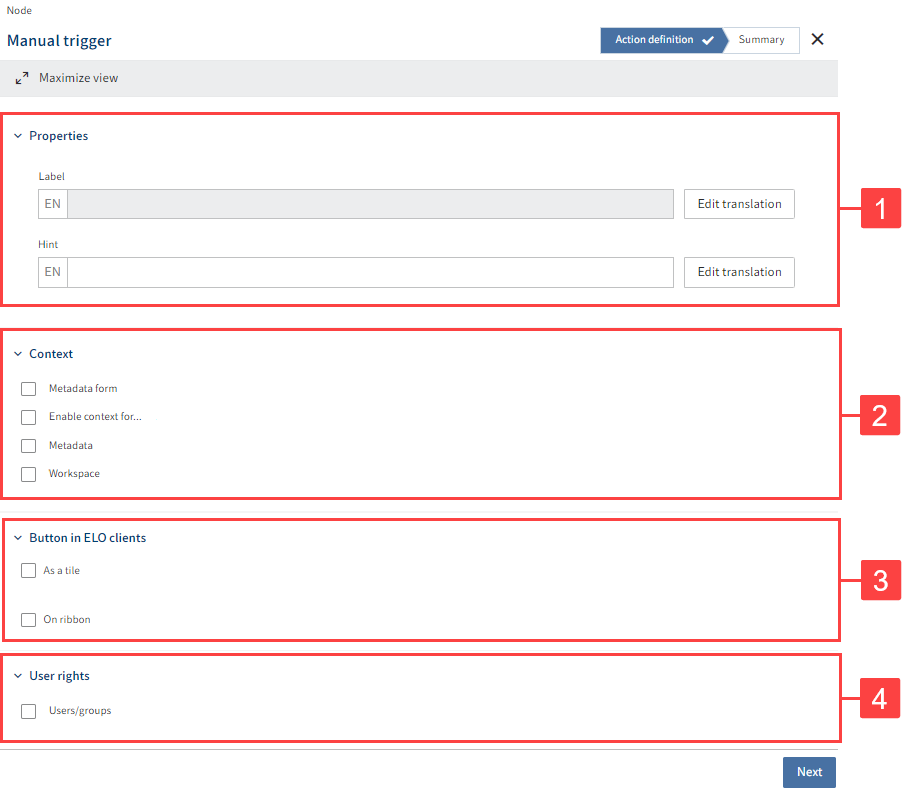
You have the following configuration options:
2 Context
# 'Properties' detailed view

The 'Properties' detailed view offers the following actions:
1 Select label: Button title shown in the ELO clients
2 Add tip: Tooltip text for the button you've created
Optional: If you want to offer translated texts, you can configure translated display names via Edit translation. You will find more information under ELO packages > Other topics > Translations > Use translation variables (opens new window).
# 'Context' detailed view

Under 'Context', you can specify when to display the user action. The following actions are possible:
1 Configure metadata form: Configure the relevant metadata form for this button. The button is only enabled if the selected element has the defined metadata form.
Information
Under Components > General information, you will find more information on completing fields with gen. 1 and gen. 2 metadata in the flow designer.
2 Enable context for…: This button is only enabled if the selected element is a folder and/or a document. After activation, the object ID of the object selected in ELO Flows is provided.
3 Metadata: Define an aspect filter (metadata gen. 2) for the user action that determines the conditions under which the action will start. Enter the aspect mapping, the field label, the comparison mode, and at least one field value.
4 Workspace: Select a workspace from your package to map the user action to it.
# 'Button in ELO clients' detailed view
Under 'Button in ELO clients', define where to display the user action. The following actions are possible:
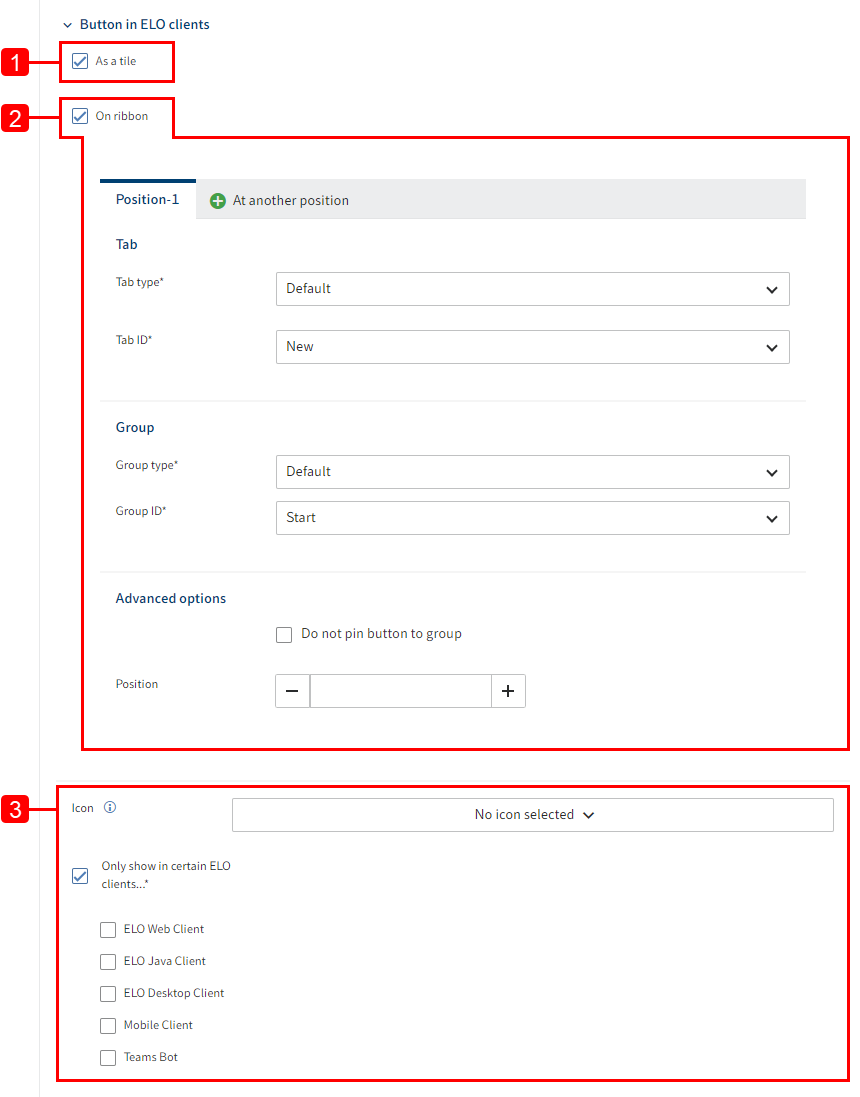
1 Show as a tile: The user action is shown as a tile in the My ELO work area. You can configure an icon for it.
2 Show on ribbon: Defines the position of the button on the ribbon in the ELO clients. Select the tab, the group, and the icon.
Under Tab type in the Tab options, choose between Default, Context, Workspace or User-defined.
If you select the Default tab type, the standard ELO tabs are available under Tab ID. With the Context tab type, the tab ID relates to the entry selected under Context. If you select the Workspace tab type, you need to specify the workspace type instead of the tab ID. With the User-defined tab type, you create a new tab on the ribbon with your own tab ID, label, and position.
Under Group, select the Default or User-defined group type to map the user action to a group on the ribbon.
Under Advanced options, you have the option to not pin the user action button to a group. In addition, you can specify the exact position on the ribbon.
3 Icon: Select an icon or upload a new icon. You can also restrict the icon to specific ELO clients.
The following clients are available: ELO Web Client, ELO Java Client, ELO Desktop Client, Mobile Client, and Teams Bot.
# 'User permissions' detailed view

The 'User permissions' detailed view offers the following actions:
Users/groups: Defines which users and groups the button is shown to. If this option is not enabled, the button is shown to all users.
# 'Summary' overview
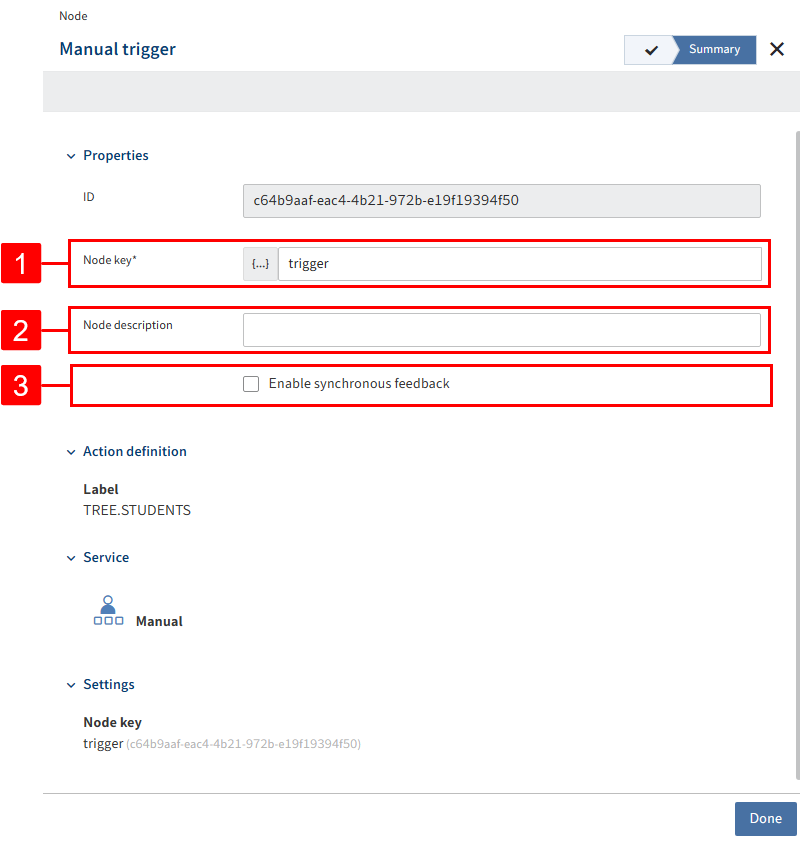
The Summary step opens. All the settings are shown once again.
1 Node key: Name of the node shown in square brackets in the flow designer
2 Node description: More detailed description of the node
3 Enable synchronous feedback: Executes the flow as a synchronous flow
Information
You can find more information on this topic in the Synchronous flows section.
# Select activities (optional)
Information
Activities are optional. You can also create a service, data query flow, or branch directly. You will find more information on branches in ELO Flows in this documentation under Advanced flow.
Via Add activity, define what to show when the button is selected in the ELO client.
User actions provide two types of activity for multiple processing of objects: activities and multi-activities.
Activities result in flows that process multiple objects as a bundle, whereas multi-activities trigger iterative flows for multiple objects. Flows with synchronous feedback cannot be used for multi-activities. You can only use this type of activity for asynchronous flows.
Activities are useful if you want to execute individual activities in the user action or, in the case of multi-activities, if you want to process concurrently in the bundle. For example, if you want to display information during the user action, or if you want to simultaneously file multiple documents in a parent folder.
Use multi-activities if you want to execute individual actions in multi-activities, or if you want conditions in the flow to target individual objects. For example, if you want to link a custom feed post to each document when filing multiple documents, or you want the flow to trigger a different action depending on the document type.
# Activities
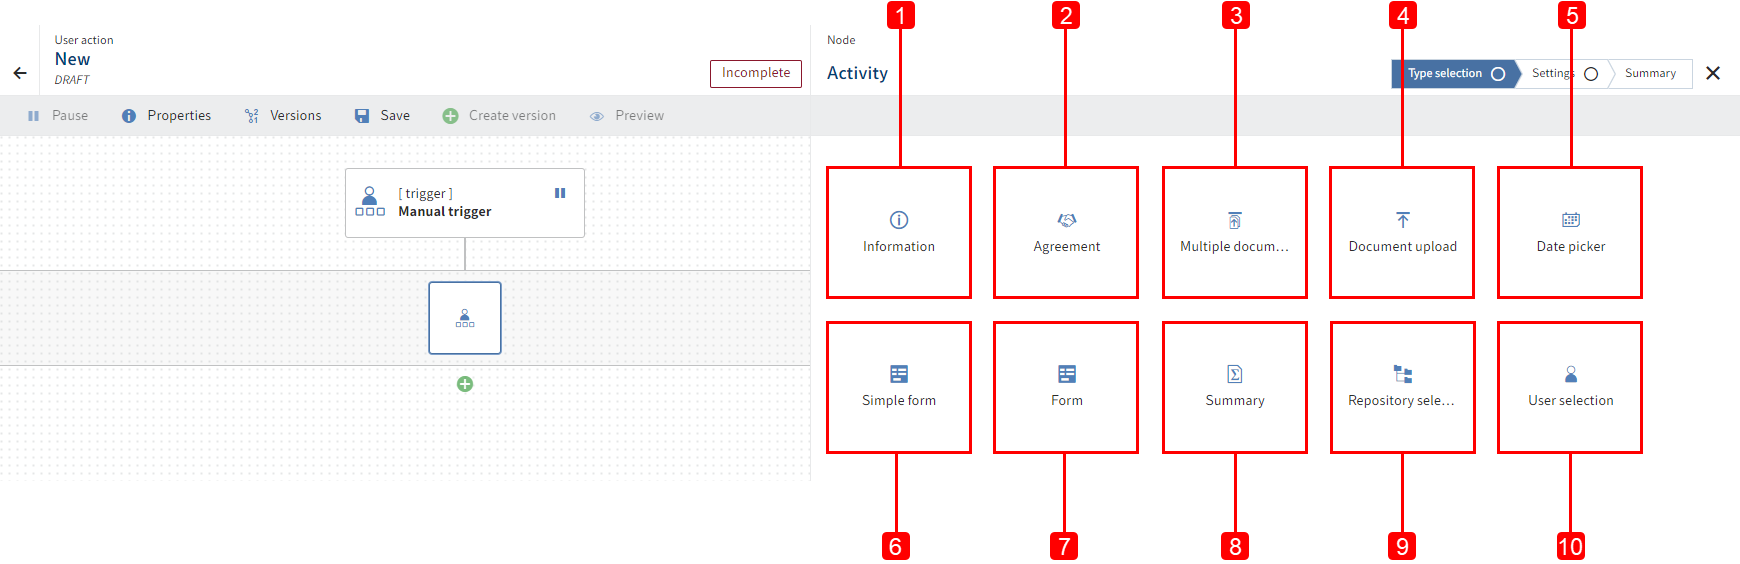
The following activities are available:
1 Information: Create information-only text that is shown in the client. This activity does not provide any data.
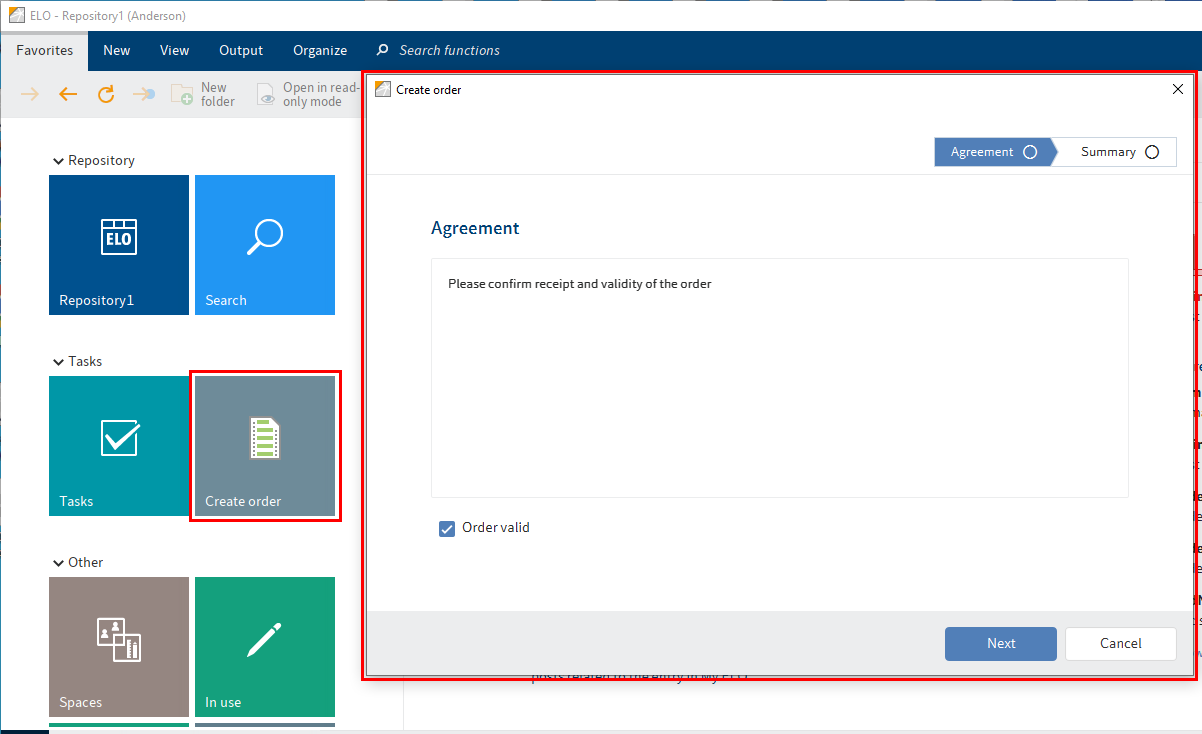
2 Agreement: Define an agreement shown in the client via a check box. A data privacy agreement, license agreement, etc. can be requested in this way, for example.
3 Multiple document upload: With this activity, you can prompt the user to upload multiple documents. You can save them in ELO with the ELO objects and metadata, for example.
4 Document upload: Request a document to be uploaded in the client. You can save it in ELO with the ELO objects and metadata, for example.
5 Date picker: Shows a calendar. Users can select a specific date or date interval here.
6 Simple form: Create a form which is then shown in the client. For example, you can implement a contact form with this activity.
7 Form: Select a preconfigured form from the package context. You can also check the following boxes: Load context in this form and Use query flow.
8 Summary: The summary shows all data from previous activities. You can place this at the end to give users a final overview.
9 Repository selection: Prompt users to select an element from the ELO repository. In the settings, set the root element to define the level at which users are offered a selection.
10 User selection: Prompt users to select an ELO user and/or ELO group from the ELO system.
# Select activity
To add an activity, select the plus icon next to the trigger node.
Information
If you have activities with text or titles visible to the user in the client, you can enter the texts in the Localization key field. If you want to offer translated texts, you can configure translated display names via Edit translation. You will find more information under ELO packages > Other topics > Translations > Use translation variables (opens new window).
Select an activity in the configuration area and define its contents.
The button and activities in the ELO client can be shown as follows:
# Conditional activities
The configured activities are usually displayed after a user action flow has been started in the client.
If you only want an activity to be displayed if specific conditions are met, use the Show activity function.
You can subsequently define the conditions that will determine whether to show or hide the activity in the integrated JSONata editor.
Please note
The data associated with activities that are hidden is not returned. Before you access activity values, you should first check whether the corresponding activity is also shown and can therefore be processed.
For example, you can use the JSONata expression $exists(activities.form) or the JSONata expression $exists(acitivites.form.field1) at the field level to check whether an activity with displayCondition exists.
Example
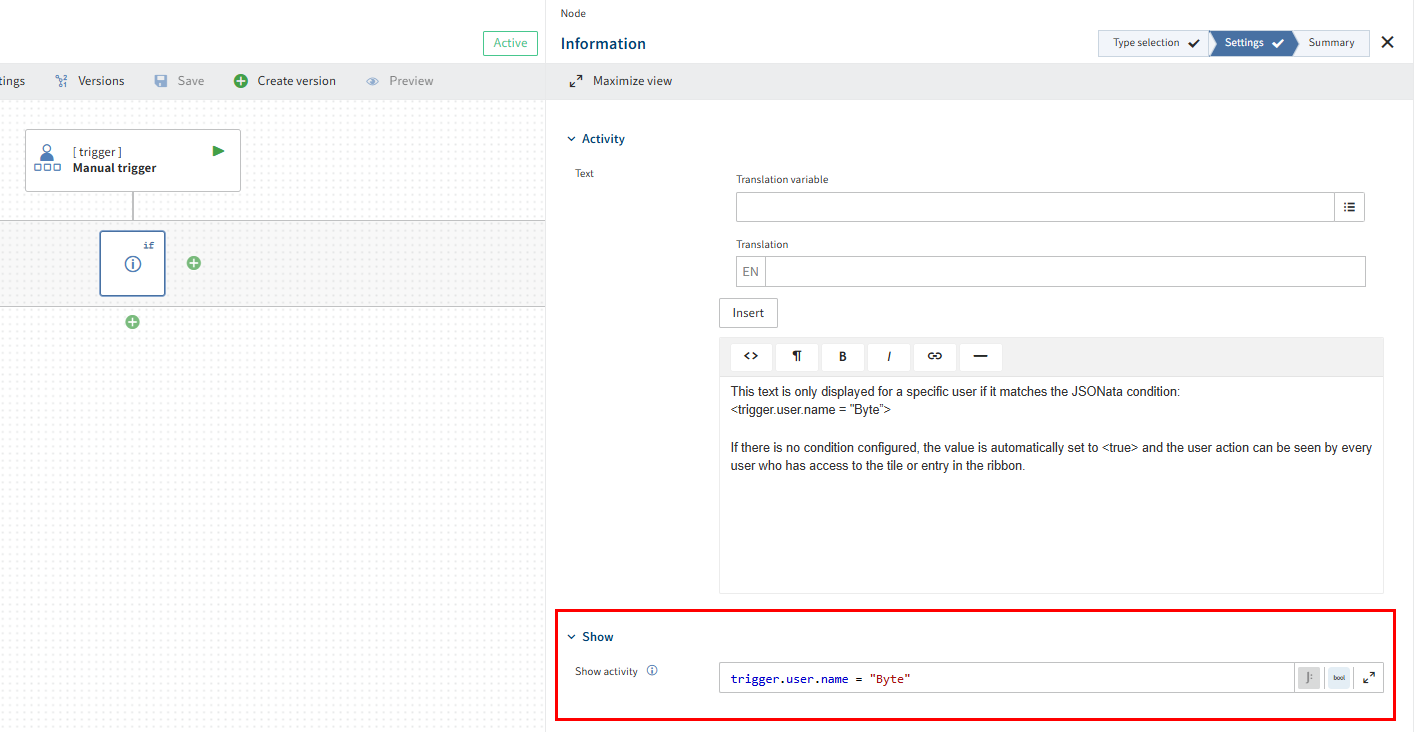
When you click on the button in the client, the Information activity displays information text that you previously configured in the flow.
If you don't enter a condition in the Show activity field, the value is automatically set to true and the information text is always displayed when the flow is active.
In the example shown here, the information should only be displayed for the user named Byte. In this case, the following condition needs to be entered in the JSONata editor.
trigger.user.name = "Byte"
This command displays the information text exclusively for the user named Byte.
# Multi-activities
Please note
You can only use multi-activities for asynchronous flows. Flows with synchronous feedback, such as Go to, do not support processing in a loop.
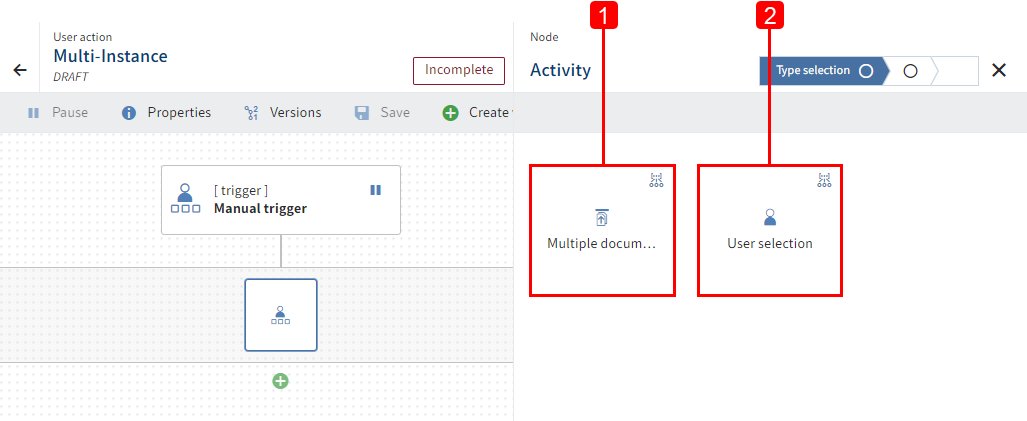
The following multi-activities are available:
1 Multiple document upload: Allows the client user to upload multiple documents.
2 User selection: Allows the client user to select multiple users or groups that the flow will apply to.
# Select service
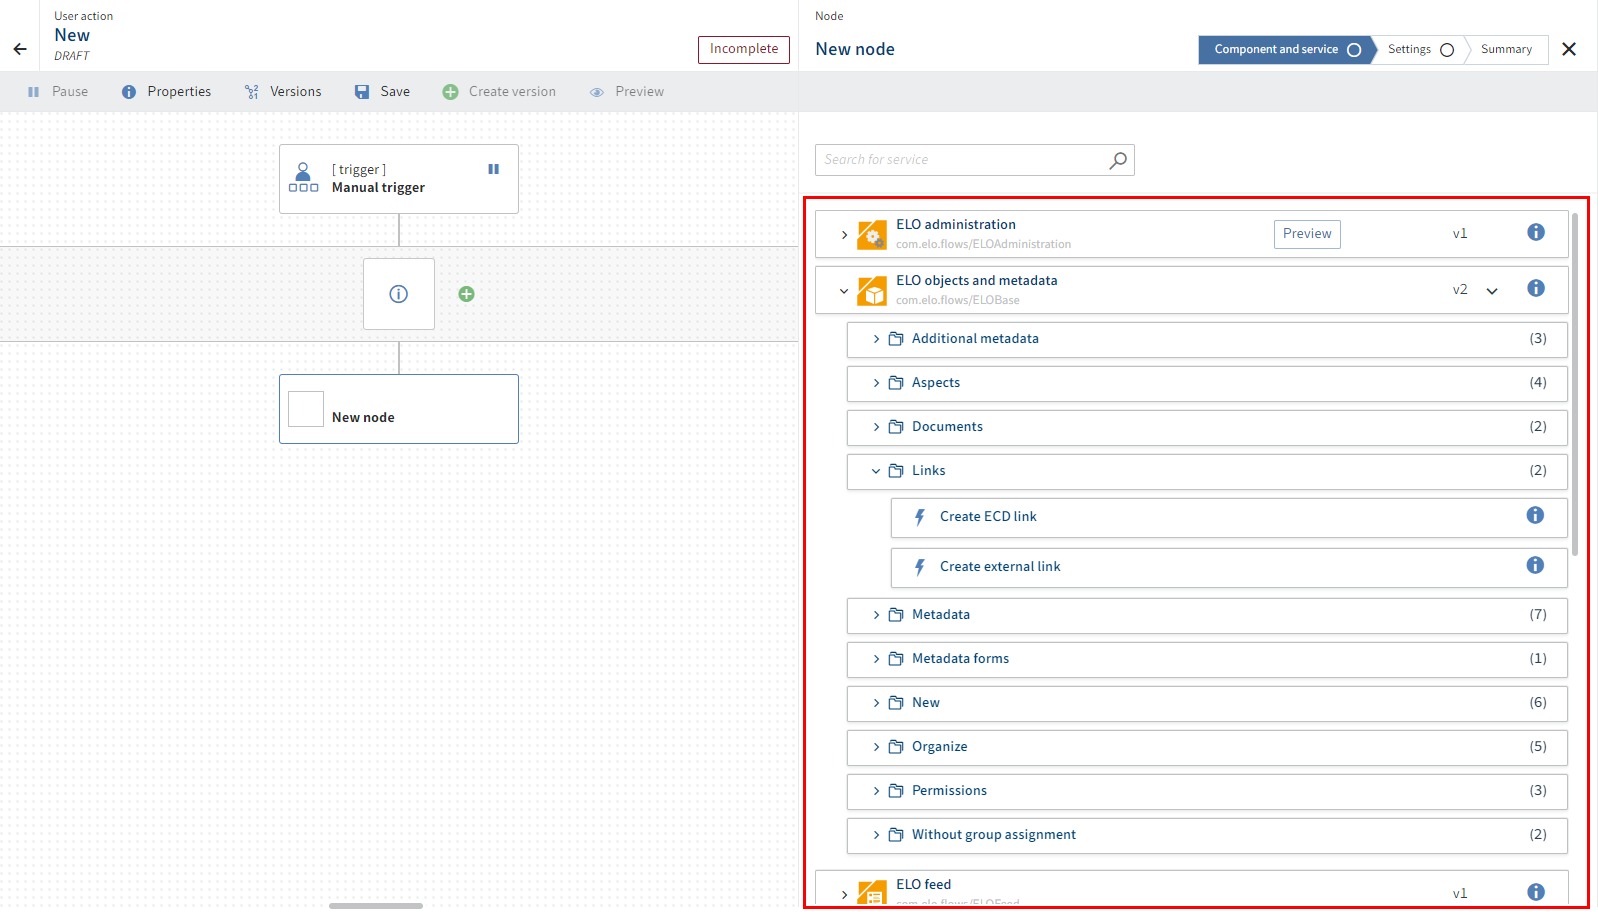
To add a service, select the plus icon next to the activity area and select Service.
The configuration area with the available components opens for the new node.
Select a component with the desired service.
Selecting the service automatically takes you to the next step with the user settings.
Select a user connection.
Information
If you've already configured a user under Credentials, you can select the user here. Otherwise, you can select the default connection or add a new one.
Confirm your selection with Next.
The Settings step opens.
Configure custom data for the service.
Information
You can complete the fields with static or dynamic values. Dynamic evaluation is performed based on JSONata. With this transformation language, you can access event objects of the previous nodes and triggers in addition to using transformations or simple functions.
You will find more about the use of JSONata in ELO Flows under JSONata editor.
Information
Some services offer you the Output schema function. That means that this service offers a dynamic output object. This can be the case with metadata objects, for example.
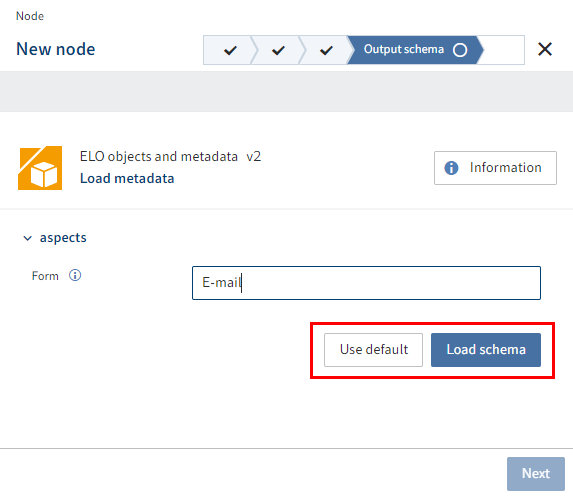
Example: You file a document with the E-mail metadata form and want to access a field of this document in a subsequent node. So that ELO Flows knows which metadata fields the output object has, you can either use a standard metadata form or load a special one. In the Metadata form field, enter "E-mail" and select Load schema. The schema is loaded with the appropriate metadata form properties.
Alternative: You can also select Use default. The object is then output with the default properties, and the properties of the object have to be accessed manually via JSONata.
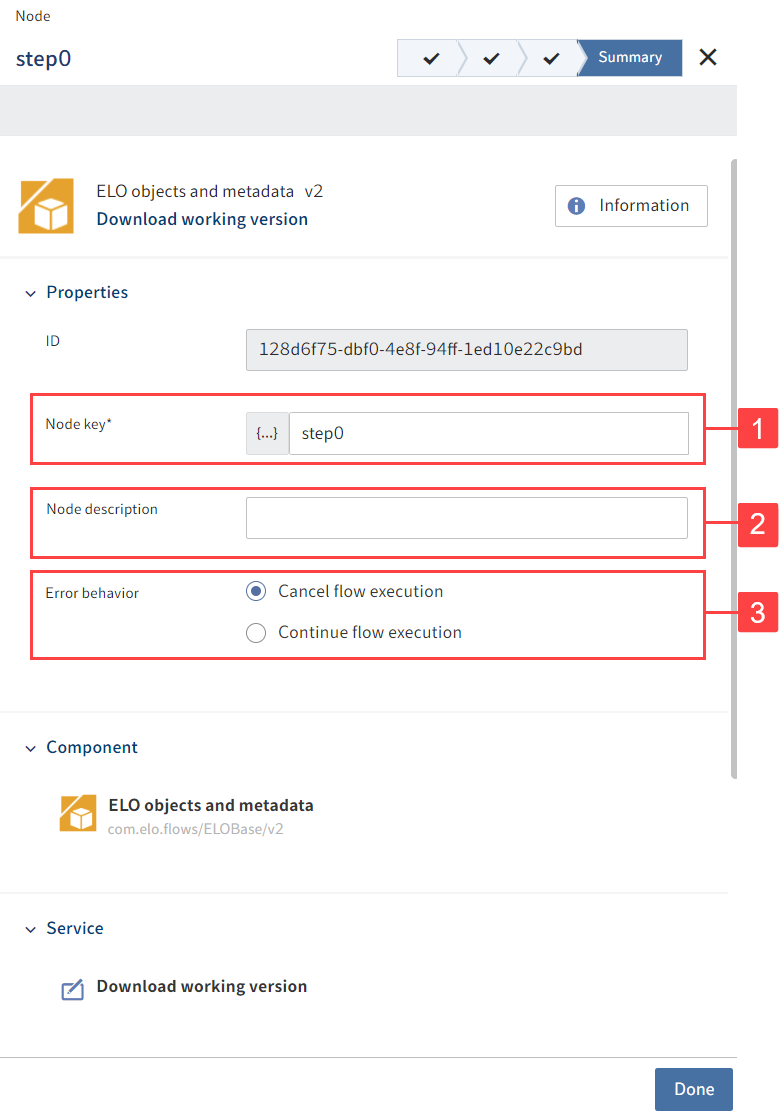
The Summary step opens. All the settings are shown once again. You can also configure the following areas:
1 Node key: Name of the node shown in square brackets in the flow designer
2 Node description: More detailed description of the node
3 Error behavior: Select whether to abort the entire flow if the service fails or whether it should continue to run. The Continue flow execution function is for test purposes. The result data for this service may be faulty or unavailable.
Select Done to apply the service settings in the configuration area.
Save the entire flow.
The status display now changes to Active.