# Data queries
Data queries are special flows for providing data. They run synchronously and enable you to provide data queries with the corresponding components. One application is dynamic keyword lists, for example.
Refer to the Synchronous flows section in this documentation for more information about synchronous flows.
If necessary, you can implement components yourself and thus provide data queries. Check the 'ELO Flows component development' documentation (opens new window).
# Select trigger
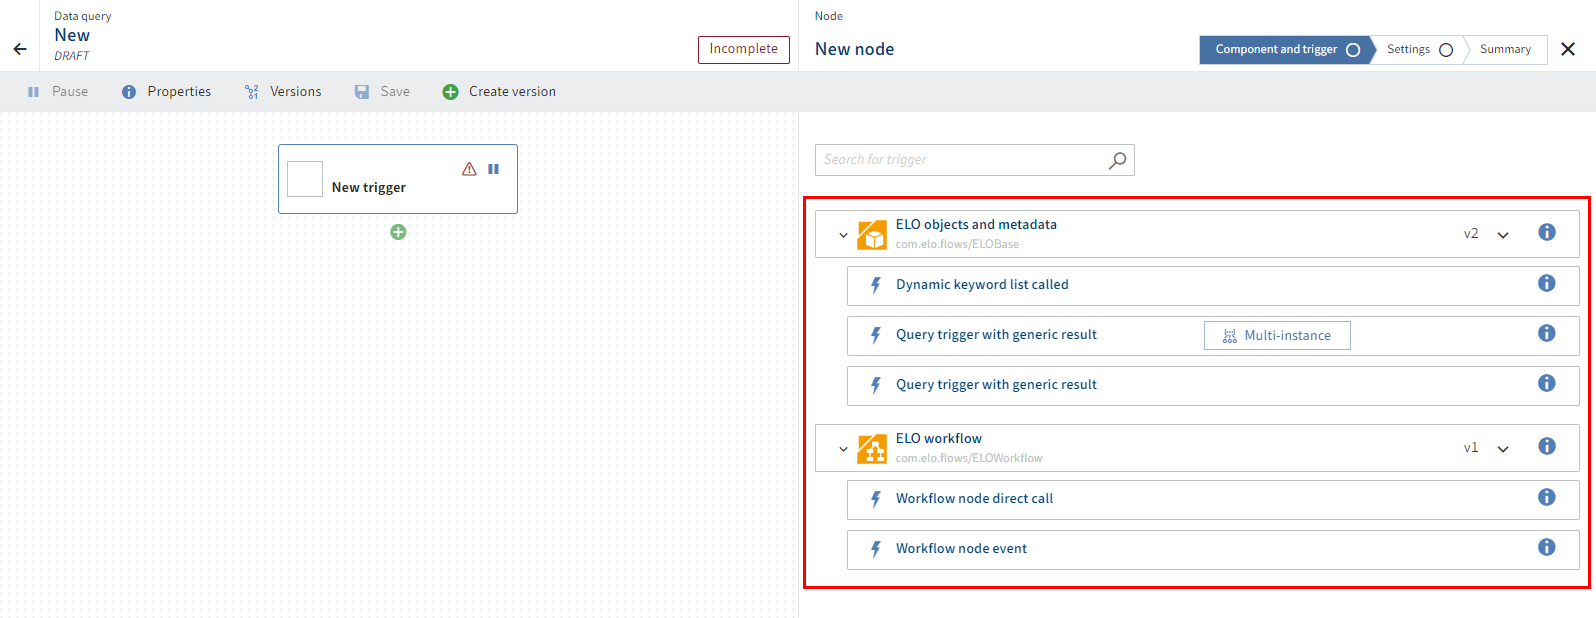
Open the trigger in the node editor by selecting the trigger node. The Component and trigger step opens.
Select a trigger.
Configure the specific trigger steps. Note that the fields marked with an asterisk are mandatory.
Information
Under Components > General information, you will find more information on completing fields with gen. 1 and gen. 2 metadata in the flow designer.
Check your entries in the Summary step.
Select Done to finish configuring the trigger.
Please note
With the Done action, the configurations are only saved in the configuration area and are not yet applied to the flow.
In the flow designer, select Save to apply the entries in the configuration area to the flow.
# Add service
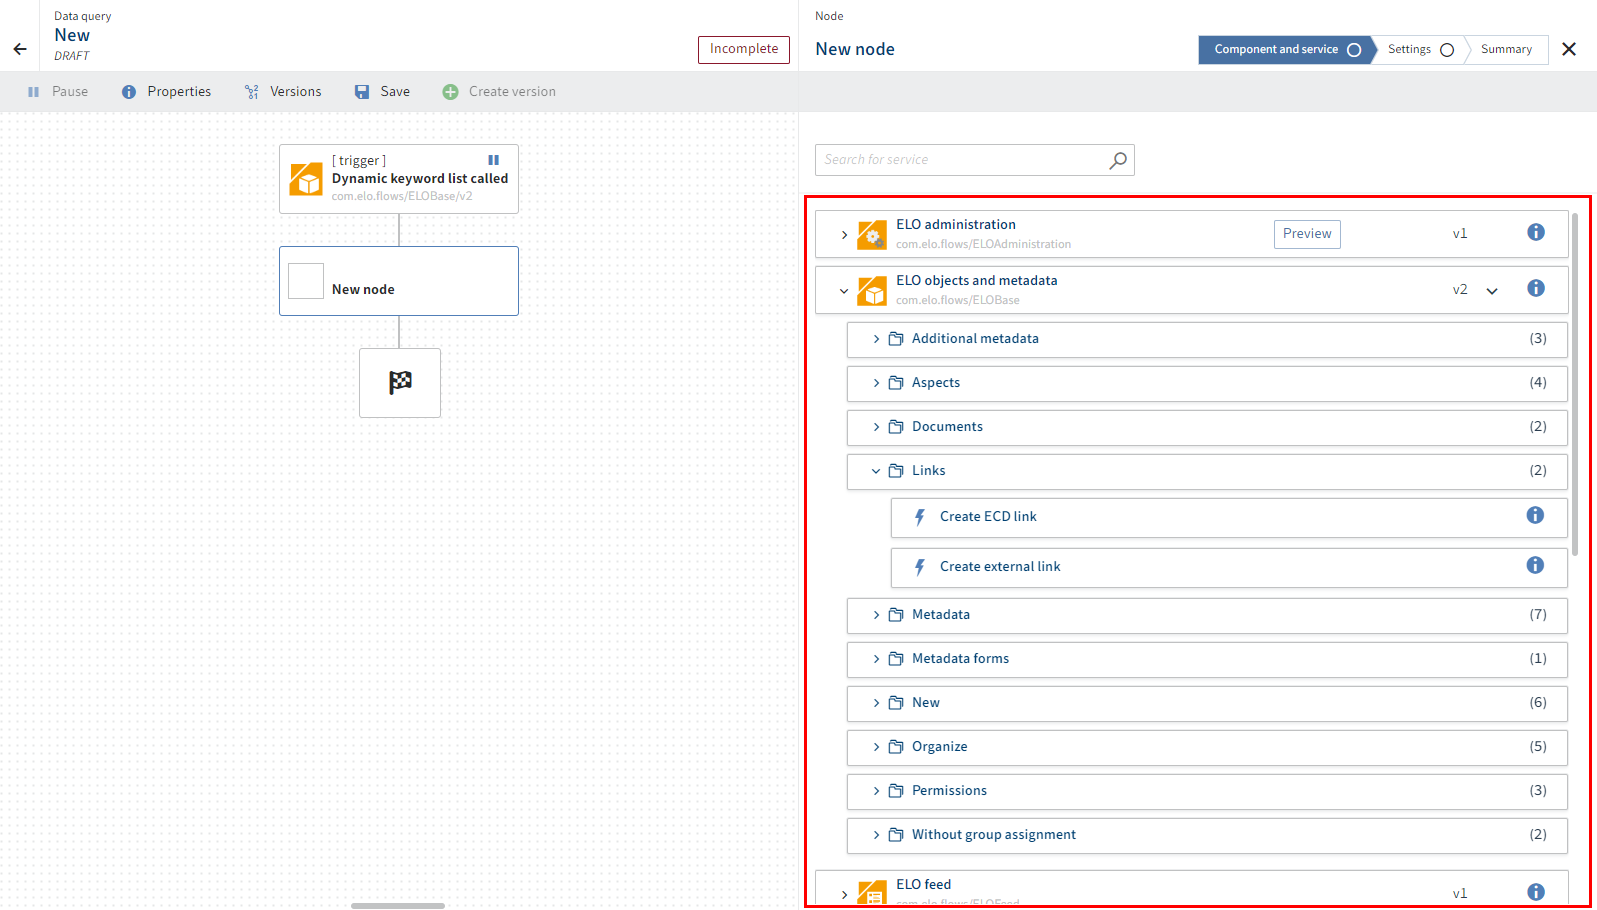
Select the plus icon next to the trigger node and select Service.
Select a component with the desired service.
Selecting the service automatically takes you to the next step with the user settings.
Select a user connection.
Information
If you've already configured a user under Credentials, you can select the user here. Otherwise, you can select the default connection or add a new one.
Confirm your selection with Next.
The Settings step opens.
Configure custom data for the service.
Information
You can complete the fields with static or dynamic values. Dynamic evaluation is performed based on JSONata. With this transformation language, you can access event objects of the previous nodes and triggers in addition to using transformations or simple functions.
You will find more about the use of JSONata in ELO Flows under JSONata editor.
Information
Some services offer you the Output schema function. That means that this service offers a dynamic output object. This can be the case with metadata objects, for example.
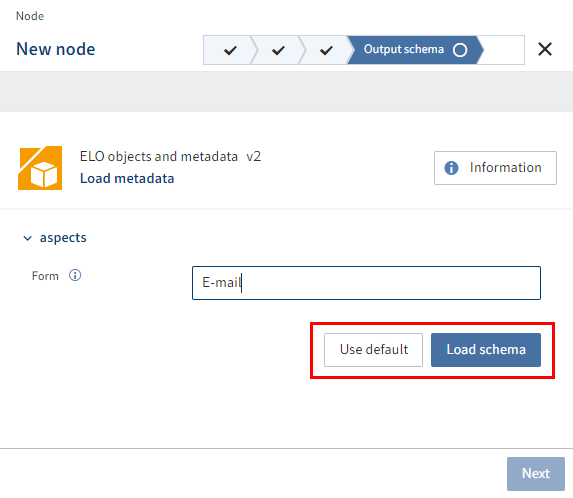
Example: You file a document with the E-mail metadata form and want to access a field of this document in a subsequent node. So that ELO Flows knows which metadata fields the output object has, you can either use a standard metadata form or load a special one. In the Metadata form field, enter "E-mail" and select Load schema. The schema is loaded with the appropriate metadata form properties.
Alternative: You can also select Use default. The object is then output with the default properties, and the properties of the object have to be accessed manually via JSONata.
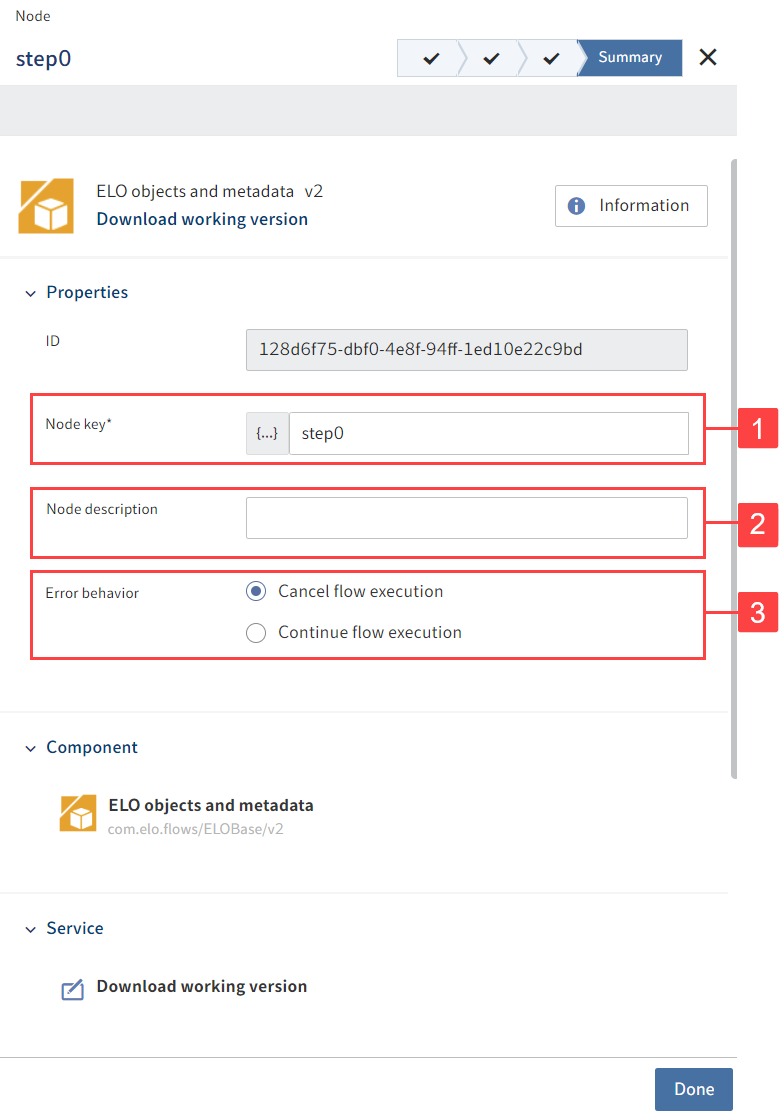
The Summary step opens. All the settings are shown once again. You can also configure the following areas:
1 Node key: Name of the node shown in square brackets in the flow designer
2 Node description: More detailed description of the node
3 Error behavior: Select whether to abort the entire flow if the service fails or whether it should continue to run. The Continue flow execution function is for test purposes. The result data for this service may be faulty or unavailable.
Select Done to apply the service settings in the configuration area.
Please note
With the Done action, the configurations are only saved in the configuration area and are not yet applied to the flow.
In the flow designer, select Save to apply the entries in the configuration area to the flow.
Save the entire flow.
The status display now changes to Active.
# End node
The data query runs as a synchronous flow and terminates with an end node with a flag icon.
Refer to the Synchronous flows section in this documentation for more information about synchronous flows.
When configuring the end node, you can choose between GenericQueryResult, SimpleDynKwlColumnsResult and DynKwlColumnsResult depending on the trigger.