# Item detail page
The item detail page is where you record all information about an item before and after the meeting.
With the exception of proposals, you can enter all information on the item detail page.
You can access the item detail page as follows:
Via the item:
- Select the item.
- Select the Item tab.
Via the meeting:
- Select the meeting.
- Select the Meeting tab.
- Select the item.
# Header
The header part of the page contains the following information about the item:

| Element | Explanation |
|---|---|
| Title | |
| Status | While you are preparing an item, it can have the status Draft, Registered, or Submitted. Refer to the Prepare item chapter to learn how to submit an item. |
| Responsible | |
| Time (duration) | Until an item has been submitted to an agenda, you will only see the scheduled duration here. Once it is on an agenda, you will see the actual time. |
| Meeting | This element is only displayed if the item has been assigned to a meeting. |
| Description | The item description that was entered in the form is displayed here. |
| Speaker | The person or persons presenting the item is displayed here. |
| Proposal status | If a resolution was passed, it is displayed here. |
You can click the button with the pencil icon to edit some information about the item. The data that you can change corresponds to the information you entered in the form. Always use this function if you want the changes to be immediately displayed on the item detail page.
The menu with three dots takes you to the Go to function. This function enables you to go straight to the corresponding Items folder. This function only appears if you opened the item via a meeting.
Information for organizers
You can use the menu with three dots to move the item to another meeting.
As soon as an item has been discussed, use the Pass resolution/Record decision button. This option depends on the proposal type.
# 'Proposal' area
This area is displayed if a proposal was created for the item.

The following elements are displayed:
| Element | Explanation |
|---|---|
| Status | You see whether the proposal status is currently Draft, Approval initiated, or Approved. |
| Recommended resolution | If a recommended resolution has been defined, the text is displayed here. You can change this text on the Form tab of the proposal folder. |
| Files | All contents of the proposal folder are displayed and can be opened from here. |
| Upload attachment | You can use the Upload attachments button to upload attachments to the item. Refer to the Upload files chapter for more information about attachments. |
# 'Minutes text' area
Minute takers and organizers are authorized to write minutes. They can do so as soon as the organizer has started the meeting. For more information about starting a meeting, refer to the Meeting assistant chapter.
The minutes text for all items is recorded in the minutes.
# 'Documents' area
In the Documents area, you can access all the documents that have already been uploaded for an item.
Use the Upload documents button if you want to store additional documents.
Refer to the Upload files chapter for more information about documents.
# 'Tasks' area
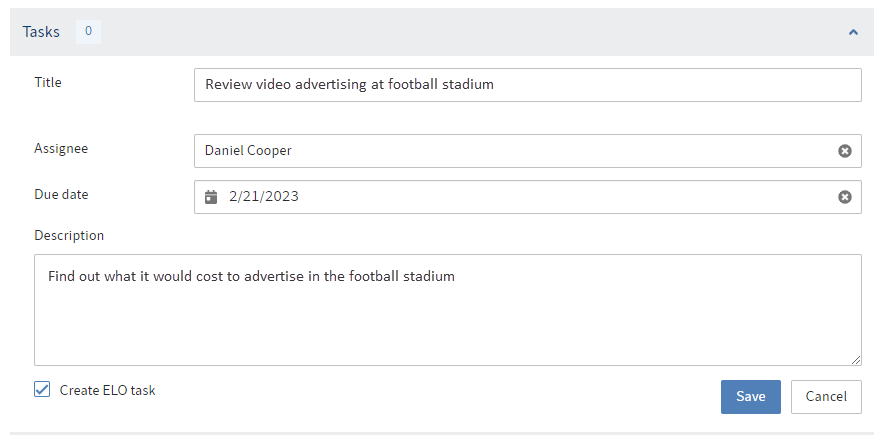
In the Tasks area, you can see all tasks relating to an item.
Create task
Click the Create new task button to create a task.

| Field | Explanation |
|---|---|
| Assignee | In this field, you can select from a list of the meeting participants with an ELO account. Alternatively, you can type in the name of people without an ELO account. |
| Due date | If you select this field, a calendar opens in which you can select a date. If you create an ELO task, it will escalate once the due date is exceeded. |
| Create ELO task | If you have selected someone with an ELO account under Assignee, you can create an ELO task that will appear in that user's task area. |
Edit task
If an ELO task was created, it will show up in the task area of the user whom the task has been assigned to. Once the ELO task has been edited, it is assigned the status Done.
If an ELO task was not created, the task is assigned the status Done using the check box next to the task.
A task can be closed oder deleted using the menu with three dots.
# 'Voting' area
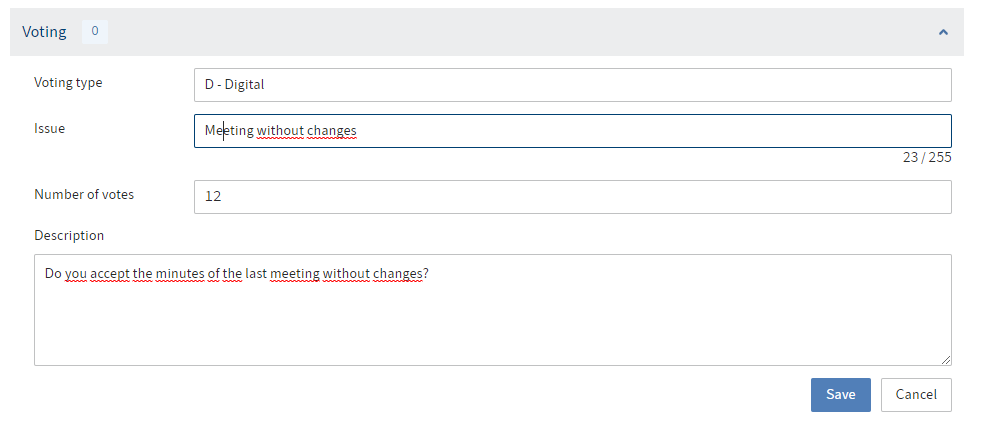
In the Voting area, you can see all votes relating to an item.
You cannot cast a vote until the vote has been started.
Create vote
Click the Create new vote button to create a vote.
Only organizers, speakers, and users responsible for an item can create votes.

| Field | Explanation |
|---|---|
| Template | You have to select a template for additional fields to appear. With electronic voting, all members of the meeting board with an ELO account have the option to cast their vote themselves. If votes are cast by a show of hands, the person organizing the meeting enters the result. |
| Number of votes | As soon as the specified number of votes is reached, no more votes can be cast. |
Hold vote
An organizer must start the vote. As soon as the maximum number of votes is reached, no more votes can be cast.
# 'Notes' area
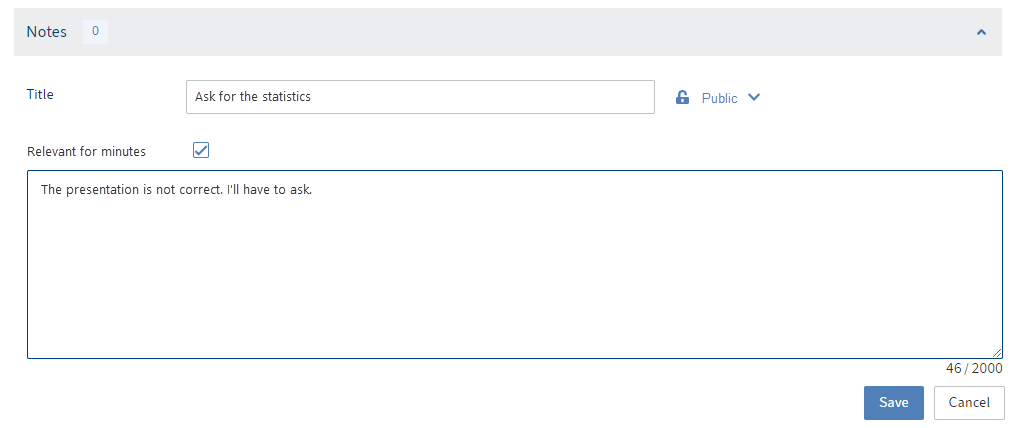
The Notes area contains all public notes as well as your own private notes about an item.
Create note
Click the Create new note button to create a note.

There are the following types of notes:
| Private | Only you can see this note. |
| Public | All people who can see your item can see this note. |
| Relevant for minutes | You can mark a public note as relevant for the minutes. In this case, it is included in the minutes. |
You can edit all notes after they have been created. If you have marked a note as relevant for the minutes, you also have the option to undo this.
# Upload files
You can upload files that are required for discussing an item.
In this context, there is a difference between documents and attachments. They are both files that are stored for an item. However, they are used differently.
Method
You can upload files in the app. For more information, refer to the Documents and Attachments chapters.
Alternatively, you can use the standard functions. However, make sure that you store the files in the correct place in each case as described in the subchapters.
- Insert file (opens new window)
- Document from template (opens new window)
- Drag-and-drop (opens new window)
The following table illustrates the differences between attachments and documents.
| Document | Attachment | |
|---|---|---|
| Filing location | Item folder | Proposal folder |
| Appears in the meeting file | No | Yes |
# Documents
Documents are stored in the item folder. There must not be any other child folders at intermediate levels.
On the item detail page, you store documents by opening the Documents area where you will find the Upload documents button. Your explorer will open and you can select a document.
# Attachments
Attachments are created in the proposal folder. There must not be any other child folders at intermediate levels.
On the item detail page, you store attachments by opening the proposals area where you will find the Upload attachments button.
You can then create a PDF from all the attachments using the Create proposal PDF function.