# Important actions in detail
This chapter is especially helpful for getting started. It explains how to perform basic actions.
# Create new folder
Before you can file documents, you will need folders in the Repository work area.
There are several ways to create a folder. This chapter describes the function New folder.
Related functions
- Copy: If a folder with the basic structure you need already exists, you can copy this basic structure without content.
- Dynamic folder: This function allows you to create a folder whose content changes dynamically. The content of a dynamic folder is based on the result of a search. All search results appear in the folder.
Example
You want to create a folder for a new project your team is working on. Only part of the team is actively involved the project and should be allowed to store content. The rest of the team should only have read access.
Method
In the repository, select the folder where you want to create the new folder.
A new folder is always created within the folder you have currently selected. The top level of your repository is also a folder.
On the ribbon, select New > New folder.
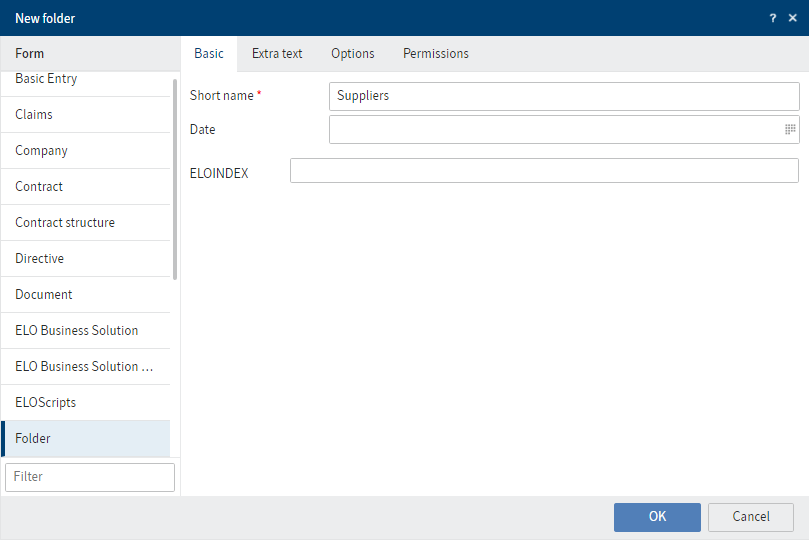
Enter the name of the project folder in the Short name field.
The name you enter here is the folder name users will see in the repository.
You don't usually need the Additional text tab. It can be used to store information in the metadata if a corresponding field is not available. This can be useful for the search function.
Select the Options tab.
To ensure that the folder is easy to find, select Green from the drop-down menu in the Font color field.
Select the Permissions tab.
When you create a new folder, the permissions of the parent folder are always applied.
To change the permissions, first delete the parent permissions by selecting the X icon.
To apply the new permissions, select the arrow in the Add user/group field.
Select your team members.
For all team members who should only have read permissions, uncheck all the boxes except View (R).
For a detailed description of other fields, refer to the Metadata chapter.
Select OK.
Result
The folder is created at the location you chose and can be accessed by all team members you selected. Other users will see the folder but not the contents.
Outlook
Like physical folders, you can add contents to folders: You can create additional child folders or file documents directly to them.
Change folder name: If you want to change the name of a folder afterwards, proceed as follows:
Select the folder.
Select Organize > Metadata on the ribbon.
Change the name in the Short name field and confirm with OK.
# Create tile
You can create tiles that provide you with quick access to a specific area of the repository. These types of tiles are called views.
A new view is displayed as a tile in the tile navigation on your My ELO home screen.
There are different types of views. This chapter covers the Create view function for a folder.
Related functions
- Task view: A task view shows you tasks with criteria you selected.
- Add favorite: Like views, search favorites are also displayed as tiles on your My ELO home screen.
- Copy to Clipboard: If you want to quickly access your folder without creating a tile, you can place it on your Clipboard.
- Most recently used: Another way to quickly access your folder is with the Most recently used tab on your My ELO home screen. You can pin folders here.
Example
Since you are likely to need your project folder frequently during the project, create a tile for it that will take you directly to the folder from your My ELO home screen.
Method
In the Repository work area, select the project folder you want to create a view for.
On the ribbon, select View > Create view.
In the Create view dialog box, the name of the folder is automatically displayed in the Name of view field. You can change this name if you want to use a different one.
Select Save.
Result
A tile is created for the new view under the Repository group in the tile navigation.
Outlook
- You can drag and drop a tile to another position.
- If you have created multiple views, you have the option to group them. To learn how to create a group in the tile navigation, refer to the chapter Create group.
- You can rename or delete a folder view.
# Filing entries
You can store documents and folders in a folder. Other users who are authorized to do so can view or edit the documents.
There are several ways to store entries. This chapter describes the function Insert file.
Related functions
- Drag-and-drop: You can drag documents and folders straight from your file system to a folder in ELO.
- Document from template: If you want to create a document from a template, use this function.
Example
You want to put a Word document in your project folder so you can plan the project with the other team members.
Method
Select the folder that you want to file the document to.
On the ribbon, select New > Insert file.
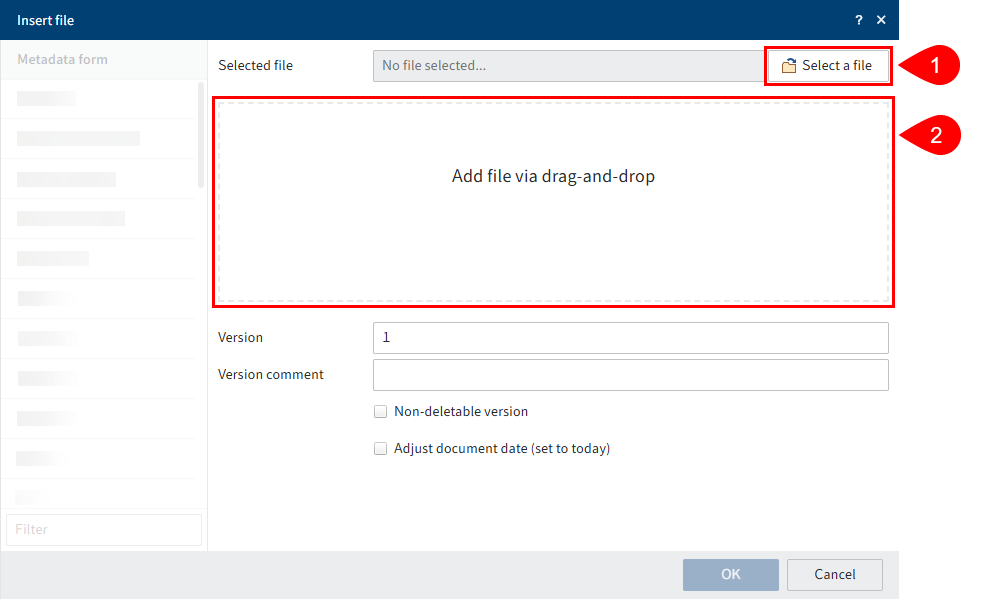
You have two options:
1: Select the Select file button and select the document.
2: Drag the document to the Add file via drag-and-drop field.
Select a metadata form.
Enter metadata.
For more information on the individual fields, refer to the chapter Metadata.
Select OK.
Result
The document is stored in the folder you selected.
Outlook
Once you have stored a document, you and other users can perform all the functions that are available when you select the document.
The Document tab opens. The functions on this tab are only available for documents. For more information on these functions, refer to the chapter 'Document' tab.
Some important functions for working with documents are:
# Check out and edit document
A document stored in ELO can be changed unless it has been configured otherwise.
There are different functions you can use to edit documents. This chapter covers the Check out function.
While the document is checked out, it is locked for other users. During this time, other users can only view the document in read-only mode (Document > Open in read-only mode). This prevents a document from being edited by multiple users at the same time, resulting in conflicting versions.

You can recognize checked out documents by a yellow arrow next to the document icon. The name of the editor is shown in square brackets.
A new version of the document is created, which becomes the new working version. The working version is always the version that you see when you select the document.
The old version is still retained.
Related functions
- Edit in Microsoft Office: This function allows you to open and edit Microsoft Office documents.
- Edit online: This function allows you to edit Microsoft Office documents in your browser. The availability of this function depends on your ELO Web Client installation.
- Collaborate: This function allows multiple users to simultaneously edit a Microsoft Office document. The availability of this function depends on your ELO Web Client installation.
Method
Select the document you want to edit.
On the ribbon, select Document > Check out.
Information
If you select Close now, the document is still checked out. If you want to cancel the action, select Close and then select Document > Versions > Cancel editing on the ribbon.
Information
If you use ELO Web Add-ons in combination with SSO, the document is opened in an external application and can be edited.
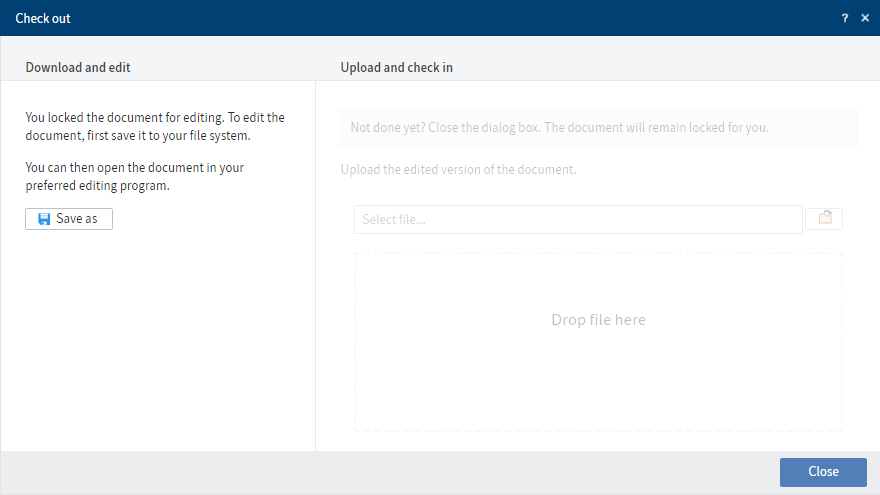
Select Save as.
The document is saved in your standard download folder.
Optional: A Windows dialog box may appear. Select an option for saving the document.
Open the document.
Edit the document.
Save the changes.
Warning
If you do not save the document, any changes you made will be lost.
You do not have to check the document back in right away. You can keep it checked out and edit it later by opening it from the local storage location on your computer.
In addition to the Repository work area, you will also conveniently find the document in your In use work area as long as you have it checked out.
Result
The document is changed locally but not in ELO.
Outlook
- To apply your changes to ELO and save your document as a new version, use the Upload and check in document function.
- If you want to discard the changes, use the Cancel editing function.
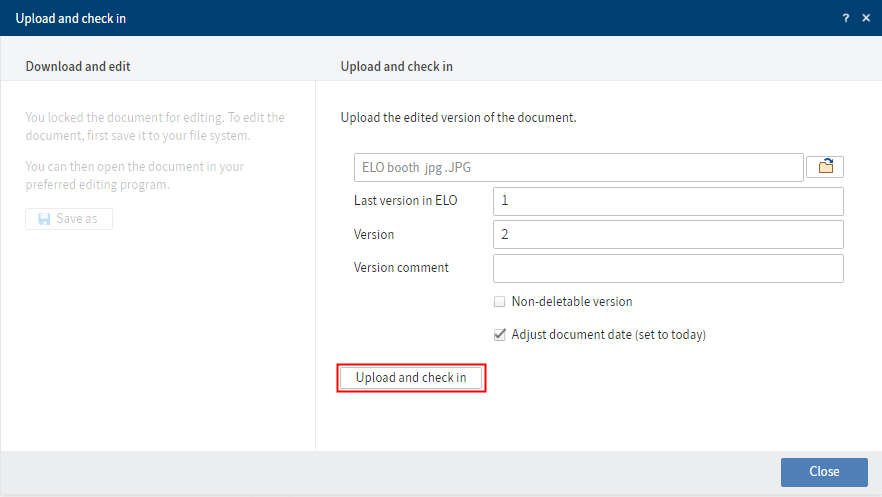
# Upload and check in document
After you have checked out a document and finished editing it, check it back in.
This saves the modified document as a new version and unlocks the document.
Related function
Cancel editing: If you want to discard the changes, use this function.
Method
Information
If you edited a document immediately after checking it out, the Upload and check in dialog box remains open. Steps 1 and 2 are no longer necessary in this case.
In ELO, select the document you want to check in.
The quickest way to find the document is through the In use work area.
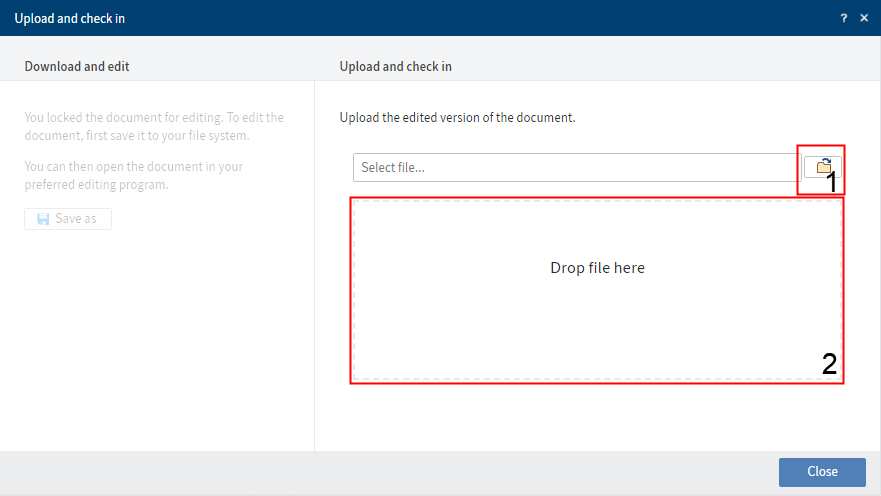
On the ribbon, select Document > Upload and check in.
Information
If you use ELO Web Add-ons in combination with SSO, select Upload and check in. The document is already selected and can be checked in directly.
Select the file. You have the following options:
1 Select the button to the right of the Select file field and select the file.
2 Drag the file to the Drop file here area.
Result
The document is filed as a new version.
The document is unlocked for other users.
Outlook
To learn how to revert to an older version, refer to the Document versions chapter.
# Start workflow
Using workflows, you can assign other users or groups tasks.
An integrated escalation management function allows you to track whether the set deadlines are met once a workflow is started.
This chapter describes the function Start workflow. This function gives you access to workflows with different levels of complexity designed for specific processes within your company.
Related function
Ad hoc workflow: The function Ad hoc workflow is used to start short default workflows (approval and notification).
Example
You want to place an order for materials at the start of your new project. You have already created a document listing the required materials using the Document from template function. To forward the order to the corresponding department in your company, you need to start the workflow.
Method
Select the document you want to start a workflow on.
Information
You can also start workflows on folders.
On the ribbon, select New > Create task > Start workflow.
Select a workflow template.
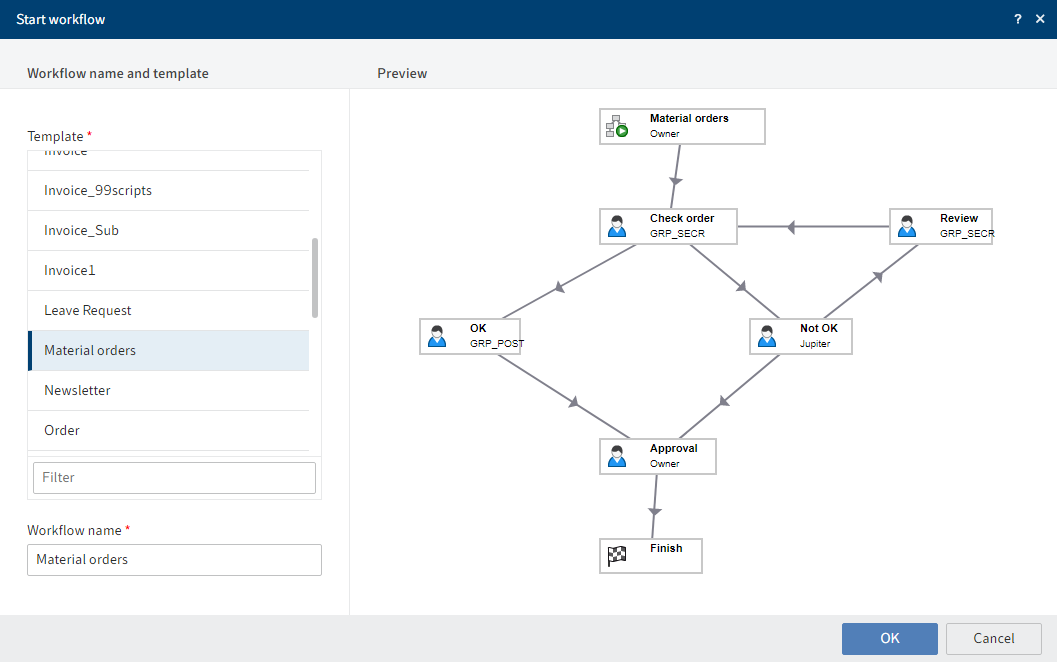
Preview: This is where you can see the different steps of the workflow. As the workflow is already configured, you do not have to make any additional settings.
In addition to the workflow steps, you will see the respective editor and, if applicable, the time allowed for the workflow step until escalation (days:minutes:seconds).
Select OK.
Result
The workflow starts.
Outlook
- Once you have started a workflow, it will appear in your My ELO work area under My recently started workflows.
- If one of your workflows was escalated, you will see the Escalated workflows area.
# Forward workflow
When you are assigned a workflow task, it will appear in your Tasks work area.
There are different ways to forward a workflow. This chapter describes the preferred method with forms.
Information
You can configure how ELO will behave in the configuration (Display > Tasks). If the Show ribbon function and "Forward workflow" dialog box option is enabled, you have to use the Forward workflow function to process and forward the workflow in a new dialog box. We recommend disabling this option. In this case, workflows without a form template are shown in the Tasks work area in a standard form and can be processed there.
Related functions
Example
You received a workflow with a material list to review.
Method
Open the Tasks work area.
Select the workflow that you want to forward.
In the viewer pane, switch to the Form tab.
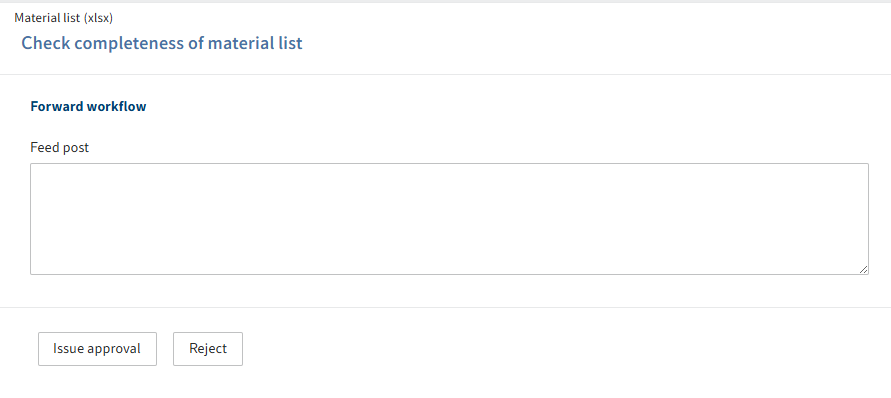
Optional: Enter a message or instruction for the next user in the feed post.
Select either Approve or Reject.
Result
The workflow is forwarded and disappears from your tasks area.
# Search entries
You can search for documents and folders. The more information you enter about the entry you are looking for, the better the result will be.
This chapter describes an example of a search. You will find descriptions of the interface and all search options in the chapters 'Search' work area and 'Search' tab.
Related functions
Example
You want to search for a document. You know
- which folder the document is in,
- that it is not an e-mail,
- that the document was filed in 2020 or 2021, and
- that the title of the document contains the words 'ideas' or 'project'.
Method
Select the folder that contains the document in the Repository work area.
Navigate to the Search work area.
On the ribbon, select in all areas.
Select the Current folder only check box to limit the search to the folder you just selected.
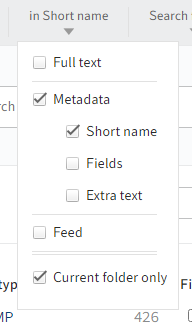
Uncheck the boxes next to Full text, Fields, Extra text, and Feed. This way, the search is restricted to the title of the document, i.e. the Short name.
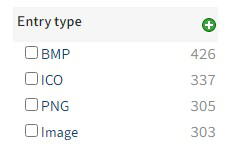
Click the facet Entry type. The facet is now negated.
Enable the E-mail entry type. This excludes all entries of the type E-mail from your search.
Select the years 2020 and 2021 under the Filing date facet.
Enter
ideas, projectin the search field.Select Search (magnifying glass icon).
Result
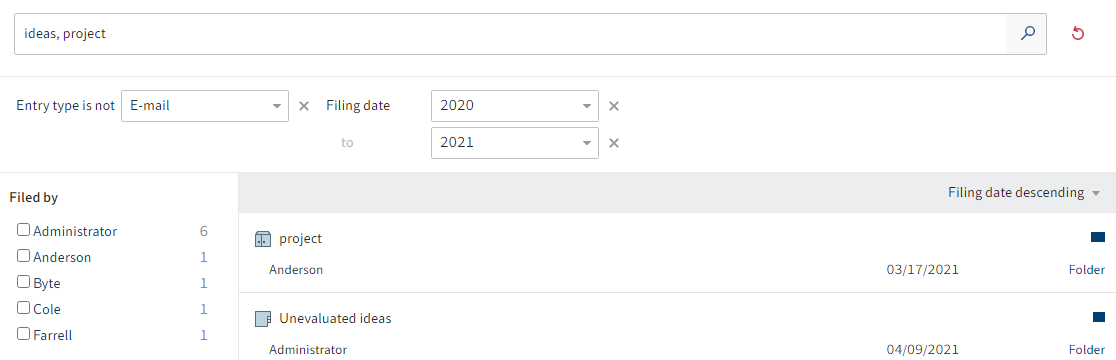
The search is performed.
Outlook
- To view an entry in the results list, select the entry.
- To go to the filing location of the entry, select the entry. On the ribbon, select View > Go to.
# Search a business object
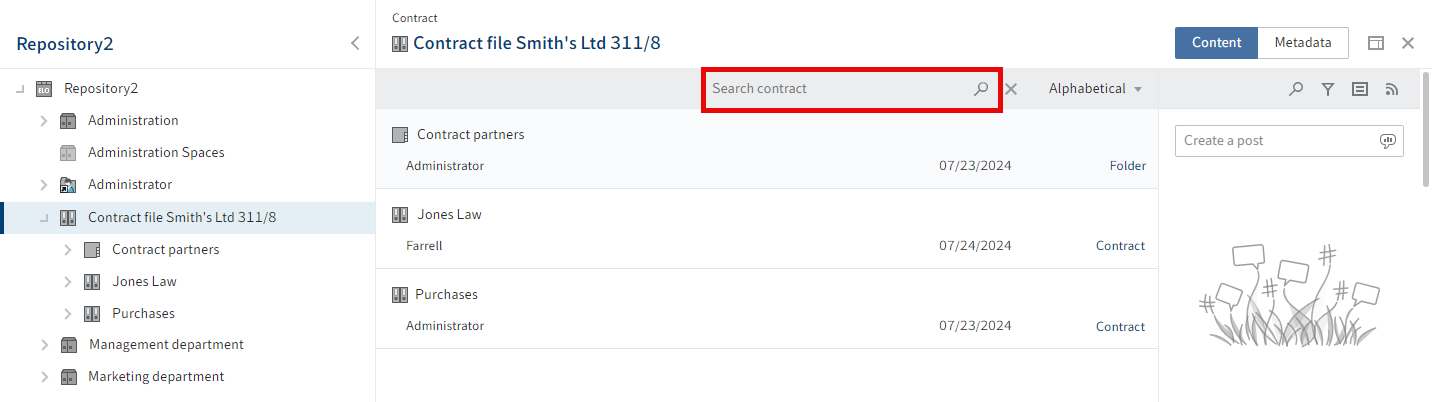
For business objects, you start a search within the region of a business object via the search field in the viewer pane. The system then searches for the entered short name. The search is restricted to the region of the business object, including the associated child folders.
# Search with ELO Click OCR
You can mark terms in documents and search all entries for the selected term using ELO Click OCR.
ELO Click OCR works on TIF documents and in the image preview (Ribbon > View > Image preview).
The following options are available for using ELO Click OCR:
- Start a search in the Repository work area
- Start a search in the Search work area
# Start a search in the 'Repository' work area
You can start the search in the Repository work area and are directed to the search from there.
Method
Select the document you want to use for the search.
Press and hold the CTRL + ALT keys. In the viewer pane, box in the terms in the document that you want to use for the search using the left mouse button.
Release.
You are directed to the Search work area. The selected terms are now in the search field.
To get the search results, select Search.
# Start a search in the 'Search' work area
In the Search work area, you can select a document you want to start a search on.
Method
Select the document you want to use for the search.
Select the search field of ELO iSearch.
Hold down the CTRL key. In the viewer pane, box in the terms in the document that you want to use for the search.
Release.
Information
If you want to transfer multiple terms after another, select each individual term using the left mouse button while holding CTRL + SHIFT. Release the mouse button after each term. Repeat the process until you have transferred all desired terms.
The selected terms are now in the search field.
To get the search results, select Search.
# Assign substitute
Substitutions ensure that your tasks are completed even if you do not have access to ELO for a longer period of time.
You can create substitutes and activate them immediately or later on.
This way, you can prevent workflow tasks from escalating, such as when you are absent.
Method
On the ribbon, select User menu [your name] > Assign substitute.
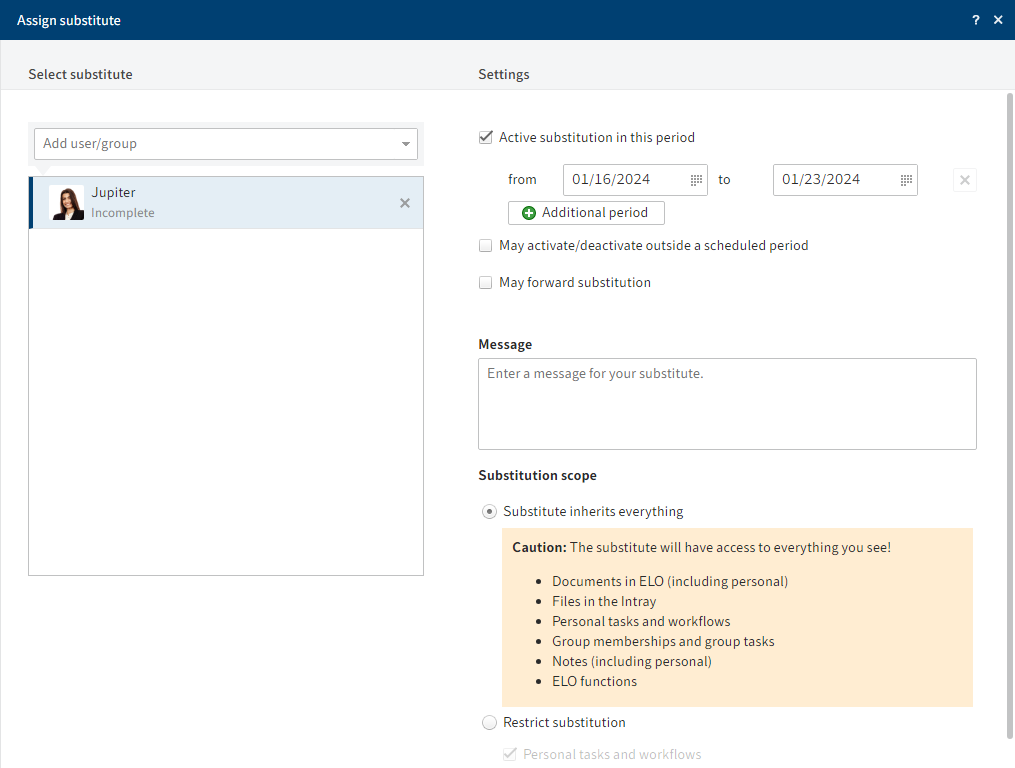
Select your substitute using the input field or from the drop-down menu.
You can be substituted for by other users or by groups.
As long as you haven't configured any settings for a substitute, their status will be Incomplete. With this status, the substitute cannot be used. You can configure settings either right away or later on.
You can configure different settings for different substitutes. For example, you can plan your substitutions in advance and edit their settings after the fact.
To configure more exact settings, tap one of the users or groups with substitution rights.
Settings
The following options are available for assigning a substitute:
- Period: You can set a period during which another user automatically acts as your substitute.
- Substitution rights: This gives another user the right to substitute for you. In this case, they have to activate and deactivate substitution themselves.
Period: The Active substitution in this period option enables the input fields for the period. If you disable option, the input fields are disabled. Entered periods are retained and can be reactivated later on.
You can define the following periods:
- A definite period with a start and end
- An unlimited period with a start
- Multiple definite and/or unlimited periods
Information
You can add a time to the selected date. Enter the time after the date in the following format: 2023-12-29 15:30.
If you have defined a substitution with an unlimited period, you can end the substitution by deleting the period with the X icon.
Information
Periods are not deleted automatically; you have to delete them by selecting the X icon.
Substitution rights: If you enable the May activate/deactivate outside a scheduled period option, the substitute is allowed to activate or deactivate the substitution. This gives them permission to substitute for you in general without you defining a substitution period.
May forward substitution
Substitutions are not forwarded automatically.
This means: Cole has appointed Anderson as his substitute. In turn, Anderson appoints a different user as her substitute. This user does not receive the tasks, rights, etc. that Anderson is given as substitute for Cole.
Enabling the option May forward substitution allows your substitute to pass on the substitution to another user.
Even in this case, the substitution is not forwarded automatically – the user has to forward it actively.
Please note
Use this option with caution to prevent rights from being forwarded unintentionally within the company.
Substitution scope
You can individually configure how many rights you want to give your substitutes.
Substitute inherits everything: Your substitute can see everything that you see.
Restrict substitution: You decide what your substitute is allowed to see.
You must enable at least one of the following three options:
- Personal tasks and workflows: If you enable this option, your substitute can access tasks and workflows that you have been assigned personally, not those given to you as a member of a group. The substitute requires the Extend workflow rights user right in order to be able to view the documents associated with a task. This user right can only be granted by an administrator.
- Intray access: If you enable this option, your substitute has access to your Intray. The Intray is only available in the ELO Java Client.
- Inherit group membership: Use the drop-down menu to select which of your groups the substitution applies to. The substitute is assigned the user rights, permissions to entries, annotations, feed entries, and group tasks associated with the group. This allows you to create multiple substitutes for the same period and allocate permissions for different groups. Only the groups that allow substitution are available for selection.
Result
You have set up a substitution. If the substitution period has already begun, the substitution is already active. Otherwise, the substitution will become active when the defined start date is reached or the authorized user activates the substitution.

If you are currently being substituted for, you will recognize this by the orange person next to your Profile menu [your name].

You will also see on your My ELO start screen that you are being substituted for.
Outlook
A substitution ends
- at the end of the defined period, or
- if the user substituting for you ends the substitution.
You can learn how to accept a substitution in the chapter Accept substitution.