# 'Task' tab
This tab appears when you are in the Tasks work area.
You can use the functions here to edit your tasks.
# Refresh
If you select Task > Refresh on the ribbon, changes recently made by other users are immediately applied.
This means that tasks can disappear from the task list in your Tasks work area if they have been accepted by other users in the meantime.
# Show workflow
This function allows you to view details of the selected workflow.
Method
Select the workflow you want to view.
On the ribbon, select Task > Show workflow.
Result
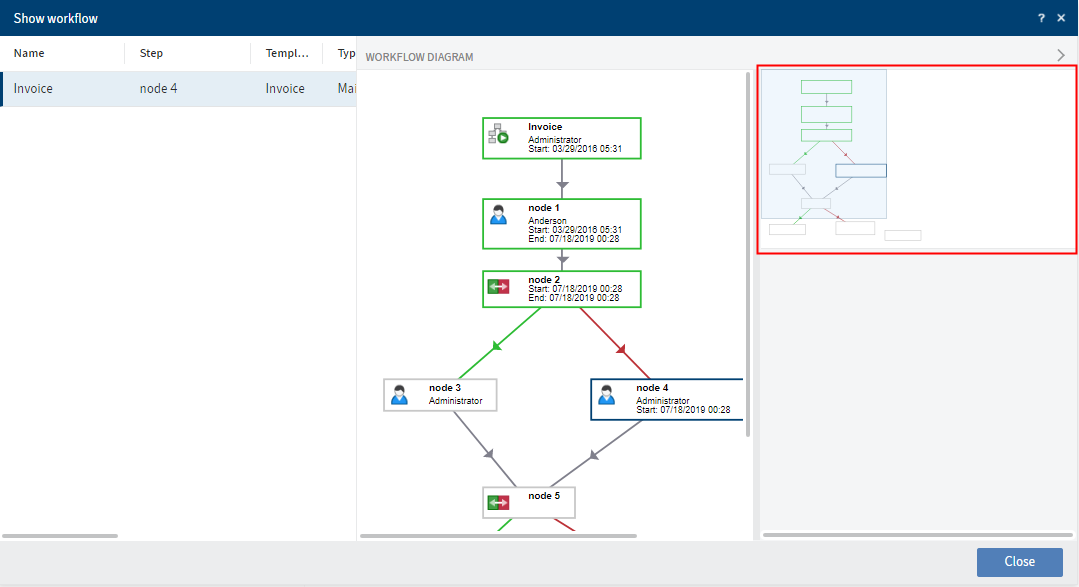
You can see all steps of the workflow in the Show workflow dialog box.
The status of the respective node is indicated by the colors in the diagram.
- Green: Node completed successfully
- Blue: Current node
- Red: Escalated node
- Gray: Future node
If you click the blue square in the minimized view of the workflow and move it while keeping the mouse button pressed down, you can change the section shown in the large view.
Select a workflow node in the workflow diagram to get more information on the node settings.
# Forward workflow
To learn how to forward a workflow, refer to the chapter Forward workflow.
# Accept workflow
If you have received a workflow as part of a group, you have to accept it before you can process and forward it. This prevents the workflow from being processed by multiple users at once.
Method
Select the workflow that you want to accept.
On the ribbon, select Task > Accept workflow.
Result
Once the workflow is accepted, it is removed from the Tasks work area of the other group members.
Outlook
- Use the Return workflow function to undo this action.
- To forward the workflow, use the function Forward workflow or the form.
Information
If a group member selects or accepts a group task, the task is marked as read for all group members. If a group task is returned, it remains marked as read for all group members.
# Return workflow
You can return a workflow you received as a group member and accepted with the Accept workflow function.
Related functions
Method
Select the workflow you want to return.
On the ribbon, select Task > Return workflow.
Result
The workflow now appears in the Tasks work area of all group members the workflow was sent to.
# Delegate workflow
You can delegate your workflow step to other users or groups.
Related functions
Method
Select the workflow that you want to delegate.
On the ribbon, select Task > Delegate workflow.
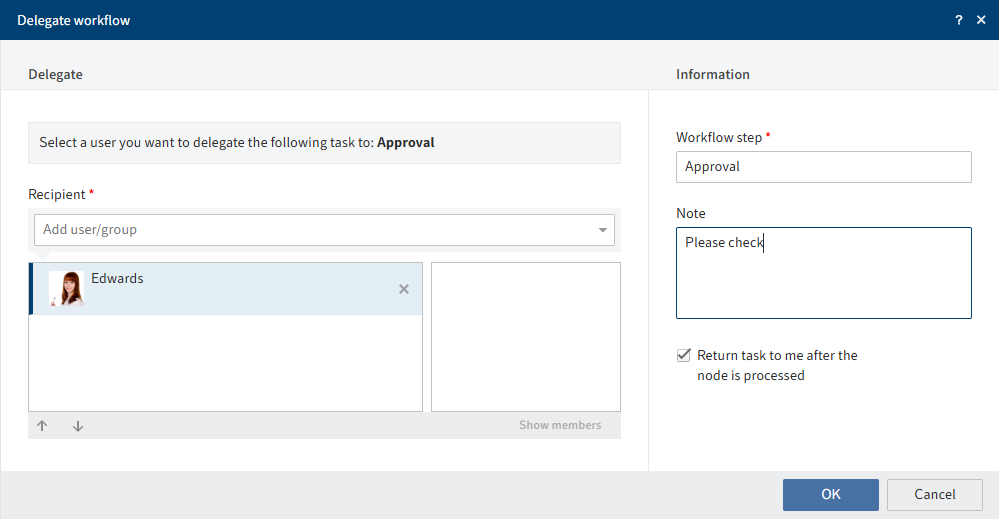
Make the required settings.
As recipient, you can select one user or group, or multiple users or groups. If you select multiple users or groups, they will receive the workflow in the order in which they appear in the list. To change the order of recipients, select a recipient and change their position using the up and down arrows.
Show members: If you select a group, a list of members appears.
Return task to me after the node is processed: You receive the workflow back after the node is processed. This gives you the opportunity to check the workflow status before you forward it to the next recipient.
Select OK.
Result
The workflow is handed off according to your settings.
In the workflow overview under Show workflow, you will still be shown as the owner of your step. The users you have delegated the workflow to represent an additional step.
# Hand off workflow
You can hand off your workflow step to another user or group. Unlike the Delegate workflow function, you hand off your processing step entirely and are no longer notified regarding the progress of the workflow.
Related functions
Method
Select the workflow that you want to hand off.
On the ribbon, select Task > Hand off workflow.
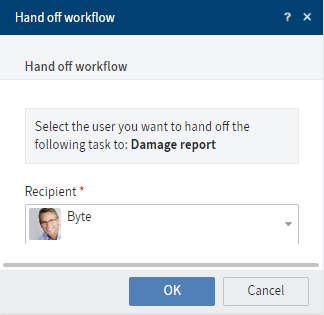
Select OK.
Result
In the workflow overview under Show workflow, you are no longer shown as the owner of your step. You will be replaced by the user you have handed off the workflow to.
# Postpone workflow
You can postpone the workflow to process it at a later time.
Related functions
Method
Select the workflow that you want to postpone.
On the ribbon, select Task > Postpone workflow.
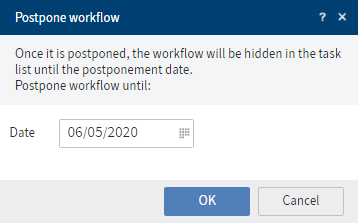
In the Postpone workflow dialog box, specify the date you want to postpone the task up to.
Select OK.
Result
The workflow disappears from your task overview.
Outlook
- When this date is reached, the workflow reappears in your Tasks work area.
- You can show or delete postponements.
# Cancel postponement
To cancel a postponement, you need a task view that shows your postponed workflows. Learn how to create this type of task view in the chapter Show postponed workflows.
Method

Select the tile on your My ELO home screen that takes you to your postponed workflows.
Select the workflow you want to cancel the postponement for.
On the ribbon, select Task > Edit > Cancel postponement.
Result
The postponement is canceled. The workflow reappears in the Tasks work area.
# Edit reminder
You can change existing reminders once they are in your Tasks work area.
You can learn how to create reminders in the chapter Reminder.
Method
Select the reminder you want to change.
On the ribbon, select Task > Edit > Edit reminder.
Make the changes as required.
Select OK.
Result
If you change a reminder, the changed reminder will appear in your Tasks work area and overwrite the previous entries made to the reminder.
Reminders you have created for other users can no longer be changed. If you have created a reminder for yourself and other users and add the other users via For user/group, their reminder is not changed. Instead, the other users receive a new reminder.
# Mark as unread
New unread tasks are denoted with a green dot. Once you have selected the task, the green dot disappears. If you want to remind yourself that you haven't worked on a task yet, you can mark it as unread again.
Method
Select the task you want to mark as unread.
On the ribbon, select Task > Edit > Mark as unread.
Result
The task is denoted with a green dot again until you select it.
# x active

You can show tasks based on different criteria. On the ribbon, select Task > x active. Here, select whether you want to view group tasks, substitution tasks, or escalations.
Information
If you are unable to accept a group task, you may need the corresponding role. You can enable roles via User menu [your name] > Enable roles.
Escalations: If you check this option, escalated tasks for which you have been entered as a user to be notified are shown. Using the Show workflow function, you can see what step resulted in the escalation.