# Teamspaces
The Teamspace function enables you to collaborate across teams. All ELO users added to a teamspace can gather and edit documents together and exchange information using the feed.
The permissions you have in a teamspace depend on the role you have been assigned by the administrator.
Workspaces can be integrated into a teamspace.
Refer to the Spaces section to learn how to access a teamspace.
# 'Overview' area
You can access all the elements of the teamspace via the overview of a teamspace. The ribbon features a tab with additional teamspace functions.
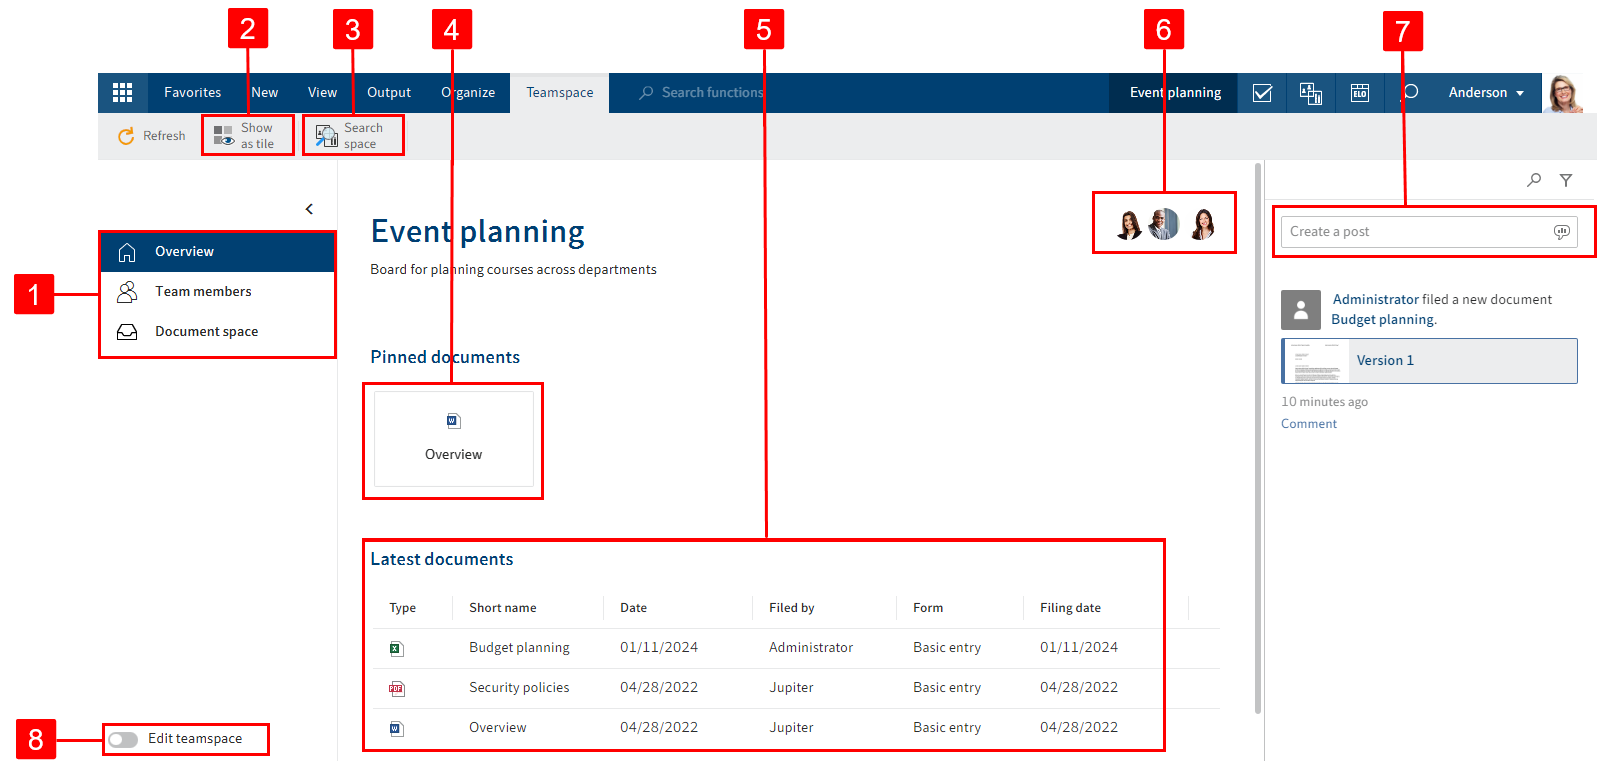
You have the following options:
1 Teamspace areas: You can navigate between areas in a teamspace. Every teamspace has the areas Overview and Team members. The names and number of additional areas are customized.
2 Show as tile: You can create a tile in My ELO that provides quick access to the teamspace.
3 Search entries in teamspace: Refer to the Filters section for a more detailed description of the search.
4 Pinned documents: You can open a pinned document or unpin a document from this space. The Document space section explains how to pin a document in a teamspace.
5 Latest documents. You can open one of the latest documents. The Document space section explains how to insert a document in a teamspace.
6 Overview of team members: You can see the members of the teamspace and navigate to the Team members area by selecting a member. You can only edit members in the 'Team members' area.
7 Enter a feed post: In the Overview area, the posts for all entries in the teamspace are displayed in the feed. If a new member or a group is added, a post with the name and role of the member is displayed in the feed and in My ELO. Otherwise, the feed works as described in the chapter Feed.
8 Edit teamspace: You can edit the teamspace if you are authorized to do so based on your role.
# Edit teamspace
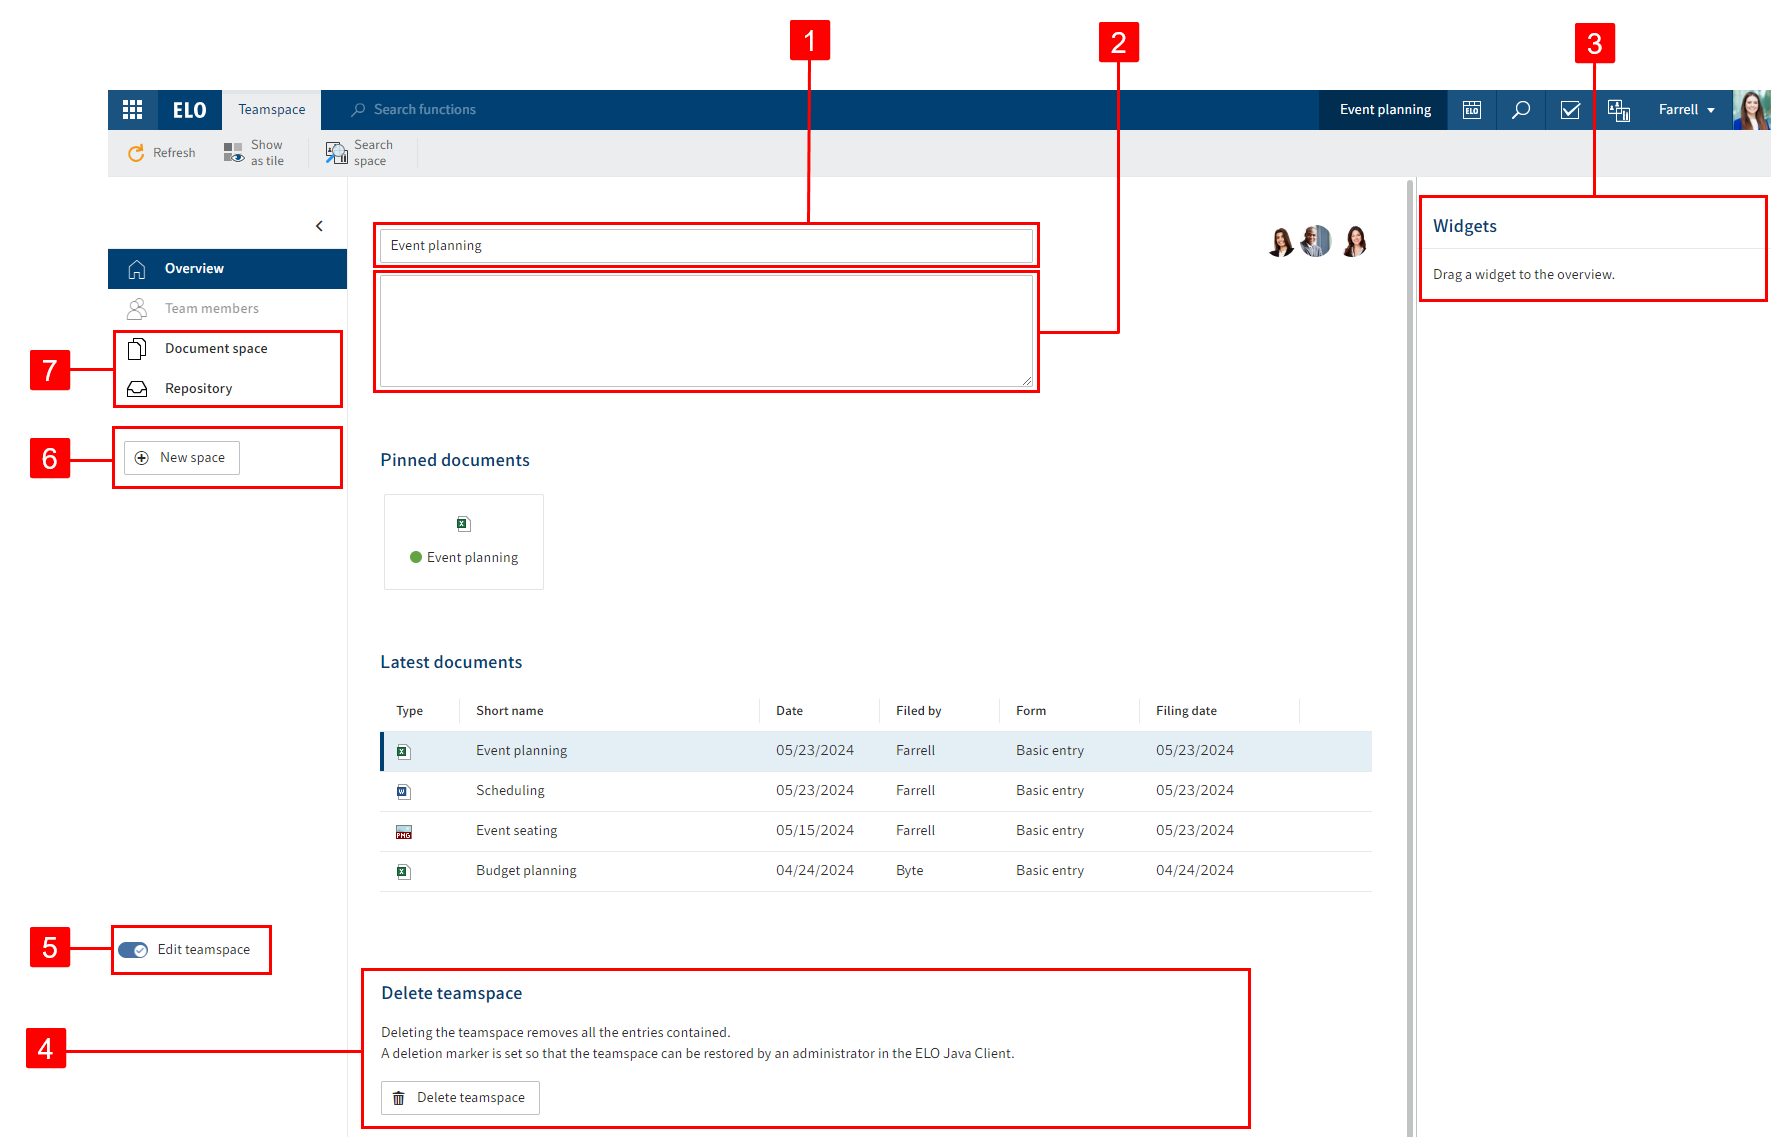
You have the following options:
1 Change the teamspace name
2 Change the teamspace description
3 Add widgets: You can drag widgets to the field in the bottom area of the overview.
4 Delete teamspace: Deleting the teamspace removes all the entries contained. A deletion marker is set so that the teamspace can be restored by an administrator if necessary.
5 Close edit mode: All your changes will be saved.
6 Create new space: Your options are Document spaces and Workspaces.
7 Arrange spaces: You can change the order of document spaces and workspaces using drag-and-drop. The Overview and Team members areas cannot be moved.
All options that are not listed here can be found in the section 'Overview' area.
# 'Team members' area
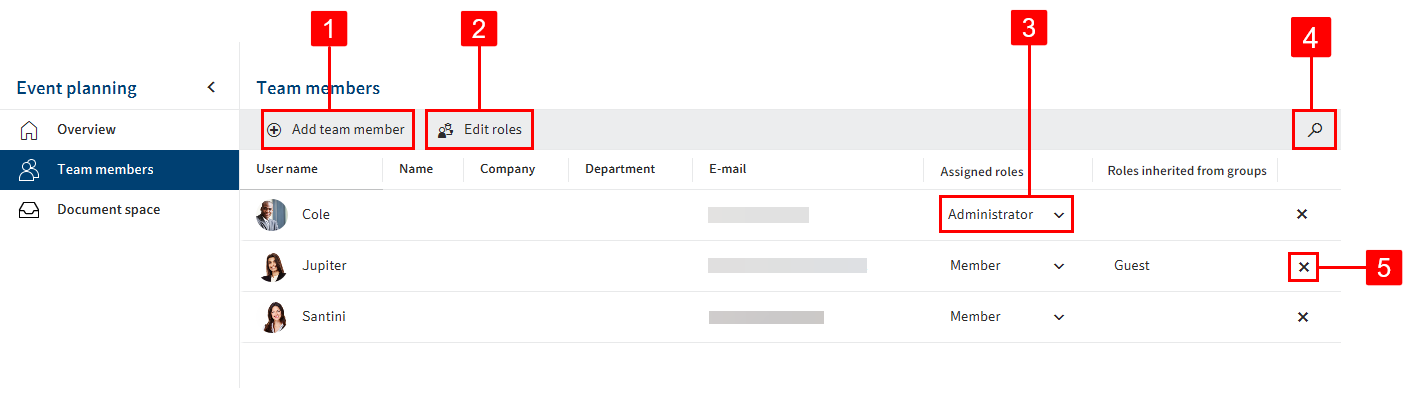
You have the following options:
1 Add team members or groups: This also determines the roles of the new team members. This role can be changed after creation, however. If you add groups, all members of the group are granted the role set for the group.
Please note
New members need to restart ELO to access the space.
2 Edit roles: You can edit the roles if you are authorized to do so based on your role. If team members belong to a group that has been added to the teamspace, they are also granted the roles that the group has in the teamspace.
3 Change team member roles: Team members can have multiple roles.
4 Search for team members
5 Delete team members: Administrators can only be deleted by administrators. The last administrator cannot be deleted.
# Roles
The following four roles are available as standard:
| Role | Permissions |
|---|---|
| Administrator | The user who created the teamspace is automatically the administrator. Additional members can also be named administrators. Administrators have all the permissions to the teamspace and its contents. |
| Moderator | Moderators have all the permissions to the teamspace and its contents. The only difference from an administrator is that they are not allowed to delete the teamspace. |
| Member | Members can create, edit, move, and delete contents in the teamspace. |
| Guest | Guests can only read contents. |
The roles can be edited.
# Edit roles
The default roles can be edited or removed, and new roles can be created.
Method
Select Edit roles.
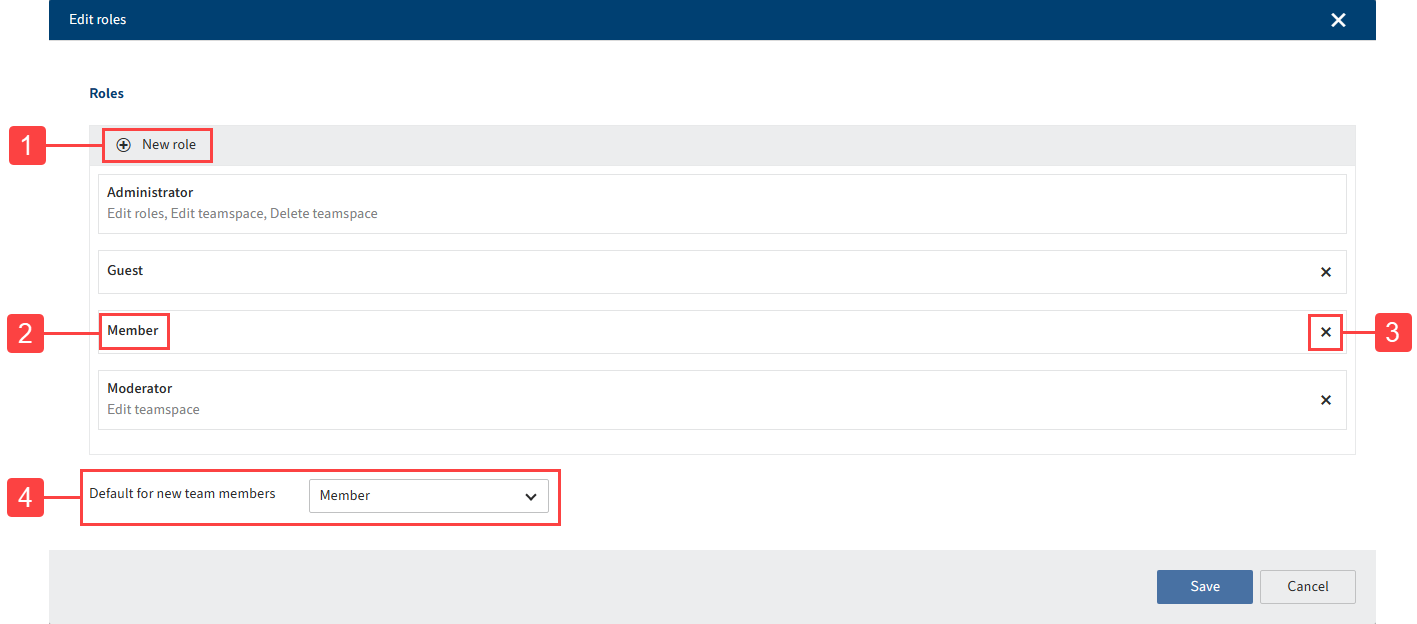
In the Edit roles dialog box, you have the following options:
1 Add new role: This is where you define the rights for the role members.
2 Edit existing role
3 Delete role
4 Set default for new team members: You can specify in the drop-down menu which role newly created team members are assigned by default. This role can still be changed after creating a member.
# Document space
A document space can have any name.
This area works like the viewer pane in the repository. You can create new documents as well as view and edit existing documents.
You can edit the entries using the functions on the ribbon and in the context menu as usual.
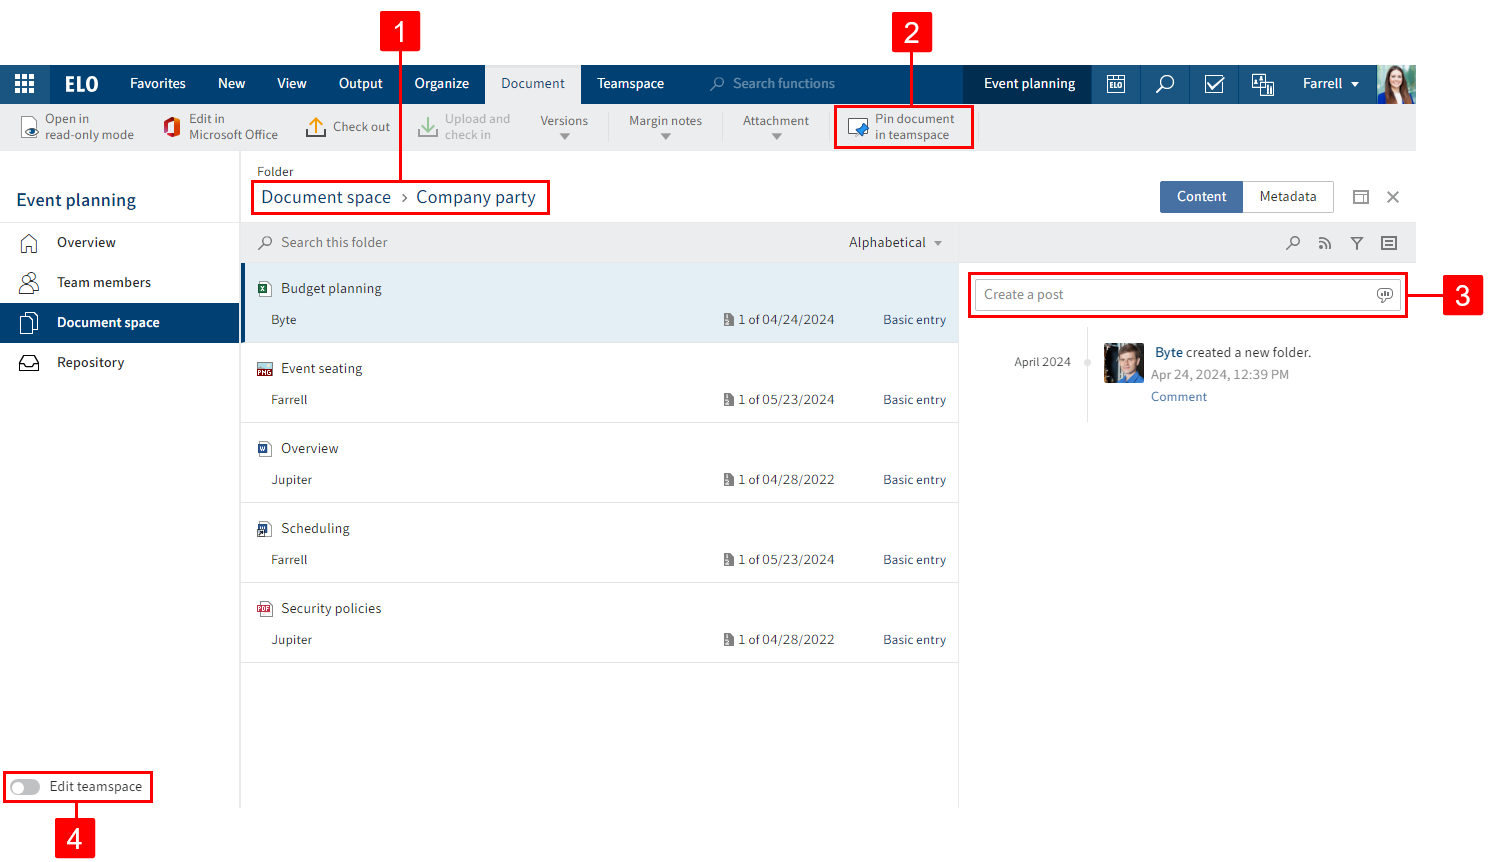
You also have the following options here:
1 Breadcrumb navigation: If you are in a folder, you can go back to a parent folder. In this case, you need to select the name of the folder in the breadcrumb navigation.
2 Pin a document in the Overview area: You will find the corresponding function on the Document tab.
3 Enter a feed post: The post does not apply to any specific entry, and is instead shown in the document space. Otherwise, the feed works as described in the chapter Feed.
4 Edit the document space: Do this by enabling the Edit teamspace slider.
# Edit document space

You have the following options:
1 Create new space: Your options are Document spaces and Workspaces.
2 Delete space
3 Change the name of the document space
4 Change the icon of the document space
5 Close edit mode: All your changes will be saved.
# Workspace
A workspace can have any name. A teamspace can also contain multiple workspaces or none at all.
You will find general information in the Workspaces section.
You can edit a workspace within a teamspace like a document space.
The members and roles of a teamspace are inherited by the workspace.
# Create teamspace
You can create new teamspaces.
Requirements
The administrator will already have created teamspace templates.
Method
In My ELO, select the Spaces tile.
Select ribbon > Spaces tab > New teamspace.
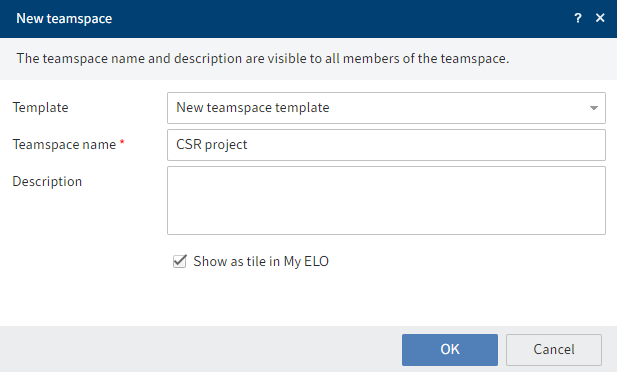
In the New teamspace dialog box, select the template you want to base the teamspace on.
Enter a meaningful teamspace name and, optionally, a description.
Show as tile in "My ELO": You can create a tile while you are creating the teamspace. This only applies to your own client. You can also create the tile later, as described in the Teamspace home screen section.
Select OK.
Result
You have created a teamspace. You are automatically entered as the administrator for teamspaces you have created.
Outlook
You can now edit the teamspace and add other members.
You will learn how to proceed in the next sections: