# Prepare meeting
Information
This chapter is aimed at meeting board organizers.
To prepare for a meeting, some steps are necessary, while others are optional. The list below provides an overview of the process.
Information
Make sure that the meeting board settings are correct before you create the first meeting. For more information, refer to the Edit basic meeting board settings chapter.
| Task | Explanation |
|---|---|
| Create item pool | An item can either be created in a meeting directly or in an item pool. An item pool first has to be created before you can start creating items in it. Not only organizers can create item pools. It is important that the item pool is in a folder that everyone who needs to create items has access to. |
| Create meeting or extraordinary meeting | You have to create a meeting board before you can create a meeting. |
| Approve meeting | In the meeting board settings, you can define whether the meetings require approval or not. If they need to be approved, you can only start preparing the meeting once the approval has been issued. |
| Prepare meeting | Meetings are prepared in the meeting assistant. This is where you create the agenda. |
| Optional: Create meeting file | You can create a meeting file containing the information compiled so far for the meeting. You can send it to the meeting participants using the Send message function. |
| Optional: Send message | You can send messages to the participants of the meeting. You also have the option to attach documents, e.g. the meeting file. |
# Create meeting
You can create meetings in a meeting board that you are an organizer of. The short names of all meetings are automatically given a consecutive number as well as a code that was stored when the meeting board was created.
Method
Select the meeting board.
On the ribbon, select New > Meeting > New meeting.
Complete the fields in the New meeting dialog box as required.
'General' tab
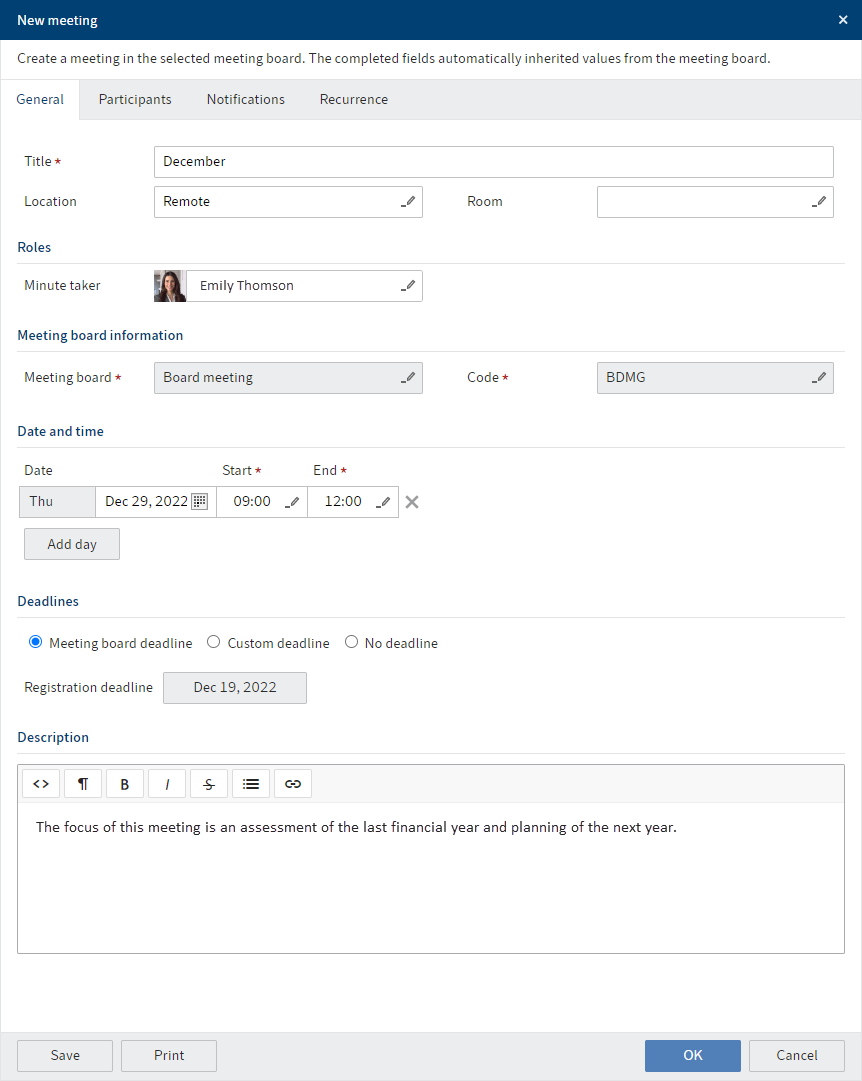
This tab already contains some general information about the meeting board.
Field Explanation Title If the meeting board has already been given a default name, this is already entered. Minute taker You can retain the person who was entered as the minute taker for the meeting board, or you can select someone else. Add day You can create multi-day meetings. You cannot create recurrences for multi-day meetings (see Recurrence tab). Registration deadline If a registration deadline was entered for the meeting board, it is selected here. However, you can also set a custom deadline or turn off the deadline. Once the registration deadline has passed, you can no longer register, submit, or withdraw items. Description If you create recurrences for these meetings, the description is used for all recurrences. 'Participants' tab
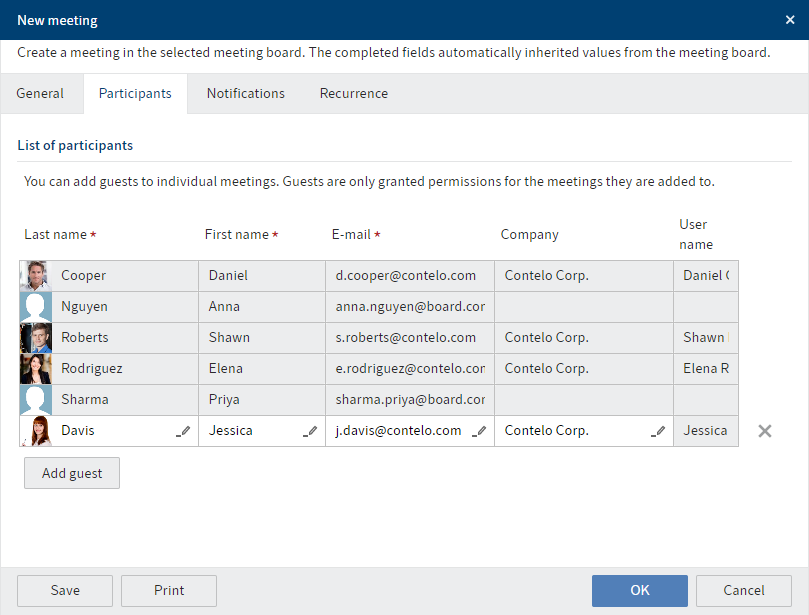
This tab contains the members of the meeting board. You also have the option to add guests. They will only be authorized for the meeting you are currently creating. If you create recurrences for the meeting, guests are only added to the first meeting.
'Notifications' tab
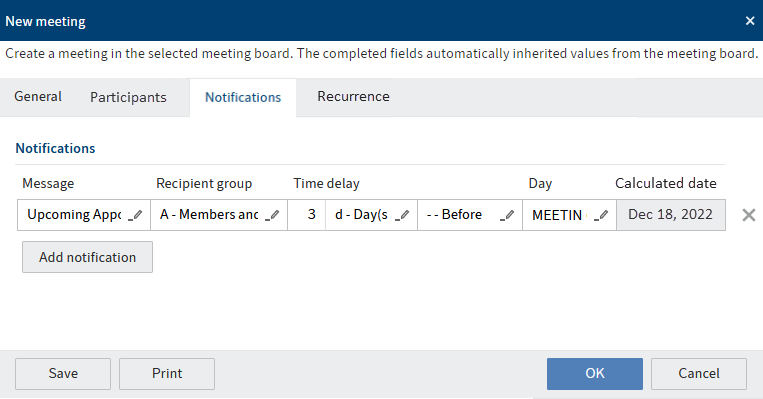
This tab contains the notifications that have already been created for the meeting board. You can add notifications to the meeting. Messages will be sent to the selected recipient group before or after the meeting, depending on the settings.
Information
If you want to send a notification that is not yet available, you first need to create a notification template.
For example, if you want to remind members to submit their items on time, you could enter something like this:
Message Recipient group Time delay Day End of registration deadline M - All members 3 d - day(s) --Before Registration deadline With this information, the recipients would get an e-mail reminder three days before the end of the registration deadline. For this to work, an administrator must have created the global template End of registration deadline.
'Recurrence' tab
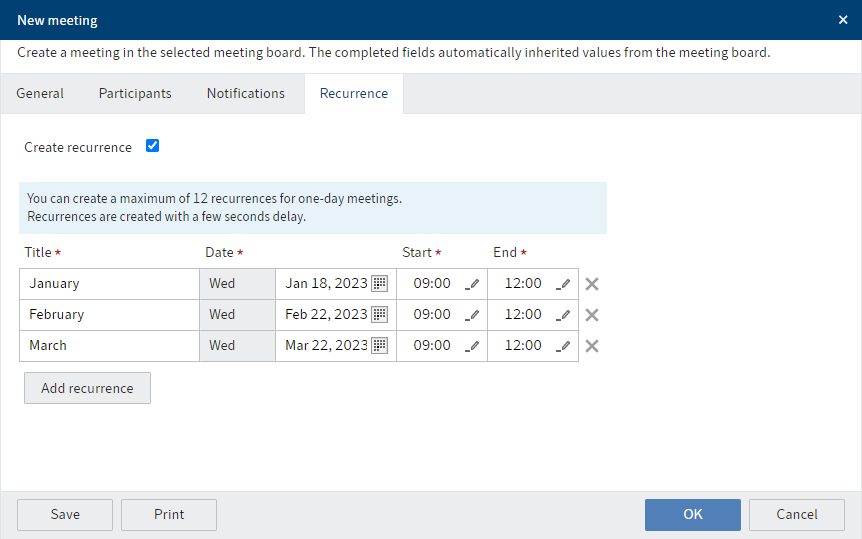
You can create a maximum of twelve recurrences of the meeting.
Select OK.
Result
The meeting is created. If you have created recurrences, they will appear after a few seconds when you refresh your client (View > Refresh or F5).
If there are meetings in your meeting board that need to be approved, the meeting will be in Draft status. At this point, they cannot be edited in the app.
Meetings that do not need to be approved will be in Approved status. They can be edited directly.
Outlook
- Once the date and time has been decided, you can approve it so that you can start preparing the meeting.
- If the meeting has already been approved, you can start to plan the agenda with the meeting assistant.
# Create extraordinary meeting
You can create extraordinary meetings in a meeting board that you are an organizer of. Extraordinary meetings have a different number range than regular meetings.
Method
Select the meeting board.
On the ribbon, select New > Meeting > New extraordinary meeting.
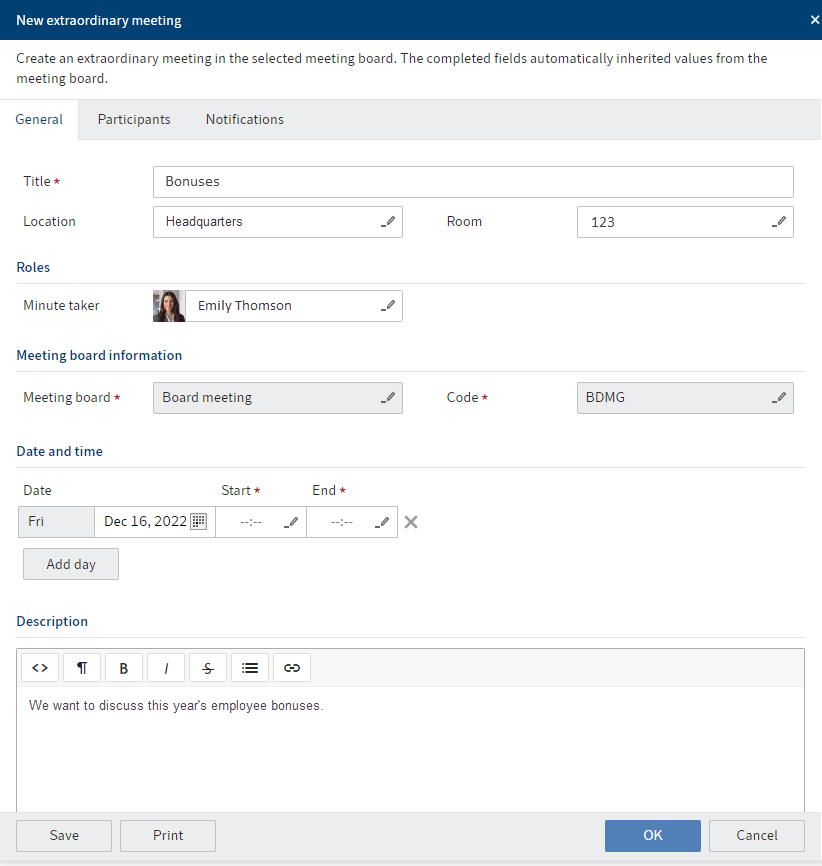
Complete the fields in the New extraordinary meeting dialog box as required.
'General' tab
This tab already contains some general information about the meeting board.
Field Explanation Title If the meeting board has already been given a default name, this is already entered. Minute taker You can retain the person who was entered as the minute taker for the meeting board, or you can select someone else. Add day You can create multi-day meetings. You cannot create recurrences for multi-day meetings (see Recurrence tab). 'Participants' tab
This tab contains the members of the meeting board. You also have the option to add guests. They will only be authorized for the meeting you are currently creating.
'Notifications' tab
This tab contains the notifications that have already been created for the meeting board. You can add notifications to the meeting. Messages will be sent to the selected recipient group before or after the meeting, depending on the settings.
For example, if you want to remind members to submit their items on time, you could enter something like this:
Message Recipient group Time delay Day End of registration deadline M - All members 3 d - day(s) --Before Registration deadline With this information, the recipients would get an e-mail reminder three days before the end of the registration deadline. For this to work, an administrator must have created the global template End of registration deadline.
Select OK.
Result
The meeting is created.
Extraordinary meetings have the name code AO and a separate number range.
If there are meetings in your meeting board that need to be approved, the meeting will be in Draft status. At this point, it cannot be edited in the meeting assistant.
Meetings that do not need to be approved will be in Approved status. They can be edited directly.
Outlook
- Once the date and time has been decided, you can approve it so that you can start preparing the meeting.
- If the meeting has already been approved, you can start to plan the agenda with the meeting assistant.
# Approve meetings
If your meeting board is subject to an approval process, you can approve the meeting dates.
Method
Select the meeting board you want to approve meetings for.
On the ribbon, select Meeting > Board > Approve meetings.
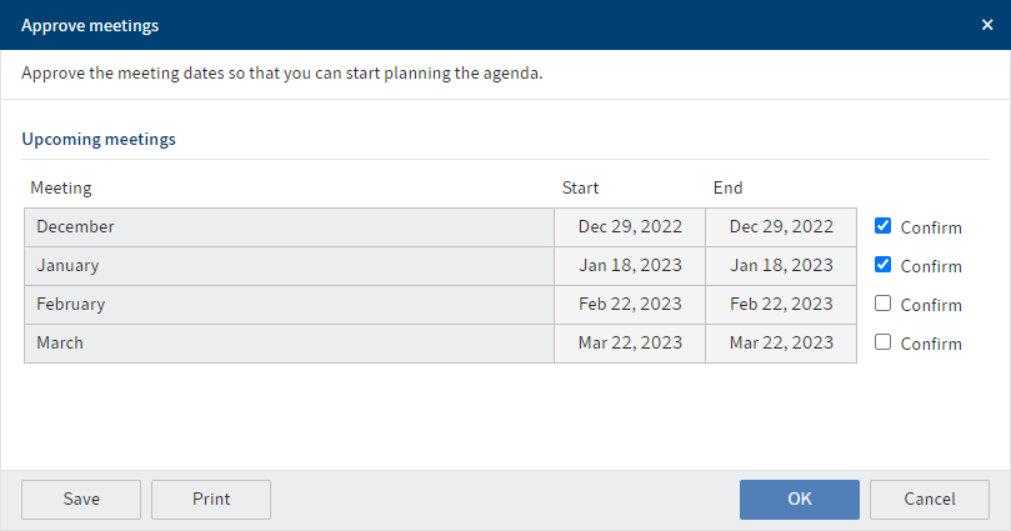
In the Approve meetings dialog box, check Confirm next to all meetings you want to approve.
If you cannot approve a meeting, it means that it has already been approved.
Select OK.
Result
The meeting is now in Approved status.
Outlook
- You can now start registering items for the meeting.
- You can prepare the meetings with the meeting assistant.
# Prepare meeting
You use the meeting assistant to prepare for meetings. In particular, you have the option to insert agenda items from the agenda pool and rearrange them as required.
For more information, refer to the separate Meeting assistant chapter.
# Create meeting file
You can create a meeting file that you can share with the other meeting participants.
A meeting file is a PDF with the following information:
| Information | Details |
|---|---|
| Meeting metadata | Title, date, location, status, start, end, minute taker |
| Agenda | Title of all items |
| Participant list with information on all members and guests | Name, e-mail address, role |
| Information on the items | Title, duration, speaker, description, proposals (possibly with attachments) |
Method
Select the meeting.
On the ribbon, select Meeting > Meeting > Create meeting file.
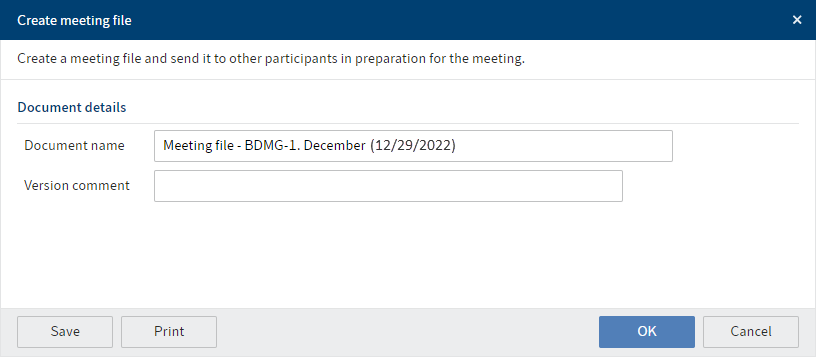
You also have the option to enter a version comment in the Create meeting file dialog box.
The document name is generated automatically. You can edit it if necessary.
Select OK.
Result
The meeting file is created in the meeting folder in the Files folder.
Outlook
You can send the meeting file to the meeting participants, e.g. using the Send message function.