# Edit meeting board
Information
This chapter is aimed at meeting board organizers.
You can make changes to the meeting board. Changes to the meeting board only affect meetings that did not exist the time of the change.
You should therefore follow these steps before you create the first meeting in the meeting board:
| Task | Explanation |
|---|---|
| Check and/or edit the basic settings in the meeting board form | Any missing or incorrect information should be added or corrected so that it is not inherited by the meetings. |
| Check recurring items | Check the Recurring items folder to make sure that it contains all the required items. Create additional recurring items if you need to. |
| Edit recurring items | When you create the meeting board, you will not be asked to enter all data about items. You can add this information in the form. |
| Create notification templates | If you want to use additional notification templates for all meetings in the meeting board, create them at the start. If you want to use additional notification templates for individual meetings only, you can create them later. |
You can make the following changes to the meeting board:
| Task | Explanation |
|---|---|
| Add members | When new members join a committee or other body, you can create them afterwards. |
| Set members as inactive | Members cannot be deleted. This is to prevent any effects on meetings already held. If a member steps down from a committee or board, you can change their status to Inactive to ensure that they will not appear as attendees at future meetings. |
| Create recurring items | If you have topics that you want to raise at every meeting, you can create recurring items. |
# Edit basic meeting board settings
You can edit some meeting board settings retroactively.
Information
Changes to the meeting board only affect meetings that did not exist at the time of the change.
Method
Select the meeting board.
Select the Form tab.
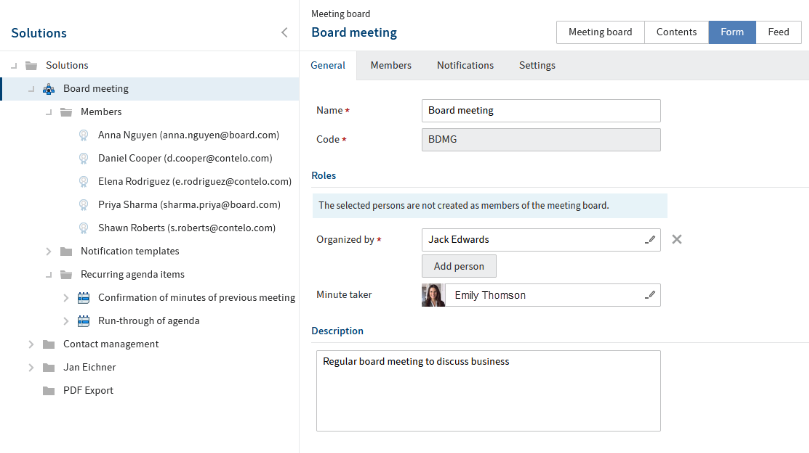
Refer to the Create meeting board chapter for details of the settings that you can make.
Information
Fields that are grayed out cannot be edited.
You cannot use the form to add members. In this case, you need to use the Add members function.
You cannot delete members. However, you can change their status to I - Inactive. For more information, refer to the Set member as inactive chapter.
If you want to send notifications but the corresponding template is not yet available, you first need to create a notification template.
Select Save.
Result
The changes are applied to the meeting board. They do not affect existing meetings.
When you create additional meetings for the meeting board, they have the new settings.
# Create notification template
You can create notification templates for a meeting board. These can be used for the entire meeting board or just for individual meetings, but not for other meeting boards.
The notifications are sent by e-mail.
Alternative
You can also contact the participants of individual meetings in the meeting board using the Send message function. There are no templates for this.
Method
Select the meeting board.
On the ribbon, select Meeting > Notifications > Create notification template.
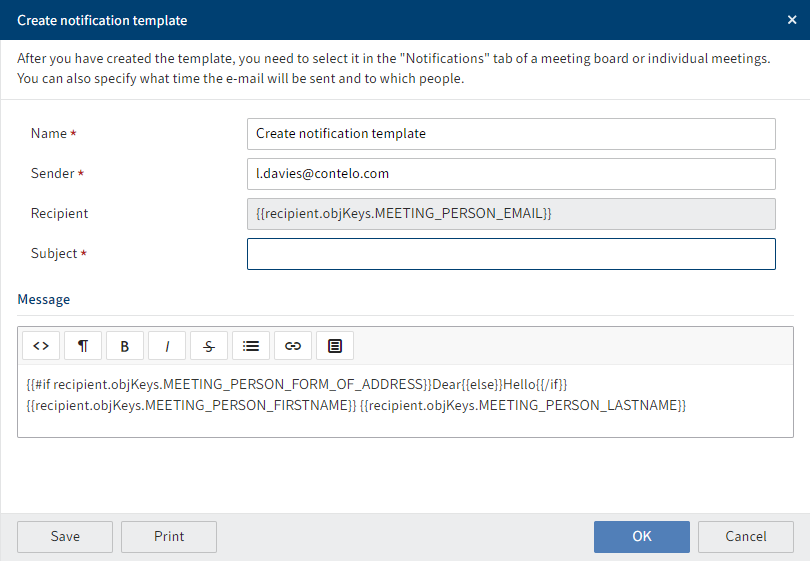
Complete the fields in the Create notification template dialog box as required.
Field Explanation Name Notification templates are selected based on their name. You should therefore enter a name that indicates what the content is. Sender You need to enter the sender's e-mail address here. Recipient You cannot edit this field. You select the recipient group when you select the template for a meeting board or meeting. Message The title or form of address is already entered. You can type and format a message. You have the option to use clips to help you write text. They contain information about the respective meeting (e.g. location) and can be inserted into the text. To use clips, select the position in the text where you want to insert information and click Clips. Select OK.
Result
The notification template is created in the Notification templates folder of the meeting board. It is now available for use in the meeting board.
Outlook
- You can use the notification template for the entire meeting board. Select the meeting board > Form tab > Notifications tab. Refer to the Create meeting board chapter for details of the settings.
- You can also use the notification template for individual meetings in the meeting board. Select the meeting > Form tab > Notifications tab.
The notification will be sent by e-mail to the selected recipient group at the designated time.
# Add members
You can add members to a meeting board.
Information
If you only want to add guests to individual meetings, use the Edit list of participants function.
Method
Select the meeting board you want to add members to.
On the ribbon, select Meeting > Board > Add members.
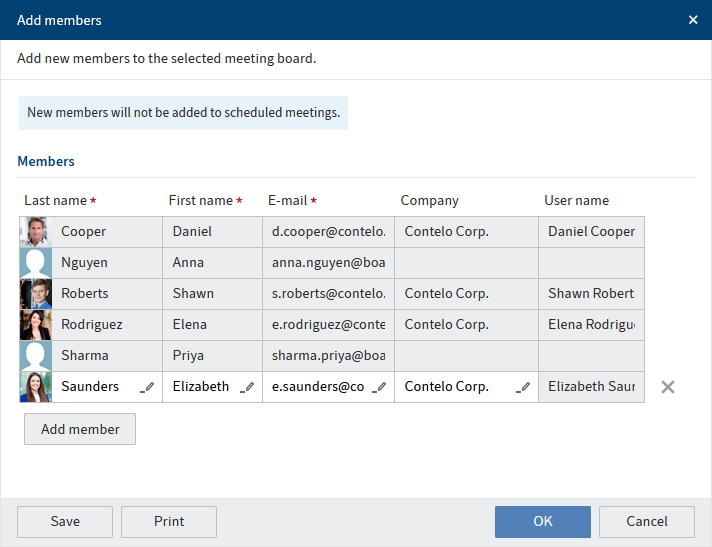
Add members as required.
Members do not require an ELO account. You can either import contacts from ELO Contact or type in their data.
Information
Members cannot be deleted. This is to prevent any effects on meetings already held. When members step down or leave the company, the status can be set as Inactive.
Select OK.
Result
The members are added to the meeting board. The change does not affect existing meetings.
When you create additional meetings for the meeting board, newly created members are added to the list of participants.
# Set member as inactive
Members cannot be deleted. This is to prevent any effects on meetings already held. When members step down or leave the company, you can set their status as Inactive.
Method
Select the meeting board.
Select the Members tab in the form.
Select Go to for the departing member.
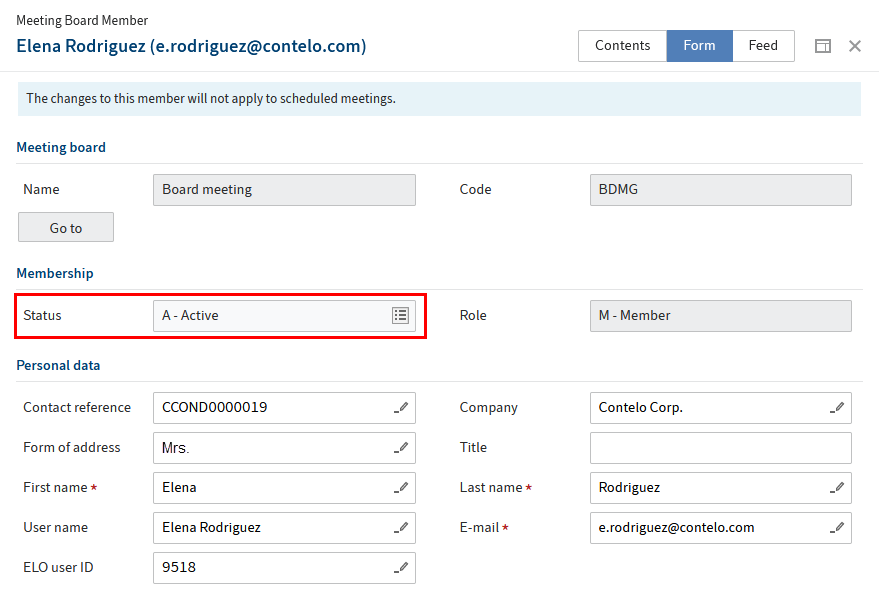
Change the status to I - Inactive.
Select Save.
Result
The member is now inactive.
When you create additional meetings for the meeting board, the member no longer appears in the list of participants.
Information
If you have already created meetings with the inactive member, you can remove them from each meeting using the Edit list of participants function.
# Create recurring item
You can add recurring items to a meeting board.
Method
Select the meeting board.
On the ribbon, select Meeting > Board > New recurring item.
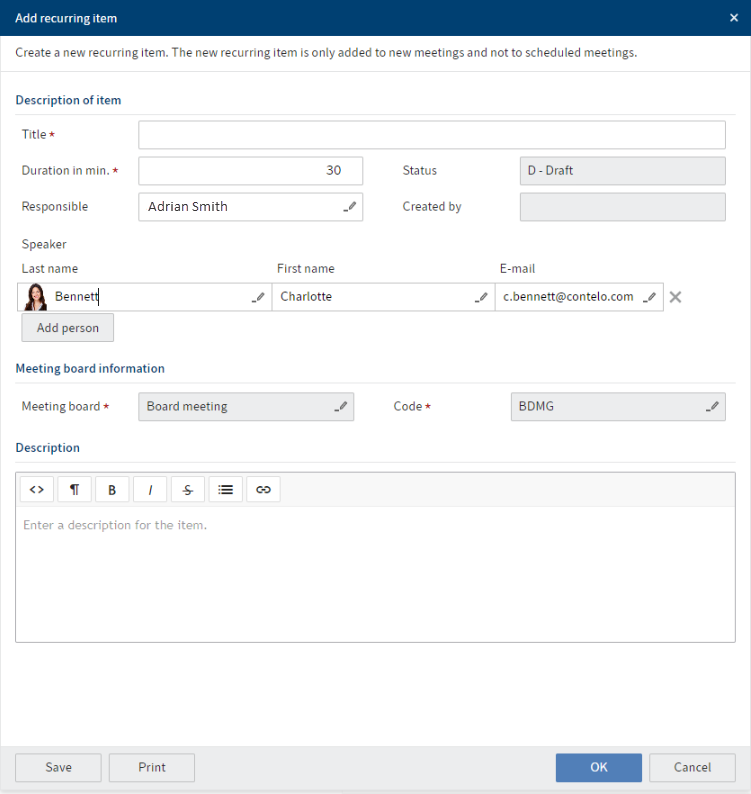
Complete the fields in the Add recurring item dialog box as required.
Field Explanation Responsible The person responsible is granted advanced permissions and can edit the item. Speaker The speakers are granted advanced permissions and can edit the item. You can select multiple people. Select OK.
Result
The item is stored in the Recurring items folder.
When you create additional meetings for the meeting board, the item appears on the agenda.
# Edit recurring items
When you create a meeting board, you can only enter the title, duration, and a description of a recurring item. If the same people are going to prepare and present the item in every meeting, you can store this information globally for the meeting board.
Information
You can also upload documents that are needed in every meeting to the folder of the recurring item. In this case, you can use either the standard functions or the item detail page (Recurring items folder > Select item > Meeting item tab).
Method
Select the meeting board.
Select the form.
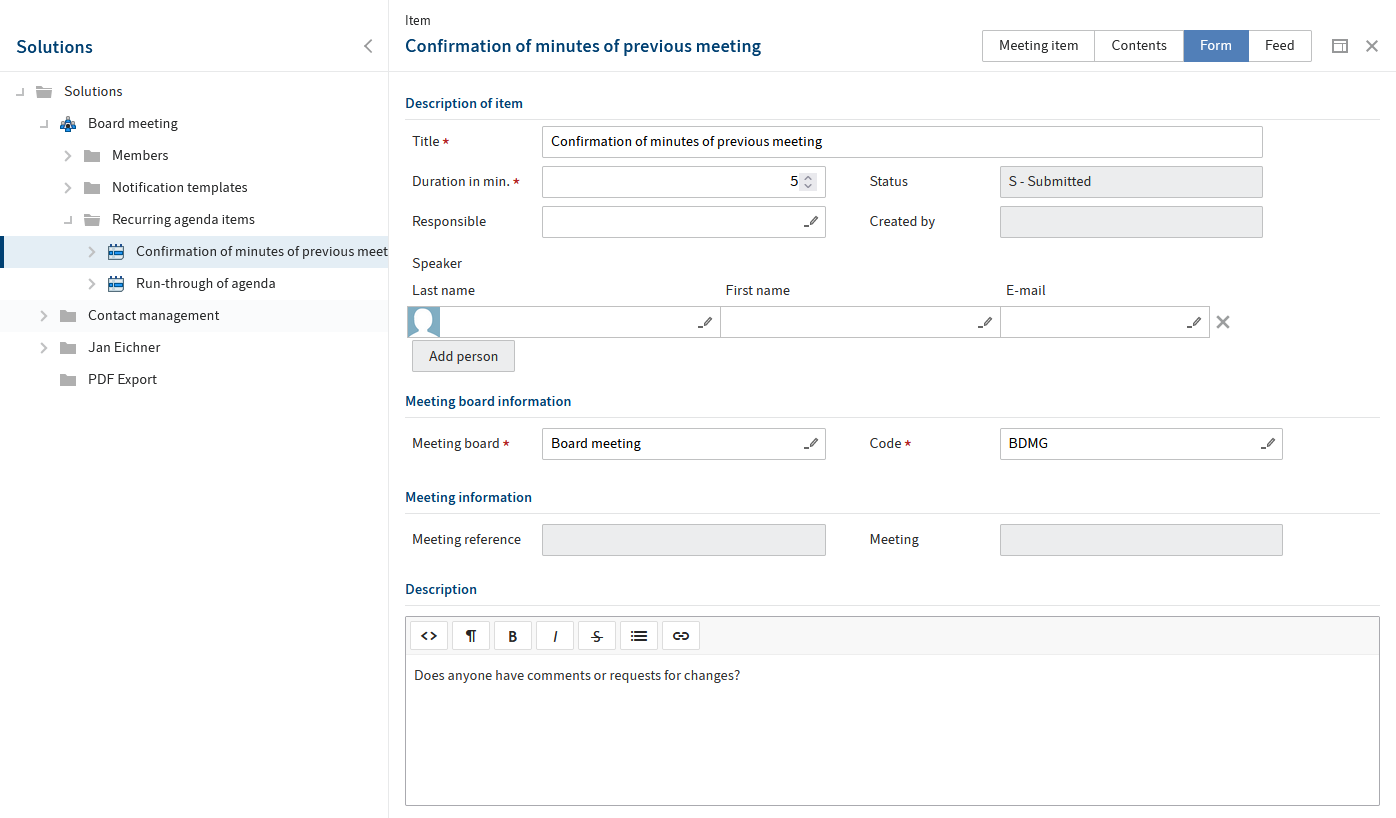
Edit the fields.
Field Explanation Responsible The person responsible is granted advanced permissions and can edit the item. Speaker The speakers are granted advanced permissions and can edit the item. You can select multiple people. Select Save.
Result
When you create additional meetings for the meeting board, the item appears on the agenda with the new information.