# Meeting assistant
Information
This chapter is aimed at meeting board organizers.
You can prepare and conduct meetings in the meeting assistant.
You can access the meeting assistant through the meeting app (Select meeting > Meeting tab > Open assistant button).
The meeting assistant consists of the following areas:
When you open the meeting assistant, you also get access to agenda functions.
# Information

You have the following options in this area:
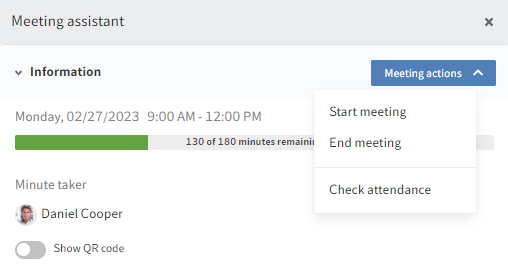
| Time information | The timeline function shows whether there is enough time remaining for other items or whether the allotted meeting time has run over. |
| Show QR code | The show QR function allows you to open the meeting as a standalone app. You can use the slider to zoom in and out of the QR code. When you close the meeting assistant, the QR code remains on the agenda and can be scanned by the participants. |
| Start meeting | You can start the meeting (Meeting actions > Start meeting). Once the meeting has started, you can start writing minutes on the item detail pages. |
| End meeting | You can end the meeting. After the meeting has ended, you can do the follow-up. |
| Check attendance | You can check attendance. The button takes you to the attendance list. |
# Organize agenda

This area contains the following organizational items:
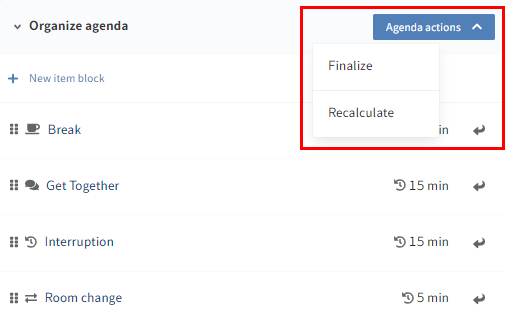
- Get-together
- Break
- Room change
- Interruption: This item can be inserted to document any unscheduled interruptions in the meeting. You also have the option to enter the reason why the meeting was interrupted in the form.
You have the following options:
| Create item block | You can create item blocks. An item block is inserted directly into the agenda and you can add items to it. |
| Add organizational item | You can add organizational items to the agenda. You can insert each organizational item as many times as you like. You can either drag and drop the items or use the arrow buttons. Once an organizational item has been added to the agenda, you can edit its duration. |
| Finalize agenda | You can finalize the agenda (Agenda actions > Finalize agenda). Once the agenda is finalized, participants know that there are not going to be any more changes. You can use the Send message function to notify participants that the agenda is final. |
| Check attendance | You can check attendance. The button takes you to the attendance list. |
# Agenda pool

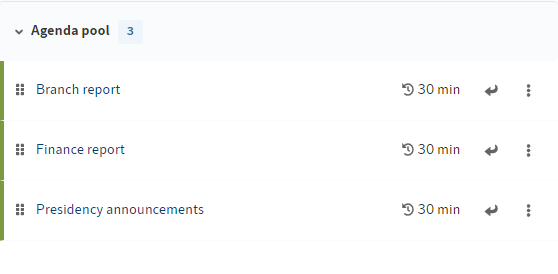
The agenda pool contains all items that can be scheduled for the agenda.
There are different ways to put items in the agenda pool:
- The item was registered directly when the meeting was created.
- The item was created in an item pool and was registered for the meeting from there. In this case, you cannot view the contents of the item yet. However, you can see the form and can schedule the item.
- The item was created in an item pool and was submitted to the meeting from there.
You have the following options:
| Insert item | You can insert items into the agenda. You can either drag and drop the items or use the arrow buttons. |
| Open detail page | You can view the full details of an item on the item detail page. To access the page, select the title of the item or click the three-dot menu > Open detail page. |
# Agenda
You can edit the agenda as long as the meeting assistant is open. When you select an item, you will see buttons that allow you to edit the item.

You have the following options:
| Edit duration | You can edit the allotted duration of the item. Click on the item and select the plus or minus button. Alternatively, you can click the three-dot menu and type in the duration in the input field. |
| Remove item | You can remove items from the agenda. Delete organizational items by clicking the three-dot menu > Delete. You can move items to the agenda pool by dragging and dropping them or by clicking the three-dot menu > Move to agenda pool. |
| Open detail page | You can view the full details of an item on the item detail page. To access the page, select the title of the item, click the three-dot menu > Open detail page, or press the D key. |
| Rearrange items | You can rearrange the items on the agenda. The table below contains more information about this: |
You have the following options for moving an item in the agenda:
| Move | You can move the item up or down in the following ways: - Drag-and-drop - Single and double arrow buttons - Three-dot menu: You will also find the corresponding keyboard shortcuts here |
| Insert into item block | You can insert items into item blocks. To insert an item into a item block, the item must be below the item block on the agenda. You have the following options: - Drag-and-drop - Right arrow curving down button (level down) |
| Move to another day | If you have meetings that are held on multiple days, you can move the item to another day. You can select the day using the three-dot menu. |
Information

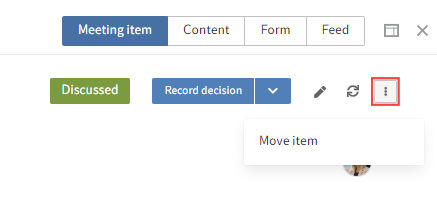
If you want to move an item to another meeting, go to the item detail page > three-dot menu > Move item.
# Clean up agenda
If an item that has already been put on the agenda is withdrawn, you need to clean up the agenda.

The item is removed from the agenda.