# Start ad hoc workflow
Proceed as follows to start an ad hoc workflow:
In ELO, select the entry (document or folder) you want to use for an ad hoc workflow.
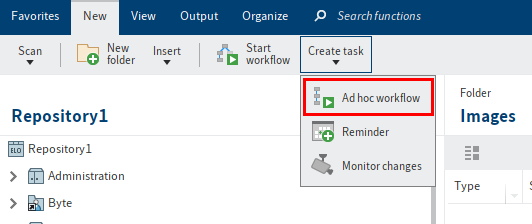
Select Ad hoc workflow (Ribbon > New > Create task).
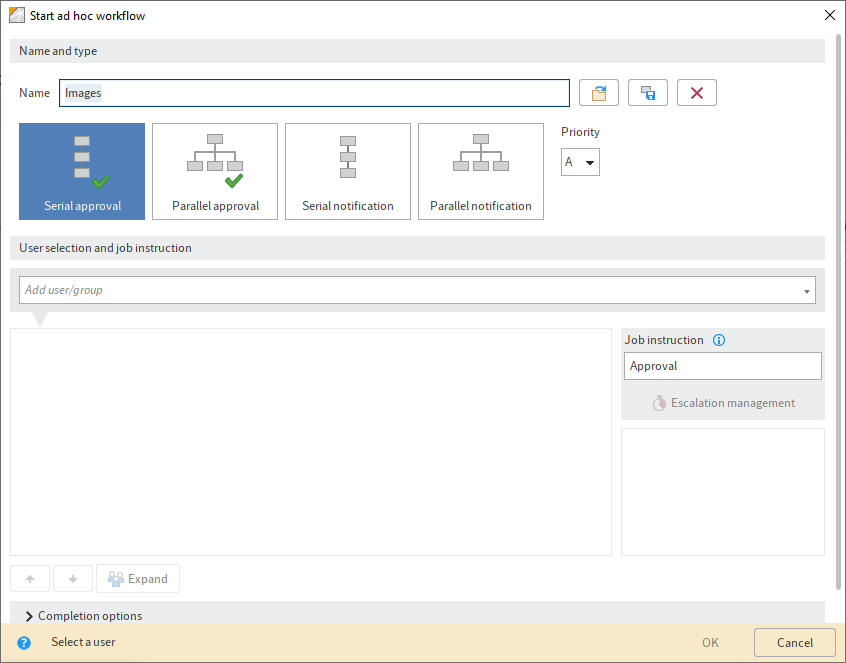
The Start ad hoc workflow dialog box opens.
Option 1: You can change the name of the ad hoc workflow in the Name field. The workflow is displayed under this name.
Specify the type of ad hoc workflow.

You can define the priority level of the ad hoc workflow in the Priority drop-down menu. You can choose between the following priorities: A (=High), B (=Medium), and C (=Low). This function is useful if you have a large number of workflows and you want to rate them according to importance.

Search for the desired user or group in the Add user/group field. Suggestions will appear as you type.
Select the relevant suggestion.
Alternative: If you click the triangle to the right of the Add user/group field, this will open a drop-down menu. The drop-down menu contains a list of the users and groups you selected recently.
The selection is displayed in the Add user/group column. This list is the distribution list for the ad hoc workflow.
Members of the group: If you select a group, you will see the group members in the Members of the group area.
Expand: If you select Expand, groups are not displayed as a group. Instead, the individual members of the group are listed.
Information
If a group is selected, one member of the group can accept and process the workflow. If you expand the group, every member of the group can accept and process the workflow.
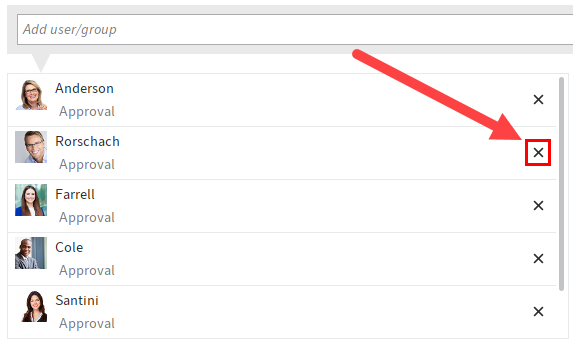
Option 2: Click the X icon next to the corresponding entry to remove the person or group from the list.
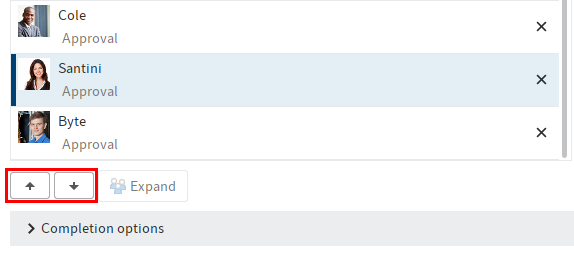
Option 3: The order of the participants in the distribution list can be changed. To do so, drag the users to the desired position in the list or use the Move up (small up arrow) or Move down (small down arrow) buttons.

Option 4: You can change the text in the Job instruction field. The respective job instruction applies for the user/group currently selected. You can select multiple users and groups. The job instruction can have a maximum of 128 characters.
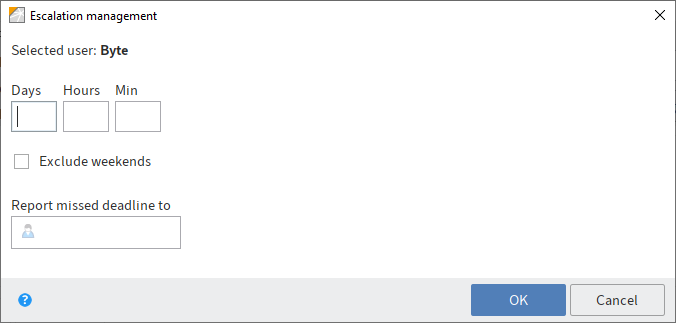
Option 5: You can also set the maximum amount of time the ad hoc workflow may remain with the selected user/group. To do so, select Escalation management.
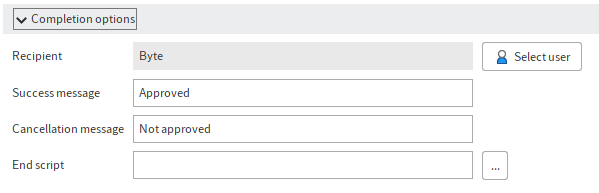
Option 6: Select a recipient for the success message when the workflow is completed. To do so, expand the Completion options area and then select the Select user button.
Option 7: Expand the Completion options area and change the message that is shown when the workflow is successfully completed in the Success message field. The text also appears as a button when forwarding the workflow.
Option 8: Expand the Completion options area and change the message that appears in the Cancellation message field if the workflow is canceled. For approval workflows, the text appears as a second button when forwarding the workflow.
Information
You cannot enter a cancellation message for Notification workflows.
Option 9: (only applies for Parallel approval workflows): Expand the Completion options and disable (if required) the option Withdraw the workflow from all users as soon as one user does not approve it.
Option 10: Expand the Completion options area and select a script to be executed when the workflow is completed from the drop-down menu in the End script line.
Information
You can find more information on the topic of scripts in the chapter Advanced functions.
Select OK.
The ad hoc workflow is started.