# Node types
You can make different node settings depending on the node type.
# Open node
Open the respective node as follows to edit the settings of a node:
- Select the node that you want to edit.
Make the desired settings in the Node settings area. Some fields correspond to the fields of the start nodes.
The following section describes the most important settings for each node type:
# User node
The following fields have been added or differ from the start node.

User: In the User field, select who should process the node. The default for this field is Owner. Owner means: The person who starts the workflow will process all nodes with this setting.
Use Select to choose another user or a group.
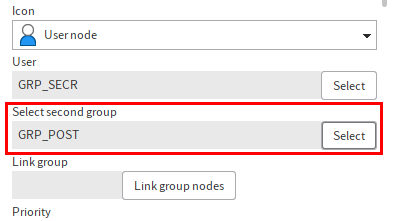
Select second group: Add another group if required. To do so, use the Select button to the right of the Select second group field. The two groups will be connected as an AND group. Only users who are members of both groups will receive the workflow.

Link group: If you have selected the same group as the user for multiple nodes, these nodes can be linked. All linked group nodes are assigned to the same group member who has accepted the workflow. In this way, you can avoid different members of a group having to take action on the same workflow.
Link group nodes:
To link multiple group nodes, select Link group nodes.
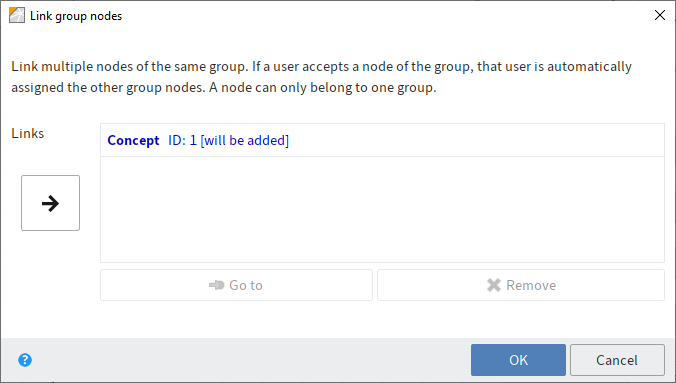
The Link group nodes dialog box opens.
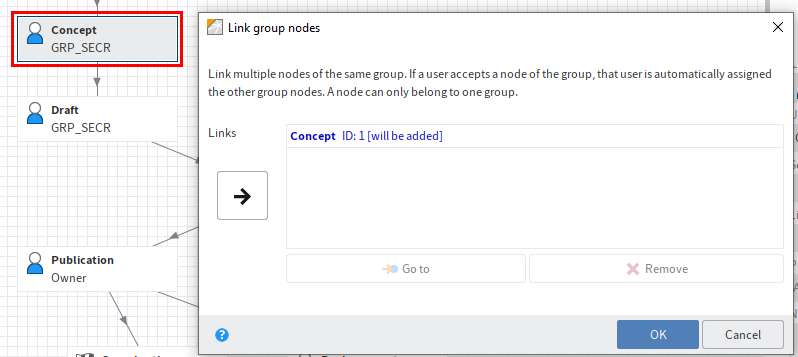
In the workspace of the workflow designer, select the node you want to link to the node you have previously selected.
The Link group nodes dialog box remains open.
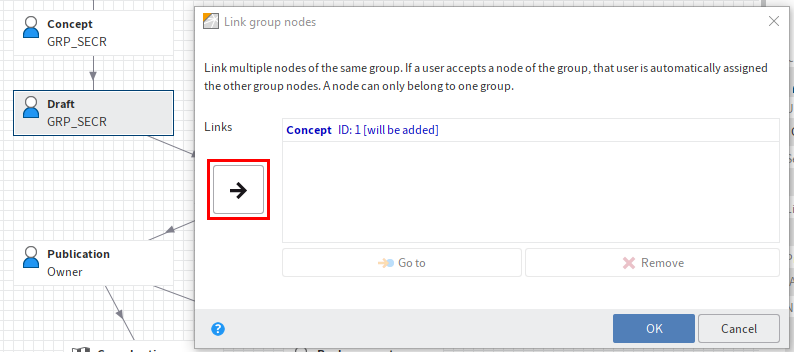
In the Link group nodes dialog box, select Link selected group nodes (right arrow).
The selected node is added to the list. Each node within the link has a unique ID.
Click OK to close the dialog box.
In the Link group field, you will see the number of the link group that the respective node belongs to.

Note: You can enter a message for the responsible editor of the workflow node, such as a job instruction or a specific note, in the Note text field.

Name on forwarding: In the Name on forwarding field, you can enter a different name to the one in the Workflow step field. The contents of the Name on forwarding field are applied to the button label in the Forward workflow dialog box.
If you leave the Name on forwarding field blank, ELO automatically applies the contents of the Workflow step field to the label for the button on forwarding.
Information
The Name on forwarding field is available for all nodes with the exception of the start node.
Translation variable: The Translation variable field is required if you need the contents of the Name on forwarding field in multiple languages. Enter the corresponding key in the respective properties file.
For more information, refer to the chapter Form-based workflow > Global form settings under Languages or Translation variable (prefix) and the chapter Translation (opens new window) in the documentation ELO Java Client administration.

Forwarding sequence: If a user node has several successor nodes, you can specify the order of appearance of the successor nodes when forwarding the workflow. This affects the buttons in the Forward workflow dialog box.
Use the Forwarding sequence field for this. Use the arrow icons to change the position of the successor node selected in the field.
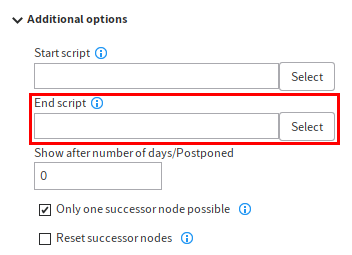
End script: In the End script field, you can define an action that is carried out when the workflow is forwarded. For example, you can send a status message to the workflow owner.
Information
End scripts are run via the ELO Indexserver. You will find additional information on these scripts in the Advanced functions chapter.
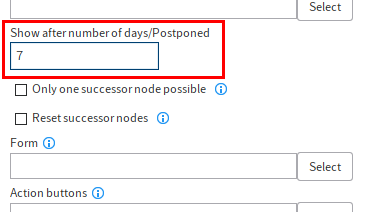
Show after number of days/Postponed: Use the Show after number of days/Postponed field to delay the workflow. If the workflow is postponed, it only shows up in the responsible user's tasks list once the specified number of days have passed. The postponement is triggered as soon as the workflow has been forwarded to the node.
Please note
The number of days for the postponement should not exceed the maximum node duration. Otherwise, the workflow will pass the deadline before it can be processed.
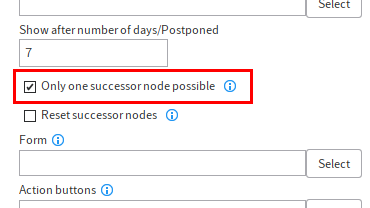
Only one successor node possible: If the option Only one successor node possible is enabled, only one node can be selected when forwarding.

Reset successor nodes: If the Reset successor nodes option is set, the completed status of all the successor nodes of a workflow node is removed if the branch of a workflow repeats within a cycle. The successor nodes are restored to the original status they had in the first cycle.
Information
Because it is now possible to map a cycle with the help of cycle nodes, this option should only be used in exceptions.
Form: In the Form field, you can integrate parts of a form (template) into a node.
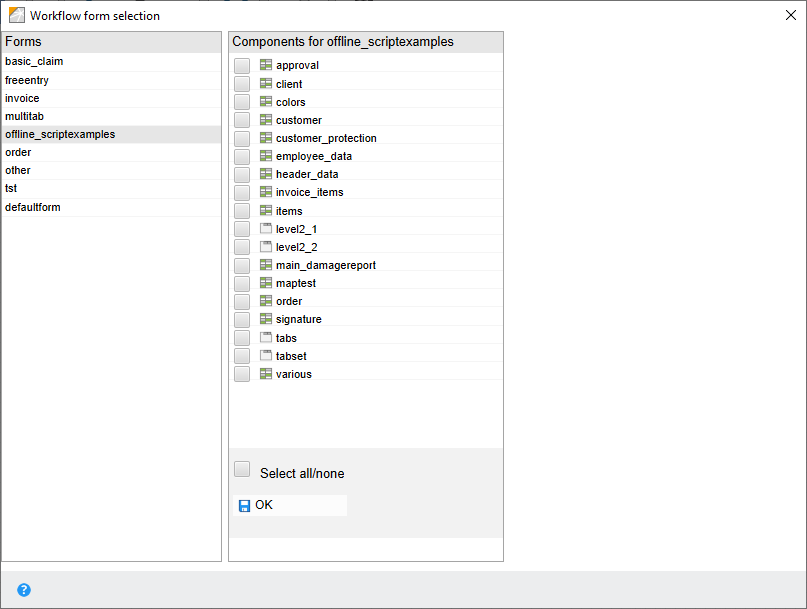
Use Select to open the Workflow form selection dialog box. This is where you can select the desired templates.
Action buttons: In the Forward workflow dialog box, up to five action buttons can be displayed.
Information
If you want to use action buttons, you have to enter at least two action scripts.
The action buttons trigger certain processes, such as sending an e-mail or opening a document.
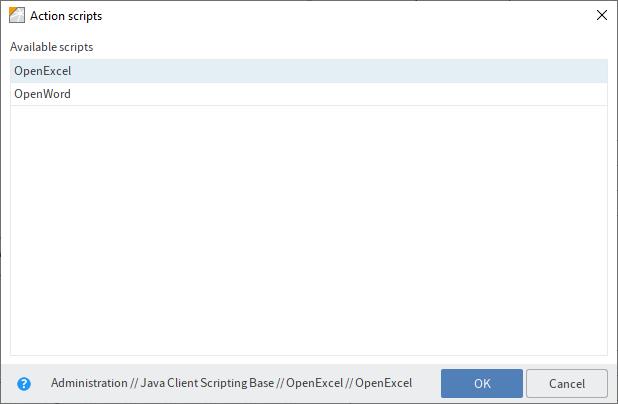
To open the Action scripts dialog box, use the Select button next to the Action buttons field. Scripts can be selected in the Action scripts dialog box.

The integrated action buttons are displayed in the Forward workflow dialog box.
Information
Certain rules apply for action scripts. You will find more information on this topic in the chapter Advanced functions.
Field: Use Field to select which fields of a metadata form to use for this node. The user who processes the respective node sees the selected fields when forwarding the workflow. This allows you to provide the user processing the workflow with important information. At the same time, the responsible user is also given the option to modify the metadata.
Information
You can select multiple filters. To do so, either press and hold the CTRL key or the SHIFT key, or select the Select all option.

Click Select next to Field to open the Fields dialog box. You can select the desired metadata form from a drop-down menu.
The Groups field shows you the field groups used on the metadata form. Use these groups to create links to the respective field in the metadata.
Information
You can see which field in the metadata is linked to which group in the ELO Administration Console.
# Decision node
A decision node is used to check the data entered into a metadata form. This data specifies what happens next in the workflow.
The following fields only exist for decision nodes:
Condition: Use the Condition drop-down menu to select a comparison operator. The following comparison operators are available:
- equal to (=)
- not equal to (<>)
- greater than (>)
- less than (<)
- greater than or equal to (>=)
- less than or equal to (<=)
Information
The node must be connected to a field in the metadata for the comparison to work.
Value: Enter the comparison value in the Value field. This is compared with the value in the selected field in the metadata using the comparison operator in the Condition field.
Depending on the result, the document is forwarded to one or the other successor node.
This means that a decision node must be connected to exactly two successor nodes.
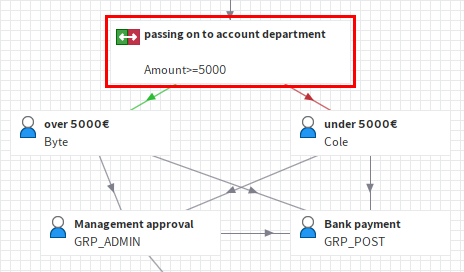
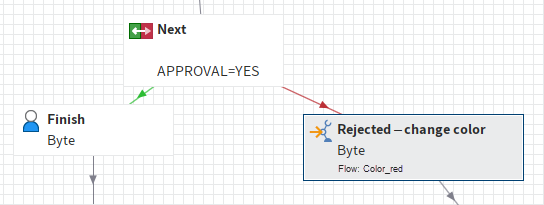
The first result determines the path that is followed if the comparison is TRUE. This connection line is green.
The second connection line is red. This path is followed if the result of the comparison is FALSE.
# Distribution node
If you want to forward the workflow to multiple nodes, you need to insert a distribution node.
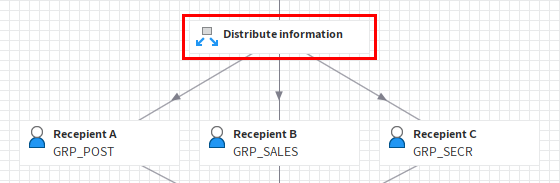
Status: If you enter a value in the Status field, the workflow is assigned the corresponding status as soon as it passes through the distribution node.
Information
The workflow status can also be modified in ELOas or using scripts.
To query the workflow status, ELO offers the predefined query ELO_WF_STATUS. This represents a fixed property that is available for all default workflows. See also Cycle node.
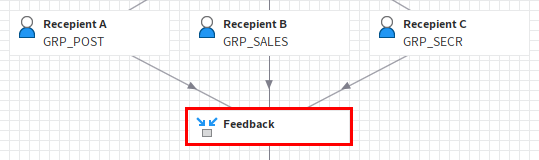
# Collection node
Collection nodes wait until all preceding nodes have been completed or only a set number of responses is outstanding. The document will not be forwarded until this occurs.
The following options are available for the collection node:
Wait for all predecessor nodes: If the Wait for all predecessor nodes option is enabled, the workflow is only forwarded to the next node when all nodes preceding the collection node have been completed.
Forward at the number of completed predecessor nodes: In the Forward at the number of completed predecessor nodes field, enter how many predecessor nodes need to be processed before the workflow is forwarded. This means not all predecessors must have processed the node.
Deactivate these nodes when forwarding: Use the field Deactivate these nodes when forwarding to determine which nodes should no longer be active once the workflow is forwarded. Enter the respective node IDs.
Information
You see the ID of the selected node in the status bar. Use the PDF output button to get a PDF overview with all nodes and corresponding IDs.
# Cycle node
Cycle nodes are used if a process has to be repeated until a certain status has been reached.
For each cycle, you need to create a separate cycle node with the option Cycle start and a cycle node with the option Cycle end. The name must be identical for both of these nodes.
All nodes between Cycle start and Cycle end will be passed until the desired status has been reached.
When the workflow reaches a Cycle start, the affected nodes are duplicated and inserted again with a space. Use the Spacing node setting (only in the start node) to define the spacing of the duplicated cycle in the workflow diagram. The higher the number entered, the greater the space between the duplicated cycles.
Similar to the decision node, you define a condition and a comparison value in the Cycle end. If the condition is not met, the cycle has to be repeated. If the condition is met, the cycle is ended. For the comparison to work, you need to connect a field in the metadata to the node which the corresponding value is read from.
Alternative: You can also enter the query ELO_WF_STATUS in the Field field. Use this query to read the workflow status and to check it against the comparison value entered in the cycle node.
Information
You can change the workflow status using distribution nodes, ELOas, or scripts.
# Server transfer
The Server transfer node type is used to transfer a workflow document to a second server. The repository ID of the second server must be entered in the server transfer node.
After synchronizing the data to the second server, you can continue processing the workflow on the second server. The workflow is then locked on the first server.
Information
This option is only required when replicating workflows, i.e. if you have installed the ELO Replication module.
# Subworkflow node
Once the workflow reaches the subworkflow node, the corresponding subworkflow is started.

Select template: The workflow started depends on the template you have selected in the Select template drop-down menu.
All workflow templates can be used for subworkflows. It is also possible to set workflow templates so that they can only be started as subworkflows. To do so, disable the option Workflow can be started manually in the start node of the respective subworkflow.
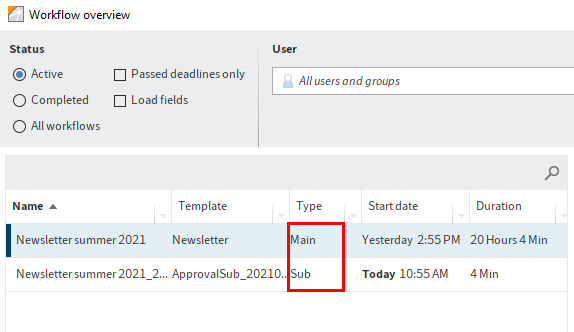
In the Workflow overview dialog box, you can distinguish between default workflows and subworkflows in the Type column. Default workflows have the type Main. Subworkflows have the type Sub.
# Flow node
Flows can be linked with a workflow using a flow node. When the workflow reaches a flow node, one or more flows are called and run, depending on the settings.
Event: If the Event option is enabled, all flows that listen to this event are called when the flow node is reached.
You can specify a name for the event in the Template field (see below).
Flow: If the Flow option is enabled, a specific flow is called.
Select the template for the flow via the Template field (see below).
Template: In the Template field, you specify which flow/event to trigger once the workflow reaches the flow node.
The following variants are possible:
- If the Event option is enabled (see above), enter the name of the event you want to trigger. To be triggered, the event has to be configured in one or more flows templates as an event in the trigger.
- If the Flow option is enabled, select the desired flow template from the drop-down menu.
Error user: Enter an ELO user in the Error user field. The workflow is forwarded to this user if an error occurs executing the flow.
Information
The Error user field is only active if the Flow option has been enabled.
# End node
Use an end node to end a workflow at a fixed point. When the workflow reaches an end node, the workflow is automatically ended. Unprocessed nodes are ignored.
Information
If there is no end node, the workflow ends as soon as there are no more unprocessed nodes.
Return value: The Return value field is intended for subworkflows. Enter a successor node to be selected when the subworkflow is completed.
If you work with translation variables, enter the translation variable of the successor node. If you don't use translation variables, enter the node name.
# Node settings overview
The following table shows which settings can be made for which node.
| Setting | Node |
|---|---|
| Select second group | User node |
| Action button | User node |
| Workflow step | All nodes |
| Wait for all predecessor nodes | Collection node |
| Condition/Value | Decision node, cycle end |
| User/group | User node |
| Permissions | Start node |
| Name on forwarding | All except start node |
| Deactivate node | Collection node |
| Level | Start node |
| End script | All except start node and flow node |
| General escalation | Start node, user node, subworkflow node |
| Escalation B and C | Start node, user node, subworkflow node |
| Event | Flow node |
| Error user | Flow node with Flow option enabled. |
| Fields | User node, decision node, cycle end |
| Flow | Flow node |
| Reset successor nodes | User node |
| Form | Start node, user node |
| Note | All nodes |
| Only one successor node | User node |
| Package | Start node |
| Priority | Start node |
| Forwarding sequence | User node |
| Return value | End node |
| Exclude weekends | Start node, user node, subworkflow node |
| Show after... | User node |
| Script properties | All nodes except flow node |
| Start script | Start node, user node, cycle node, subworkflow node |
| Icon | All nodes |
| Transfer to server | Node, server transfer node |
| Translation variable | All nodes |
| Link group | User node |
| Spacing | Cycle start |
| Template | Flow node |
| Select template | Subworkflow node |
| Forward at the number... | Collection node |
| Workflow can be started manually | Start node |
| Duplicate cycle at start | Cycle start |