# Integrate a form into a workflow
To use forms in workflows, you need to specify in the workflow template which form templates are to be used at which nodes. This is a distinct advantage of splitting workflow forms into templates. This makes it possible to specify which workflow participants will be shown which parts of the form.
Templates can be integrated via user nodes and the start node. The templates integrated via user nodes are shown to the workflow participant who is currently processing the workflow.
The owner (user who started the workflow) of a workflow can show templates integrated via the start node.
# Example
The following example describes how to integrate templates via a person node. For the example, the Material order form and the corresponding Material order workflow template and Material order metadata form were created.
Open the desired workflow template.
Select Edit workflow template to switch to edit mode.
Select the desired user node.
The settings of the selected node can now be edited.
Navigate to Additional options and then to the Form field.

Select the Select button (to the right of the Form field).
The Workflow form selection dialog box opens. The available forms appear in the Forms column.
Select the form you want to use.
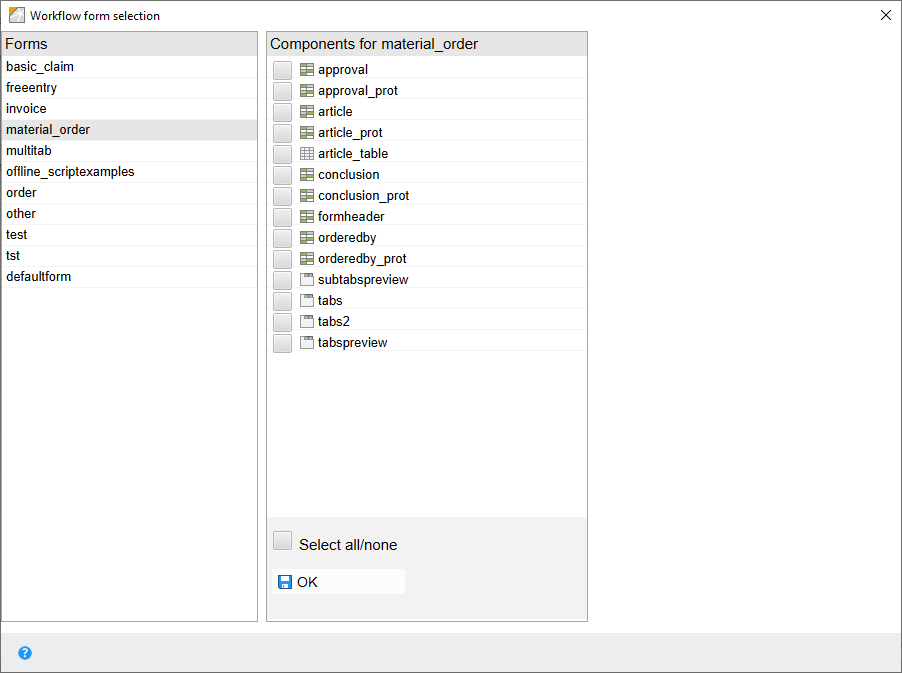
The Components for column with the available templates appears in the right area of the dialog box.
Select a template.
Information
You can select multiple templates for one node.

The selected template is moved up in the Components for column. The check box in front of the respective template is now enabled. There are two black arrows to the right of the template.
Select OK.

The Workflow form selection dialog box closes. The template selected above is now integrated into the respective workflow node.
Confirm the changes to the workflow template in the Workflow designer dialog box with OK or Apply.
From now on when you start a workflow with the corresponding template, the selected template is shown to the responsible workflow participant.
# Change order

Optional: Change the order of the templates via the arrows to the right of the selected templates. The order set in the Workflow form selection dialog box (from top to bottom) corresponds to the order displayed in the form.
# Integrate a form without the dialog box
You can enter forms or their respective form templates directly into the Form field.
You must use the following pattern:
[formname(templatename1,templatename2,...)]
Please note
All names must be lowercase.
The order (from left to right) corresponds to the order displayed in the form.
In the example, the expression is entered as follows:
[materialorder(formheader,approval, customer_prot,items_prot)]
# Integrate form (gen. 2)
Starting with ELO 21, you can create second generation forms. This is done via package administration in the ELO Administration Console.
You will find more information on creating forms under ELO packages > Metadata > Forms (opens new window).
To integrate the forms (gen. 2) into a workflow template, the following requirements must be met:
- There is at least one package
- This package has at least one metadata form
- A view/form (gen. 2) has been created for this metadata form
- There is a workflow template
To integrate a form (gen. 2) into a workflow template, you can proceed in the same was as described in Integrate a form without the dialog box. Follow the steps below.
Open the desired workflow template.
Select Edit workflow template to switch to edit mode.
Select the desired user node.
The settings of the selected node can now be edited.
Navigate to Additional options and then to the Form field.

Enter the name of the form (gen. 2) to be used for the metadata form in lowercase letters.
Information

You will find the name of the form in the configuration of the respective metadata form (ELO Administration Console > Package administration > Package > Metadata form) under Views.
Confirm the changes to the workflow template in the Workflow designer dialog box with OK or Apply.
As soon as you start a workflow with the corresponding template, the selected form is shown to the responsible workflow participant.
Please note
The entry selected to start the workflow must have been filed with the corresponding metadata form. Otherwise, it will not be possible to connect to the correct form.
If you select an entry with a metadata form, and a form (gen. 2) with the same name exists, this form is shown.