# Create templates
Templates are the building blocks of the ELO forms. ELO differentiates between three types of templates:
Standard templates: These templates, which are empty at first, can include a variety of field types.
Table templates: The table data is saved automatically via special map fields. However, you need to follow special rules when adding tables. You can find additional information on tables in the Table attributes section.
Tab groups: Tab groups help to structure a form. These groups are only useful when at least two other templates exist. The tools available for tab groups differ from those for templates and tables. You can find additional information on tab groups in the Create tab groups section.
There is one basic method for creating templates, regardless of the type. In the following, we will demonstrate how to create a standard template.
# Create the basic structure
Open the form designer.
Select the form that you want to add a template to.

Select Template.
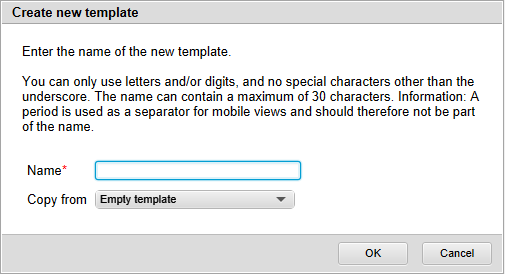
The Create new template dialog box opens.
Enter a name for the new template in the Name field.
The same rules as for naming forms apply. See the Create form section.
Optional: Use the Copy from field to apply the settings of an existing template.
Select OK.
The template is created. The form designer switches to a different mode.
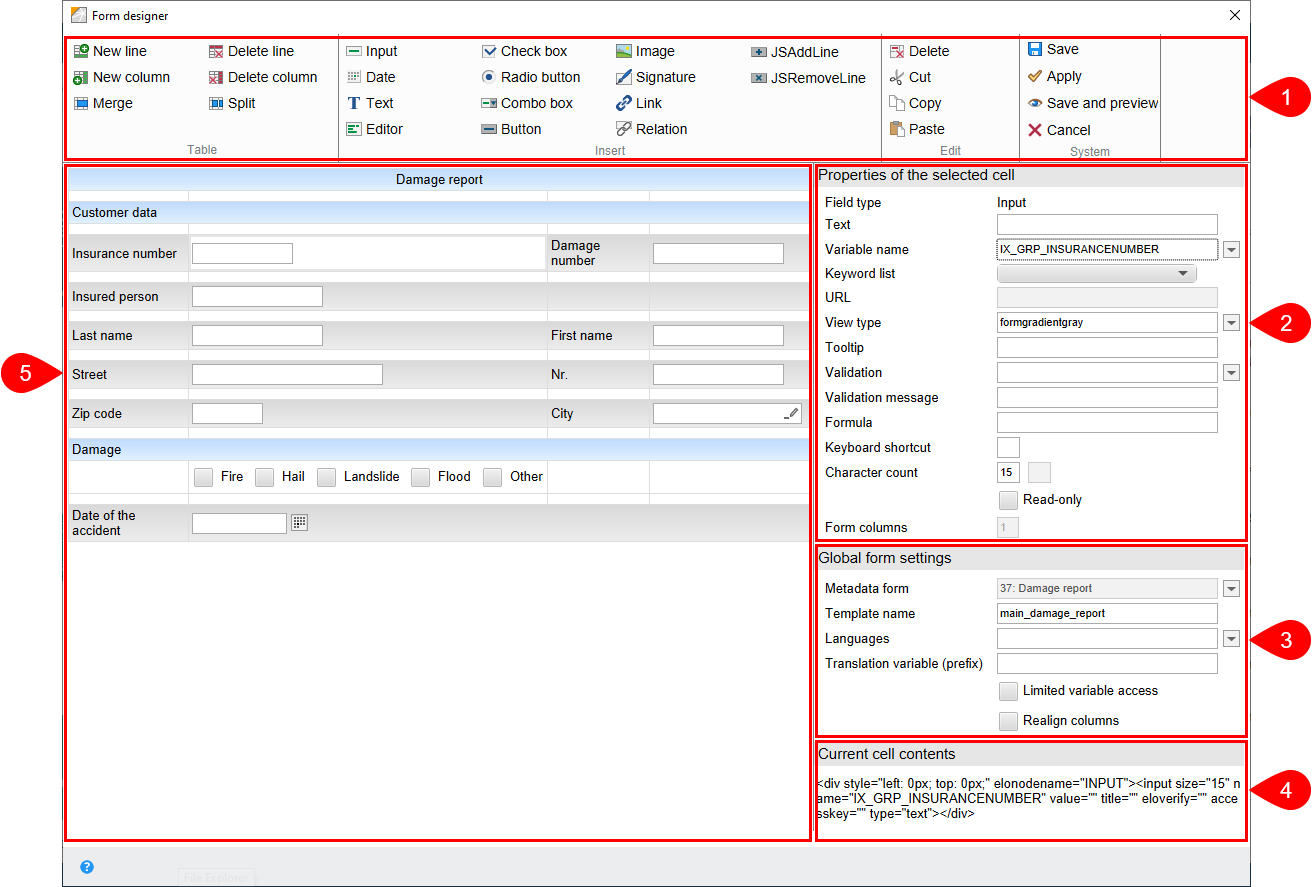
You now see the following areas in the form designer:
1 Toolbar: The tools for creating and editing templates and tables.
2 Properties of the selected cell: This is where you edit the properties of the cell selected in the form area.
3 Global form settings: This is where you edit the settings that apply for the entire form.
4 Current cell contents: Shows the HTML structure for the cell selected in the form area.
5 Form area: The elements of the template or the table appear here.
# Connect metadata forms/metadata
Each form must be connected to a metadata form with the metadata of an object in ELO. The time at which you create and integrate the metadata form depends on your preferred way of working.
Connect a form to a metadata form via the Global form settings area. You can make and change the settings via any template of a form. However, the settings always apply to the entire form.
Once you have created the metadata form, perform the following steps to connect it to the form:
Information
Newly created metadata forms do not appear immediately in the form designer. If required, restart the ELO Indexserver and then ELO Web Forms Services.
Open the form designer.
Open the desired form.
Open a template.

You see the current metadata form in the Global form settings area in the Metadata form field. The field can be edited even if it is grayed out.
Select the arrow icon to the right of the Metadata form field.
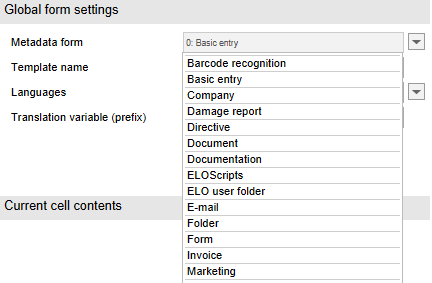
A drop-down menu with available metadata forms appears.
Select the desired metadata form.
The selected metadata form is entered.
# Design template
You can start designing the template once the basic structure has been created.
Use the form designer tools to do so. The tools are introduced in the Toolbar section. Also read the sections following this section.
# Save
Once you have created the template and made all desired settings, save the template.
- Select Save.
The form designer closes. The template now appears in the Components for column and can be integrated in a workflow, for example.
Information
If you want to save the template without closing the form designer, select Apply or Save and preview.