# Edit form
Depending on the context and application, forms can be edited in different ways.
# Add elements
To add contents to a form, you have to add elements to the form. The following sections address the different elements.
# Place a field or aspect mapping
Place fields or aspect mappings in the layout area depending on the context. In the following, we explain this process based on a field.
To place a field, drag it from the Fields tab to the layout area using drag-and-drop.
Drop it in the desired position.
Optional: You can move elements in the same way.
# Grouped fields
For some fields, grouping makes sense, as the fields are closely related. With money for example, the field for the total and the field for the currency.
Follow the steps below to create grouped fields.
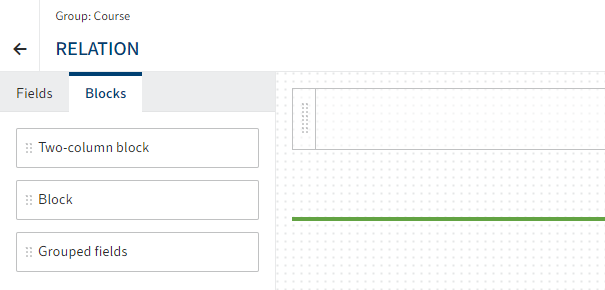
Switch to the Blocks tab.
Drag the Grouped fields block to the layout area.
A Group type field appears in the layout area.
Optional: Edit the field properties as needed under Properties.
Switch to the Fields tab.
Drag the first field to the Group type field.
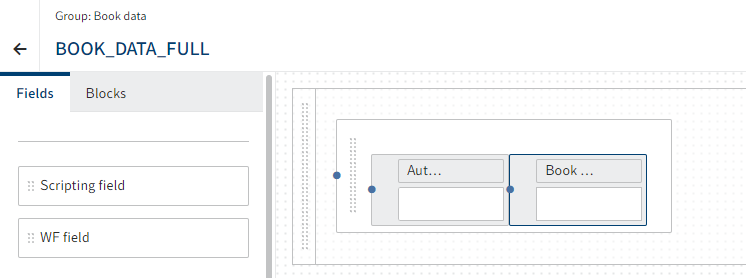
Drag additional fields to the previous field.
Optional: Edit the field properties as needed under Properties.
Information
As soon as you have dragged fields to the Group type field, additional settings will become available for the field size of the individual fields. You can choose per field whether to automatically determine the size of the field or if you want to set a fixed value of small.

Select Save.
You have added multiple fields to a group.
# Add block
There are two ways to add a layout element (block):
- Using Add block
- Placing blocks in the layout area using drag-and-drop.
The following briefly explains the approach using Add block:
In the layout area, select Add block.

A drop-down menu appears.
Select one of the options.
The block is added.
# Create independent block
For metadata forms, you can create separate form areas as independent blocks in addition to the aspects.

Select Add (plus icon) in the Independent block area.
The Create independent block dialog box opens.
Enter a translation variable into the Translation variable field.
Information
Only letters (without umlauts and special characters), numbers, periods, and underscores are allowed. The first character must be a letter.
Alternative: Select one of the available translation variables from the drop-down menu.
Enter a name in the Display name field.
Select OK to confirm.
This closes the dialog box. The new block appears in the Independent block area.
Drag the block to the layout area.
No view exists yet. The Properties area opens.

Select Add (plus icon) under Properties > View.
The Create view dialog box opens.
Enter a technical name for the view in the Identifier field.
Information
Only capital letters (without umlauts and special characters), numbers, and underscores are allowed. The first character must be a letter.
Select OK to confirm.
The form designer opens in a new browser tab. The fields that are not part of an aspect are available.
Drag the relevant fields to the layout area.
Select Save.
Close the browser tab.
Return to the browser tab with the original form.

The new view is now selected.
Select Save.
Selecting Preview displays the new view. The independent block is now available and can be applied to all metadata forms.
# Create tabs
A form can be divided into tabs for a clearer structure. Follow the steps below.
Information
This function is currently only available for metadata form views.
# Create tab
Open the metadata form view you want to edit.
Select the Blocks tab.
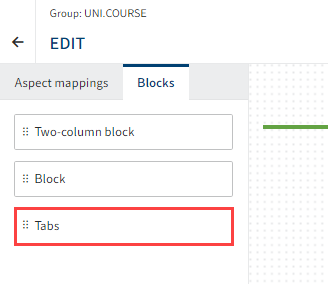
On the Blocks tab, you will see the Tabs element.
Drag the Tabs element to the layout area and place it above the existing aspect mappings.
The tab is shown.
Option 1: Under Properties > Translation variable, change the translation variable for the tab.
Option 2: Change the display name of the tab under Properties > Tab name.
Option 3: Enter something under Properties > API name.
Select Save.
The first tab is created.
# Add tab

You can add tabs with the plus icon.
# Position element on tab
You can position elements and move them on a tab via drag-and-drop.
You can also drag elements to other tabs and drop them there.
# Remove elements from the layout area
Depending on the context, you will find fields, aspect mappings, or layout elements in the layout area. These elements are removed in the same way. In the following, we explain this process based on a field.
Move the mouse cursor over a field in the layout area.

An X icon appears on the field.
Remove the element using the X icon.
The field is removed from the layout area.