# Configuration
In this chapter, you will learn how you can change the settings for the ELO Java Client in the Configuration dialog box as administrator and which additional information you should pay attention to for specific settings.
You will find more information about all the settings in the configuration in the ELO Java Client (opens new window) user documentation.
# Overview
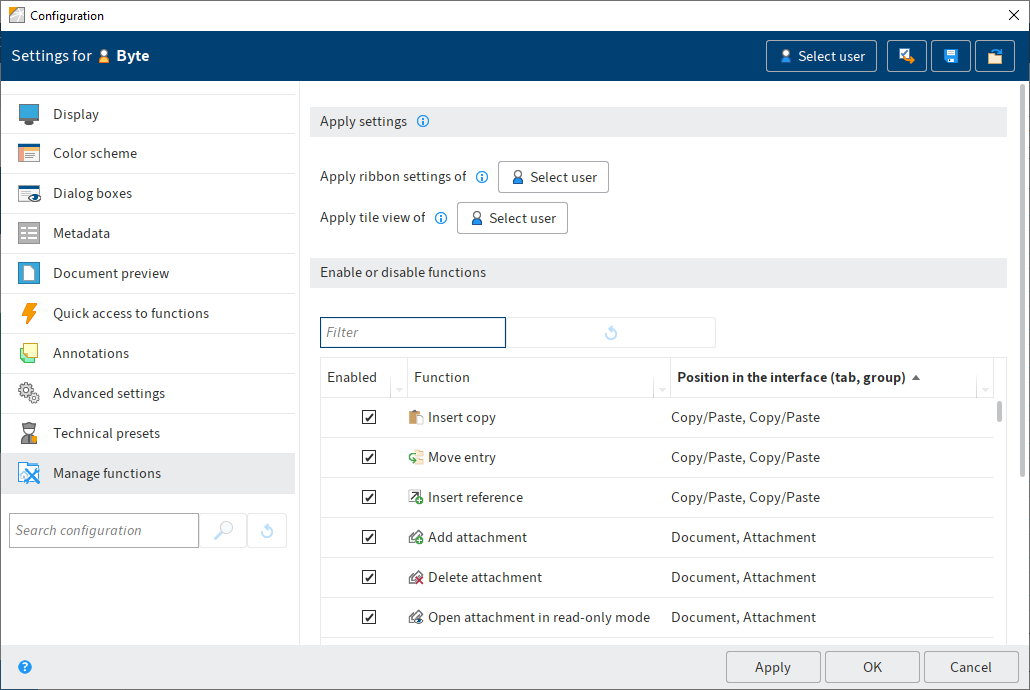
Use the Configuration dialog box to change the local user settings.
Open this dialog box under Ribbon > User menu [your name] > Configuration.
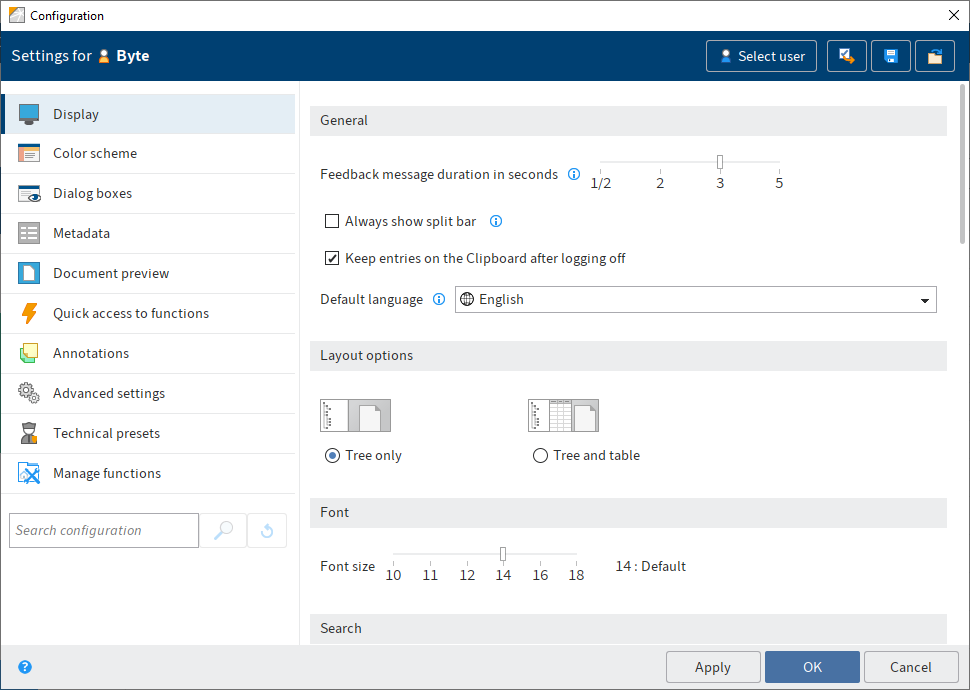
This dialog box is divided into multiple areas. For users with administrative rights, the Manage functions area is also shown.
Additional functions you can use to define settings for other users and groups appear in the header.
# Levels concept in the configuration
There are different levels in the configuration: User, option group, global, default. In the Set by column, you can see the level at which settings have been made. This column appears if you make settings for another user or group.
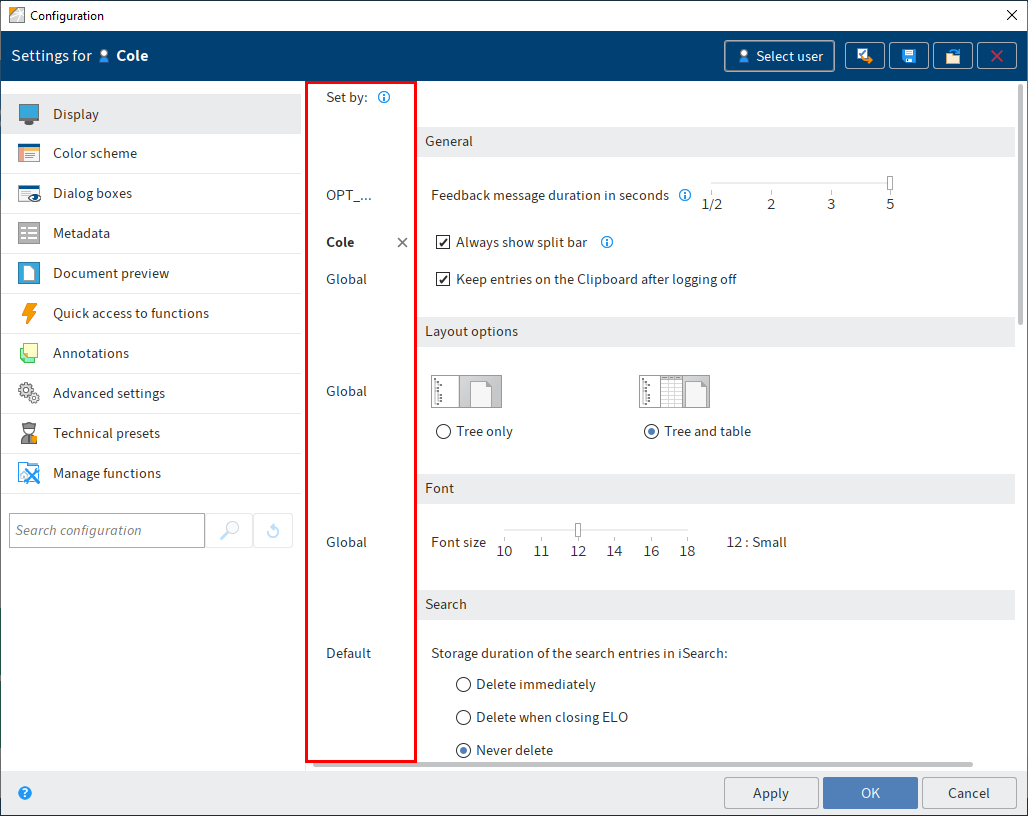
If the settings are configured differently at two or more levels (conflicting settings), the following hierarchy applies:
| Level | Description | Hierarchy |
|---|---|---|
| User | Settings that a user has made or that an administrator has made on a user's behalf. | The settings for all other levels can be overridden at the User level. |
| Option group | Settings that an administrator has made on behalf of an option group. Members of the option group are assigned these settings. | The settings for the levels Global and Default can be overridden at the Option group level. |
| Global | Settings that an administrator has made for all users (the Everyone group). | The settings for the Default level can be overridden at the Global level. |
| Default | The default settings in the ELO Java Client | The Default level applies if no settings have been made at any of the other levels. |
Please note
Option groups cannot be used to transfer permissions.
# General functions

Select user: Select a user or option group via the Select user button to assign the user or option group specific settings in the configuration.
Transfer settings to other users (arrow icon): Transfer the settings you made to one or multiple users or an option group.
Save the settings of the configuration as a file (disk icon): This option saves the settings of the configuration as an INI file.
Load existing settings for the configuration (folder icon): Load the settings from an INI file.
Delete settings (X icon): Click here to delete all settings you made for an option group or other users. This restores the default settings.
# Transfer settings to other users
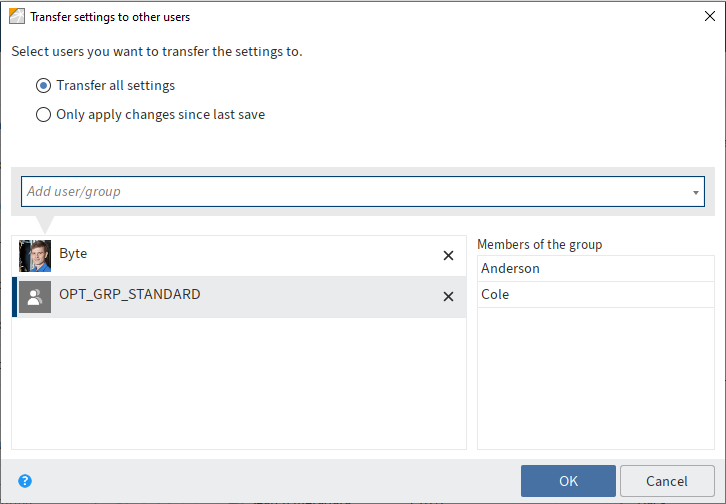
In this dialog box, you add users or option groups and select which settings from the configuration to transfer. The following options are available:
- Transfer all settings
- Only apply changes since last save
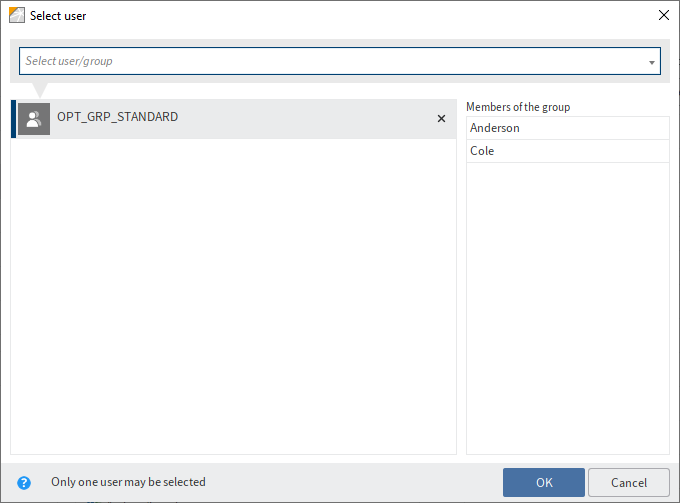
Information
If you select a group, a list of members appears. Double-click the corresponding user in the Members of the group column to select a member of a group.
# Override settings
You can modify and override settings at all levels.
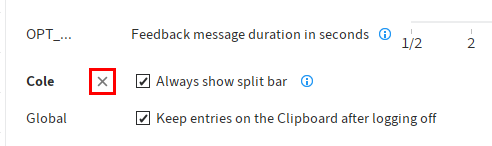
For example, to delete the settings for a user, select the X icon in the Set by column.
Information
The user can override these settings again.
# Additional information for the administrator
The following settings are only available to users with administrative rights or they contain additional information for administrators.
# Display
Show contents of priority fields in the tree view: If you enable this option, the contents of the fields marked as priority fields are displayed after the short name in the tree view.
You will find the setting for priority fields in the ELO Administration Console under System settings > Field templates > Properties > Field with high priority.
Number of priority fields in the table columns: Define the maximum number of columns with high priority that may be displayed in tree view. A column with high priority is used to display a field of a metadata form.
You will find the setting for priority fields in the ELO Administration Console under System settings > Field templates > Properties > Field with high priority.
Information
Having a large number columns will mean it takes longer to load the view.
# Metadata
In Metadata forms for different file types, you can link extensions to metadata forms. The file extension is recognized when you file a document. The associated metadata form is set by default. When filing without metadata, the linked metadata form is used automatically.
By default, the .js and .vbs file extensions are linked to the ELOScripts metadata form and the .eml and .msg file extensions are linked to the E-mail metadata form.
Information
It is not possible to remove the predefined file extensions eml, js, msg, and vbs for individual users or option groups.
# Document preview
In Preview plug-ins, you can link extensions to preview plug-ins.
New: Creates a new row for linking the file type and preview plug-in. Enter a file extension and the corresponding OLE object ID.
Please note
For the plug-ins to work, the ActiveX plug-in preview method must be set for the respective file extensions (Preview configuration for different file types area). If a preview method was not selected, the ActiveX plug-in preview method is set automatically.
Remove mapping (X icon): Removes the corresponding line.
# Advanced settings
Automatically file documents assigned a metadata form with existing filing definitions: Select this option to automatically file documents if you have entered all metadata and the documents have a valid filing definition. The documents are filed as soon as you close the Metadata dialog box by clicking OK or Apply and next. You do not need to run the Automatic filing function.
Information
You cannot create or edit metadata forms in the ELO Java Client. You need to do this in the ELO Administration Console. Metadata forms must be created by users with appropriate administrative rights and permissions.
# Technical presets
Barcode serial number: Enter a valid barcode serial number here if you want to use the barcode function at your workstation.
Information
This setting is only available to administrators with the rights Main administrator and/or Edit user data.
Please note
Barcode serial numbers are unique to each workstation and may not be used multiple times.
Start search immediately when clicking a search favorite: The Search favorites function on the Search tab enables you to save search favorites and use them repeatedly. Select the Start immediately when clicking a search favorite option to immediately start the search when clicking a search favorite. If this option is disabled, the search favorite is added without starting the search.
Information
The sort order of the search results always applies to the currently selected page.
Available languages: From the list on the left, select the languages for text recognition that will be used to analyze the documents in ELO.
Information
The OCR service and languages are only available if the ELO OCR Service has been installed. ELO OCR installed when you install the ELO Java Client with the AIO installer.
# Manage functions
In the Manage functions area, you can set the ribbon for other users or option groups and define which functions are available to them.
# Apply settings
To transfer the settings and favorites from the ribbon of a user or option group to another, select Select user, then select the desired user/option group.
You can also apply the My ELO tile view settings of a user or option group to another user. No tiles are deleted or created in the process. Existing tiles are assigned to the new groups. You'll find more information in the Transfer views and tile views chapter.
# Enable or disable functions
You can enable or disable the functions in the list via the corresponding check box. The function is available if the check box is selected. If the check box is not selected, the corresponding function is not displayed in the user interface.
Please note
Disabling/enabling functions does not remove any permissions associated with the function.
- Filter: Use this field to filter the list of functions. The column is refreshed as soon as you enter a character.
- Reset filters: Deletes the current filter term from the Filter field. All functions are displayed.
- PDF output: Creates an overview of the functions as a PDF file
- Enable all
- Disable all
Information
If you make changes here, the ELO Java Client restarts automatically when you close the Configuration dialog box.
# Configure favorites for other users
You can use the Favorites tab on the ribbon to obtain quick access to frequently used functions.
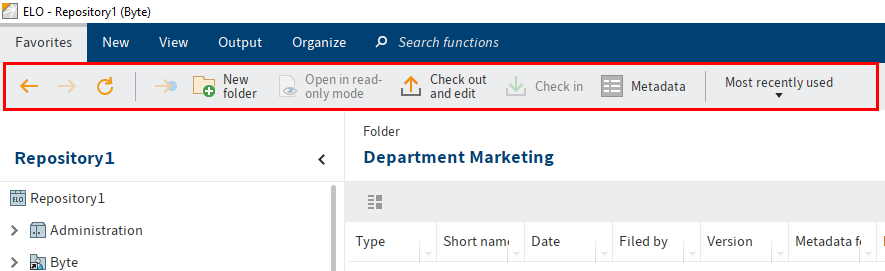
Users can customize this part of the ribbon themselves but administrators can also assign a set of functions for the users.
Method
Open the Configuration dialog box.
In the Select user dialog box, select the user or option group you want to add functions for on the Favorites tab.
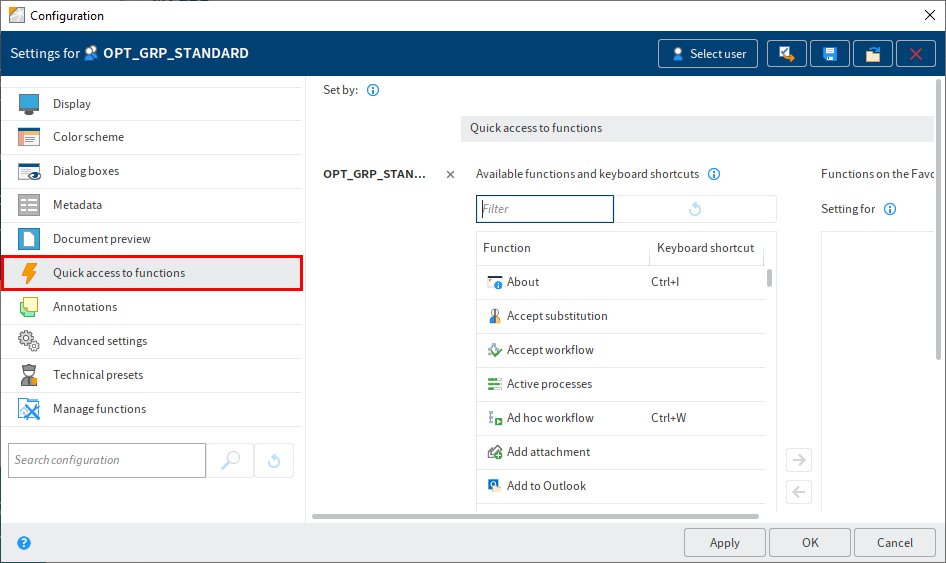
Select the menu item Quick access to functions.
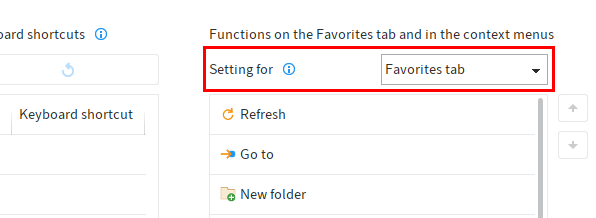
Under Functions on the Favorites tab and in the context menus, the default settings for the Favorites tab are already selected.
Information
In addition to the Favorites tab, you can also customize the right-click context menus in the Repository, Tasks, and Intray work areas.
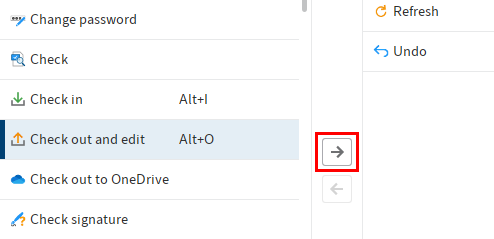
To add a function to the Favorites tab, select the function in the left column and then Add function (right arrow).
Information
You can change the order of functions with the arrow buttons next to the column.
Alternative 1: To remove a function from the Favorites tab, select the function in the Functions on the Favorites tab and in the context menus column and select Remove function (left arrow).
Alternative 2: To restore the default functions on the Favorites tab, select Use default (below the column Functions on the Favorites tab and in the context menus).
Select OK.
Result
The changes are applied for the selected user or option group.
Information
Users are still able to customize these settings themselves.
# Insert separator line
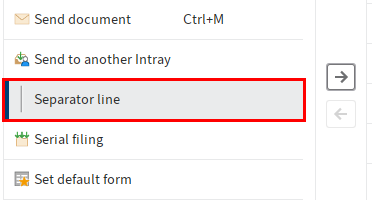
You can add separator lines to get a better overview of the functions on the Favorites tab. You will find the Separator line function in the Available functions and keyboard shortcuts column.
Information
The Separator line function can be added as often as you like.
# HTML templates for the metadata preview
The HTML templates are used for configuring how metadata is displayed for a document or folder.
You can define HTML templates for each metadata form. There is also a default template that is used if a specific template has not been defined for a metadata form.
# Folder for HTML templates
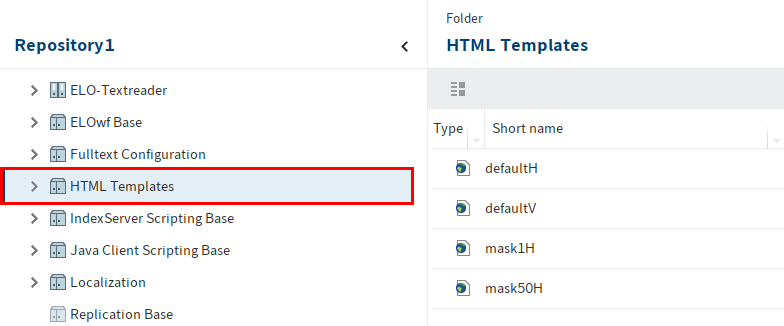
Custom HTML templates must be stored in ELO under Administration//HTML Templates.
# File format for HTML templates
You must apply the following naming convention: defaultH or defaultV. The file extension is htm.
Convention: form{no.}{H|V}.htm
The following applies:
- {no.}: Replace this placeholder with the metadata form ID.
- {H|V}: Replace this placeholder with
H(= horizontal) ORV(= vertical).
Example: form3H.htm
Alternative: To edit the default values for all metadata forms, store the defaultH.htm and defaultV.htm files in ELO and modify them according to your requirements.
Information
To view changes to the files directly, you must execute the CTRL+ALT+R keyboard shortcut after saving the respective HTM file. This command reloads the scripts and templates.
# Variables
You can use the following variables in the HTML templates. They will be automatically evaluated by the ELO Java Client.
<!--ELO_T_A-->: Filing date
<!--ELO_T_B-->: Internal file attachment ID
<!--ELO_T_D-->: File date
<!--ELO_T_E-->: Owner
<!--ELO_T_I-->: Document ID
<!--ELO_T_K-->: Short name
<!--ELO_T_M-->: Name of the metadata form
<!--ELO_T_O-->: ELO object ID
<!--ELO_T_T-->: Document type ID
<!--ELO_T_V-->: Retention period
<!--ELO_T_D-->: File date
<!--ELO_T_...-->: Content of the field. You must replace the (...) placeholder with the number of the desired field.
<!--ELO_N_...-->: Name of a field. You must replace the (...) placeholder with the number of the desired field.
# Correct syntax
To ensure that the contents of variables are displayed correctly, every code block must start with the following variable:
<!--ELO_B_...-->: You must replace the (...) placeholder with the number of the desired field or the identifier for one of the variables specified above.
The code block must end with the following variable:
<!--ELO_E_...-->: You must replace the (...) placeholder with the number of the desired field or the identifier for one of the variables specified above.
# Examples
Example: Owner
<!--ELO_B_E--><tr class="odd">
<th class="index"><!--ELO_N_E--></th>
<td class="index"><!--ELO_T_E-->
</tr><!--ELO_E_E-->
Example: Standard variables
<table cellspacing="0" cellpadding="3" width="100%">
<!--ELO_B_D--><tr class="oddeven">
<th class="index"><!--ELO_N_D--></th>
<td class="index"><!--ELO_T_D--></td>
</tr><!--ELO_E_D-->
<!--ELO_B_1--><tr class="oddeven">
<th class="index"><!--ELO_N_1--></th>
<td class="index"><!--ELO_T_1--></td>
</tr><!--ELO_E_1-->
<!--ELO_B_2--><tr class="oddeven">
<th class="index"><!--ELO_N_2--></th>
<td class="index"><!--ELO_T_2--></td>
</tr><!--ELO_E_2-->
<!--ELO_B_3--><tr class="oddeven">
<th class="index"><!--ELO_N_3--></th>
<td class="index"><!--ELO_T_3--></td>
</tr><!--ELO_E_3-->
# Additional variables
A number of additional variables and information are also available in the ELO Java Client.
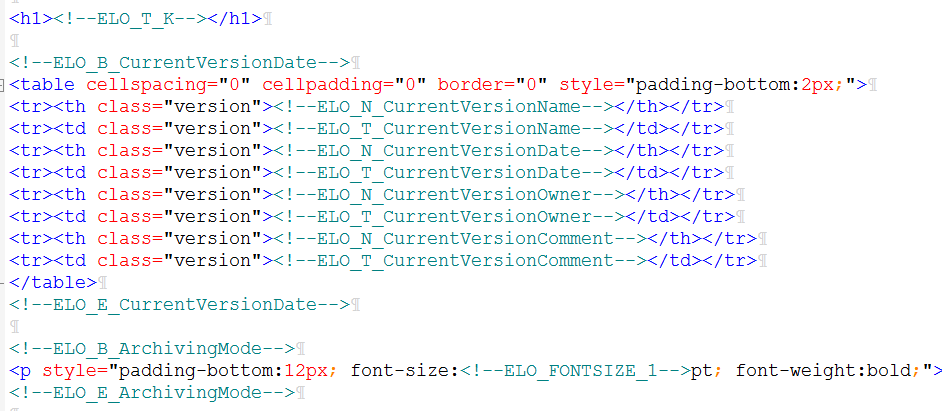
These are some examples of additional information that can be displayed:
<!--ELO_N_CurrentVersionName-->: Display name of the Current version field
<!--ELO_T_CurrentVersionName-->: Contents of the Current version field
<!--ELO_N_CurrentVersionComment-->: Display name of the Comment field
<!--ELO_T_CurrentVersionComment-->: Contents of the Comment field
<!--ELO_N_CurrentVersionOwner-->: Display name of the Editor field
<!--ELO_T_CurrentVersionOwner-->: Contents of the Editor field
<!--ELO_N_CurrentVersionDate-->: Display name of the Version date field
<!--ELO_T_CurrentVersionDate-->: Contents of the Version date field
<!--ELO_T_ArchivingMode-->: Document status (Version control disabled, Version control enabled, or Non-modifiable)
Information
To temporarily disable an HTML template, change the short name of the template so that it no longer corresponds to the above format (see the section File format for HTML templates).