# User menu [your name]
# Configuration
This dialog box is where you make system settings for the ELO Java Client. The dialog box consists of the following areas:
- Display
- Color scheme
- Dialog boxes
- Metadata
- Document preview
- Quick access to functions
- Annotations
- Advanced settings
- Technical presets
# Search configuration
You can search all options in the configuration.
Enter a search term in the Search configuration field. To start the search, select Start search (magnifying glass icon) or press the ENTER key. To reset the search, select the Reset search button (arrow icon).
You can either make the desired setting in the results list or go to the corresponding area of the configuration by clicking on the header.
# Configuration ‒ Display
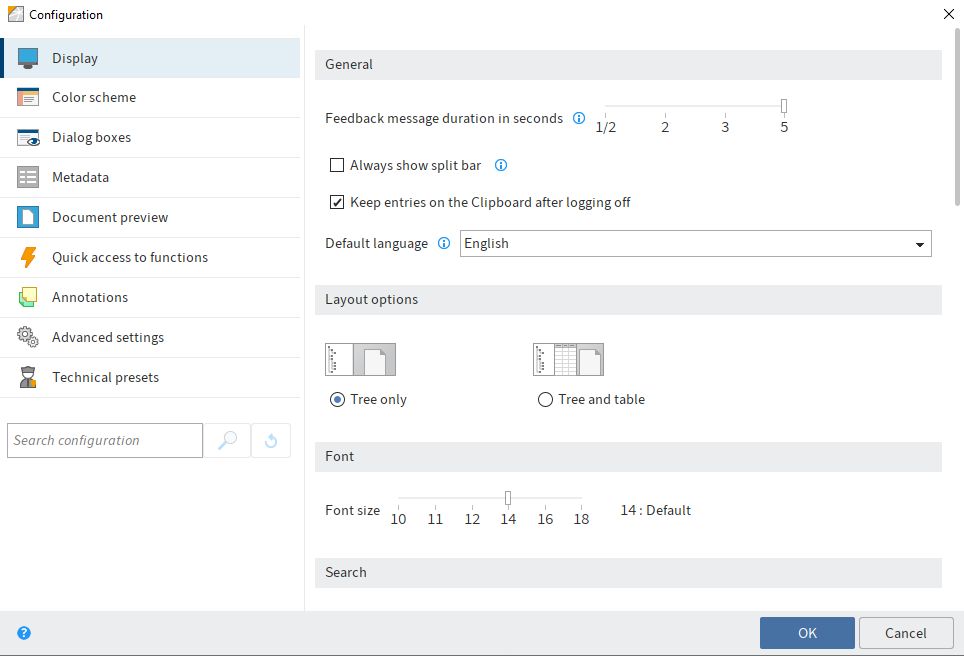
The View area contains the settings for the following topics:
- General
- Layout options
- Font
- Search
- Lists and tables
- Task list display options
- List of recently used entries
# General
Feedback message duration in seconds: For actions without displaying a confirmation window, a notification is displayed in the top area of the program window. Use this option to set how long the notification is shown in seconds.
Always show split bar: You can show the split bar permanently in the viewer pane for entries. If you disable this option, the split bar is only shown if margin notes are available.
Keep entries on the Clipboard after logging off: You determine that the contents of the Clipboard are saved when closing the program.
Default language: You can change the language of the client.
# Layout options
There are two layout options for the Repository work area:
- Tree only: The filing structure is displayed in a tree view. The entry is displayed to the right.
- Tree and table: In addition to the tree and entry, a table is displayed that shows the content of the element selected in the tree.
# Font
Font size: Define the font size for the ELO Java Client user interface here.
Information
The ELO Java Client restarts automatically when you change the font size.
# Search
Storage duration of the search entries in iSearch: Choose an option for the storage duration of the search results.
New search view for every metadata search: Select this option if you do not want to overwrite an existing search view when starting a search. A separate search view is created for each new search.
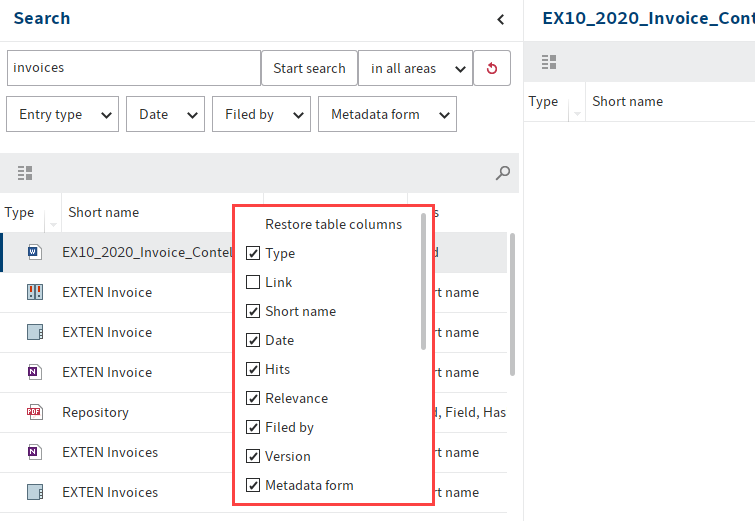
Search results context: Choose whether to display the Hits column or the Results text column in the search result list. To improve search performance, select the Disable option.
Number of synonyms: Use the spin box to specify the maximum number of synonyms suggested for a search term. To disable synonyms, select the value 0.
Maximum number of search results per page: Define in this area how many search results are displayed per page. The higher the number of search results per page, the longer the search takes. If the number of search results exceeds the defined number, you can access the other search results via the arrow buttons below the table with the search results.
Number of search suggestions per field: Specify how many search suggestions are displayed in a metadata field during the search.
- Minimum value: 50
- Maximum value: 10000
Information
If the value is too low, you may not get any suitable suggestions for some search queries.
Number of index columns for the metadata in the tasks and search results tables: Search results and tasks are shown in table form. The table columns correspond to the fields from the metadata. In this area, you specify how many fields from the metadata you want to display.
# Lists and tables
Show version in the tree view: Select whether and what version information to show in the tree view after the short name.
Show document date in the tree view: If you enable this option, the document date is shown in front of the short name.
Show folder date in the tree view: If you enable this option, the folder date is shown in front of the short name.
Show contents of priority fields in the tree view: If you enable this option, the contents of the fields marked as priority fields in a metadata form are displayed after the short name in the tree view.
Show version information in additional columns: Select this option to show additional information on the entries. This includes the the version comment, the version date, and the version size, among others.
Number of priority fields in the table columns: Define the maximum number of columns with high priority that may be displayed in tree view. A column with high priority is used to display a field of a metadata form.
Information
Having a large number columns will mean it takes longer to load the view.
Maximum size of thumbnails in pixels: Define the maximum size of the thumbnails in this area. Enter the length of the longest side in pixels. The size of the thumbnails can also be changed with the zoom function.
# Task list display options
Refresh interval for the list in minutes: Specify how often you want the task list to be refreshed by entering a value to the field Refresh interval for the list in minutes. If the tasks list is not updated automatically, enter 0.
Show tasks due in the following number of days: The task list in the Tasks work area contains an overview of all due tasks. Use this option to specify in how many days a task must be due for it to be displayed in the task list. For example, if you enter 10 days, all tasks that are due in the next 10 days will be displayed. Tasks that are only due in 20 days are not displayed.
Maximum number of tasks displayed: With this option, you specify the maximum number of tasks that are displayed in the task list of the Tasks work area.
Information
This setting only refers to the number of displayed tasks and not to the total number of tasks in ELO.
# List of recently used entries
Maximum number of documents in the "Most recently used" list: Use this option to define the maximum number of recently used entries that are shown. You will find the overview of recently used entries in the My ELO work area.
Include stored documents and folders: If you enable this option, the list will also include documents you stored in ELO and folders you created.
Save selected entries after the set period: If this option is enabled, you will also see entries that you have selected in the viewer pane but have not executed a function on.
Use the slider to set how much time should pass before an entry you selected appears in the list. If you view an entry for a shorter time than set, it won't appear in the list.
# Configuration - Color scheme
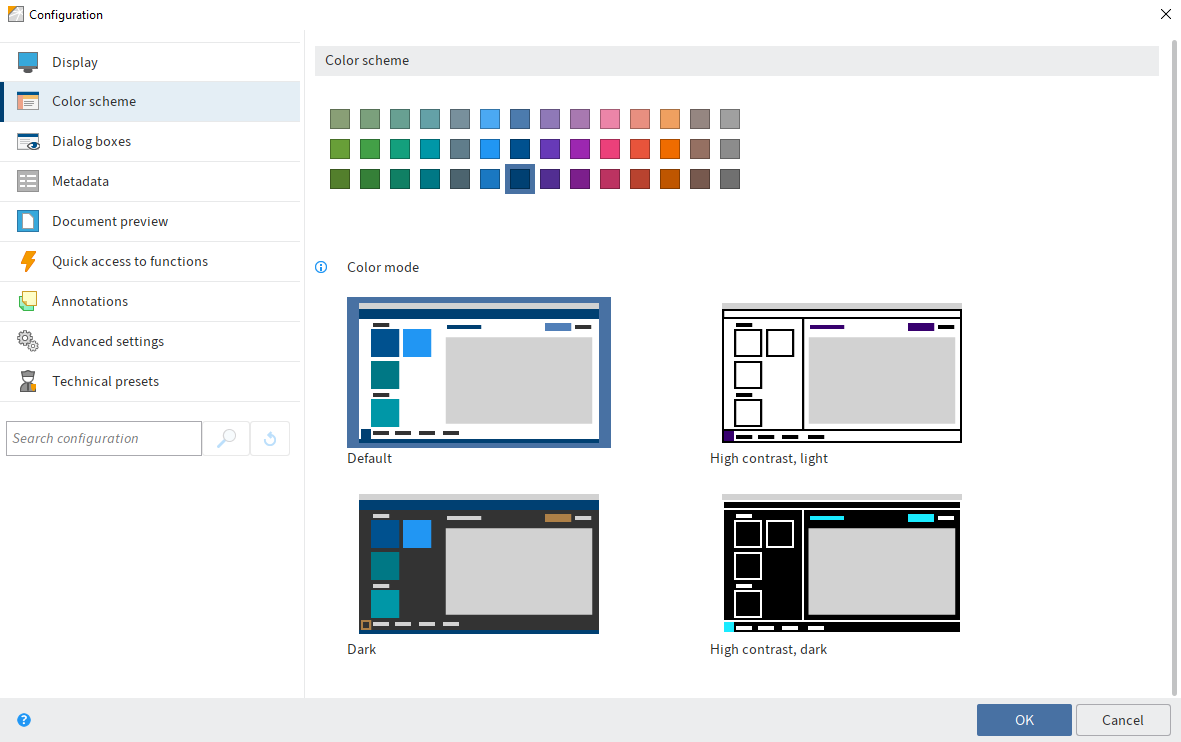
You will find the following settings in the Color scheme area.
# Color scheme
Choose the color scheme for the ELO Java Client program interface in this area.
You can change the display mode via the preview images. You can select from four display modes:
- Default
- Dark
- High contrast, light
- High contrast, dark
Information
The ELO Java Client restarts automatically when you change the color scheme or the display mode.
# Configuration - Dialog boxes
The Dialog boxes area contains the settings for the following topics:
- General
- Version comment
- Information
- Annotations when sending as PDF
- Inherit permissions when moving entries
- Drag-and-drop
- Duplicate check
- Load new version
- Check in
- Delete reference
- Multiple entries as link
- Print separator pages
- Delete from the Clipboard
- Delete from the search
- Logon dialog box
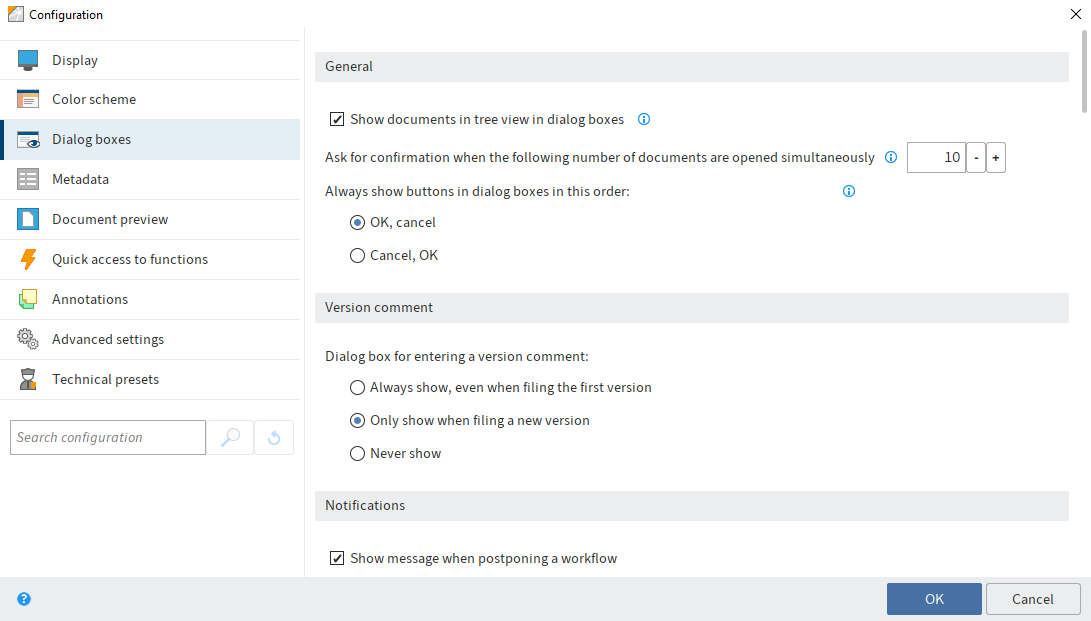
# General
Show documents in tree view in dialog boxes: If this option is selected, the documents are displayed in dialog boxes with a tree view. If the option is disabled, only the folder structure is displayed.
Ask for confirmation when the following number of documents are opened simultaneously: When you open or edit many documents at the same time, it can take a while for them to load in the client. Use this option to specify how many documents you can open or edit at the same time.
Always show buttons in dialog boxes in this order: This option enables you to specify the order of the OK and Cancel buttons in the dialog boxes.
# Version comment
Dialog box for entering a version comment: When you store a new version of a document, you can enter a comment for this version. Select an option for displaying the version dialog box.
# Messages
Show message when postponing a workflow: If you select this option, you will be notified that the postponed workflows will be hidden in the task list.
Show message if retention period was set: If you select this option, a notification window is displayed when closing the Metadata dialog box. The message only appears if you have entered a retention period on the Options tab. In this case, you will be notified that you cannot delete a document with a retention period before the deadline has expired.
Show message if metadata does not contain a personal identifier: If this option is enabled, a message is displayed when closing the Metadata dialog box if the fields Personal identifier and Deletion period are empty.
Show message when setting the document status to "Non-modifiable": Define whether you want to display a message when setting the Non-modifiable document status.
Show message when deleting files in the Intray: Documents in the Intray have not been filed to ELO yet. If you delete documents in the Intray, the documents (and metadata) are removed and cannot be restored. Select this option to show a message when deleting Intray documents. You will be asked to confirm the deletion process.
Show message in the "Metadata" dialog box when changing metadata forms: If you select this option, a message is displayed when you assign the entry a different metadata form in the Metadata dialog box. The message only appears if a field that you already edited does not exist in the new metadata form.
Show message when removing your own read or write permissions: Specify whether to display a message when a user wants to revoke their own read or write permissions.
Show message when overwriting existing metadata with serial filing: Specify whether to display a message when overwriting existing metadata with serial metadata.
Show message when searching for multiple terms in different areas of iSearch: Specify whether to display a message when you perform a search with multiple terms in multiple areas (full text, metadata, and feed). When you perform a search with multiple terms, only results containing all the search terms are found.
Show restart required message when activating/deactivating a substitution: Specify whether you want a message to be displayed when you activate or deactivate a substitution. Changes to substitutions do not take effect until you restart the client.
# Annotations when sending as PDF
In this area, you specify how annotations on a document are handled when creating and sending a PDF file.
Please note
When you create a PDF, margin notes on the split bar are not embedded. The embedded annotations can no longer be edited.
- Confirm via a dialog box: A dialog box opens. In this dialog box, you can choose how to proceed with the annotations.
- Do not embed annotations: The annotations will not be embedded in the PDF.
- Embed annotations in the PDF file: The annotations will be embedded into the PDF during conversion.
# Inherit permissions when moving entries
Behavior for differing permissions when moving documents: In this area, specify what to do with permissions when moving an entry in the repository. Choose from the following options:
- Confirm via a dialog box: A dialog box opens. In this dialog box, you can choose how to proceed with permissions when moving entries.
- Keep previous permissions unchanged: The moved entries retain the previous permissions.
- Replace with the permissions of the target folder: The moved entries inherit the permissions of the target folder.
- Replace permissions inherited from the previous folder, keep individual permissions: The moved entries inherit the permissions from the target folder. Any additional permissions will be retained.
# Drag-and-drop
Behavior when dragging a file within the repository: This is where you specify the settings for moving entries in the Repository work area using drag-and-drop.
Choose from the following options:
- Confirm via a dialog box: A dialog box opens. This is where you specify whether the entry is moved or referenced.
- Move: The entry is moved to the new position without confirmation.
- Reference: The entry remains at its original filing location. A reference to the entry is created at the target location with confirmation.
Behavior when dragging a file to a document in ELO: This is where you specify the settings for dragging an external document onto a document that already exists in ELO.
Choose from the following options:
- Confirm via a dialog box: A dialog box opens. In the dialog box, you can determine what ELO should do in each case.
- File as a new version of the document: This creates a new version of the document.
- Attach to front: The file is attached to the front of the document you have dragged it to.
- Attach to back: The file is attached to the end of the document you have dragged it to.
- File as new document in ELO: The document is filed to ELO as a new document.
- File as a new document with the same metadata: The document is filed to ELO as a new document. The new document is filed with the same metadata as the document that you drag the file to.
Information
If you have selected the File as a new version of the document option, you cannot drag and drop onto a checked-out or deleted document.
Confirm via dialog box if you want to cancel metadata entry when filing multiple documents: If this option is enabled, a dialog box will appear if you cancel the metadata entry asking whether you want to file the documents with the default metadata. If the option is not enabled, the action is aborted without asking you for confirmation.
# Duplicate check
Behavior when filing a duplicate: When filing documents, the client recognizes whether the document already exists in ELO. This is where you specify how to proceed with duplicates.
Choose from the following options:
- Confirm via a dialog box: A dialog box opens. In the dialog box, you can determine what ELO should do in each case.
- Reference: Automatically creates a reference. The entry only exists once in ELO.
- File again: The document is stored in duplicate.
# Load new version
Behavior with an identical new document version: This option refers to the Load new version function (available in: Ribbon > Document > Versions.
This determines how the program behaves when an identical document is loaded as a new document version using the Load new version function.
Choose from the following options:
- Confirm via a dialog box: A dialog box opens. In the dialog box, you can determine what ELO should do in each case.
- Cancel loading the new version: No new version is created.
- File as new version anyway: Creates a new version with identical content.
# Check in
Behavior when checking in an unmodified document: This option refers to the Check in function (available in: Ribbon > Document.
Choose from the following options:
- Confirm via a dialog box: A dialog box opens. In the dialog box, you can determine what ELO should do in each case.
- Cancel editing and restore original version: A new version is not created.
- File as new version anyway: Creates a new version with identical content.
# Delete reference
Behavior when deleting a reference: Use this option to specify whether you want a dialog box to appear before deleting a reference and what ELO should do if the dialog box is deactivated.
Choose from the following options:
- Confirm via a dialog box: A dialog box opens. In the dialog box, you can determine what ELO should do in each case.
- Delete reference only: If this option is enabled, a dialog box will not appear. Only the reference will be deleted. The original document will not be deleted.
- Delete original and reference: If this option is enabled, a dialog box will not appear. The reference and the original document will be deleted.
# Multiple entries as link
Behavior when creating a link when multiple entries are selected: Use this setting to define the program behavior when sending multiple entries as an ELO link.
Choose from the following options:
- Confirm via a dialog box: A dialog box opens. In the dialog box, you can determine what ELO should do in each case.
- Create one ELO link for each entry: This option creates an ELO link for each entry sent.
- Create one ELO link for all entries: This option creates one ELO link for all entries.
# Print separator pages
Behavior when printing a separator page: This is where you specify the type of separator page to be printed.
Sometimes, separator pages are needed, e.g. for the Join (separator pages) function. To print a sample separator page, select New > Scan > Scan profiles > Print separator page on the ribbon.
Choose from the following options:
- Confirm via a dialog box: A dialog box opens. In the dialog box, you can determine what ELO should do in each case.
- Print separator page with horizontal bar: This option prints separator pages with a horizontal bar..
- Print separator page with vertical bar: This option prints separator pages with a vertical bar.
# Delete from the Clipboard
Behavior when deleting from the Clipboard: When you select this option, a message appears when you delete an entry on the Clipboard. You must select whether you want to only remove the entry from the Clipboard or delete it in ELO as well.
Choose from the following options:
- Confirm via a dialog box: A dialog box opens. In the dialog box, you can determine what ELO should do in each case.
- Remove from Clipboard: The entry is deleted from the Clipboard but remains in ELO.
- Delete in ELO: The entry is removed from the Clipboard AND deleted in ELO.
# Delete from the search
Behavior when deleting in the search: This option enables you to specify how the program behaves when you delete a document in the Search work area.
Choose from the following options:
- Confirm via a dialog box: A dialog box opens. In the dialog box, you can determine what ELO should do in each case.
- Remove from search results: The entry is removed from the search results but remains in ELO.
- Delete in ELO: The entry is removed from the search results AND deleted in ELO.
# Logon dialog box
Show logon dialog box when closing the program: If this option is selected, the logon dialog box is displayed when closing the program.
Show dialog box for selecting functional roles during logon: If a user has been assigned functional roles (e. g. Accounting), a dialog box for enabling the roles opens when the users logs on.
# Configuration – Metadata

The Metadata area contains the settings for the following topics:
# General
Use default keyword list for fields: Select this option to use a default keyword list (global) for fields without a separate keyword list.
Sort keyword lists alphabetically: Select this option to sort keyword lists alphabetically.
Automatically activate keyword list filter: When this option is enabled, the keyword list is filtered automatically based on the characters entered when assigning metadata.
Show "Metadata" dialog box on filing if a metadata form has not been assigned: Select this option to open the Metadata dialog box when filing a new document. The dialog box only appears if the document has not been assigned a metadata form. If the option is disabled, the document is automatically filed with the default metadata form for new documents. The file name is used as the short name.
# Show metadata
Show extra text in the metadata preview: Enable this option to display the text entered on the Extra text tab of the Metadata dialog box in the metadata preview.
# Default settings for metadata
Form for new folders: Specify which metadata form to use for new folders.
Form for new documents: Specify which metadata form to use for new documents.
Form for the metadata search: Select the metadata form that is used by default for the metadata search.
# Metadata form for different file types
In this area, you can link file extensions to metadata forms. The file extension is recognized when you file a document. The associated metadata form is set by default. When filing without metadata, the linked metadata form is used automatically.
By default, the .js and .vbs file extensions are linked to the ELOScripts metadata form and the .eml and .msg file extensions are linked to the E-mail metadata form.
Use default: Restores the original settings in this area.
New: Creates a new row for linking the file type and metadata form. Enter a file extension and select a metadata form.
X (Remove mapping): Removes the corresponding line
# Configuration – Document preview
The Document preview area contains the settings for the following topics:
# General
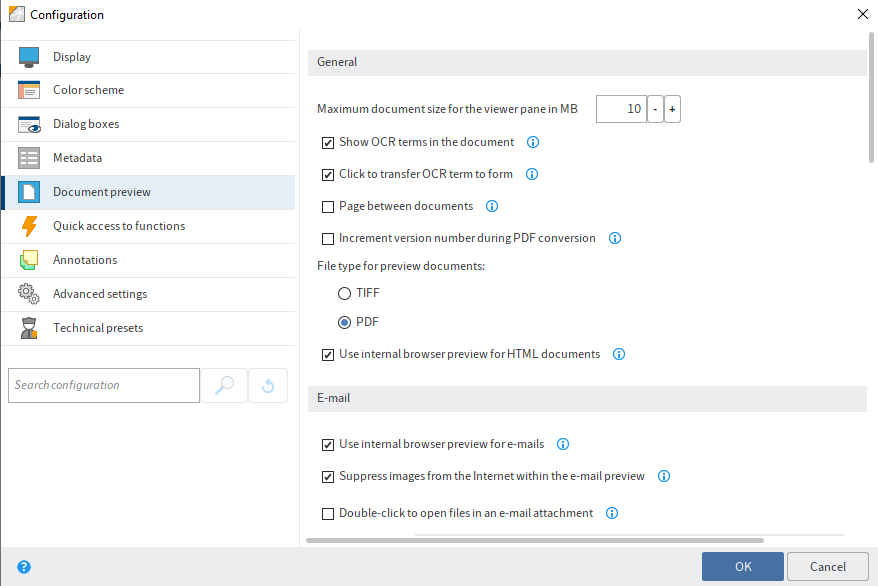
Maximum document size for the viewer pane in MB: Specify the maximum number of megabytes (MB) a document can have in the preview. If a document exceeds the defined size, a notification will be displayed instead of the preview. The value 0 disables the preview.
Show OCR terms in the document: Select this option to highlight the words in the document recognized by OCR. As soon as you point to a word, the word is highlighted. If the Metadata dialog box is open, you can click a word in a document to add it to the metadata.
Click to transfer OCR term to form: Transfer words recognized by OCR to the currently open form with a click.
Page between documents: If you enable this option, you can go straight to the next document when you reach the start or the end of the original document in the viewer pane.
Increment version number during PDF conversion: If this option is enabled, the document version is incremented during PDF conversion.
File type for preview documents: This setting refers to the Create document preview function. Specify whether to display preview documents in TIFF or PDF format.
Please note
Depending on the selected format, the correct ELO printer (ELO TIFF Printer or ELO PDF Printer) must be installed.
Use internal browser preview for HTML documents: If this option is enabled, HTML documents are displayed with the internal browser instead of the embedded Internet Explorer.
Use internal browser preview for e-mails: If this option is enabled, e-mails are displayed with the internal browser instead of the embedded Internet Explorer.
Suppress images from the Internet within the e-mail preview: If this option is selected, images in e-mails that are downloaded from the Internet will not be displayed. However, embedded images in e-mails will be displayed.
Double-click to open files in an e-mail attachment: In this field, you can enter the file extensions that you want to open by double-clicking. For all other file extensions, a dialog box for saving the e-mail attachment opens.
Information
You can enter multiple file extensions. You need to separate the entries with periods.
Certificates for decrypting e-mails: This option allows you to specify where ELO should import the certificates for decrypting e-mails from.
- Use Windows certificate store: If you are using ELO on a Microsoft Windows system, you can use the certificates supplied by Microsoft Windows.
- Use certificate store from specified path: If you are not using ELO on a Microsoft Windows system, or if you do not want to use the certificates supplied by Microsoft Windows for other reasons, you need to select this option. In addition, you must specify where you want to store the certificates in the Path field.
# Preview configuration for different file types
In this area, you specify which type of preview to use for different file extensions. If a preview class is not defined for a file extension, the browser will be used for the preview.
Use default: Restores the original settings in this area.
New: Creates a new row for linking the file type and preview method. Enter a file extension and select a preview method.
Confirm: When displaying this file type, ELO will ask every time whether you want to open the file with the default viewer.
Remove mapping (X icon): Removes the corresponding line
Choose from the following options for configuring the preview:
- ActiveX plug-in preview: This preview type now supports viewer plugins from the ELO Windows Client.
- Apple OS X preview: Viewer for displaying files on the macOS operating system
- Image preview: Viewer for JPG, BMP, and TIFF that can be used to place annotations on documents.
- Browser preview: Preview in the standard browser.
- Code preview: Viewer with syntax highlighting for displaying code.
- DXL preview: Viewer for documents in DXL format.
- EML e-mail preview: Viewer for IBM Notes e-mails in .eml format.
- Windows Media Player preview: Preview for audio and video files based on JavaFX.
- MSG e-mail preview: Viewer for Microsoft Outlook e-mails in .msg format.
- Windows Media Player preview (Windows): Preview in Windows for audio and video files.
- MS Office preview (Windows): Recommended viewer for Microsoft Office documents newer than 2003. Also suitable for Apache OpenOffice documents (ODT).
- OpenOffice preview: Viewer for Apache OpenOffice documents. Requires an installation of Apache OpenOffice including an additional module or LibreOffice compatible with the Java version used in the ELO Java Client.
- PDF preview: Viewer for PDF documents with which annotations are affixed to documents. As an alternative, you can use Internet Explorer with the Acrobat Reader plug-in (the annotations on the document are not shown).
- Text preview: Viewer for text files; allows two font types, adjustable font size, and automatic line breaks.
- Show preview document: With this setting, preview documents created previously are shown instead of the original documents.
- ZIP preview: Viewer for ZIP folders, shows file contents as a tree. Files can be displayed or saved to disk from the context menu.
# Preview plug-ins
In this area, you can link file extensions to preview plug-ins.
New: Creates a new row for linking the file type and preview plug-in. Enter a file extension and the corresponding OLE object ID.
Remove mapping (X icon): Removes the corresponding line
# Configuration – Quick access to functions
You will find the following settings in the Quick access to functions area.
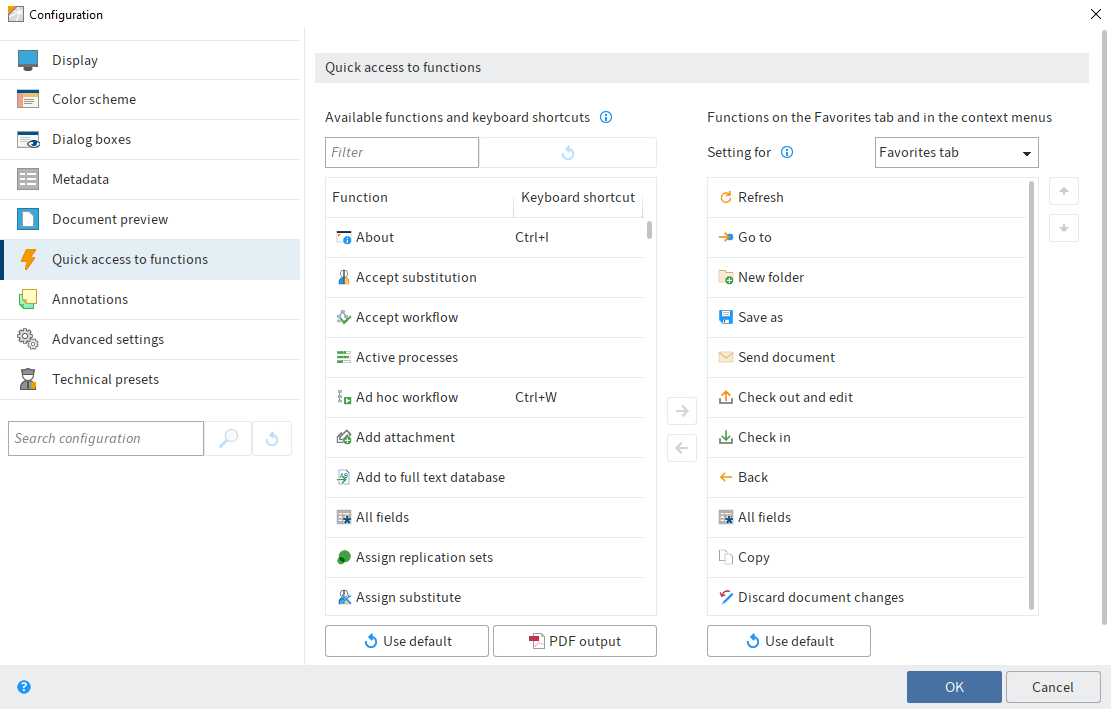
# Quick access to functions
Available functions and keyboard shortcuts: In this column, select the function that you want to add to the Favorites tab or a context menu. To add a function, select the function and select Add function (arrow icon pointing to the right).
Filter: Use the Filter field to filter the Available functions and keyboard shortcuts column. The column is updated as soon as you enter a character.
Reset filters: Deletes the current filter from the Filter field. All functions are displayed.
Functions on the Favorites tab and in the context menus: In this column you can see which functions are already on the Favorites tab or in the selected context menu.
Settings for: Use the Settings for drop-down menu to choose whether you want to edit the Favorites tab or one of the context menus.
The following items are available for selection:
- Favorites tab
- Entry context menu (context menu for entries in the repository)
- Tasks context menu
- Intray context menu
Information
Functions only appear in the context menu if they are executable in the given context.
# Assign keyboard shortcuts to function
You can assign keyboard shortcuts to functions in the Available functions and keyboard shortcuts column.
Method
Select the function you want to assign a keyboard shortcut to.
The function is now marked as selected.
Enter the desired keyboard shortcut, e.g. CTRL + L.
Please note
Some keyboard shortcuts are already in use by the operating system or other programs. This applies in particular to the function keys F1 to F12. You can assign keyboard shortcuts to the function keys but the commands will not be executed. Keyboard shortcuts at the operating system level are executed first.
Result
Enter the keyboard shortcut in the field to the right of the function.
# Delete keyboard shortcut
Method
- Select the function with the keyboard shortcut you want to delete.
- Press the BACKSPACE key.
Result
The keyboard shortcut is deleted.
# Reset keyboard shortcuts
You can restore all keyboard shortcuts to default values. Click the Use default button below the Available functions and keyboard shortcuts column.
# Keyboard shortcuts as PDF file
You can save an overview of the keyboard shortcuts as a PDF file. Click the PDF output button below the Available functions and keyboard shortcuts column.
# Add function
Method
Use the Settings for drop-down menu to choose where you want to add a function.
Select the desired function in the Available functions and keyboard shortcuts column.
Select Add function (arrow icon pointing to the right).
Information
The Separator line function can be added as often as you like. The separator line is used to group functions and to set them apart from one another.
Result
The function is displayed in the Functions on the Favorites tab and in the context menus column.
# Change order
You can change the order of the entries on the Favorites tab and in the context menus.
Use the Settings for drop-down menu to choose what you want to edit.
Select the desired function in the Functions on the Favorites tab and in the context menus column.
Select the Move up button (arrow pointing upwards) to move the selected function up.
Alternative: Select the Move down button (arrow pointing downwards) to move the selected function down.
# Remove function
Use the Settings for drop-down menu to choose what you want to edit.
Select the desired function in the Functions on the Favorites tab and in the context menus column.
Select Remove function (arrow icon pointing to the left).
Information
You can also add or remove functions by double-clicking them.
# Reset functions
You can also restore the default settings of the Favorites tab or the context menus. Click Use default below the Functions on the Favorites tab and in the context menus column.
# Configuration – Annotations
The Annotations area contains the settings for the following topics:
- Sticky notes
- Marker width
- Horizontal marker
- Freehand marker
- Rectangle marker
- Strikethrough
- Redaction
- Text note configuration
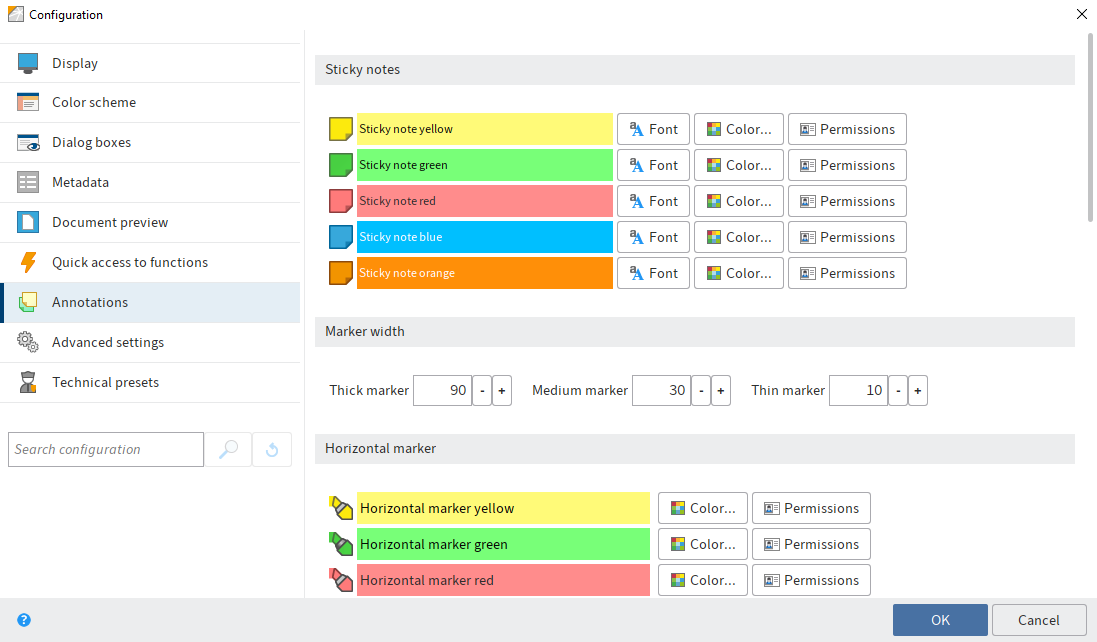
# Sticky notes
A sticky note is a colored text field that you can place directly on a document to record information. There are five different colors available for sticky notes. The default colors are yellow, green, red, blue, and orange. You can define these colors individually.
You can make the following settings:
Font: Opens the Font dialog box. You can set the font, font size, font style, font color, and permissions for each type of sticky note here.
Color: Opens the Color selection dialog box. Use the dialog box to change the color of the respective sticky note.
Permissions: Opens the Permissions dialog box. Use the dialog box to define the permission settings for the respective sticky note type.
# Marker width
The Horizontal marker, Freehand marker, and Strikethrough tools are available in three different sizes (widths). You can define the widths of the markers with the Large marker, Medium marker, and Small marker fields.
Information
The values are about the same as the point size, depending on the font. For example, if you enter the value 12, this corresponds approximately to the width of a line in 12-point Arial font.
# Horizontal marker
You can define five types for the Horizontal marker tool. You can define the colors and permissions for each type.
Color: Opens the Color selection dialog box. Change the color of the respective marker in the dialog box.
Permissions: Opens the Permissions dialog box. Define the permission settings for the respective marker in the dialog box.
# Freehand marker
You can define five types for the Freehand marker tool. You can define the colors and permissions for each type.
Color: Opens the Color selection dialog box. Change the color of the respective marker in the dialog box.
Permissions: Opens the Permissions dialog box. Define the permission settings for the respective marker in the dialog box.
# Rectangle marker
You can define five types for the Rectangle marker tool. You can define the colors and permissions for each type.
Color: Opens the Color selection dialog box. Change the color of the respective marker in the dialog box.
Permissions: Opens the Permissions dialog box. Define the permission settings for the respective marker in the dialog box.
# Strikethrough
You can change the settings of the Strikethrough tool.
Color: Opens the Color selection dialog box. Change the background color of the Strikethrough tool in the dialog box.
Permissions: Opens the Permissions dialog box. Define the permissions settings for the Strikethrough tool in the dialog box.
# Redaction configuration
The Redaction tool can be used to render texts unreadable.
Information
For the Redaction function to be available, some settings must be made in the ELO database. You can find more detailed information in the documentation ELO Redaction (opens new window).
Permissions: Opens the Permissions dialog box. Define the permission settings for redacting documents in the dialog box.
# Text note configuration
You can define five types for the Text note tool. You can set the font, font size, font style, font color, and permissions for each type.
Font: Opens the Font dialog box. You can set the font, font size, font style, font color, and permissions for each type of text note here.
Permissions: Opens the Permissions dialog box. Define the permission settings for each type of text note in the dialog box.
# Configuration – Advanced settings
The Advanced settings area contains the settings for the following topics:
- General
- Settings for the Intray work area
- Separator page recognition
- Intray folder in the file system
- Workflow
- My ELO
- Signature
- Behavior on double-click
# General
Drag and drop onto the top level of a view: If this setting is selected, the entry is inserted at the top repository level when dragging and dropping onto a tile view. If this option is disabled, the entry is inserted at the location currently selected in the view.
Information
If a document is dragged to a view that only contains a branch of the repository, the document is filed at the top level of this view.
Always use short name as file name outside of ELO: Select this option to always use the short name of an entry as the file name. The file name is then used when sending a document by e-mail, for example. If this option is enabled, the File name field is ignored on the Options tab of the metadata form.
Optimize collaboration with ELO Desktop: This option should only be selected if the ELO Java Client is used together with ELO DMS Desktop. Select this option to avoid slow load times when opening Microsoft Office documents.
Transfer checked-out documents to the server when logging off: If you log onto another workstation, you have access to documents you have checked out there as well.
Checking out a folder: Check out and lock references: This option is for checking out folders. If there are references in a checked-out folder, these are also stored in the checkout directory. To lock the references and original files when checking out folders, select the option Checking out a folder: Check out and lock references.
Please note
If you check out a folder with all the references, you cannot check in the references separately. Instead, you need to check in the entire folder. In addition, you cannot check in the original documents that are linked to the references until you have checked in the entire folder.
Automatically compress e-mail attachments into a ZIP folder: Enter a maximum value here. If the number of e-mail attachments exceeds this limit, the e-mail attachments will be automatically compressed into a ZIP folder.
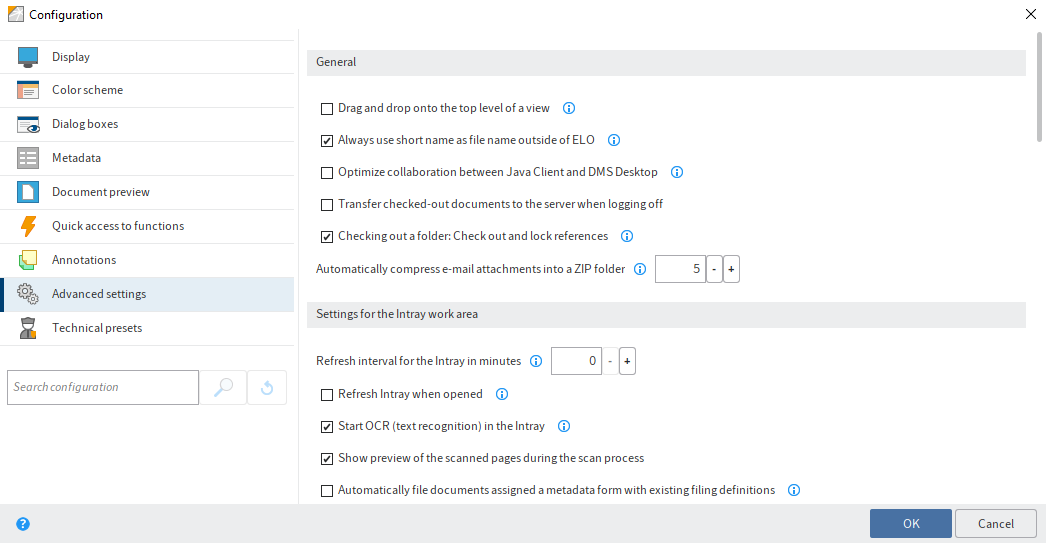
# Settings for the Intray work area
Refresh interval for the Intray in minutes: Enter a number greater than 0 in the Refresh interval for the Intray in minutes field if you want the Intray work area to automatically refresh at regular intervals. The value 0 means that the Intray will not automatically refresh.
Refresh Intray when opened: Select this option to automatically refresh the Intray work area every time you open it. This also updates the monitored folders.
Start OCR (text recognition) in the Intray: Select this option to start text recognition as soon as a document is filed to the Intray work area. The text content of the document is available when entering metadata, for example.
Show preview of the scanned pages during the scan process: Select this option to display the preview of the scanned pages during the scan process.
Automatically file documents assigned a metadata form with existing filing definitions: Select this option to automatically file documents if you have entered all metadata and the documents have a valid filing definition. The documents are filed as soon as you close the Metadata dialog box by selecting OK or Apply and next. You do not need to run the Automatic filing function.
Information
You cannot create or edit metadata forms in the ELO Java Client. Contact your system administrator if you have any questions about automatic filing and the filing definition.
Automatically convert TIFF files to PDF when filing to ELO: TIFF files are automatically converted into PDF files when filed to ELO.
Create searchable PDFs: If this option is enabled, TIFF files are sent to OCR during automatic conversion to create searchable PDF files.
Save Intray on server when logging off: Select this option to save checked out documents to the Intray work area after the user logs off. If the user logs onto another workstation, they have access to their Intray documents.
# Separator page recognition
Join pages: Specify which type of separator pages to use for the Join (separator pages) function.
The following options are available:
- Separator page
- Blank page
- Delete separator page and blank pages
- Triangle to mark the first page
Margin in percent: Enter a percentage of the margin of a separator page to be ignored during recognition.
Threshold for white area in percent: Enter a threshold for the white area of a separator page to be ignored. This makes it easier to recognize noisy separator pages.
Threshold for split bar in percent: Enter a threshold for the split bar of a separator page to be ignored. This makes it easier to recognize noisy separator pages.
# Intray folder in the file system
Include child directories when moving to the Intray: Enable this option to include all child directories of the specified Intray directories when refreshing the Intray work area.
New: Select this button to select a folder in the file system to use as the Intray folder.
Information
You can use the variables %USERTEMP% and %APPDATA% in the Intray folder.
Directory: This field shows the path to the designated Intray folder.
X (Remove directory): Removes the corresponding link to a folder in the file system.
# Workflow
Default duration of a workflow postponement in days: You can postpone a workflow for later editing. Use this option to define the default settings in days for the Postpone workflow dialog box.
Start workflow in edit mode: Select this option to edit the selected workflow template when starting a new workflow. If this option is not checked, you only see a list of templates. In this case, you can open the workflow templates using the Show template button.
Show successor node users when forwarding workflows: The name of the successor node will be displayed in the Forward workflow dialog box in addition to the name of the responsible user/group.
Automatically refresh the "Workflow overview": This options allows you to specify whether the list of workflows in the Workflow overview dialog box is refreshed automatically.
Default name for new workflows: In this area, you specify the default settings for the name of new workflows. You can change the name when you start the workflow.
Choose from the following options:
- Name of workflow template
- Short name of entry
- Name of workflow template + short name of entry
- Short name of entry + name of workflow template
# My ELO
This is where you define the settings for automatically subscribing to a feed.
Choose from the following options:
- When filing a document
- When creating a new folder
- When checking in a new version
- When creating a post or comment
# Signature
Recognize signature files: In the File extensions field, specify which file extensions to recognize as signature files.
Information
You can enter multiple file extensions. You need to separate the entries with periods.
Save signature files: Select this option to save signature files in ELO.
Include signature file when sending documents: Select this option to send the associated signature file along with a document.
Automatically save the signature verification log as an attachment: Select this option to store the verification logs of the documents as an attachment.
Check signature on display: Select this option to run the signature check while displaying a signed document.
Behavior for signing PDF documents: In this area, you specify what to do when signing PDF documents.
Choose from the following options:
- Confirm via dialog box
- Embed signature into document
- Create separate signature file
# Behavior on double-click
In this area, you can define which action is performed when double-clicking a document in the Repository, In use, and Search work areas.
# Configuration – Technical presets
The Technical presets area contains the settings for the following topics:
- General
- Display and refresh
- Log file
- Date formats
- Number formats
- Show or hide work areas
- Folder for document templates
- OCR (text recognition)
# General
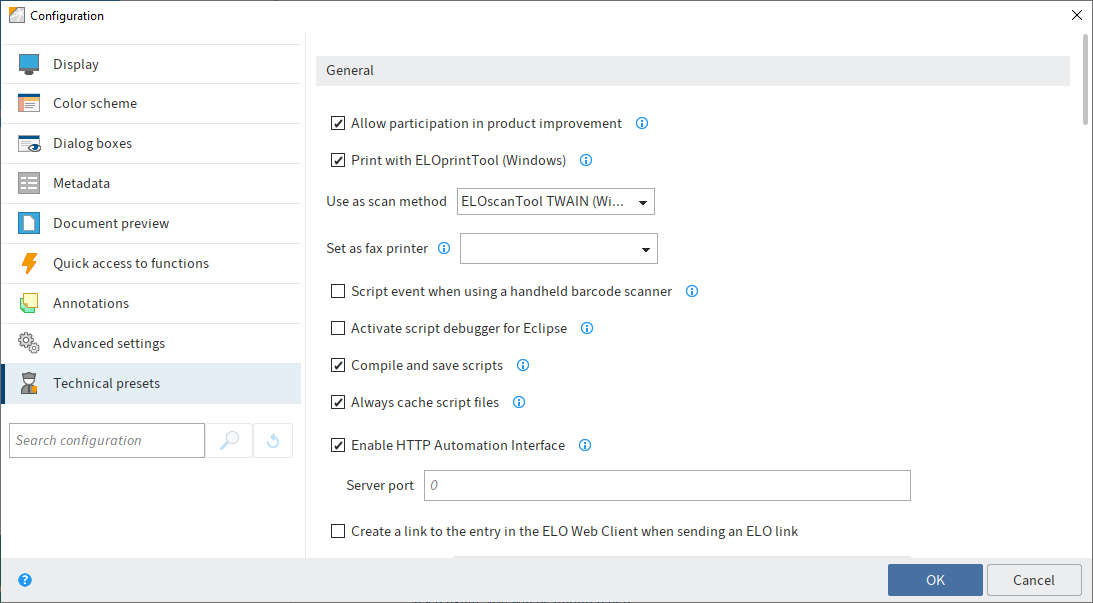
Allow participation in product improvement: Select this option to participate in ELO product improvement.
Print via ELOprintTool (Windows): Enable this option to print documents with the ELOprintTool.
Use as scan method: Select which scan method to use.
Please note
The ELOscanTool can only be used under Microsoft Windows and requires a 32-bit TWAIN driver.
Set as fax printer: To send a document as a fax, the document must be sent to a fax printer that processes the digital data and sends it to the recipient. Use this setting to specify which fax printer to use.
Barcode serial number: Enter a valid barcode serial number here if you want to use the barcode function at your workstation.
Information
This setting is only available to administrators.
Please note
Barcode serial numbers are unique to each workstation and may not be used multiple times.
Script event when using a handheld barcode scanner: If this option is enabled, the ELO Java Client sends a corresponding script event as soon as a handheld barcode scanner is recognized.
Activate script debugger for Eclipse: Select the Activate script debugger for Eclipse option to activate the script debugger for internal scripts. This will disable the internal script debugger (CTRL+ALT+D).
Compile and save scripts: Scripts are compiled once and then saved locally. This reduces the client execution time. If this option is enabled, you cannot use the JavaScript debugger.
Always cache script files: If this option is enabled, scripts are always stored in the local cache even if the document cache is cleared when you close the program. This reduces the client execution time.
Enable HTTP Automation Interface: Selecting the Enable HTTP Automation Interface option allows you to call scripting functions starting with the prefix http via the HTTP Automation Interface. To do so, you need to enter the corresponding port number in the Server port field.
The syntax must have the following format:
http://<server>:<port>/script/<script name>/?p1=<parameter value1>&p2=<parameter value2>
Server port: To call script functions via the HTTP Automation Interface, you need to enter the corresponding port number in the Port field.
Create a link to the entry in the ELO Web Client when sending an ELO link: If this option is enabled, a web link to the entry is embedded in the e-mail when sending an ELO link. This web link can also be used as an ELO link in the ELO Web Client.
Web Client URL: For the additional web link when sending an ELO link to work, you need to enter the ELO Web Client URL to the Web Client URL field.
Store cookies in integrated browser: If this option is enabled, ELO stored the internal browser cookies across sessions. Otherwise, the cookies are deleted when the client is closed.
Add references to full text database: If this option is enabled, references are included when adding to the full text database.
Autosave option for changed settings in minutes: This option can prevent Clipboard entries from being lost if ELO closes unexpectedly, for example. If the value 0 is configured, the settings are not saved until the session is ended.
# Display and refresh
Cache refresh interval in seconds: Use this option to set the refresh interval of the Repository work area. Work areas and settings are updated at this interval.
Limit display in large folders: If you open an entry with the Go to function, only the respective entry is displayed in the specified folders. This option speeds up the load time, since the other contents of the specified folders are not loaded. In the Object IDs field, specify the object IDs of the folders that you want to apply the restriction to.
Storage duration of thumbnails in the cache: The ELO Java Client stores the created thumbnails to a local cache. In this area, you specify when to delete the cache. Choose from the following options:
- Delete when closing ELO
- Delete after 30 days
- Never delete
Clear document cache on closing: If this option is enabled, the temporary file folder will be emptied when you close the ELO Java Client.
Maximum number of documents in the In use work area: In this area, you specify how many documents can be checked out at the same time. This prevents too many external applications from being started since this can impact system performance. The default value is 20.
Maximum number of pages in OCR preprocessing: This is where specify the maximum number of pages per document to evaluate during OCR preprocessing. The default value is 20.
Start search immediately when clicking a search favorite: The Save search and Search favorites functions on the Search tab enable you to save search favorites and use them repeatedly. Enable this option to immediately start the search when clicking a search favorite. If this option is disabled, the search favorite is added without starting the search.
# Log file
The log file contains the automatic protocol of all or certain processes of an application.
You can make the following settings for the log file:
Write log file: Select this option to write a log file.
Open log file: Open the log file for viewing.
Send log file: Attach a log file as a TXT file to an e-mail.
Log file path: Define the storage location for the log file.
Information level: Define how detailed you want the information in the log file to be (default, script development, debug, or network debug).
Information
You can only make changes to the log file if there is no logger entry in the registry.
# Date formats
Possible date and time formats: Expand this list to show the variables for the configuration of the date and time formats.
Preview: This field shows what the date format would look like with the current settings.
Format for date and time entries: Specify the format for the date and time entries here. The format used is displayed as an example in the Preview field. The default setting is Use standard Java date formats.
Please note
If nothing is displayed in the Preview display field, the date entries will not be displayed in the client either.
Date format: If you have selected the User-defined option, you can choose a predefined date format in the Date format field or generate your own date format from the variables displayed under Date and time format options.
Time: If you have selected the User-defined option, you can choose a predefined time format in the Time field or generate your own time format from the variables displayed under Date and time format options.
Date format that should also be accepted for entries in ELO: If you have selected the User-defined option, you can select or create an additional date format that is also valid in ELO in the Date format that should also be accepted for entries in ELO field.
Replace date in tables with "Yesterday", "Today", and "Tomorrow" as required: Select this option to replace the date with Yesterday, Today, or Tomorrow as appropriate.
First weekday in the calendar: Use the drop-down menu to set the first day of the calendar week in ELO. The default value is Monday.
First calendar week: Use the drop-down menu to set when the first calendar week should start. With the default settings, the first calendar week starts on January 1.
# Number formats
Separator for number entries: Specify the separators used for numbers here. The default setting is Use standard Java separators.
Thousands separator: If you have selected the User-defined option, you can enter a separator to mark numbers higher than one thousand in the Thousands separator field.
Decimal separator: If you have selected the User-defined option, you can enter a separator for numbers with decimal places in the Decimal separator field.
# Show or hide work areas
You can hide or show the Intray, Clipboard, Tasks, In use, and Search work areas here.
# Folder for document templates
Path: Define in which folder the document templates will be stored in ELO.
# OCR (text recognition)
OCR recognition: Specify here whether you want to perform OCR in fast or detailed (but slower) mode.
Filter: Use this field to filter the Available languages column. The column is updated as soon as you enter a character.
Reset filters: Deletes the current filter from the Filter field. All available languages are displayed.
Available languages: From this list, select the languages for text recognition that will be used to analyze the documents in ELO.
Information
The OCR service and languages are only available if an OCR instance has been installed.
Selected languages: In this list, you can see which languages have been selected for text recognition.
# Enable roles
Roles are used to grant users additional rights in ELO. For example, a role can grant a user membership to the Accounting group. You do not need the additional group rights for your everyday work, so you can enable them as and when required. You need to enable the role to get the corresponding rights in the client.
You can also enable the roles manually when you log on. This dialog box opens after you sign in to ELO.
# Change password
You can change your password as often as you want. To change your password, you need your old password.
Information
Follow the instructions for choosing a secure password in the Change password dialog box.
If your new password is rejected, it does not meet the minimum password requirements at your company.
If you have forgotten your password, notify your system administrator.
# Assign substitute
You can create substitutes and activate them immediately or later on.
This way, you can prevent workflow tasks from escalating, such as when you are absent.
For more information, refer to the Important actions in detail chapter.
# Accept substitution
This function enables you to accept a substitution request from another user. You can view the substitution tasks in your Tasks work area by selecting Task > Display > Substitution tasks.
The following options are available for accepting substitution:
- Another user has defined a period during which you automatically accept their substitution.
- Another user has given you the right to substitute for them. In this case, you have to activate the substitution yourself.
On the ribbon, select User menu [your name] > Accept substitution.
In the dialog box, you can see who you are currently substituting for or may substitute for.
# I have the right to substitute for
On the left-hand side, you will see an overview of the users you have permission to substitute for.
Information
If you are a supervisor of other users, you automatically have the right to substitute for these users. Users for whom you are a supervisor are not automatically displayed in the overview. Select a user from the Add employee drop-down field. The Add employee field is only displayed if you have been assigned the role of supervisor.
You will recognize active substitutions by a green bar next to the profile picture.
If you select a user, their exact substitute permissions are shown on the right-hand pane. This area is for information purposes only and cannot be edited.
# Edit substitutions
You have the following options:
- Activate/Deactivate: These buttons allow you to activate substitutions that are currently inactive or deactivate active substitutions you want to end. These buttons are only available if the user you want to substitute for has given you the right to activate and deactivate the substitution yourself.
- Forward: With this button, you can forward a substitution if the user you are substituting for has given you the corresponding right. You can either hand off the substitution entirely or assign an additional substitute.
![]()
If you are currently substituting for another user, you will recognize this by the blue person next to your User menu [your name].
You will also see on your My ELO home screen that you are substituting for another user.
# Additional information:
# Edit profile
You can edit your profile.
You can edit your profile in the following ways:
- On the ribbon, select User menu [your name] > Edit profile.
- In the My ELO work area, select the Settings button (gear icon) > My profile (person icon at the top right).
- Click your user name or profile image in the feed.
Information
You can open the group profile via the feed if the group has been mentioned.
Information
Administrators with the Edit user data right can change images for other users.
In the Profile dialog box, you can edit your profile picture and profile data. Select either Edit profile picture or Edit data.
# Edit profile picture
Select Edit profile picture to open edit mode. In edit mode, you can change or delete your own profile image.
Select picture: Use Select picture to open a dialog box to select a file from the file system. Select an image file to use as your profile image.
Information
Use PNG, JPG or GIF image files with a minimum of 280 x 280 pixels. If ELO is unable to process the format or the size of the selected image, a message will appear at the bottom of the dialog box.
For larger images, you can hold down the left mouse button to drag and select the desired section of the image.
Delete picture: You can delete your profile image. The dialog box remains open, but editing mode is closed.
Save: You can apply the changed profile image. The dialog box remains open, but editing mode is closed.
Cancel: Undo the changes. The dialog box remains open, but editing mode is closed.
# Edit data
Select Edit data to edit your profile data. You can enter and edit data in the fields provided.
You will find the following buttons below the input fields. You may need to scroll down.
Save: Applies the changed profile data. The dialog box remains open, but editing mode is closed.
Cancel: Undo the changes. The dialog box remains open, but editing mode is closed.
# Close dialog box
Close: Exit the dialog box. Any unsaved changes will be lost.
# About
This dialog box contains program information, e. g. the version numbers of the ELO Java Client and ELO Indexserver. The version number is particularly important for support requests.
# User feedback
This is where you can write feedback on the program and send it to ELO. You can enter an e-mail address if you want. This e-mail address will be used for enquiries.
Select Privacy Policy to read about data protection. To see a preview of your feedback message, select Preview.
# Help
This launches the ELO in-program help function. This is where you will find the documentation for the ELO Java Client.
# Active processes
Use this function to open an overview of processes running in the background. This includes, e. g. import and export processes.
You can view a detailed log for each process. You can save the log as a CSV file (comma separated values).
You can cancel current processes and select Go to to go straight to the respective entry in the Repository work area.
You can remove one or all finished processes from the process overview.
# Close
Close the ELO Java Client with this function.