# Add fields
After an aspect is created, you can add one or more fields to the aspect.
Select the aspect you want to edit.
The settings for the selected aspect open.

Select Add field.
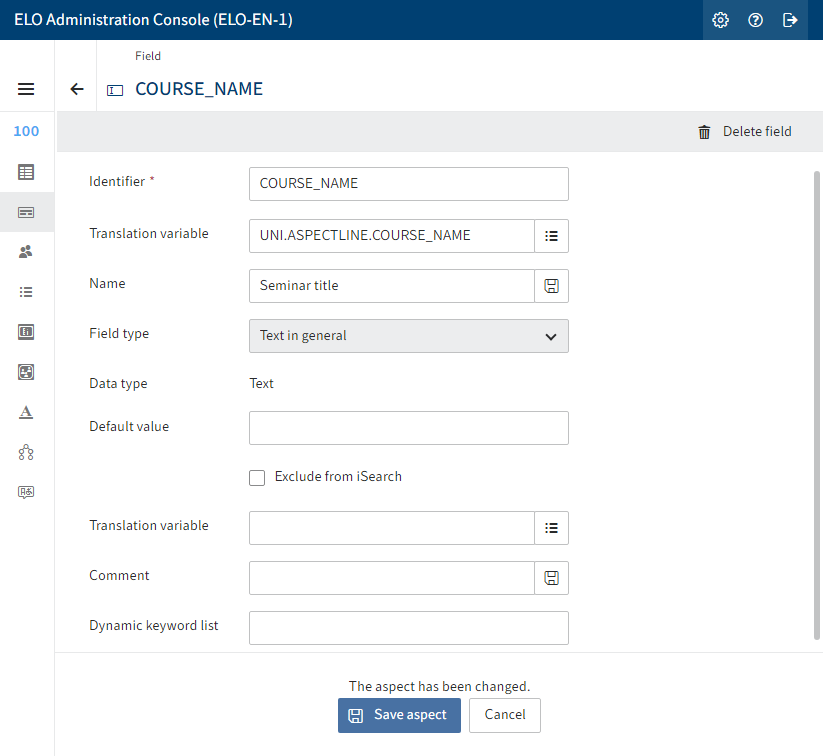
The settings for the field you are adding open.
Enter a technical name in the Identifier field.
Information
Only uppercase letters are possible.
Enter a translation variable into the Translation variable field.
Information
Option 1: Select one of the available translation variables from the drop-down menu. The Name field is completed automatically.
Option 2: Generate a new translation variable via direct input. Then, enter a name in the Name field and select the Save icon at the end of the field. The name is assigned to the translation variable and stored in the translation variable database.
Select a field type via the Field type drop-down menu.
Choose from the following options:
- Text in general: In Text type fields, you can enter any characters.
- Integer: In Integer type fields, you can enter any whole numbers.
- Floating-point number: In Number type fields, you can enter floating-point numbers.
- Date: In Date type fields, you can enter a date via a calendar function. The format is based on the settings in the client.
- Date with time: In DateTime type fields, you can enter a date and time via the calendar/clock function. The format is based on the settings in the client.
- Selection list: Choice type fields are shown as selection lists. A keyword list has to be configured.
- Relation: Relation type fields are shown in relation to a metadata form. A metadata form has to be configured as a relation target.
- User: User type fields are shown with a selection of users.
- E-mail address: In E-mail type fields, you can enter an e-mail address. From this field, the user can open a linked window in an e-mail program.
- URL: In URL type fields, you can enter a URL. From this field, the user can open a browser window with the website.
- Check box: Check box type fields generate a check box.
Option 1: If necessary, enter a value in the Default value field. This value is automatically entered when the metadata form is shown. The user can change the value as required.
Option 2: To not add the content of the field to the ELO iSearch search index, enable the option Exclude from iSearch.
Option 3: If necessary, enter additional information in the Comment field.
Option 4: If necessary, enter a translation variable for the comment in the Translation variable field.
Option 5: Add a dynamic keyword list.
Select Save aspect.
The field is saved and added to the aspect.