# Basic functions
This chapter explains the basic functions of the ELO app. These include:
- Create new folder
- Insert file
- Load new version
- Edit document
- Show form
- Share document
- Create margin note
- Delete entry
- Create QR code
- Scan QR code
- Assign substitute
- Accept substitution
For more information on the functions in the Clipboard, Tasks, Search, Offline, Data sets, Feed, and My ELO areas, refer to the separate chapters.
# Create new folder
You can create new child folders in existing folders.
Information
This function is only available in the Repository work area.
Method
Tap the info icon next to a folder in the list view.
The information about the selected folder appears in the viewer pane.
In the navigation bar, tap Menu (button with three dots) > New folder.
Alternative: Tap Menu (button with three dots) > New folder in the list view navigation bar.
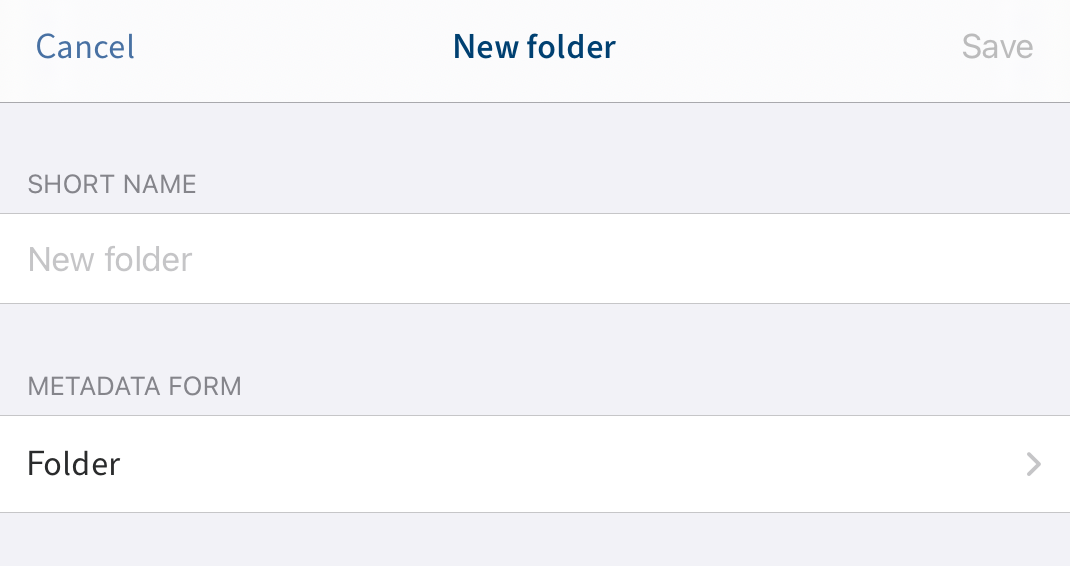
The New folder dialog box appears.
Tap the Short name field to enter a name for the new folder.
Optional: Tap Metadata form to change the metadata form.
Information
If a metadata form contains mandatory fields, your administrator will have to create a form and link it to the metadata form so it can be selected in the ELO app.
Information
You cannot create new metadata forms in the ELO app.
Tap Save to create the new folder.
Result
The New folder dialog box closes. You have created a new folder.
Optional: In the configuration, you can specify whether you want a metadata dialog box to appear when filing. You can find more information in the section Configuration. To enter metadata retroactively, use the Show form function.
# Insert file
You can transfer a file from your device to ELO. There are two ways to insert a file:
Requirements
You need an external application to add files. The application, e.g. a file manager or a gallery app, must support file sharing.
# Insert file from the menu
To insert a file from the menu (button with three dots), proceed as follows:
Method
Tap the info icon next to the folder in the list view that you want to insert a file into.
The information about the selected folder appears in the viewer pane.
In the navigation bar, tap Menu (button with three dots) > Insert file.
Alternative: Tap Menu (button with three dots) > Insert file in the list view navigation bar.
The Insert file dialog box opens.
Select one of the following options:
- New photo: Opens the camera app on your device to take a photo. Take a photo.
- Photo from album: Opens the image gallery on your device. Select an image from your album.
- Intray: Shows an overview of documents in the Intray work area. Select a document.
- QuickScan: Opens the integrated ELO QuickScan app. Scan a document. You can find more information about this in the ELO QuickScan (iOS) manual.
- Browse: Opens locations on your device or cloud storage. Select a document.
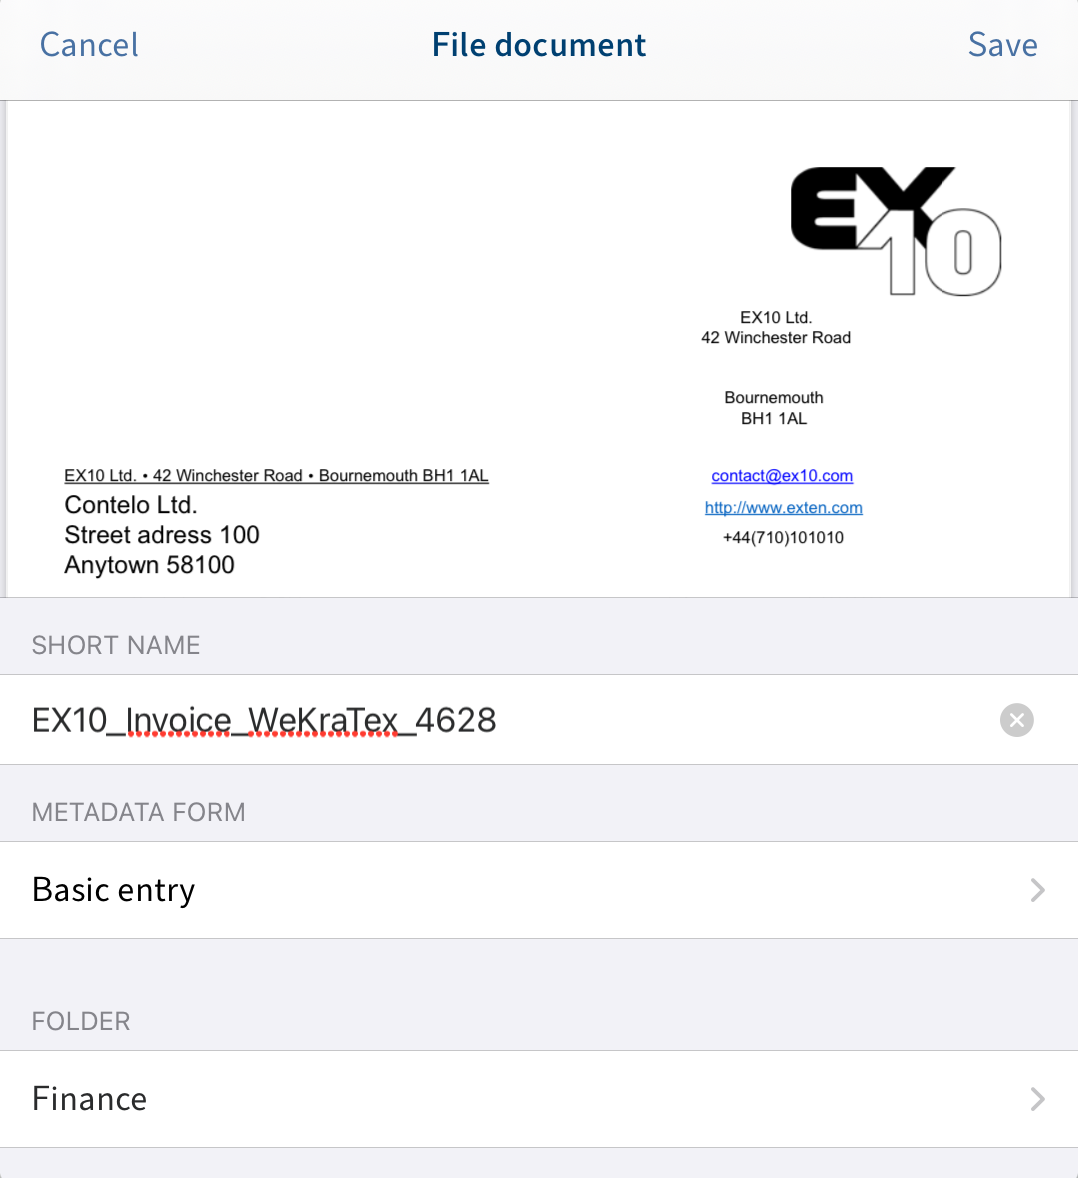
The File document dialog box opens.
Tap the Short name field to enter a name for the document.
The Basic entry metadata form is selected by default. Tap Metadata form to change the metadata form.
The Metadata form dialog box opens. The list contains all available metadata forms that have already been created in ELO.
Information
If a metadata form contains mandatory fields, your administrator will have to create a form and link it to the metadata form so it can be selected in the ELO app.
Information
You cannot create new metadata forms in the ELO app.
Tap the metadata form you want to use. A check mark indicates that the metadata form is selected.
Tap File document to confirm your selection.
The Form dialog box closes. The name of the new metadata form appears in the Metadata form field.
Optional: To change the target folder of the new document, tap the Folder input field.
To insert the document, tap Save.
Result
The File document dialog box closes. You have filed the new document to the target folder.
Optional: In the configuration, you can specify whether you want a metadata dialog box to appear when filing. You can find more information in the section Configuration. To enter metadata retroactively, use the Show form function.
# Insert file from the Intray
To insert a file via the Intray work area, proceed as follows:
Method
Open the Intray work area.
In the navigation bar, tap Menu (button with three dots) > Add file.
The Add file dialog box appears.
Select one of the following options:
- New photo: Opens the camera app on your device to take a photo. Take a photo.
- Photo from album: Opens the image gallery on your device. Select an image from your album.
- QuickScan: Opens the integrated ELO QuickScan app. Scan a document. You can find more information about this in the ELO QuickScan (iOS) manual.
- Browse: Opens locations on your device or cloud storage. Select a document.
The selected document or photo is added to the Intray. It will appear in the list view in the Intray.
Alternative: You can also upload files to the Intray from external apps. To do so, use the Share function in the respective app.
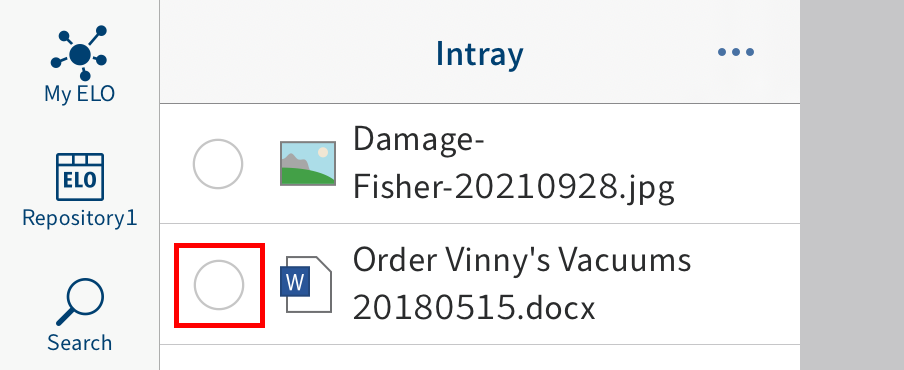
Tap the radio button to the left of the document to select it.
A check mark indicates that the document is selected.
In the navigation bar, tap Menu (button with three dots) > File document.
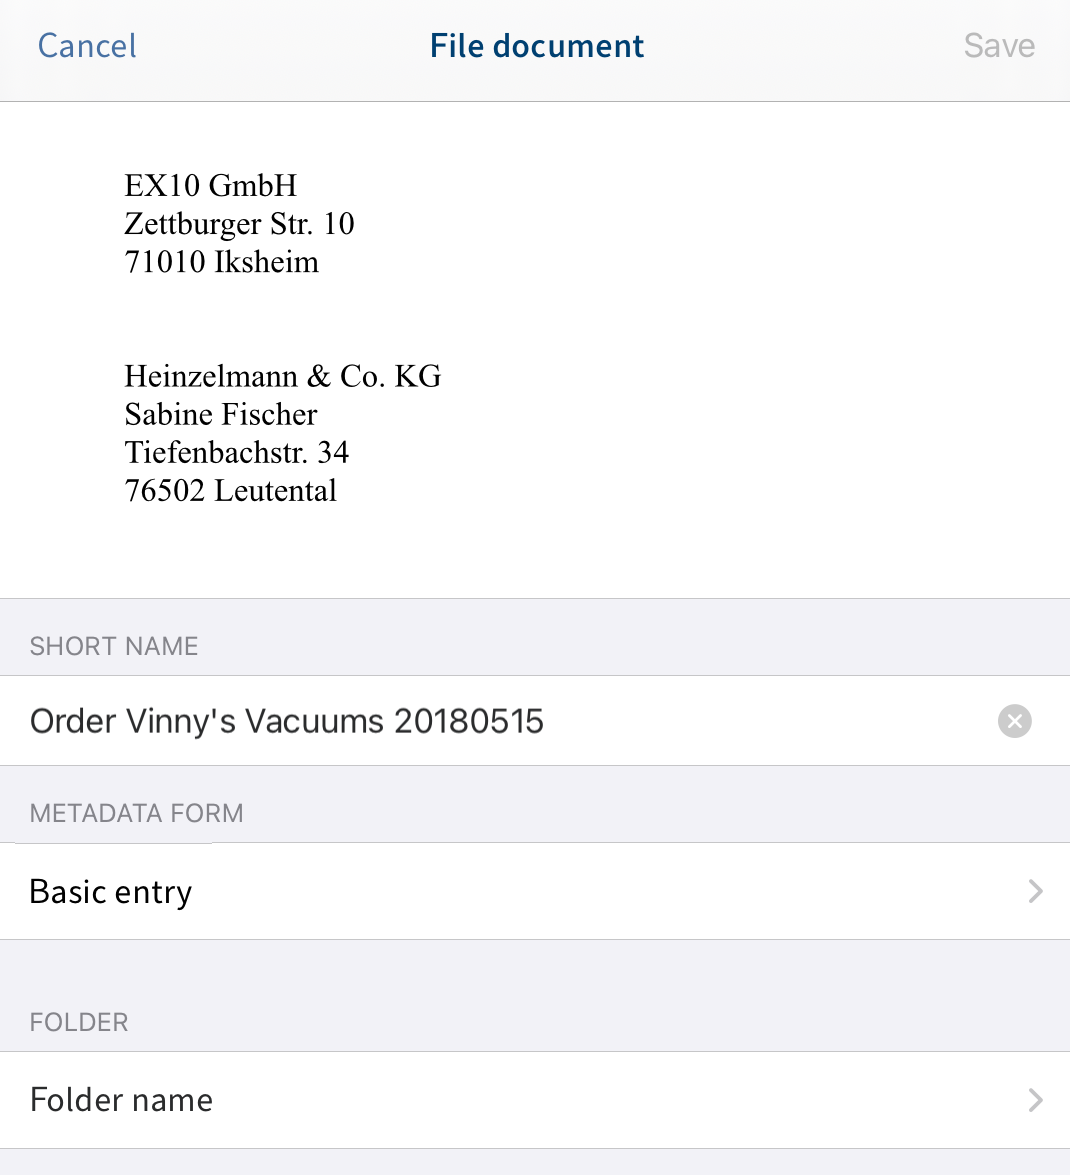
The File document dialog box opens. The file name is entered to the Short name field.
Optional: Tap the Short name field to change the short name.
The Basic entry metadata form is selected by default. Tap Metadata form to change the metadata form.
The Metadata form dialog box opens. The list contains all available metadata forms that have already been created in ELO.
Information
If a metadata form contains mandatory fields, your administrator will have to create a form and link it to the metadata form so it can be selected in the ELO app.
Information
You cannot create new metadata forms in the ELO app.
Tap the metadata form you want to use. A check mark indicates that the metadata form is selected.
Tap File document to confirm your selection.
The Form dialog box closes. The name of the new metadata form appears in the Metadata form field.
To specify the filing location, tap the Folder input field.
The Select target folder dialog box appears.
Navigate to the folder you want to file the document to.
The History tab contains the target folders you have previously selected.
Confirm with Select.
Your selection is applied. The Select target folder dialog box closes.
To insert the document, tap Save.
Result
The File document dialog box closes. You have filed the new document to the target folder.
Optional: In the configuration, you can specify whether you want a metadata dialog box to appear when filing. You can find more information in the section Configuration. To enter metadata retroactively, use the Show form function.
# Load new version
You can load a new version of your documents to document changes to files.
Method
Select the document you want to upload a new version of.
In the navigation bar, tap Menu (button with three dots) > Load new version.
The Insert file dialog box opens.
Select one of the following options:
- New photo: Opens the camera app on your device to take a photo. Take a photo.
- Photo from album: Opens the image gallery on your device. Select an image from your album.
- Intray: Shows an overview of documents in the Intray work area. Select a document.
- QuickScan: Opens the integrated ELO QuickScan app. Scan a document. You can find more information about this in the ELO QuickScan (iOS) manual.
- Browse: Opens locations on your device or cloud storage. Select a document.
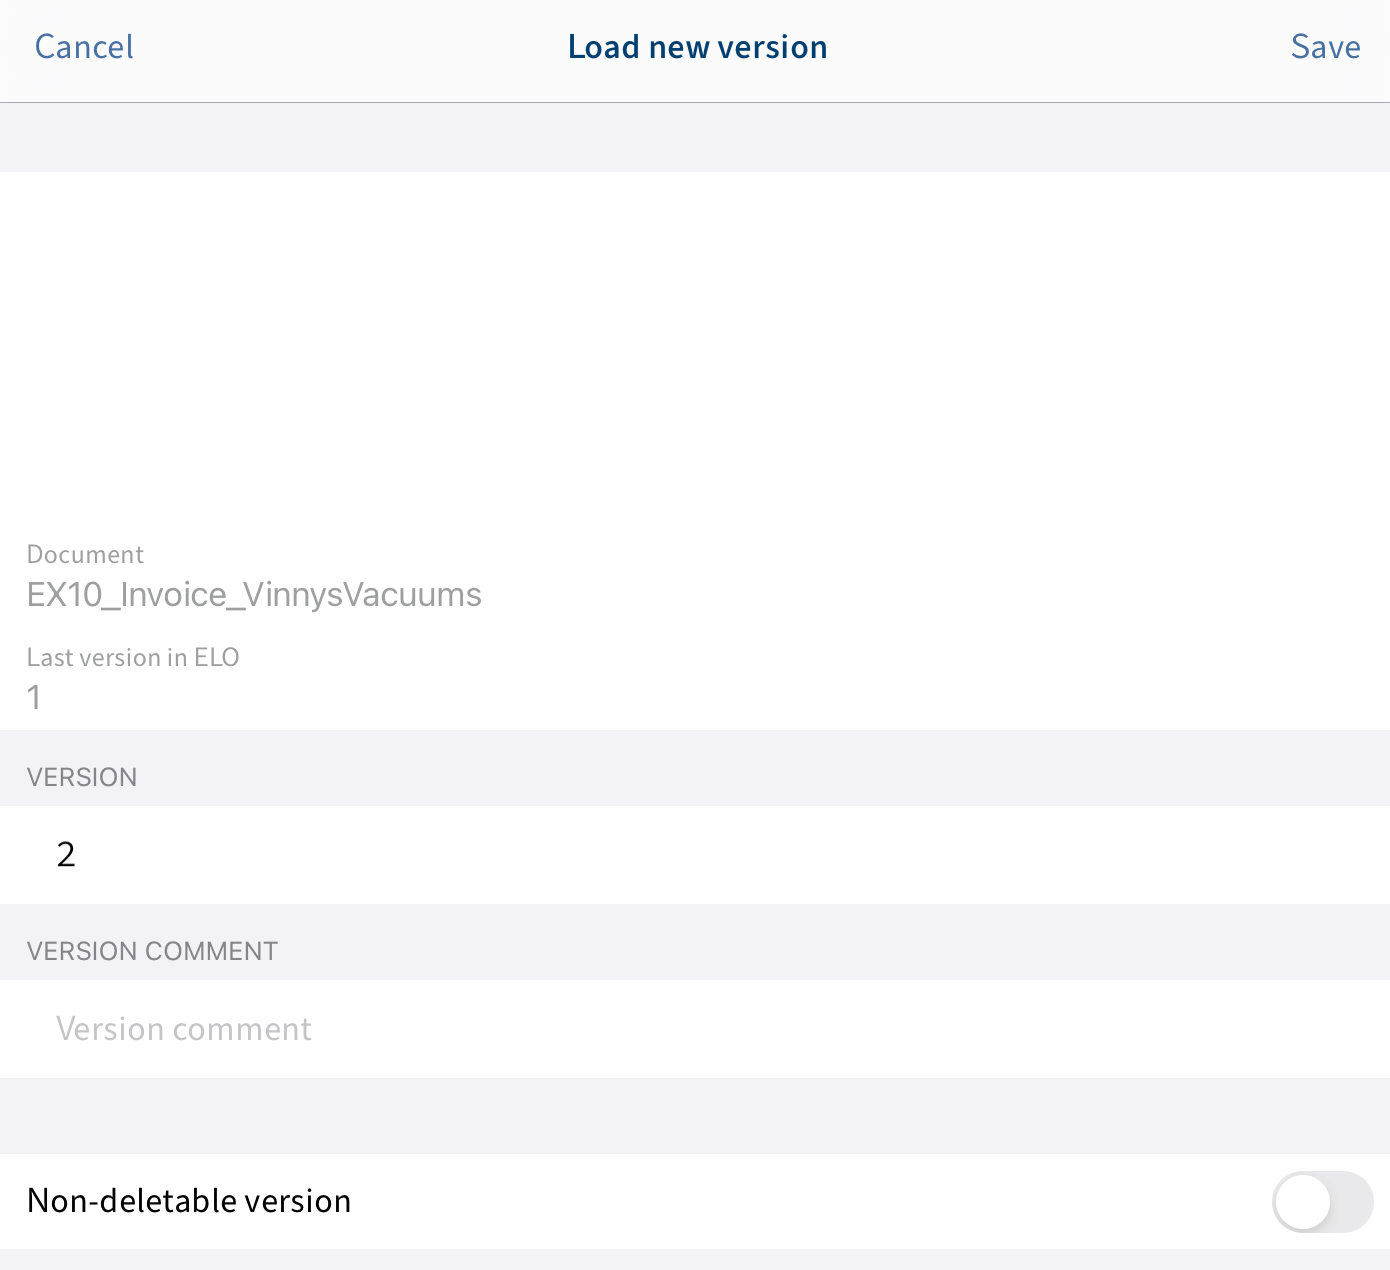
The Load new version dialog box appears.
You can make the following changes:
- Version: Change the version number in the VERSION field.
- Version comment: Enter additional information in the VERSION COMMENT field.
- Non-deletable version: Select this option to prevent the version from being deleted from ELO.
Tap Save to load the new version.
Result
The Load new version dialog box closes. You have filed the new version of the document.
# Edit document
With the Check out and edit function, you can make changes to a document using a third-party application (e.g. text editor app).
Information
Not all third-party applications support this function.
Method
Select the document you want to edit.
In the navigation bar, tap Menu (button with three dots) > Check out and edit.
A selection dialog box opens.
Select the external application you want to edit the document with.
The document opens in an external app.
Once the document is open in an external app, it is checked out of ELO and locked for other people.
Make the desired changes to the document.
To finish editing, save your changes in the external app.
Close the external app to return to the ELO app.
In the menu (button with three dots), tap Check in.
Result
The document is checked back into ELO. The document is unlocked for other people. A new version of the document is filed.
# Zip files in ELO
If you want to edit zip files stored in ELO, proceed as follows:
- Select the zip file.
- In the navigation bar, tap Menu (button with three dots) > Share document > Copy.
- Select where you want to save the zip file on your device.
- Open the location where you saved the zip file.
Result
You can extract and open the zip file.
# Show form
To view or edit the metadata for an entry, use the Show form function.
Requirements
Your administrator must have linked a form to the metadata form and defined it as a preview form. For more information, refer to the ELO Java Client Workflow manual.
Information
If a preview form has not been assigned to the metadata form, the ELO app loads a default form with the fields Short name, Document date, and Extra text.
Method
Select the entry that you want to show the form for.
In the navigation bar, tap Menu (button with three dots) > Show form.
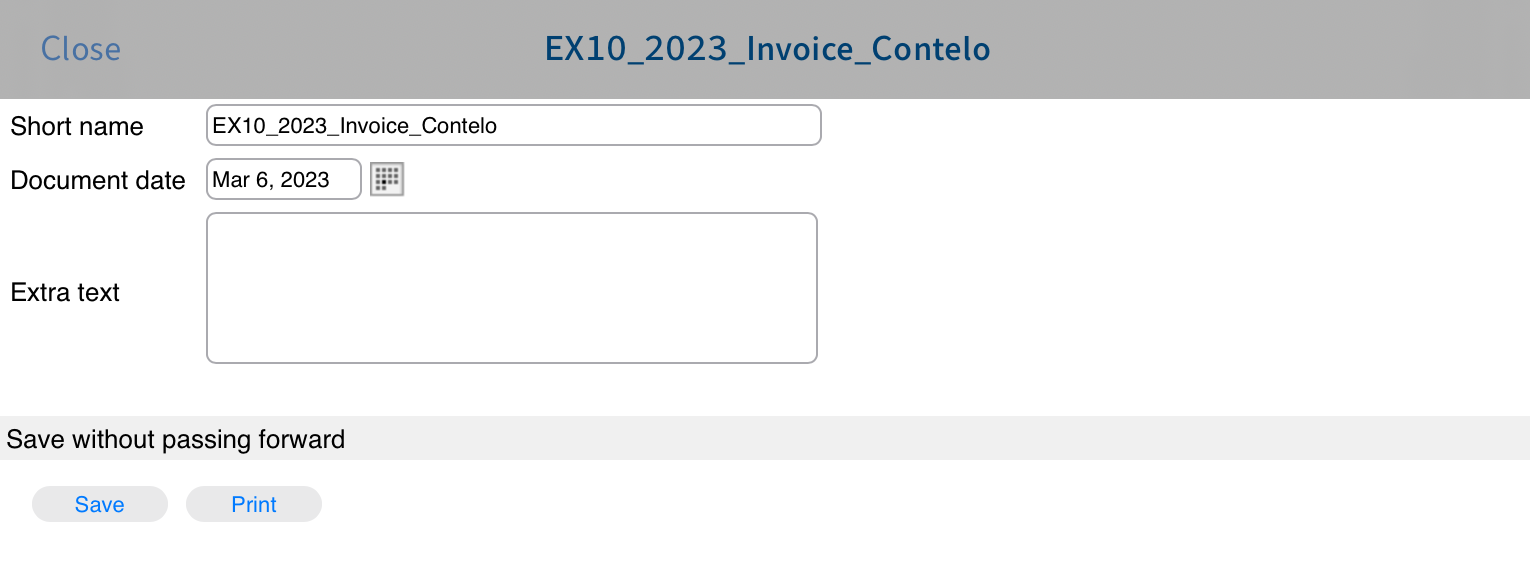
The Show form dialog box appears. The dialog box displays the corresponding form.
Optional: Tap the input fields to edit the metadata. To save your changes, tap Save. The Print function is not available in the ELO app.
To close the Show form dialog box, tap Close.
Result
The dialog box closes. Your changes are applied.
# Share document
To send a document from an external application (e.g. by e-mail), use the Share document function.
Method
Select the document that you want to send.
In the navigation bar, tap Menu (button with three dots) > Share document.
The Share document as dialog box opens.
Choose from the following options:
- Copy: This function allows you to send a document as a copy to persons without access to the repository.
- ELO ECD link: This function enables you to send another user a direct link to an entry in the repository.
- ELO URL link: Some external applications do not support the ELO ECD link format. This function enables you to send another user a URL link to a document in the repository.
A selection dialog box opens.
Select the external application that you want to send the document with.
Send the document in the way you normally do in this application.
Result
You have sent the document. The external application closes.
# Create margin note
If you want to add comments to a document or folder, you can use margin notes. You can create three types of margin notes:
- General margin note (yellow): Visible to every user.
- Personal margin note (green): Only visible to the creator of the margin note.
- Permanent margin note (red): This margin note can be viewed by every user and cannot be deleted.
Information
This function is only available in the Repository work area.
Method
Tap the entry that you want to add a margin note to.
In the navigation bar, tap Menu (button with three dots) > Create margin note.
The Margin note dialog box appears. General margin note is set as the default type.
Optional: Tap Personal margin note or Permanent margin note to change the type.
Enter your text for the margin note to the colored input field.
Tap Save to save the margin note.
Result

The Margin note dialog box closes. The new margin note is located on the Margin note tab in the viewer pane.
Optional: To edit or delete a general or personal margin note, tap the margin note in the viewer pane. The Margin note dialog box appears. In this dialog box, you can change the contents of the margin note, or delete the margin note.
# Delete entry
You can also delete folders and documents that you no longer need.
Important
The entries are not deleted permanently, just marked as deleted. This mark signals the administrator to remove the documents from ELO permanently.
Requirements
The Show delete option is enabled. You will find this option in the Configuration dialog box under OTHER.
Method
Select the entry that you want to delete.
In the navigation bar, tap Menu (button with three dots) > Delete.
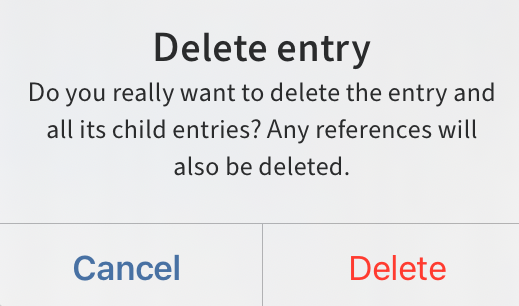
The Delete entry dialog box appears.
Confirm with Delete.
Result
You have deleted the entry.
# Create QR code
To access entries in ELO quickly and easily, you can generate and print QR codes. When you scan a QR code, you go straight to the entry in ELO.
Requirements
Your printer must support Apple AirPrint.
Method
Select the entry that you want to create a QR code for.
In the navigation bar, tap Menu (button with three dots) > Create QR code.
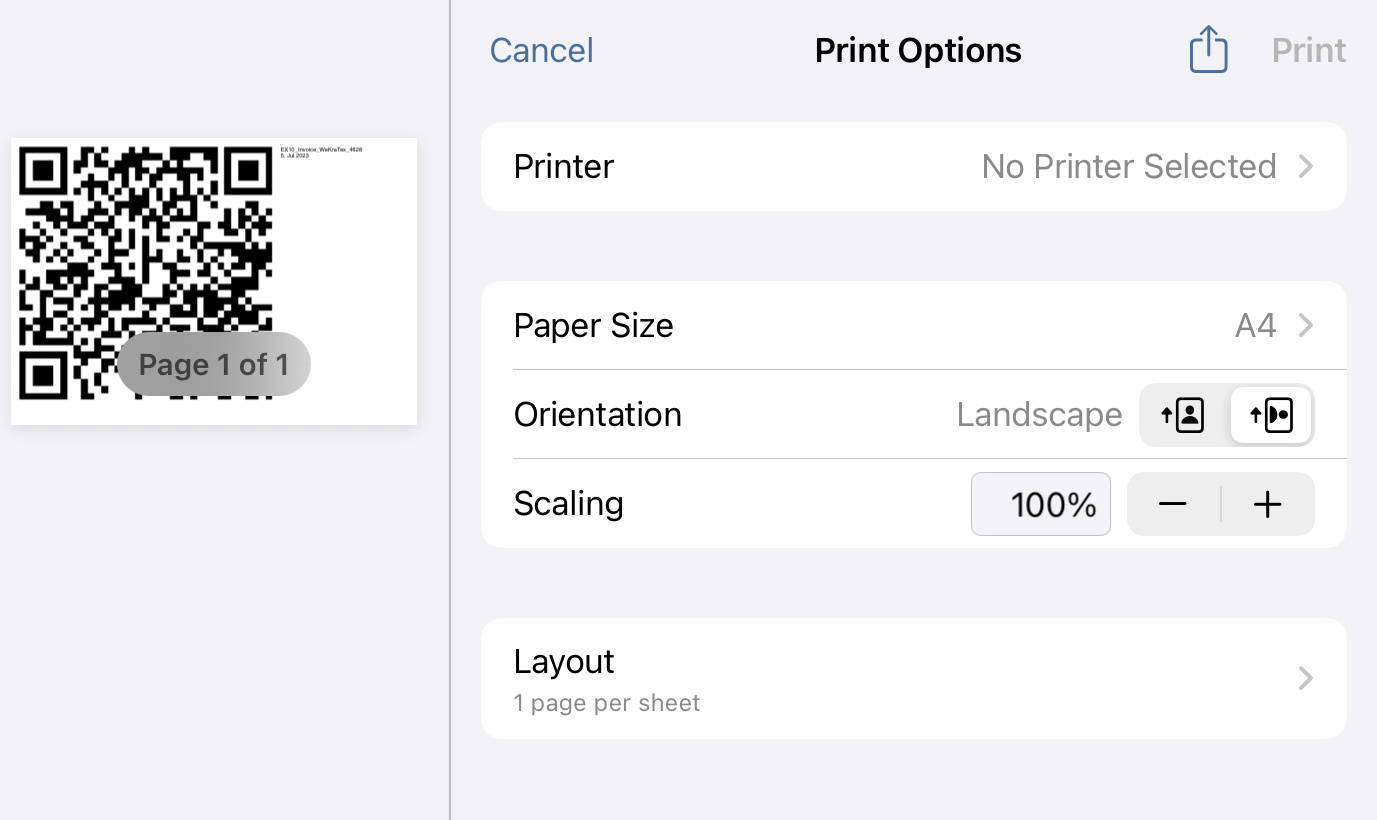
The QR code is created. The Options dialog box appears.
Select a printer.
Tap Print.
Result
The QR code is printed.
# Scan QR code
There are two ways to access an entry in ELO using a QR code:
Requirements
The entry linked to the QR code must be in the repository that your profile in the ELO app is connected to.
# Scan QR code with the ELO app
To scan a QR code with the ELO app, proceed as follows:
Method
Tap the Tile navigation button.
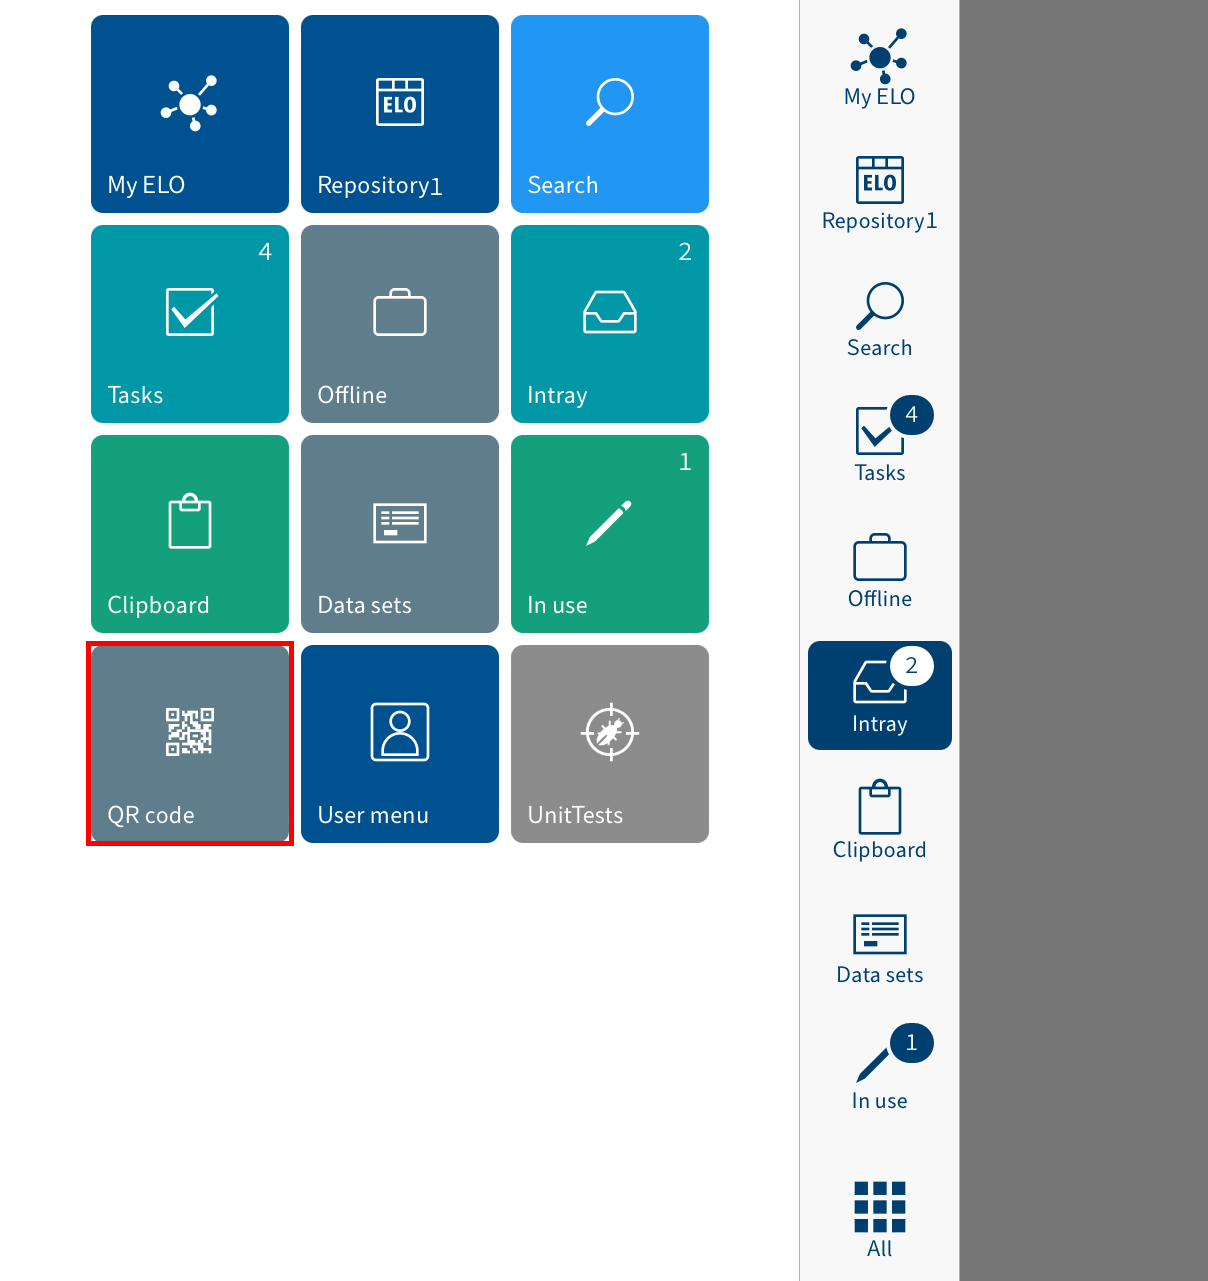
The tile navigation opens.
Tap the QR code tile.
The QR code scanner in the ELO app opens. You will see a green search field in the middle of the screen.
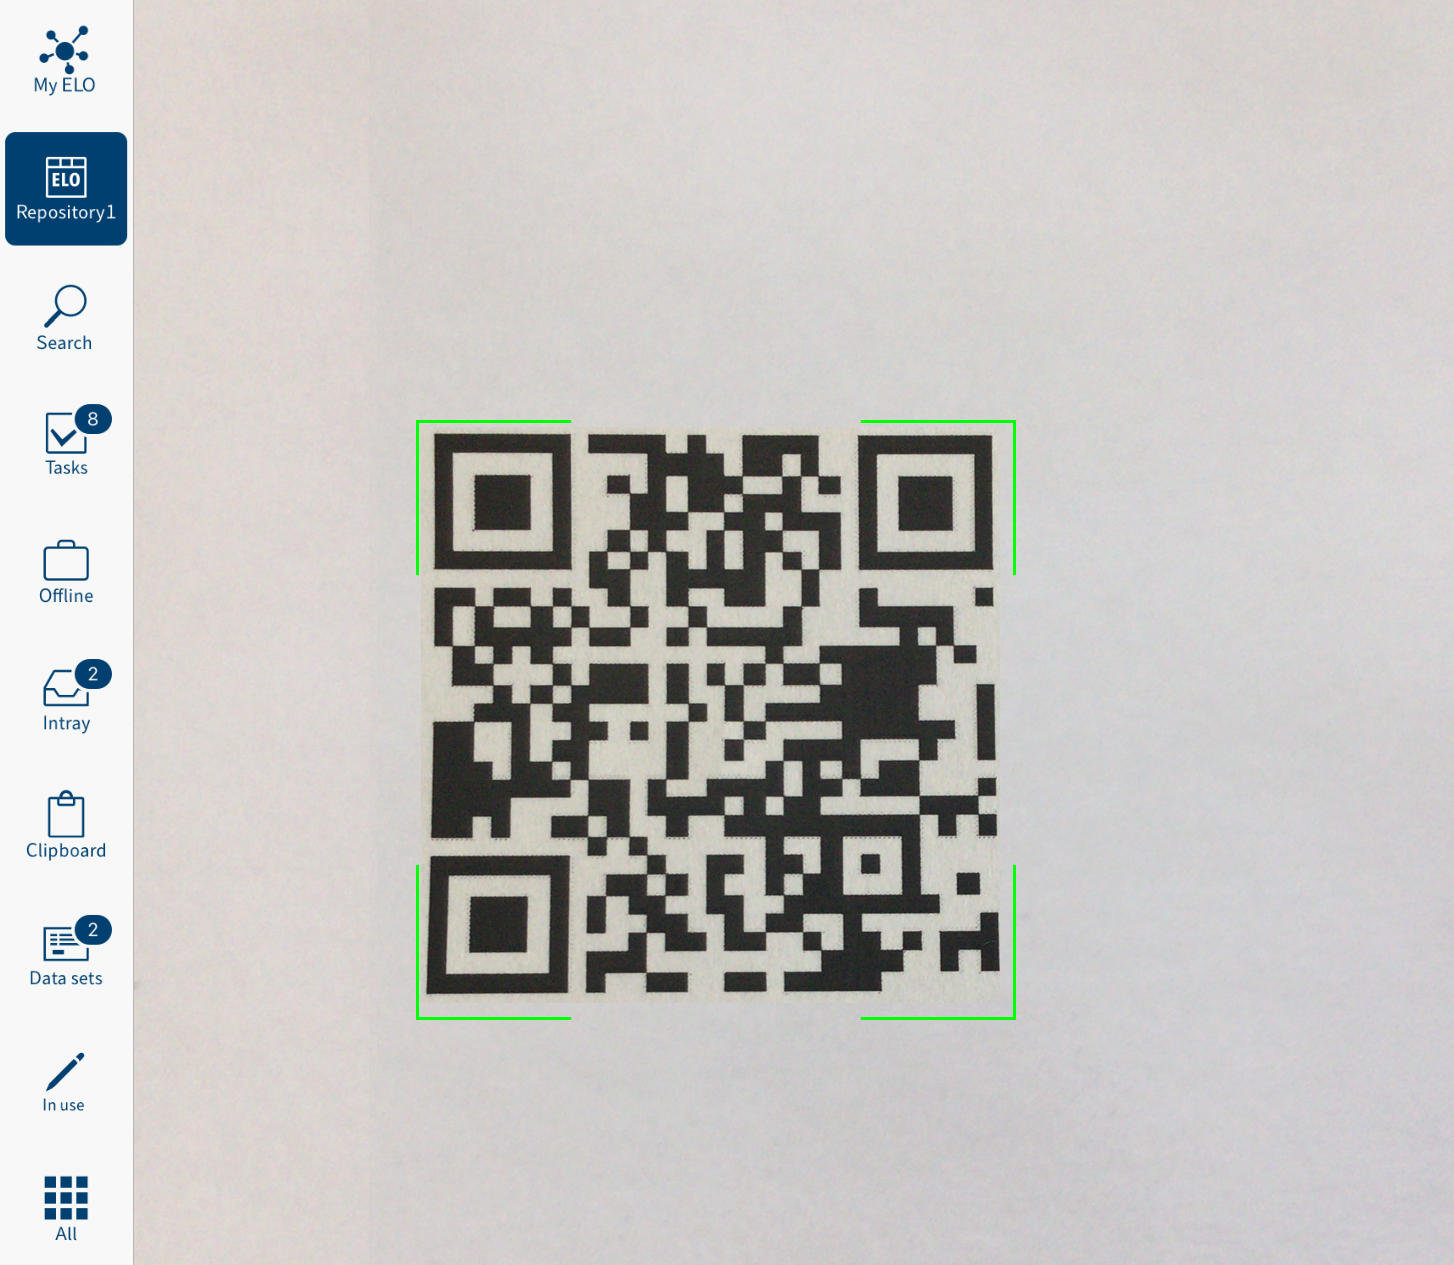
Bring the QR code into focus.
Result
The QR code is read, taking you straight to the entry in ELO.
# Scan QR code with the camera app
To scan a QR code with your device's camera app, proceed as follows:
Method
Open the camera app.
Bring the QR code into focus.
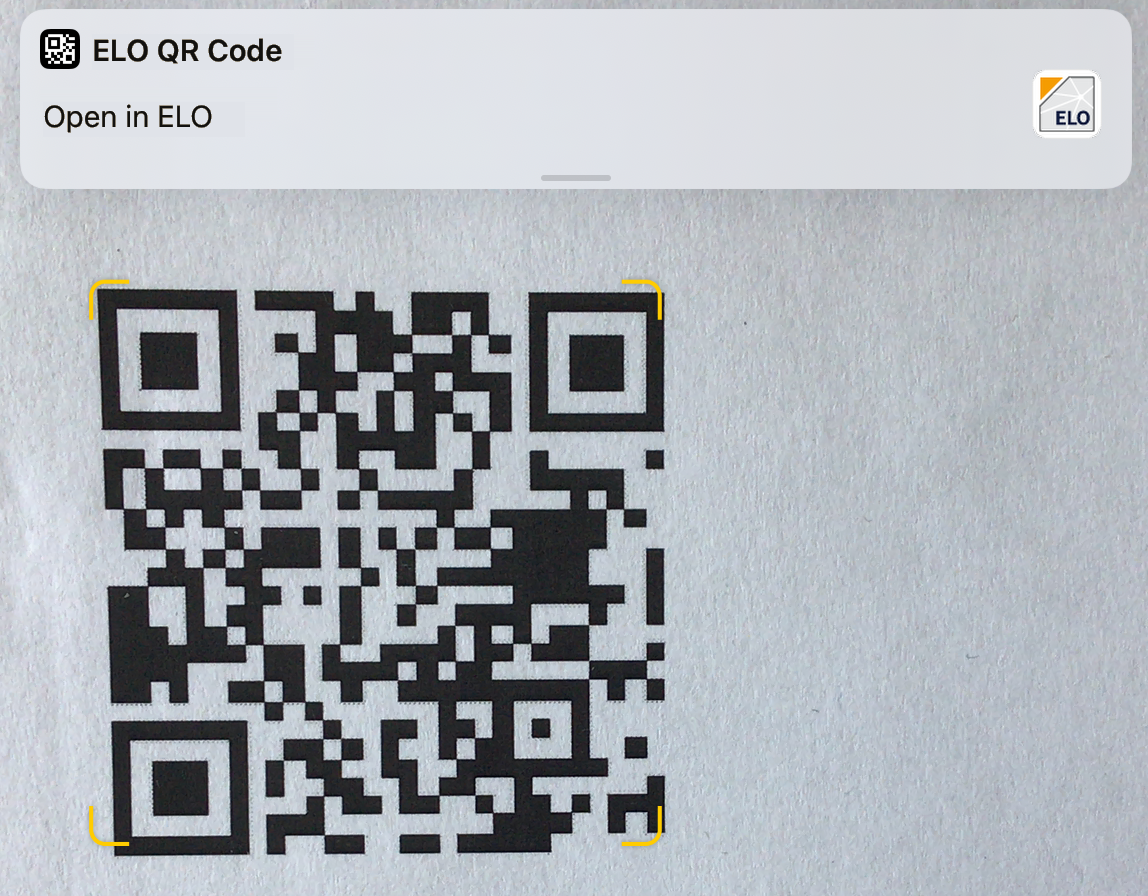
The pop-up window ELO QR-CODE appears at the top of the screen.
Tap the pop-up window.
Result
The ELO app opens and goes straight to the entry.
# Assign substitute
You can create substitutes and activate them immediately or later on.
This way, you can prevent workflow tasks from escalating, such as when you are absent.
Please note
A substitution rule can only be changed or deleted by the
- creator,
- main administrator,
- subadministrator, and
- the supervisor of the user
being substituted.
Method
Open the area Assign substitute in the user menu.
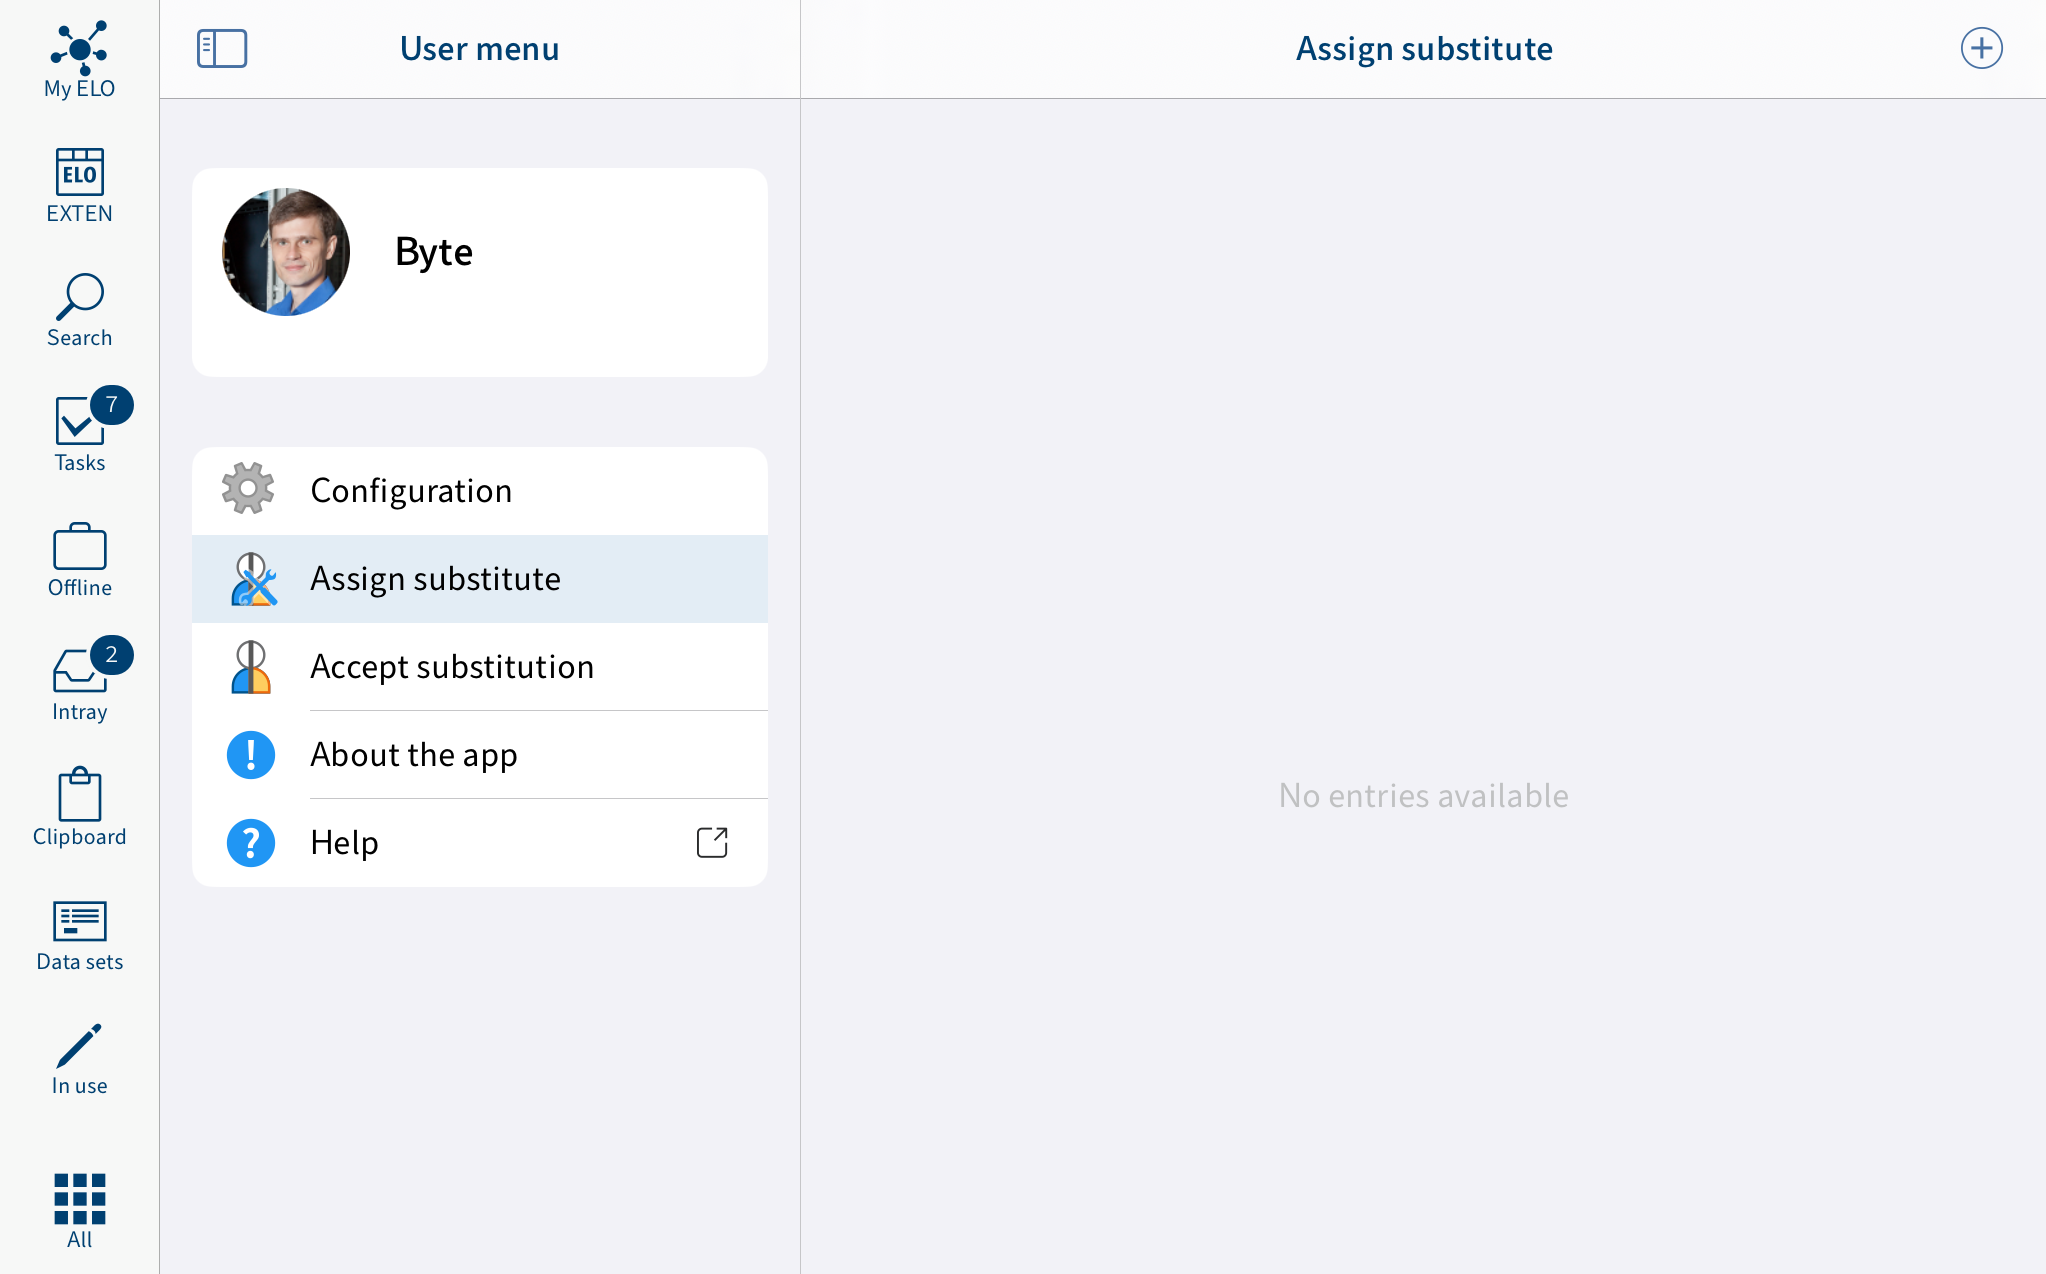
Tap the plus icon to select your substitute (user/group).
Select your substitute using the input field or the list.
You can be substituted for by other people or by groups.
As long as you haven't configured any settings for a substitute, their status will be Incomplete. With this status, the substitute cannot be used. You can configure settings either right away or later on.
You can configure different settings for different substitutes. For example, you can plan your substitutions in advance and edit their settings after the fact.
To configure more exact settings for your substitute, tap the respective substitute.
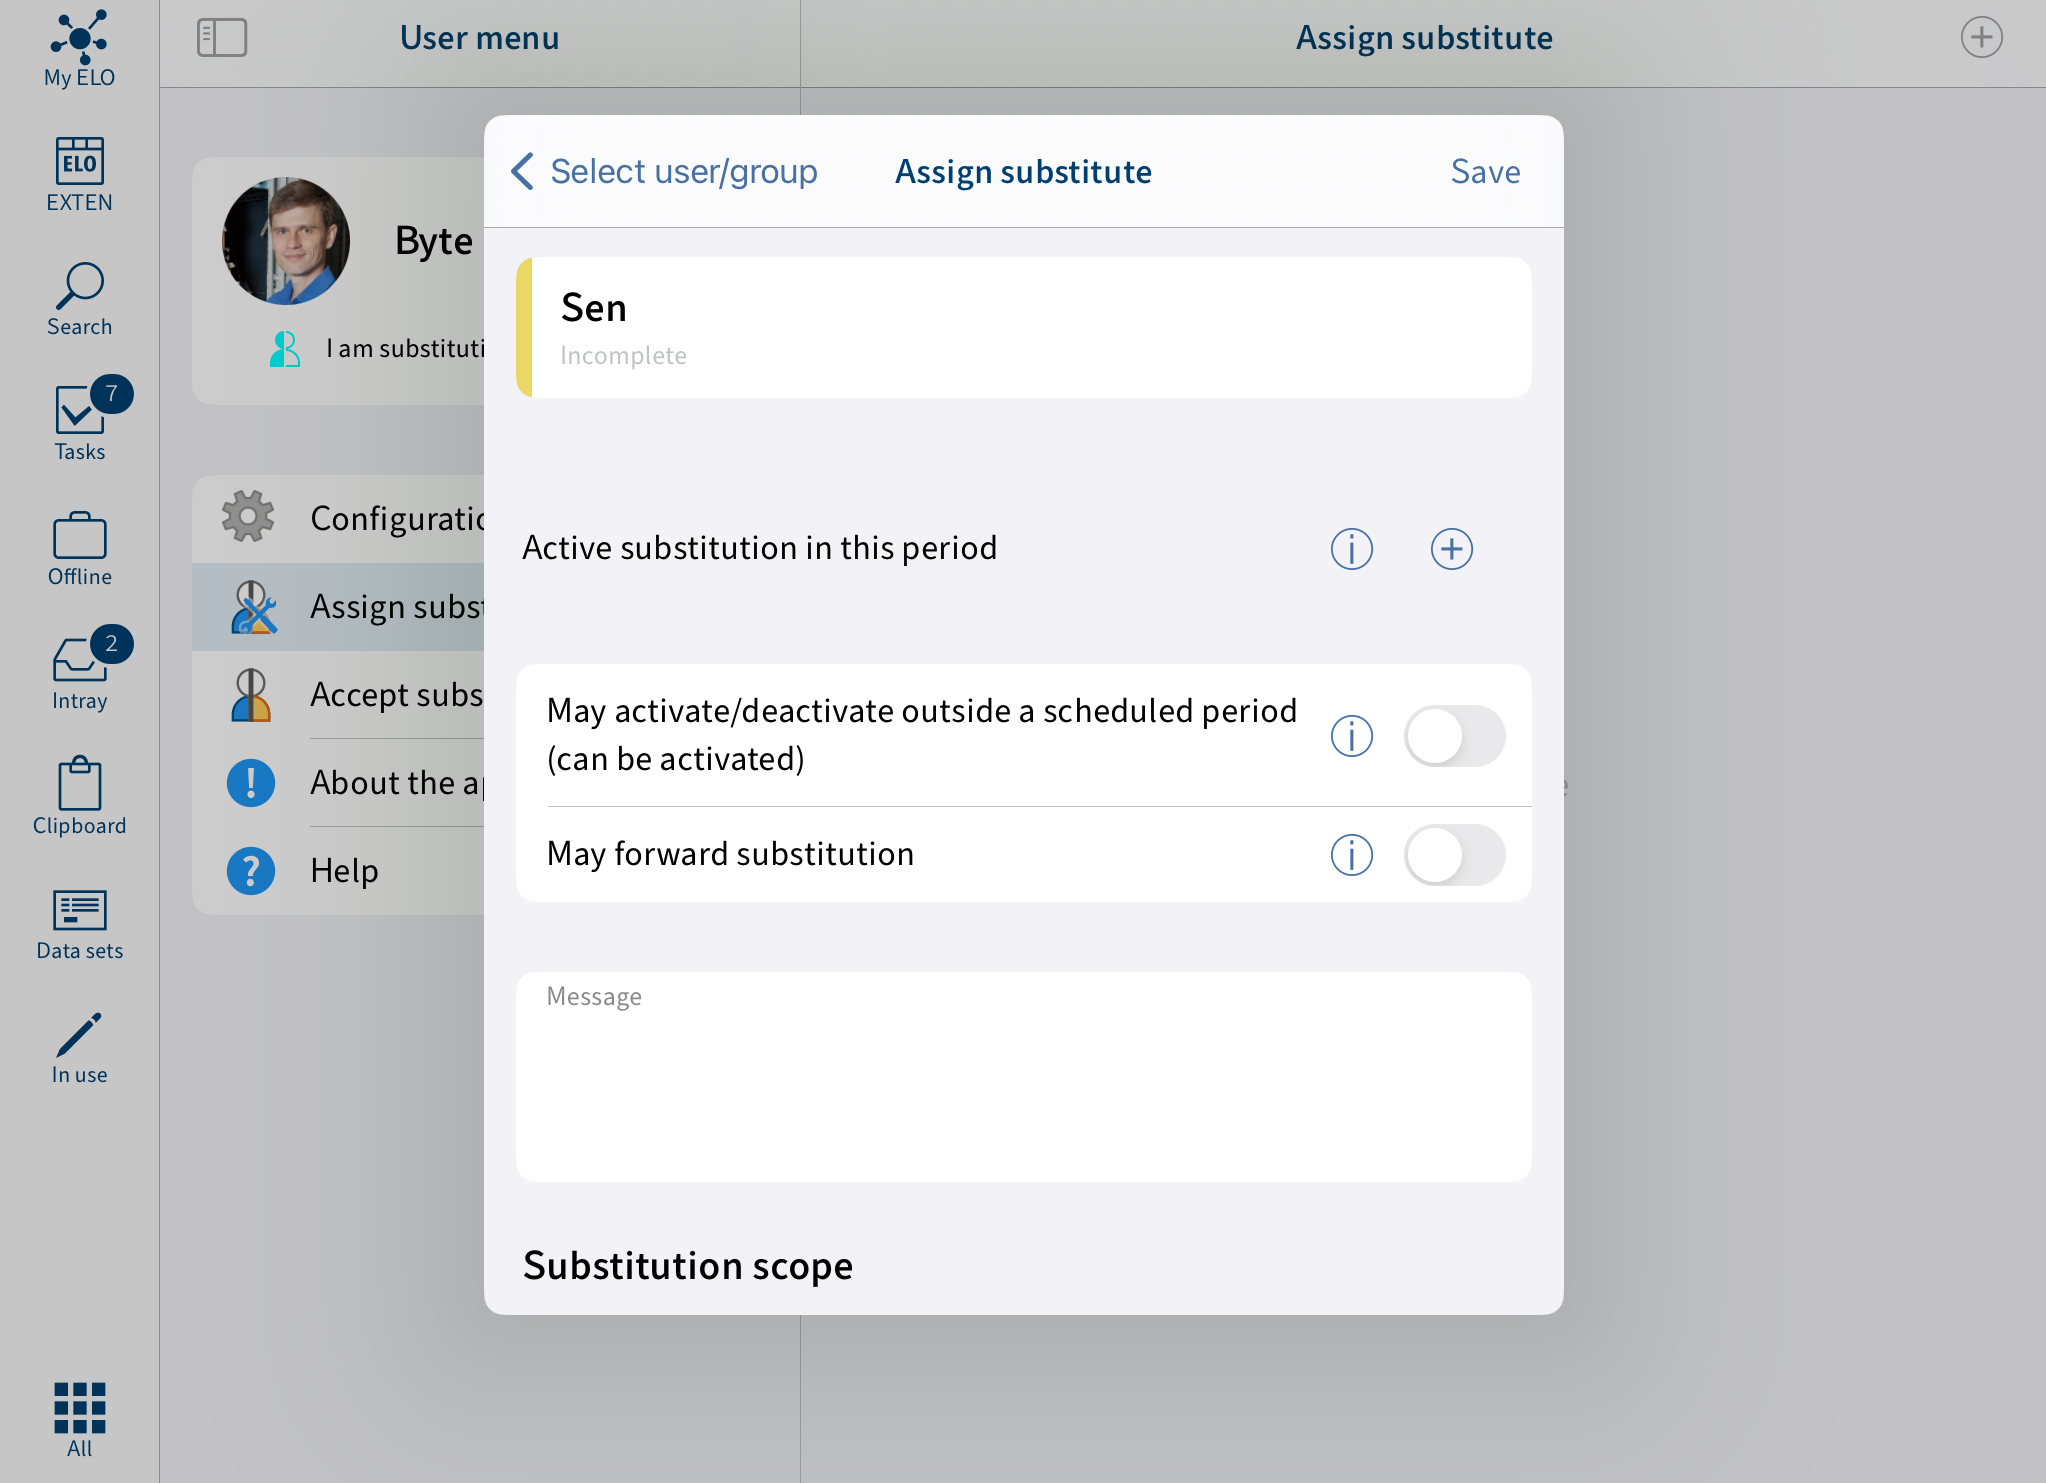
You have the following options for assigning a substitute:
- Period: You can set a period during which another user automatically acts as your substitute.
- Substitution rights: This gives another user the right to substitute for you. In this case, they have to activate and deactivate substitution themselves.
Active substitution in this period: Use the plus icon to select a period for the substitution. You can add multiple periods. The substitution will be activated automatically on the start date specified.
You can define the following periods:
- a definite period with a start and end
- an unlimited period with a start
- multiple definite and/or unlimited periods
If you have defined a substitution with an unlimited period, you can end the substitution by deleting the period.
Information
Periods are not deleted automatically; you have to delete them by clicking the Delete button.
May activate/deactivate outside a scheduled period (can be activated): If you enable this option, the substitute is allowed to activate or deactivate the substitution themselves. This gives them permission to substitute for you in general without you defining a substitution period.
May forward substitution: Substitutions are not forwarded automatically.
This means: Cole has appointed Anderson as his substitute. In turn, Anderson appoints a different user as her substitute. This user does not receive the tasks, rights, etc. that Anderson is given as substitute for Cole.
Enabling the option May forward substitution allows your substitute to pass on the substitution to another user.
Even in this case, the substitution is not forwarded automatically – the user has to forward it actively.
Please note
Use this option with caution to prevent rights from being forwarded unintentionally within the company.
Substitution scope: You can individually configure how many rights you want to give your substitutes.
Substitute inherits everything: Your substitute can see everything that you see.
Restrict substitution: You decide what your substitute is allowed to see.
You must enable at least one of the following three options:
Personal tasks and workflows: Your substitute can access tasks and workflows that you have been assigned personally, not those given to you as a member of a group. The substitute requires the Extend workflow rights user right in order to be able to view the documents associated with a task. This user right can only be granted by an administrator.
Intray access: Your substitute has access to your Intray. This option is only available in the ELO Java Client.
Inherit group membership: Use the plus icon to select which of your groups the substitution applies to. The substitute is assigned the user rights, permissions to entries, annotations, feed entries, and group tasks associated with the group. This allows you to create multiple substitutes for the same period and allocate permissions for different groups. Only the groups that allow substitution are available for selection.
Tap Save.
Result
You have set up a substitution. If the substitution period has already begun, the substitution is already active. Otherwise, the substitution will become active when the defined start date is reached or the authorized user activates the substitution.
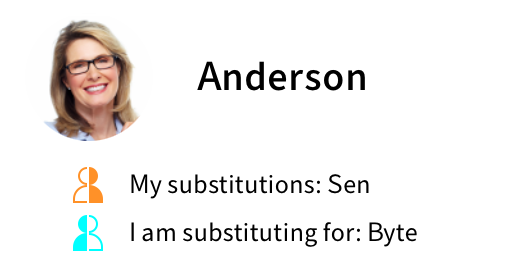
You can tell who you are substituting or who is substituting for you from the person icon.
- Orange person: A substitute is currently set for you.
- Blue person: You are currently substituting for at least one person.
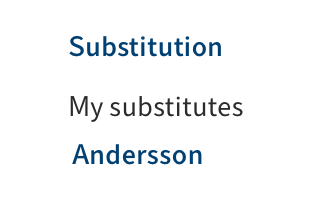
You will see on your My ELO start screen that you are being substituted for.
Outlook
A substitution ends
- at the end of the defined period, or
- if a user substituting for you ends the substitution.
You can learn how to accept a substitution in the section Accept substitution.
# Accept substitution
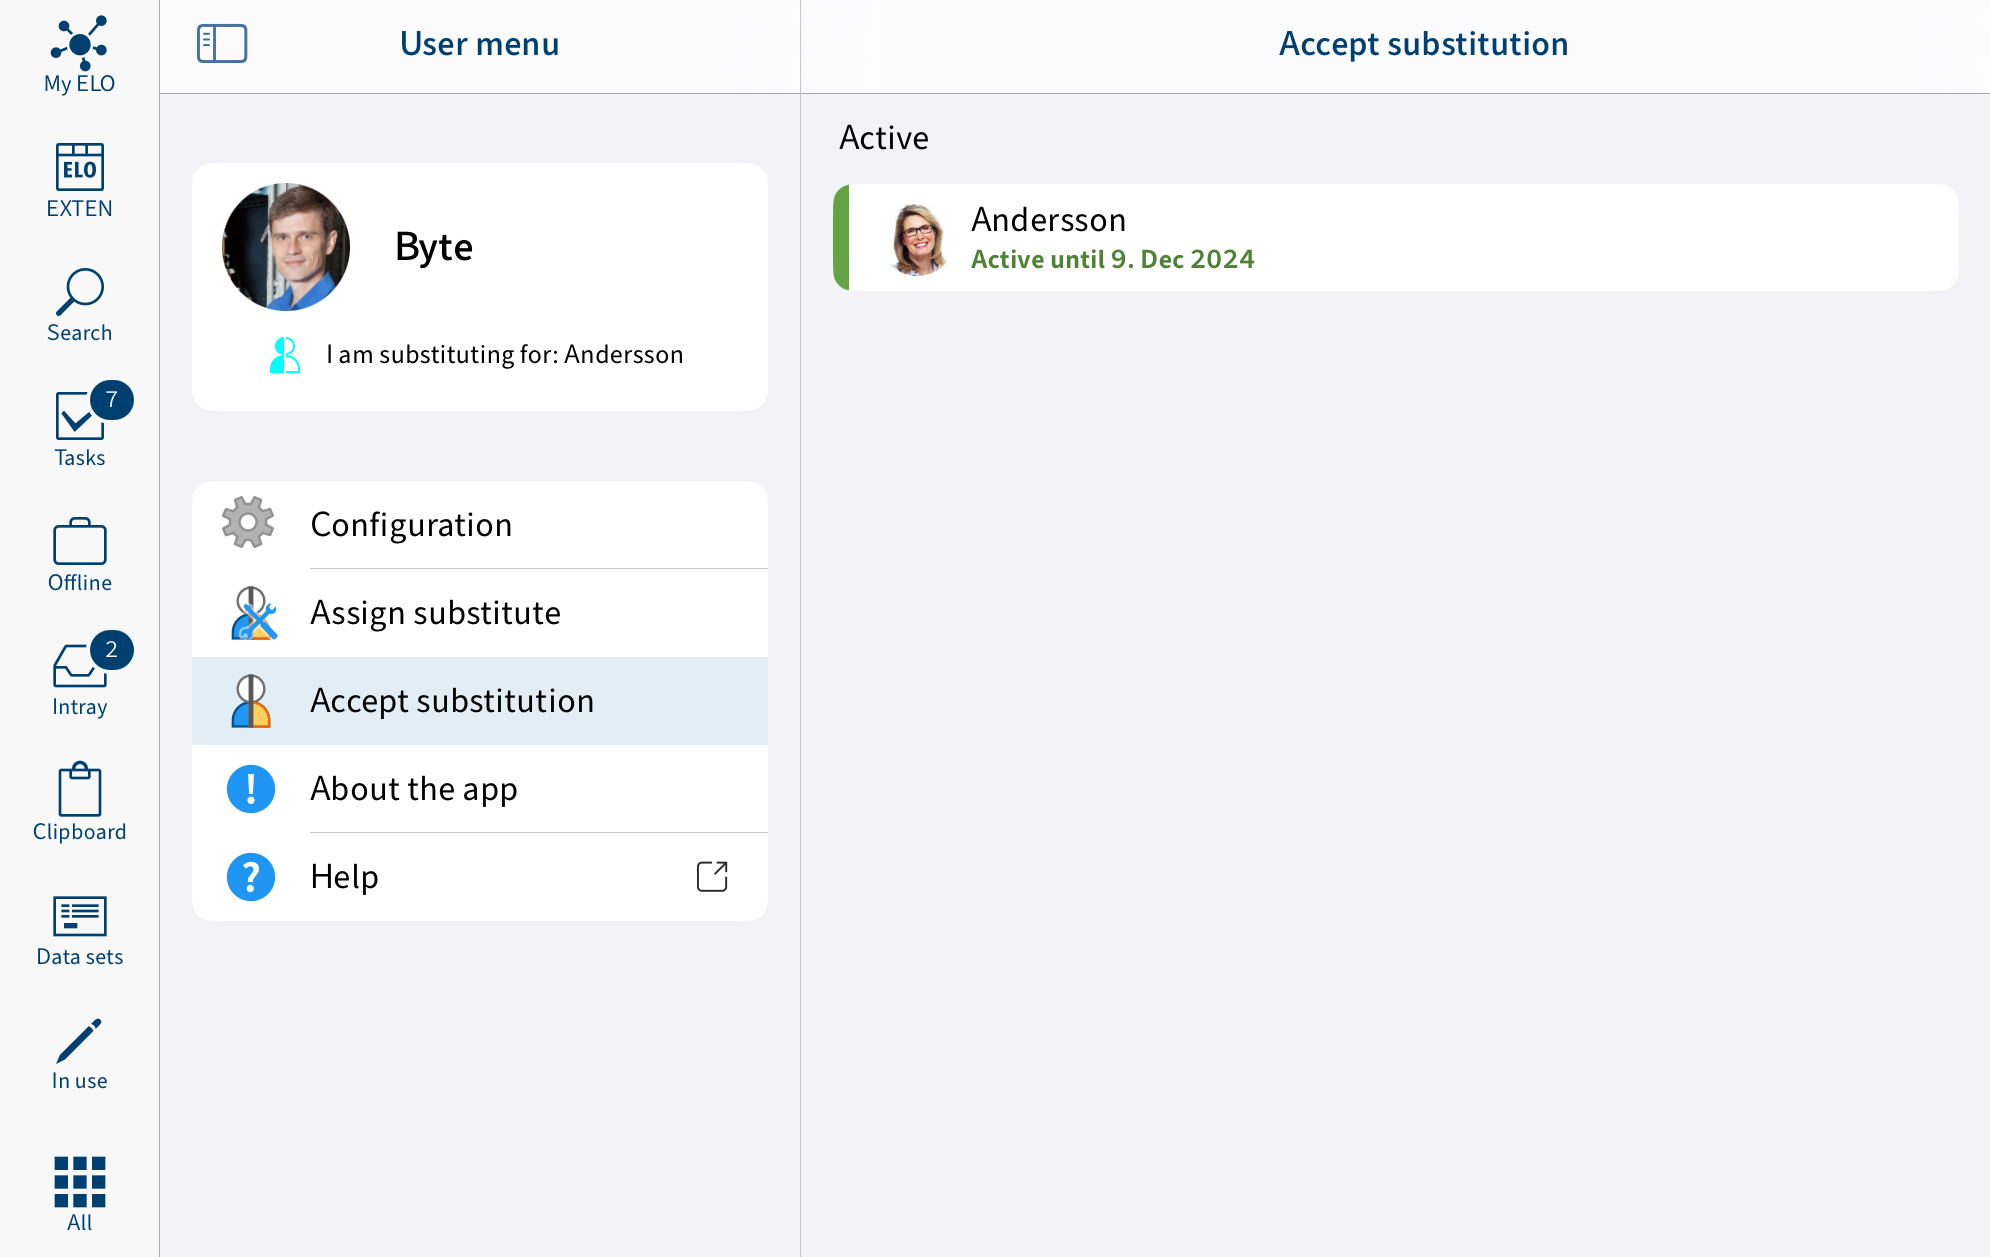
In the user menu, tap Accept substitution. In the dialog box, you can see who you are currently substituting for or may substitute for. The following options are available for accepting substitution:
- Period: Another user has defined a period during which you automatically accept their substitution.
- Substitution rights: Another user has given you the right to substitute for them. In this case, you have to activate the substitution yourself.
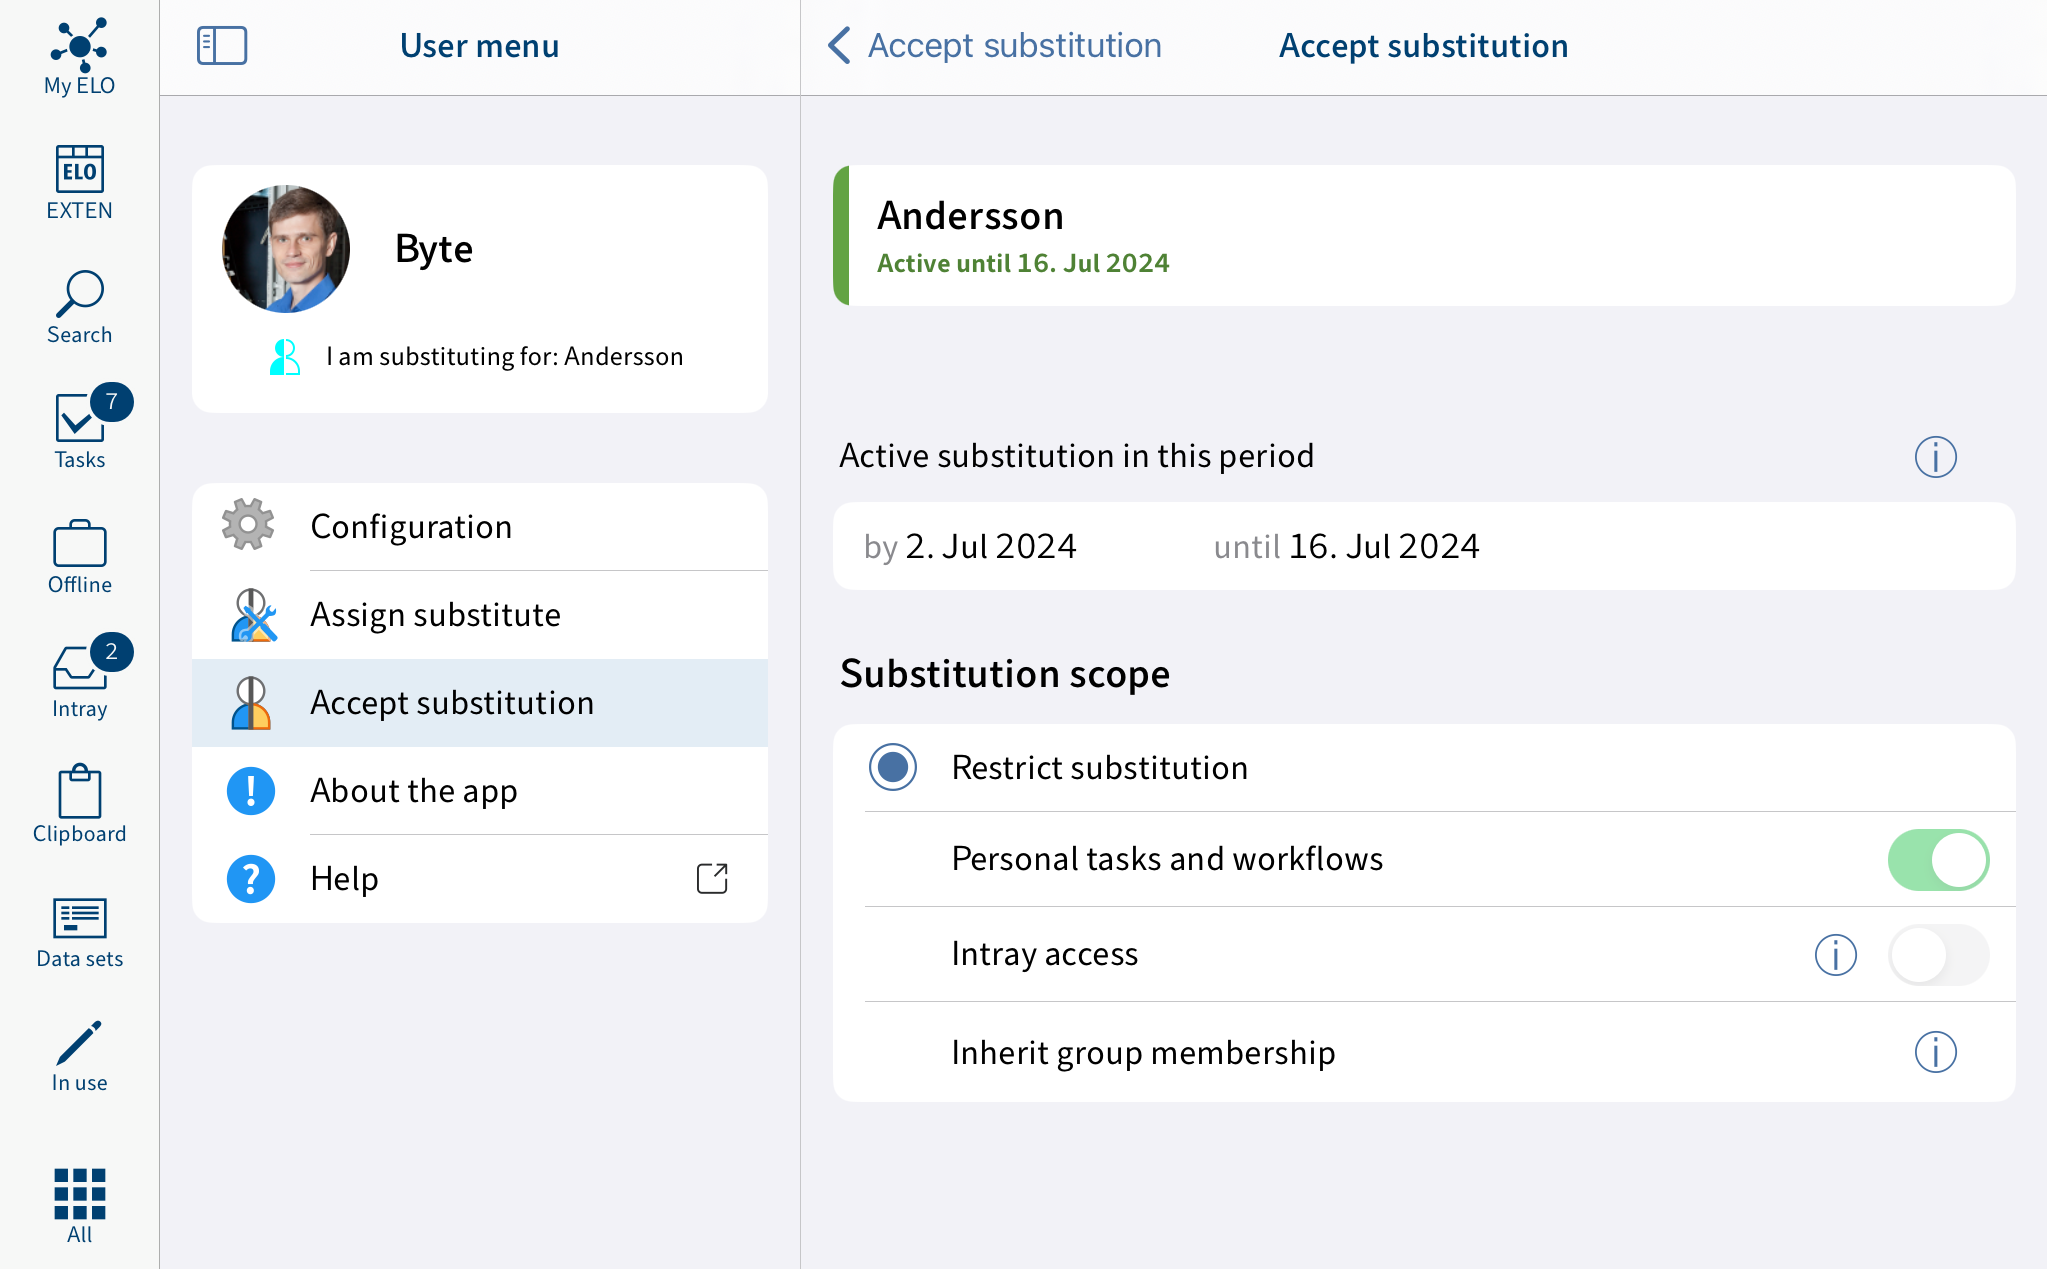
Active
On the right-hand side, you will see an overview of the people you have permission to substitute for.
You will recognize active substitutions by a green bar to the left of the profile picture.
If you click a user, their exact substitute permissions are shown on the right-hand pane. This area is for information purposes only and cannot be edited.
Edit substitutions
You have the following options:
- Activate/deactivate: These buttons allow you to activate substitutions that are currently inactive or deactivate active substitutions you want to end. These buttons are only available if the user you want to substitute for has given you the right to activate and deactivate the substitution yourself.
- Forward: With this button, you can forward a substitution if the user you are substituting for has given you the corresponding right. You can either hand off the substitution entirely or appoint an additional substitute.
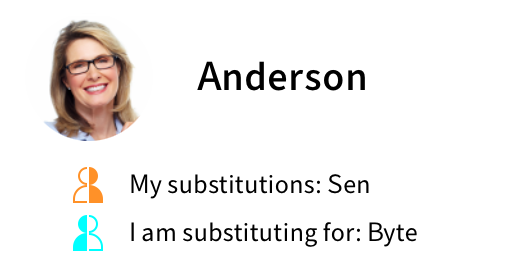
You can tell who you are substituting or who is substituting for you from the person icon.
- Orange person: A substitute is currently set for you.
- Blue person: You are currently substituting for at least one person.
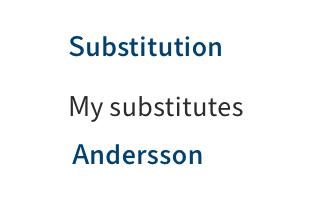
You will see on your My ELO start screen that you are being substituted for.