# Add and search for annotations and margin notes
# Add annotations
Annotations include sticky notes, text notes, and stamps. Annotations are affixed to a single page of a document. You can only place annotations, text notes, and sticky notes on documents that can be displayed in the document viewer (PDF, TIFF, JPEG, ...).
The following example shows how to do this using a sticky note. The method is similar for other types of annotations.
Information
To use stamps, you must have been assigned at least one stamp by the administrator.
Information
You can use the Create margin note function if you want to add a note on an entire document or on a document in another format.
Requirements
- You need a document that can be displayed with the document viewer, e.g. a PDF or image file.
Method
In the Repository work area, select the document that you want to place an annotation on.
Information
You can assign permissions so that not all users can see or edit annotations. You will find the permissions settings for sticky notes and text notes under Ribbon > User menu [your name] > Configuration > Annotations.
You define the permission settings for stamps in the Stamps overview dialog box. You can also create and edit stamps here.

The document viewer toolbar is displayed above the document in the document viewer.
Apply a sticky note
Select the sticky note icon on the document viewer toolbar to enable the Sticky note function.
Information
To use an annotation function multiple times in succession, hold down the ALT GR key as you click the function. To return to normal mode, choose the Select function (cursor icon).
Optional: To change the color, click the triangle next to the sticky note icon and select a different color from the drop-down menu.
The cursor turns into a sticky note in the color you selected.
Click the part of the document you want to place the sticky note on.
The sticky note is created. The dotted border indicates that the sticky note can be edited. The editor and the current date are displayed below the sticky note.

Enter text.
Click the area outside of the sticky note.
Result
The text you entered is saved. The sticky note is displayed on the document.
Information
You can use the context menu to open e-mail addresses, ELO links, and web pages in a sticky note (Available in: Right-click > Open links).
Outlook
- Double-click the sticky note to edit it. To delete a sticky note, select the sticky note with the selection tool and then select Delete in the document viewer toolbar.
- You can search for annotations and margin notes using the Search metadata function. You will find more information in the ELO Java Client (English) (opens new window) documentation.
# Add margin note
Available in: Ribbon > Document > Margin note
You can create margin notes for a document or a folder. Margin notes are displayed on the split bar.

There are three types of margin notes:
- General margin note (yellow): Can be seen and edited by all users.
- Personal margin note (green): Only the creator can read and edit this type of margin note.
- Permanent margin note (red): Can be read by everyone, but cannot be edited or deleted.
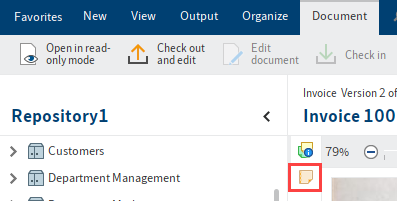
You can use the margin note icon to open the margin note and read it or edit it again.
You can use the context menu to open e-mail addresses, ELO links, and web pages in a margin note (Right-click > Open links).
A margin note applies to the entire entry and not just the current version.