# Create ruleset via ELO Administration Console
In the ELO Administration Console, you create new rulesets in the ELO Automation Services area.
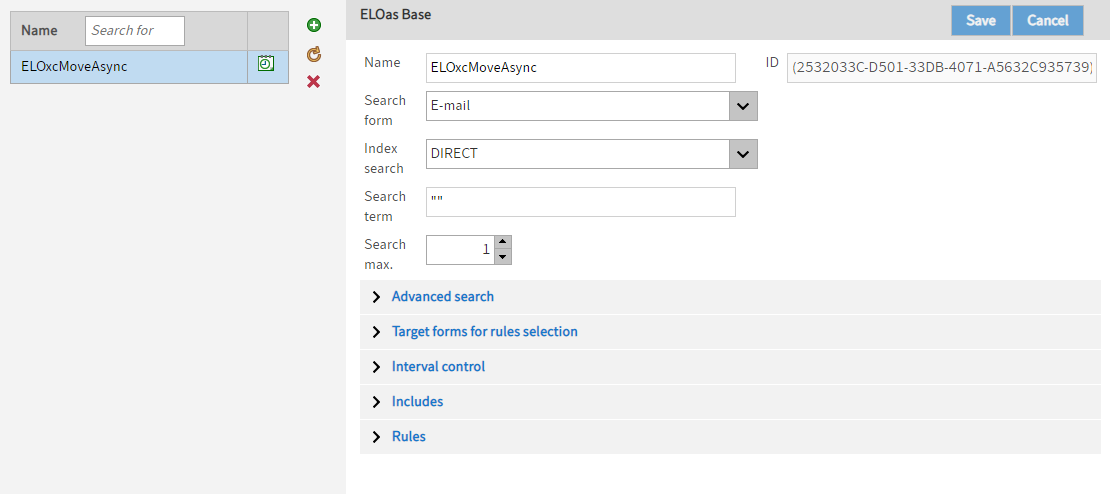
Fig.: 'ELO Automation Services' menu item
Add (green plus icon): Click the Add button to create a new ruleset.
Information
Once you have saved it, the new ruleset is stored in the Rules folder of ELO. You can configure the rulesets in the Rules area.
Reload data from server (yellow circle arrow icon): Click the Reload data from server button to reload the area.
Delete (red X icon): Click the Delete button to delete the selected ruleset.
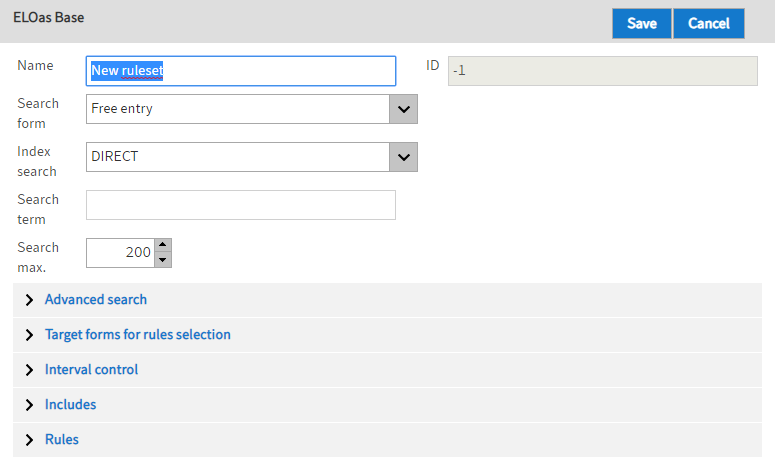
Fig.: New ruleset
Name: The name of the ruleset that you entered when you created the rule is shown here. The name can be modified later.
Please note
Not all characters are allowed. Refer to the following list.
- 
- "
- /
- \
- :
- ;
- ,
Search form: Select the search form that will be used to find documents to be processed.
Index search: Select a group field to search across different fields.
Search term: Enter the character string you want to search for here. All documents in ELO that correspond to the defined rules will be selected in accordance with the rules and criteria defined in the wizard. The character string must be entered in quotation marks.
Search max: Enter the maximum number of search results here.
# Advanced search
From filing date ... to: You can narrow down the search here by selecting a specific filing date or a filing period.
From date ... to: You can narrow down the search here by selecting a specific date or period.
# Target forms for rules selection
Add target form: This is where you can select the metadata form for the target folder that moved documents are filed to.
# Interval control
In the Interval control area, you define how often you want to run ELO Automation Services.
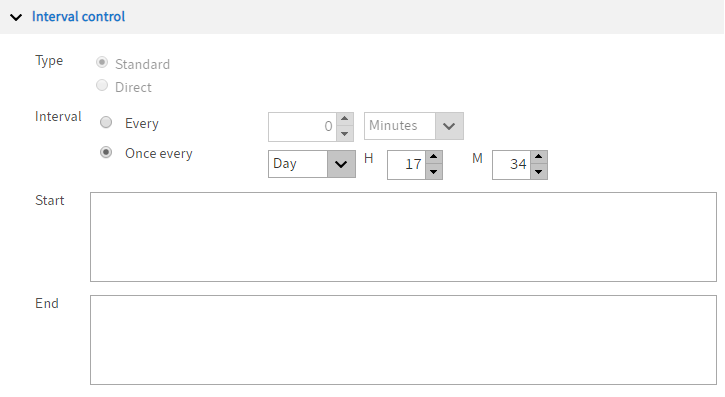
Fig.: 'Interval control' area
Start: This input box contains script code that will be executed before running the ruleset.
End: This box contains script code that will be executed after running the ruleset.
# Includes
Add Include library: In the Add Include library field, you can add any script libraries that you need to the ELOas rule.
# Rules
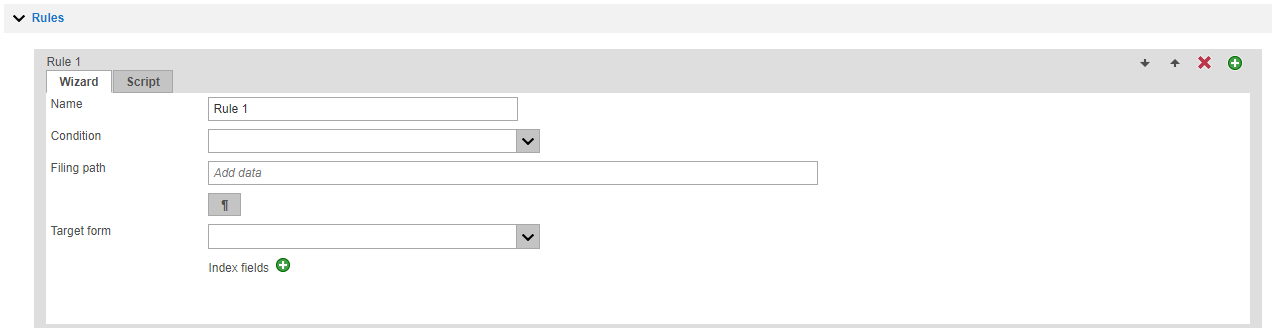
Fig.: 'Rules' area
This rule will be applied to all entries found in ELO. This is where you define settings such as where documents are moved.
Add (green plus icon): Add a new rule. The rules will be processed in sequence.
Name: Enter a name for the rule.
Condition: The query rule is defined here to check the status of a field, for example.
In this menu, you can select a script, e.g. to move files to the file system. Scripts are filed to the administration area of ELO Automation Services in ELO.
Please note
The configuration in your repository can differ from the illustrations shown here.
Filing path: Specify where you want to file the document to. Use the button at the end of the input field to enter separator characters for paths in ELO.
Target form: Select the metadata form for the document.
Fields: You can replace the content of fields in the metadata of the target documents here.
Information
If you switch to the Script tab, you make all the rule settings using a script. If you do so, you can no longer access the Rule tab.
# Error handling
You can define the basic settings for handling errors in the Global Error Rule area. This rule is executed when an error occurs in a general rule.
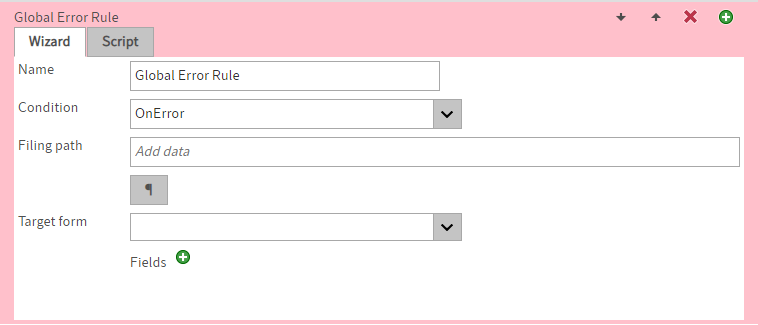
Fig.: Defining basic error handling
Name: The name of the error handling routine is entered here.
Condition: A condition for an error rule is defined here.
Filing path: Set the filing path of the error report in the repository here.
Target form: Select the metadata form of the document with the error log.
Fields: This option enables you to define individual fields that you can assign a specific character string on filing.
Please note
If a ruleset is invalid, it cannot be saved. The validity of a ruleset is verified when saving.