# Administration
# Mobile device management (MDM)
If you want to create a profile for another person as the administrator, you can use a mobile device management system.
To transfer user profiles to a mobile device, information, such as the server URL, has to be entered in the mobile device management system via a JSON editor. The JSON template for entering repository values is loaded right from the app. All you have to do is replace the variables with the relevant data.
Please note
This data is saved on the device unprotected. This means you should not enter any passwords or other sensitive data here.
Taking Microsoft Intune as an example:
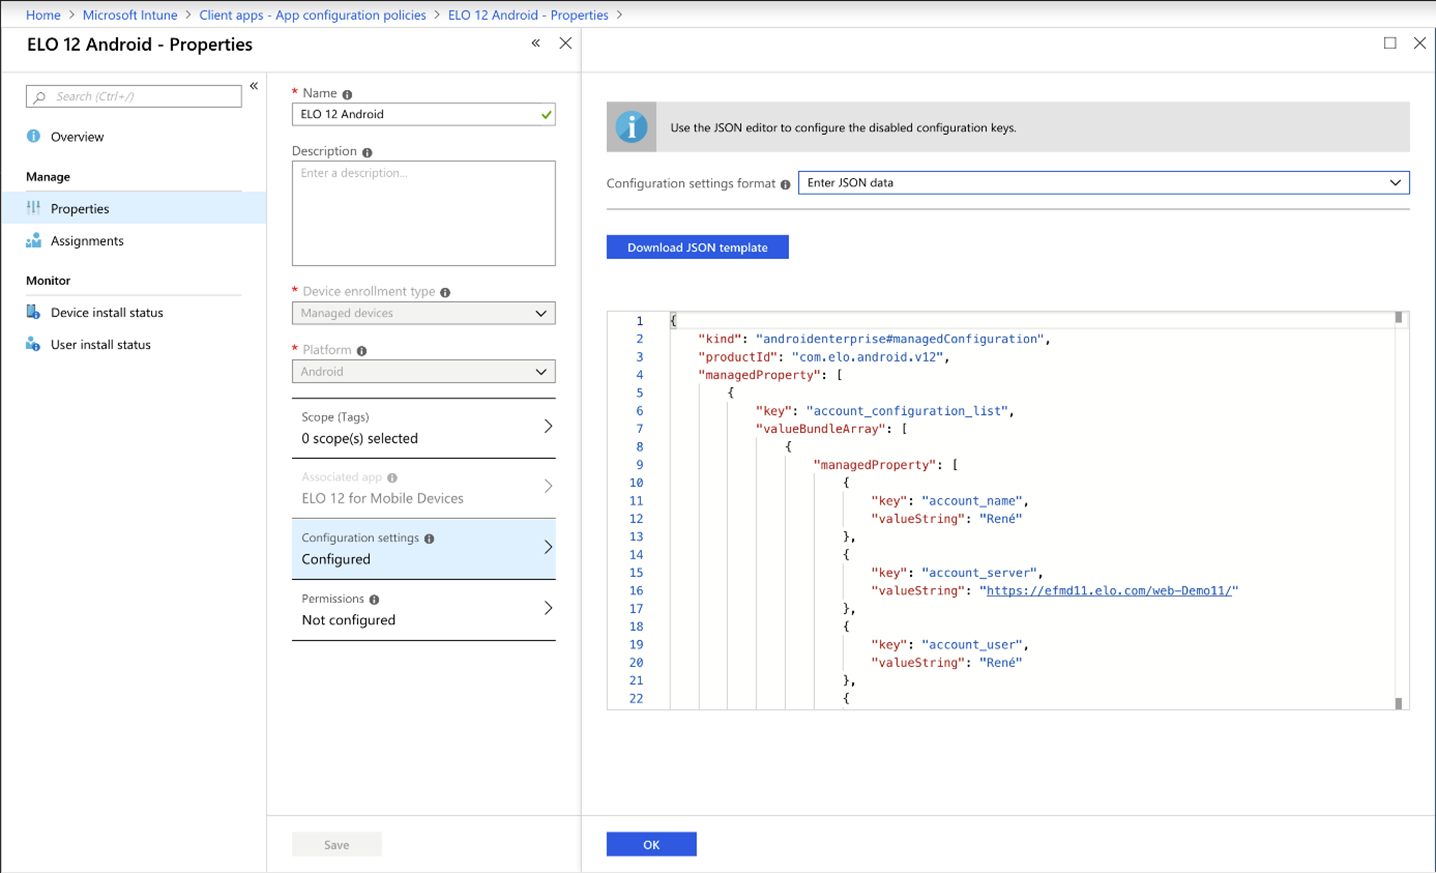
If the template is not loaded automatically, you can enter it manually in the editor.
Please note
You need the current ELOauth plug-in to use this template.
<?xml version="1.0" encoding="utf-8"?>
<restrictions xmlns:android="http://schemas.android.com/apk/res/android">
    <restriction
        android:key="account_configuration_list"
        android:title="@string/restriction_account_configuration_list"
        android:restrictionType="bundle_array">
        <restriction
            android:key="account_configuration"
            android:title="@string/restriction_account_configuration"
            android:restrictionType="bundle">
            <restriction
                android:key="account_name"
                android:title="@string/accountdetails_profile"
                android:restrictionType="string" />
            <restriction
                android:key="account_eloauth_url"
                android:title="@string/accountdetails_eloauth_url"
                android:restrictionType="string" />
            <restriction
                android:key="account_server"
                android:title="@string/accountdetails_server_url"
                android:restrictionType="string" />
            <restriction
                android:key="account_user"
                android:title="@string/accountdetails_username"
                android:restrictionType="string" />
            <restriction
                android:key="account_password"
                android:title="@string/accountdetails_userpwd"
                android:restrictionType="string" />
            <restriction
                android:key="account_config_id"
                android:title="@string/accountdetails_config_id"
                android:restrictionType="string" />
            <restriction
                android:key="account_delete"
                android:title="@string/accountdetails_account_delete"
                android:description="@string/accountdetails_account_delete_desc"
                android:restrictionType="bool"
                android:defaultValue="false" />
            <restriction
                android:key="account_keep_user_password"
                android:title="@string/accountdetails_keep_user_password"
                android:description="@string/accountdetails_keep_user_password_desc"
                android:restrictionType="bool"
                android:defaultValue="false" />
            <restriction
                android:key="account_client_id"
                android:title="@string/accountdetails_client_id_azure_portal"
                android:restrictionType="string" />
            <restriction
                android:key="account_tenant"
                android:title="@string/accountdetails_tenant"
                android:restrictionType="string" />
        </restriction>
    </restriction>
</restrictions>
To roll out user profiles with manual user data (i.e. user name and password), a user name must be provided. This can be a placeholder. We recommend using a clear and unique profile name.
account_server, account_name, and account_user are mandatory for a manual account.
Important
Duplicate profile names created via MDM are not supported.
An account created in the app with the profile name EXTEN, for example, will be overwritten if an account with the same profile name is rolled out via MDM. Therefore, accounts should not be created independently in the app.
# Azure AD application proxy configuration (Azure)
Please note
Use the current version of the ELOauth plug-in.
The ELO app automatically detects whether you are using ELOauth or ELO Modern Authentication.
The following steps describe the configuration process using ELO Modern Authentication. Any differences for ELOauth are noted.
Method
Open the ELO Administration Console.
Navigate to Login settings > Add OpenID provider.
Select Microsoft.
In the Audience field, enter the following Microsoft Graph API:
00000003-0000-0000-c000-000000000000For ELOauth, follow these steps:
Open the file de.elo.ix.plugin.auth.json.
The content should have the following structure:
{
"azureadproxy":
    {
    "mapping":"mail",
    "api":"azure",
    "appKey": "Application ID from Azure",
    "azureTenant": "Tenant ID of the Entra ID",
    "appSecret": "...",
    "fixedCallbackUrl": "https://elo.hostname.net"
    }
}
Install the app proxy connector on your computer.
Open Microsoft Azure.
Navigate to App Proxy > Private Network connectors.

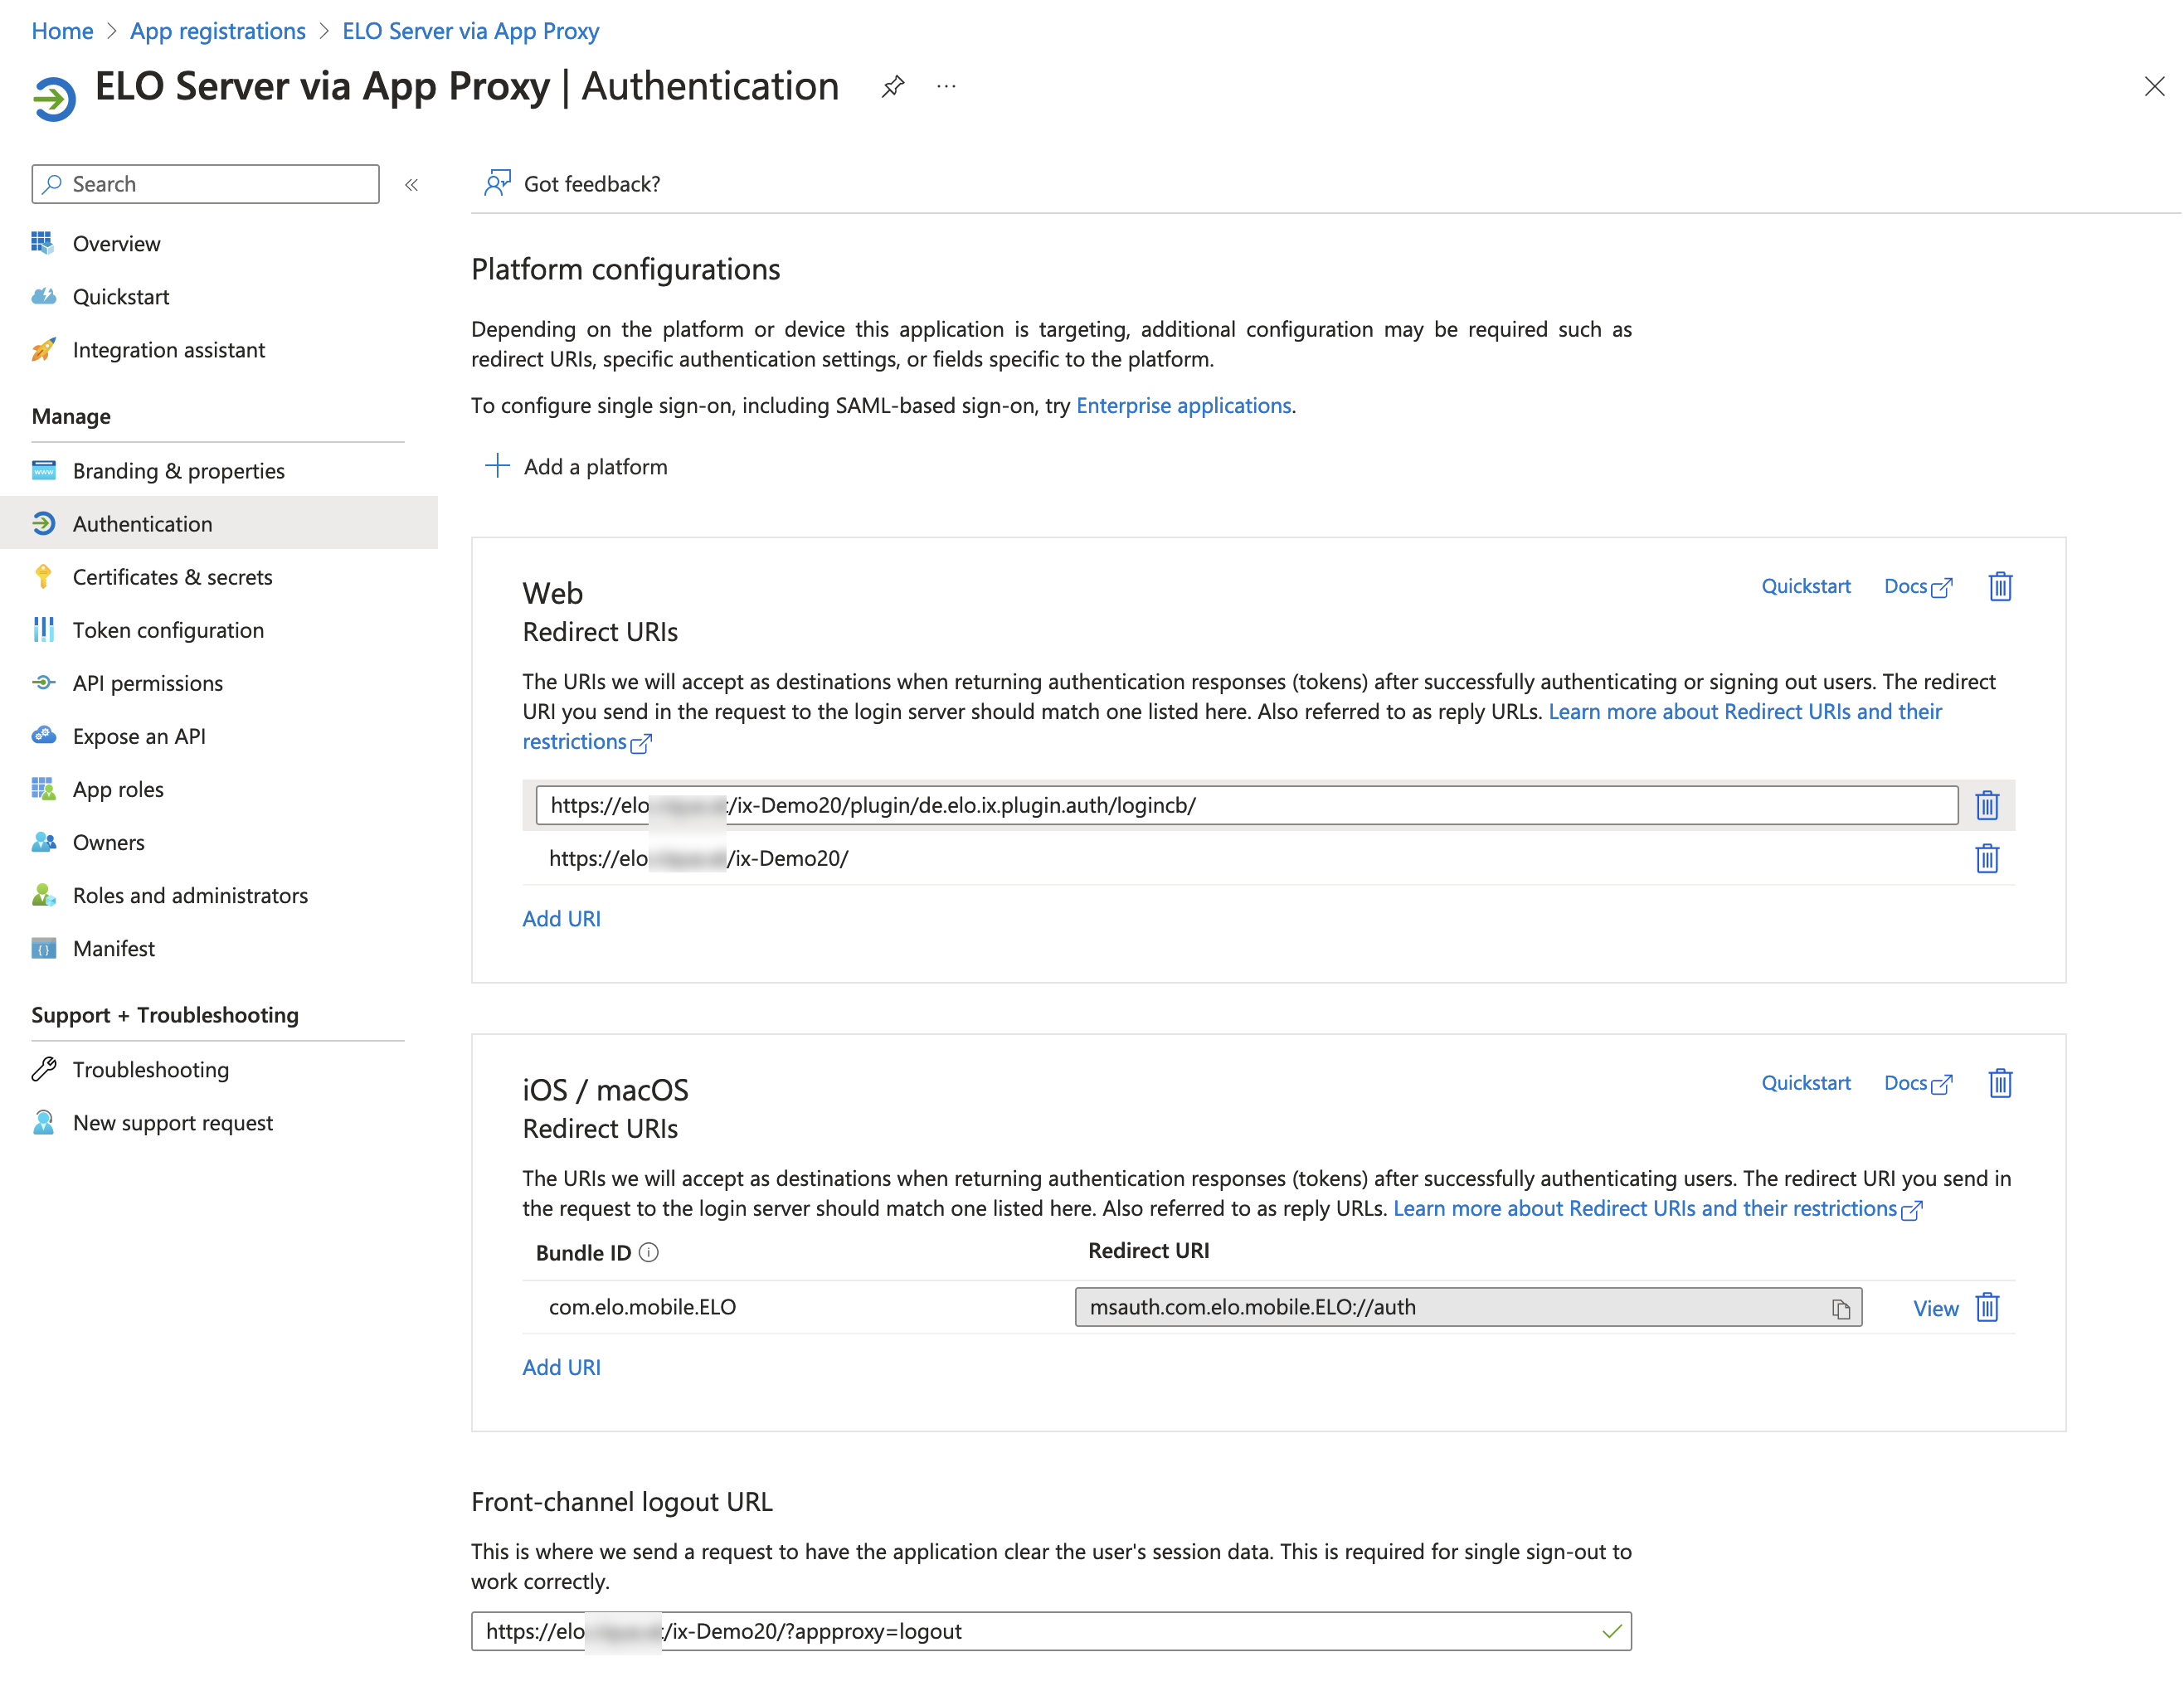
Navigate to Authentication > Platform configurations.
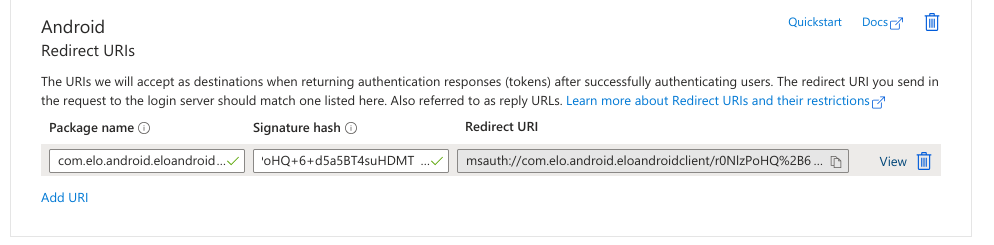
Under Android > Redirect URIs, enter the following values:
- Package name:
com.elo.android.eloandroidclient - Signature hash:
r0NlzPoHQ+6+d5a5BT4suHDMTCw=
These values are used to generate the redirect URI.
- Package name:
Under Web > Redirect URIs, enter the redirect URI.
For ELOauth, specify the redirect URI and the front-channel logout URL:
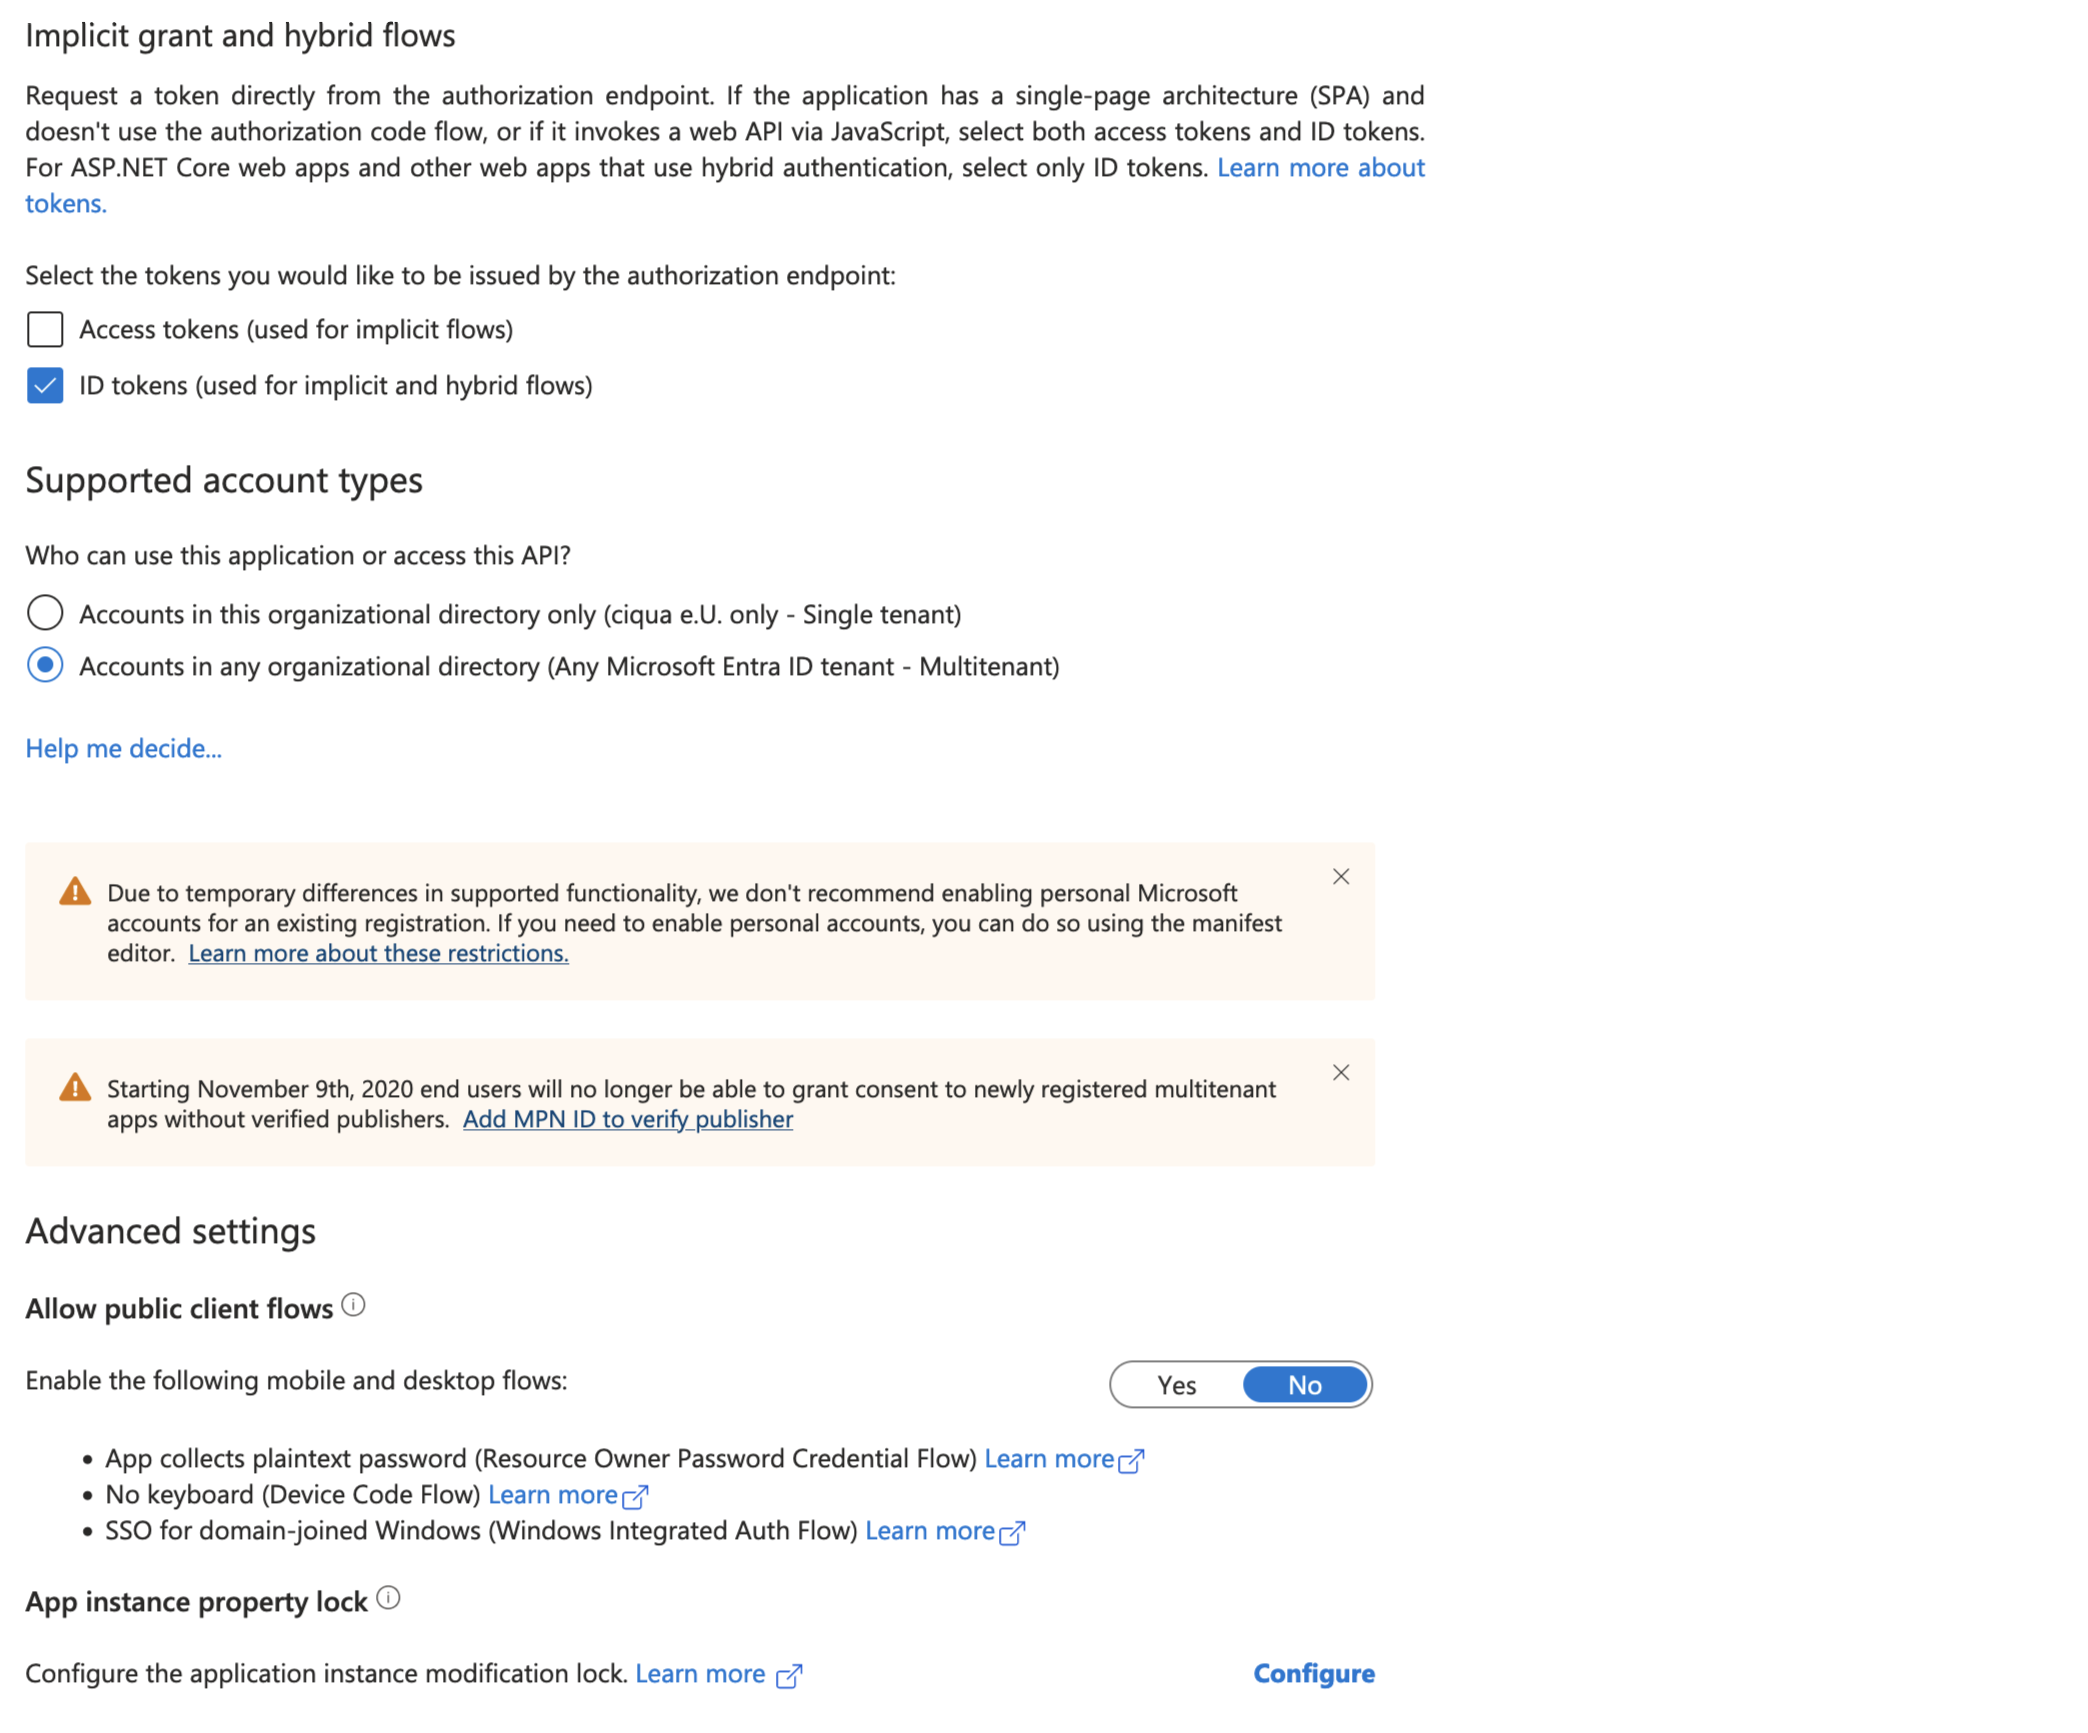
Check the Accounts in any organizational directory (Any Microsoft Entra ID tenant - Multitenant) box.
Information
Use a URL that you have configured a TLS certificate for in the Azure Portal.
Navigate to API Permissions.

Assign the permissions as shown in the screenshot.
Navigate to Expose an API.
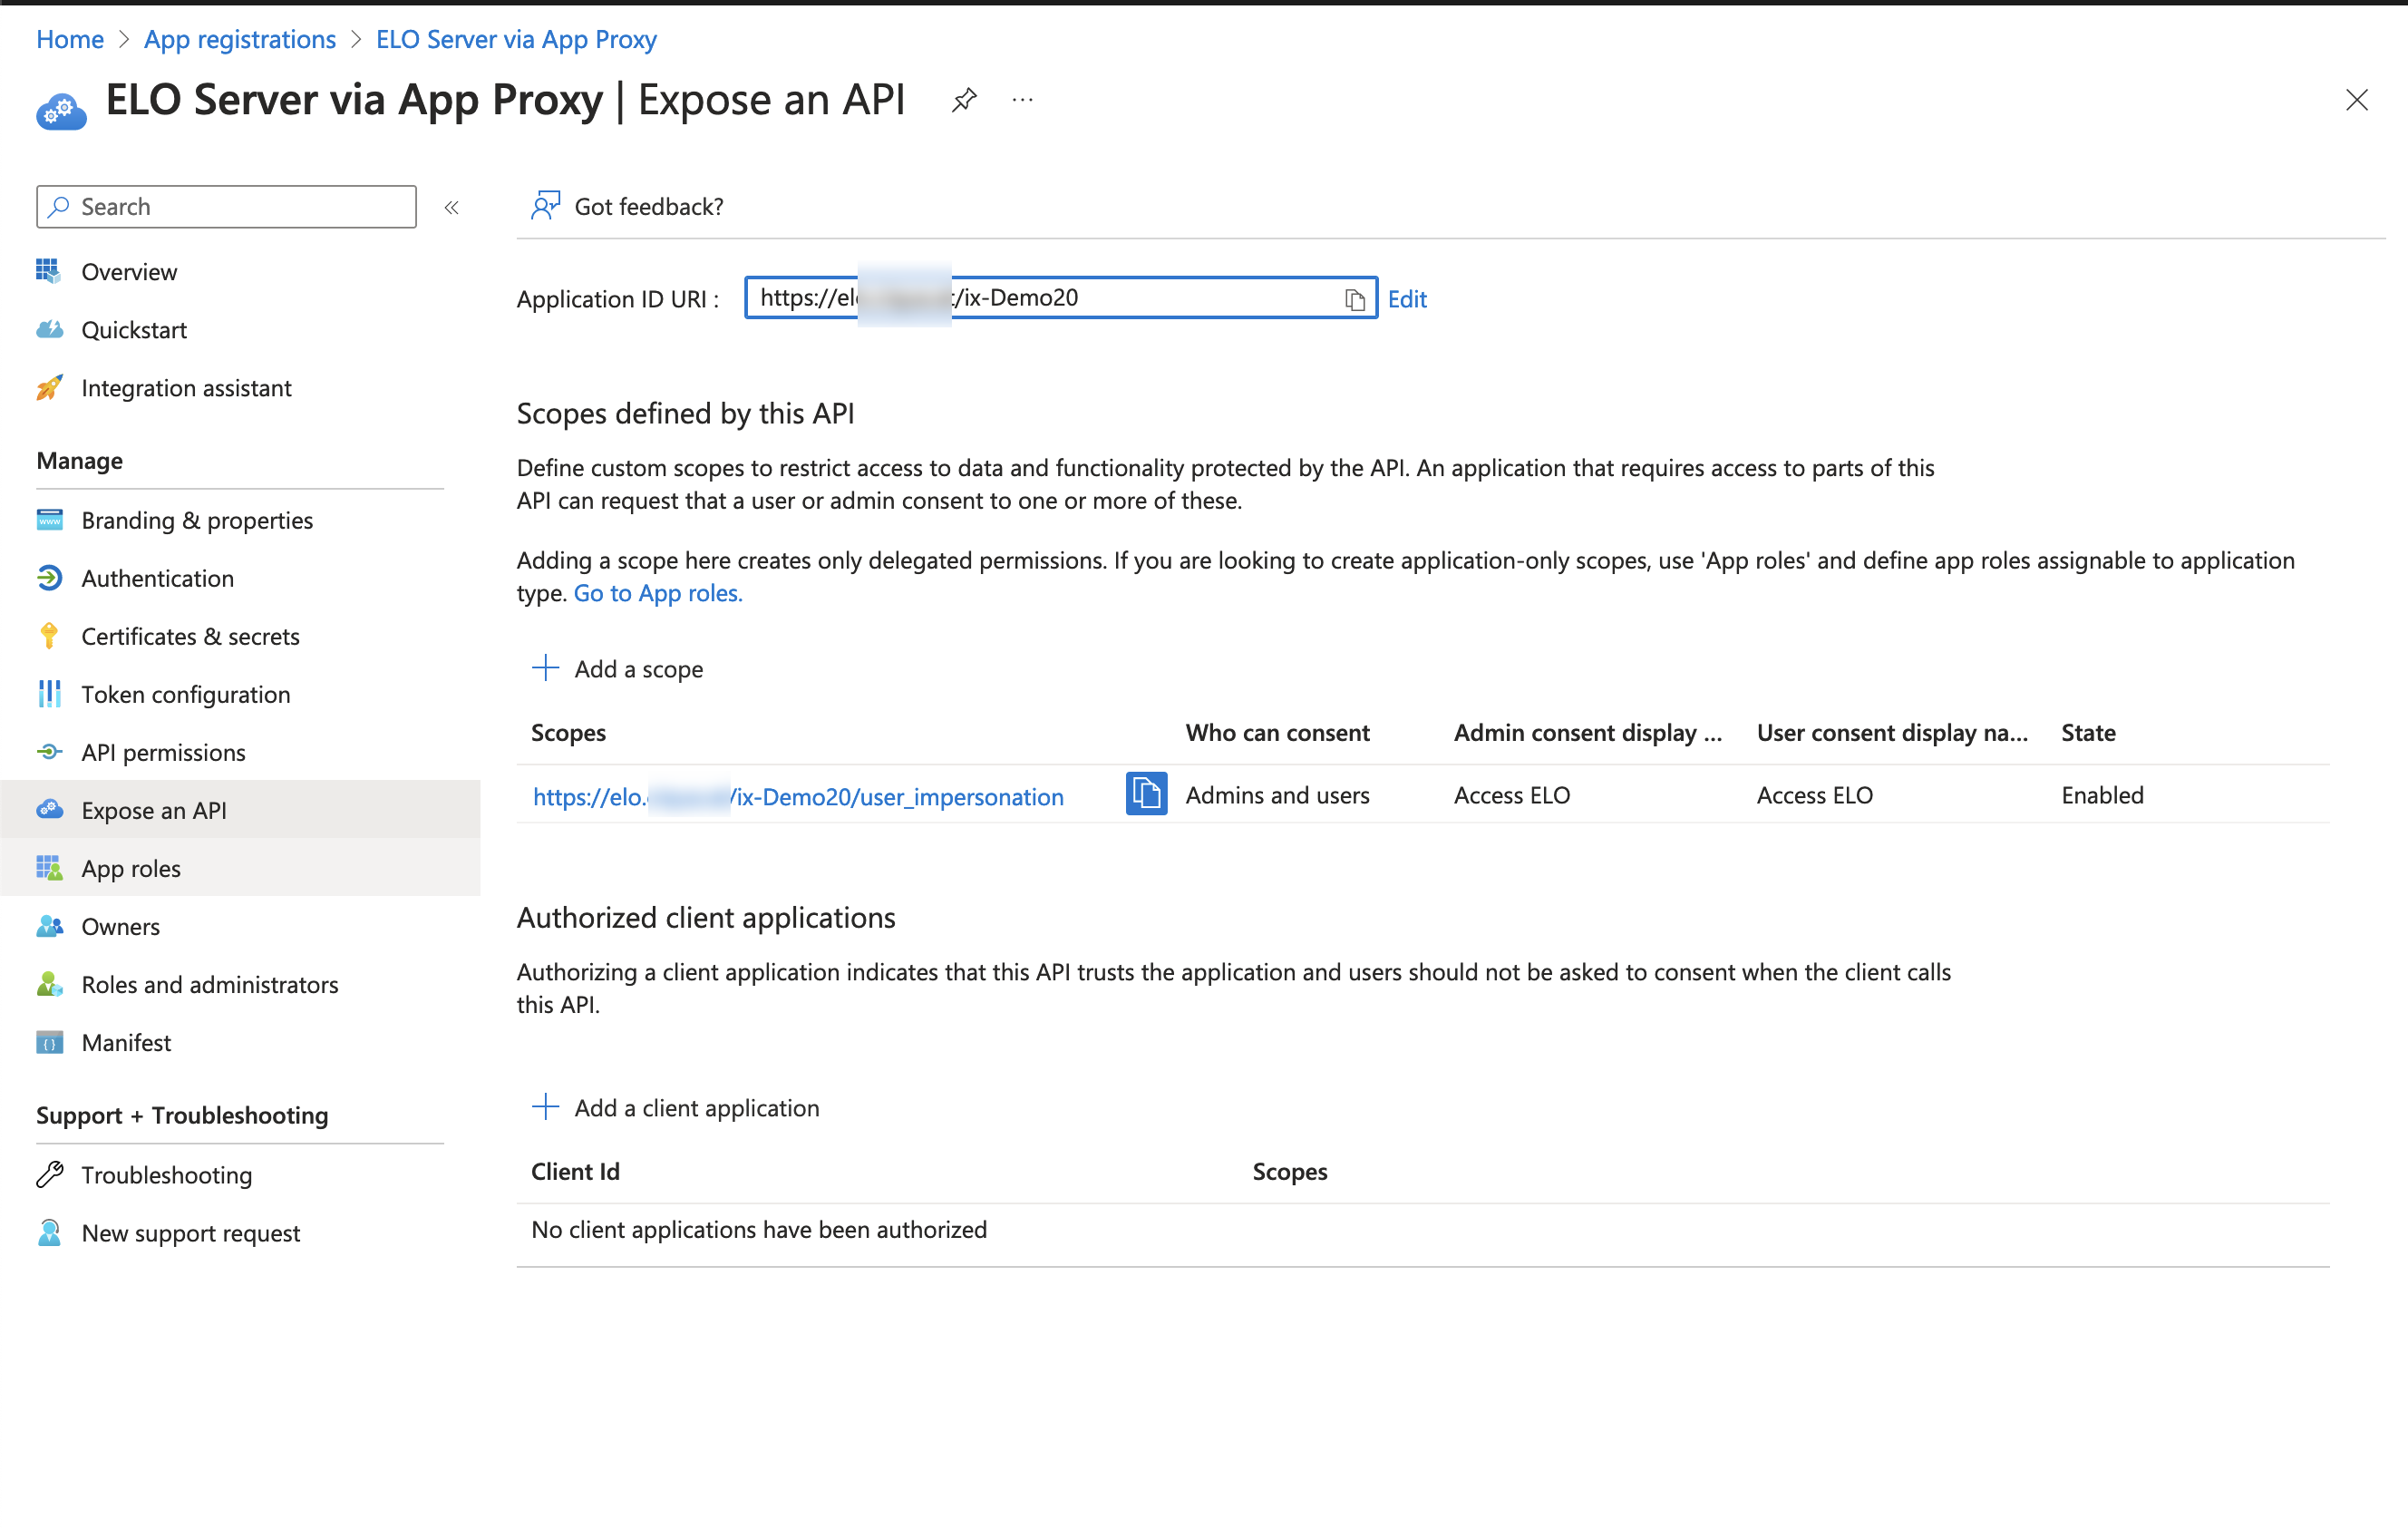
Enter the application ID URI.
Add a scope.
Information
The user impersonation scope is required for the app to pass through the application proxy.
# Azure AD application proxy configuration (MDM)
# ELO Modern Authentication
Requirement: ELO Modern Authentication version 25.00.013
The following values must be entered:
| Value | Description |
|---|---|
| account_client_id | Client ID of the app registration |
| account_server | Server URL. Example: https://example.com/repository |
| account_name | Account profile name |
The following values are optional:
| Value | Description |
|---|---|
| account_config_id | ELO Modern Authentication provider ID |
| account_tenant | Tenant ID if the account is in multiple organizations |
Information
If a problem occurs and you haven't configured a tenant, enter a tenant and try again.
# Example of eloprofile file
{
  "name": "LoginWithMicrosoftExample",
  "server": "https://example.com/repository",
  "tenant": "<TENANT ID> (Optional. If not required, do not enter!)",
  "client_id": "c[...]c"
}
# ELOauth
The following values must be entered:
| Value | Description |
|---|---|
| account_client_id | Client ID of the app registration |
| account_config_id | ELOauth config ID |
| account_server | Server URL. Example: https://example.com/repository |
| account_name | Account profile name |
The following values are optional:
| Value | Description |
|---|---|
| account_tenant | Tenant ID if the account is in multiple organizations |
Information
If a problem occurs and you haven't configured a tenant, enter a tenant and try again.
# Example of eloprofile file
{
  "name": "LoginWithMicrosoftExample",
  "server": "https://example.com/repository",
  "tenant": "<TENANT ID> (Optional. If not required, do not enter!)",
  "client_id": "c[...]c",
  "config_id": "<ELOauth config ID>"
}