# Data sets
Please note
You can only use data sets with gen. 1 metadata.
Data sets enable you to enter data in a form and save it to ELO. You can also save data in forms without an Internet connection. You can transfer the data sets as soon as your device is connected to ELO.
# Settings for transferring data sets
In the Configuration dialog box, you can decide when to automatically file data sets to ELO.
Method
Open the configuration via the Tile navigation > Context menu.
The Configuration dialog box opens.
Tap the profile you want to make the settings for.
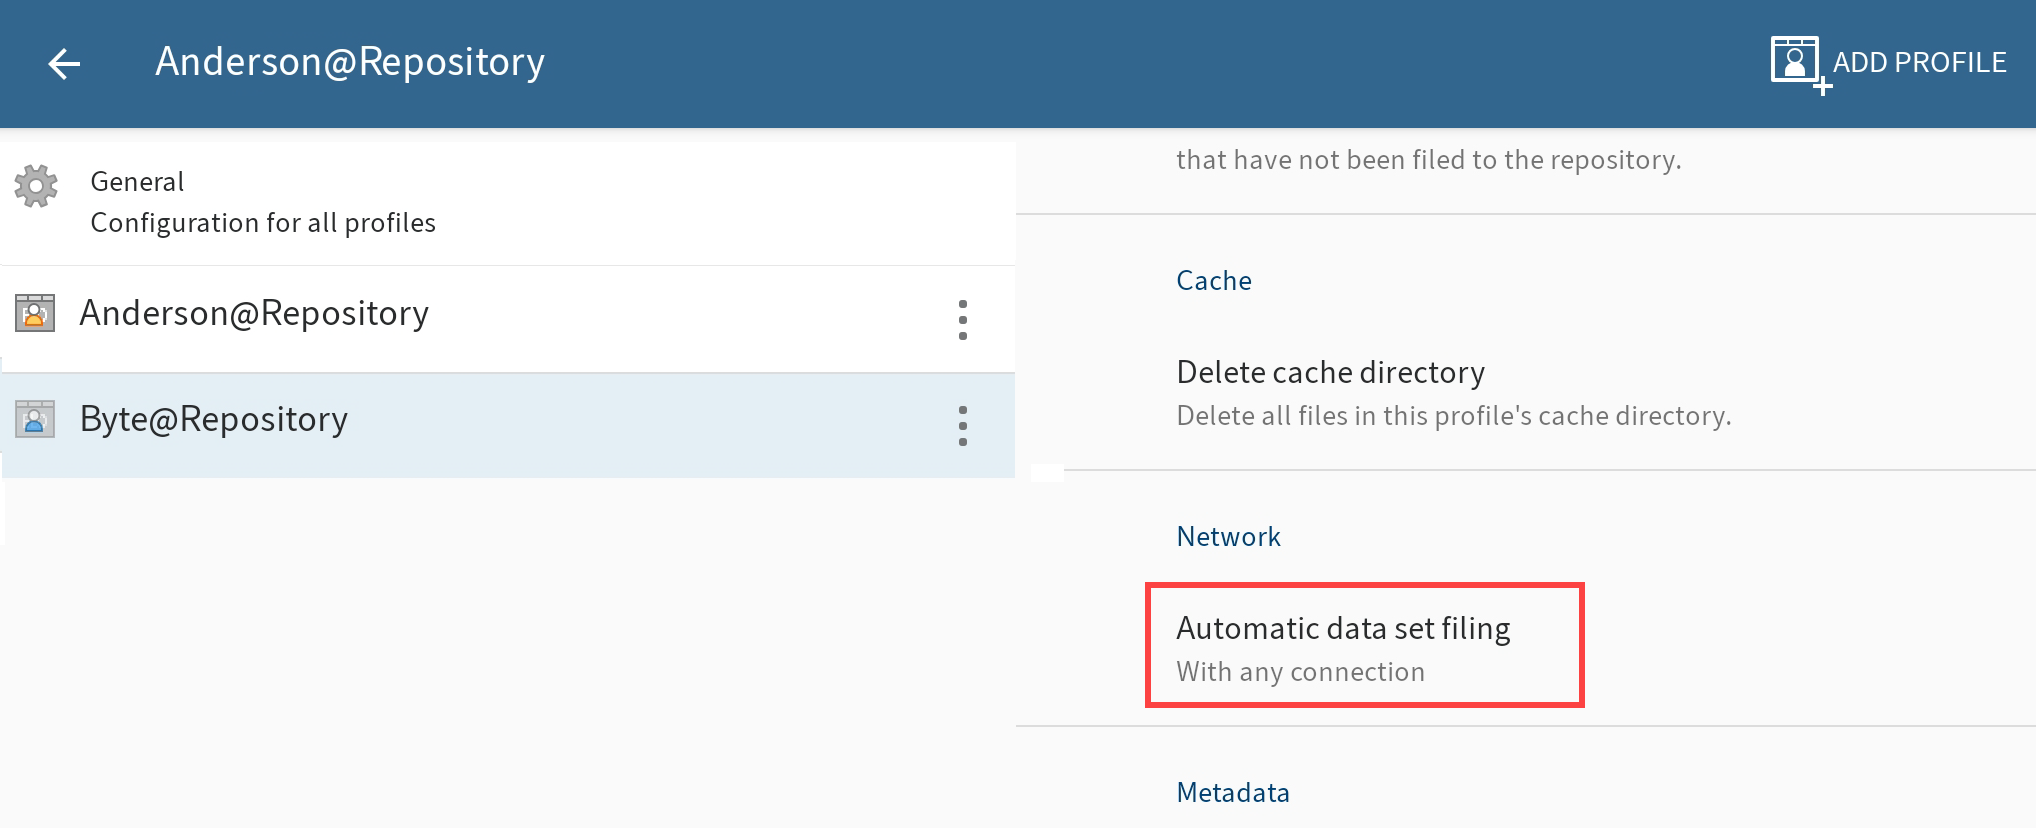
The configuration options for the selected profile appear. The selected profile is highlighted in blue.
In the Network area, tap Automatic data set filing.
The Automatic data set filing dialog box opens. Specify when data sets are automatically filed to ELO. You have the following options:
- With any connection: The data sets are transferred as long as the device is connected to the Internet.
- Only over Wi-Fi: The data sets are only transferred if a Wi-Fi connection is established.
- No automatic filing: The data sets are not filed automatically.
Tap the desired settings.
Result
The Automatic data set filing dialog box closes. Your changes have been applied.
# Requirements
To work with data sets, you need a metadata form with the corresponding settings and a specific form.
# Metadata form
When submitting data with the ELO app, all data is saved to a metadata form. Create a separate metadata form for each form you want to enter data with. To do so, use the ELO Administration Console (opens new window).
The layout of the metadata form depends on the data you want to submit. Use the metadata form to define:
- The fields for submitting data
- The filing path for the data sets (filing definition) you created
- Whether you can add one or multiple files to the data set (form type)
# Fields
Add a field and the associated group for each data field that you want to include in the form. These fields are linked to the form. The user enters data to the fields via the form in the app.
# Filing definition
Create a filing definition so that the data sets can be uploaded to ELO. The data sets cannot be filed to the repository without a filing definition.
# Form type
The form type specifies whether the data set is created as a document or as a folder. You can select the following settings:
Usage > Folders: If this option is enabled, data sets are created as folders. You can attach multiple files to a data set. However, you do not have to attach a file. Attachments are filed with the Basic entry metadata form.
Usage > Documents: If this option is enabled, data sets are created as documents. You must attach a file. You cannot attach more than one file.
If both options are selected, the conditions for the Usage – Documents option will apply.
# Form
You need a specific form to create a data set. You create this form using the ELO form designer in the ELO Administration Console or in the ELO Java Client.
Information
For detailed information on forms (opens new window), refer to the ELO Java Client Workflow manual.
Please note
Data set forms are intended for offline use. This means you cannot use functions that require a connection to the ELO Indexserver, such as ELOas rules or dynamic keyword lists.
Please note
A data set form must be created as a separate template. Data set forms must not be divided into tab groups.
A data set form must meet the following criteria:
Form name: The name of the form must follow this pattern: offline_<NAME>. Replace <NAME> as required.
Template: The form requires a template. The name of the template must follow this pattern: main_<NAME>. Replace <NAME> as required.
The names of the form and the template do not need to match.
# Link to metadata form
You need to link the template to a suitable metadata form (see above).
Method
Open the template in the ELO form designer.
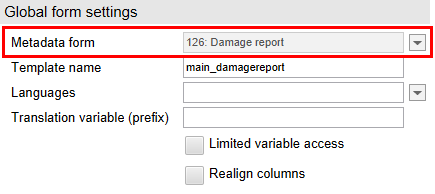
Open the Metadata form drop-down menu under Global form settings.
Select the metadata form you require.
Information
If the metadata form does not show up in the list, it is possible that the ELOwf module did not transfer the data to the client. Restart the module and the client. Afterwards, click Refresh in the form designer.
Tap Apply to apply your changes.
Alternative: The changes are also applied when you save the template.
Result
The name and the ID of the selected metadata form are grayed out in the Metadata form field.
# Link to fields
To ensure that the data is applied to the metadata of the data set, you need to link each form field to a metadata field.
Link to a field as follows:
Open the template in the ELO form designer.
Click the line of the form that you want to link to a field.
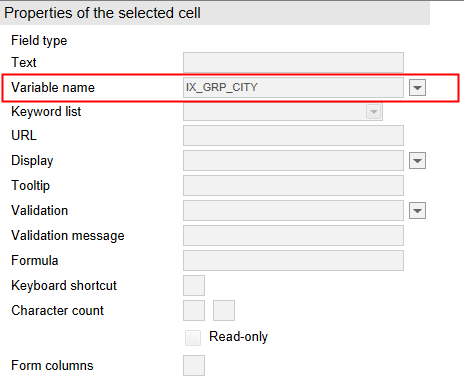
Open the Variable name drop-down menu under Properties of the selected cell.
Select a field.
The name of the variable that establishes the connection to the field is located in the Variable name field.
Save the form once you have created and connected all form fields.
Result
You can now use the form to create data sets.
# Create data set
To submit data to a form and add files, use the CREATE DATA SET function.
Requirements
You must have created a data set form in the ELO Java Client or the ELO Administration Console. Forms are automatically uploaded to and updated on your mobile device. Every three days, the system checks whether new forms exist or whether changes have been made to existing forms. If you reconnect or change your user account, forms are automatically downloaded and updated.
Method

Tap CREATE DATA SET on the action bar.
The Select form dialog box appears.
Tap the form that you want to fill out.
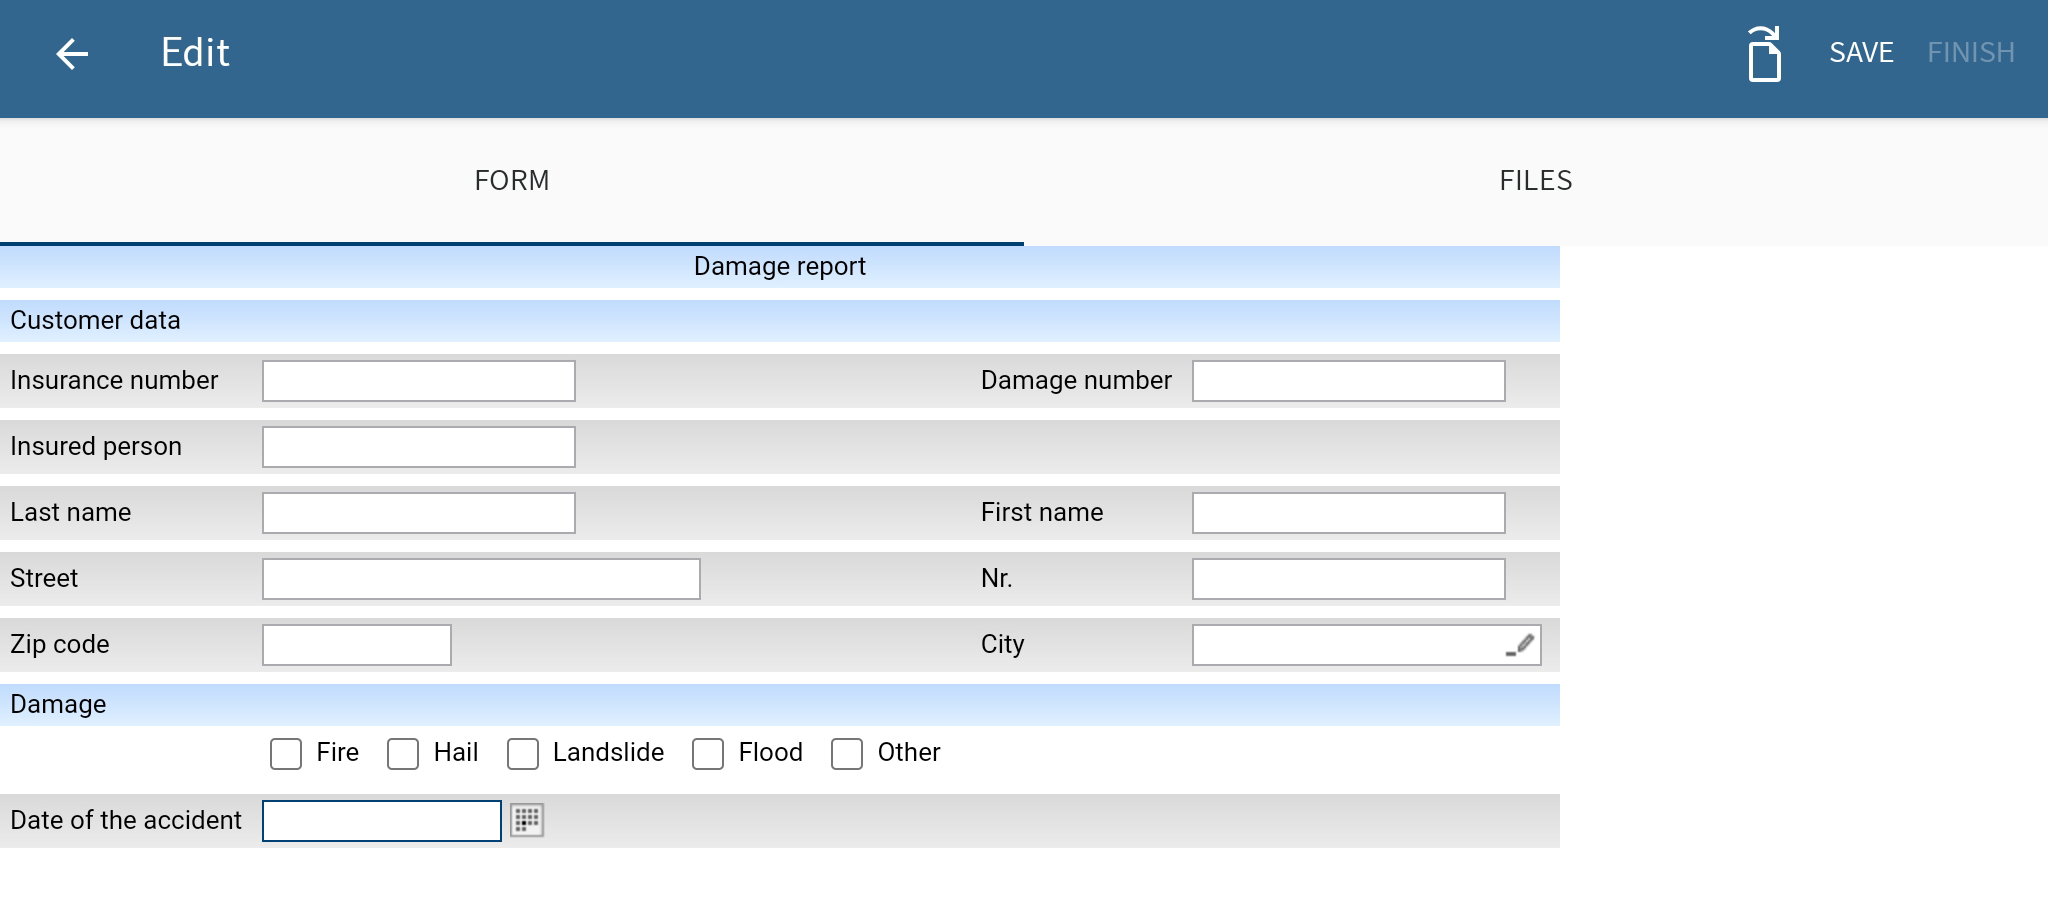
The Edit dialog box appears along with the selected form.
In this dialog box, you fill out the form, add files, save the data, and finalize the data set.
Tap the fields to fill out the form. The type of entry you need to make depends on the field type.
Add file
The number of files you can or need to add to a data set depends on the metadata form. Create the metadata form in the ELO Administration Console.
You can select the following metadata form options in the ELO Administration Console:
Usage > Folders: If this option is enabled, data sets are created as folders. You can attach multiple files to a data set. However, you do not have to attach a file. Attachments are filed with the Basic entry metadata form.
Usage > Documents: If this option is enabled, data sets are created as documents. You must attach a file. You cannot attach more than one file.
If both options are selected, the conditions for the Usage > Documents option will apply.
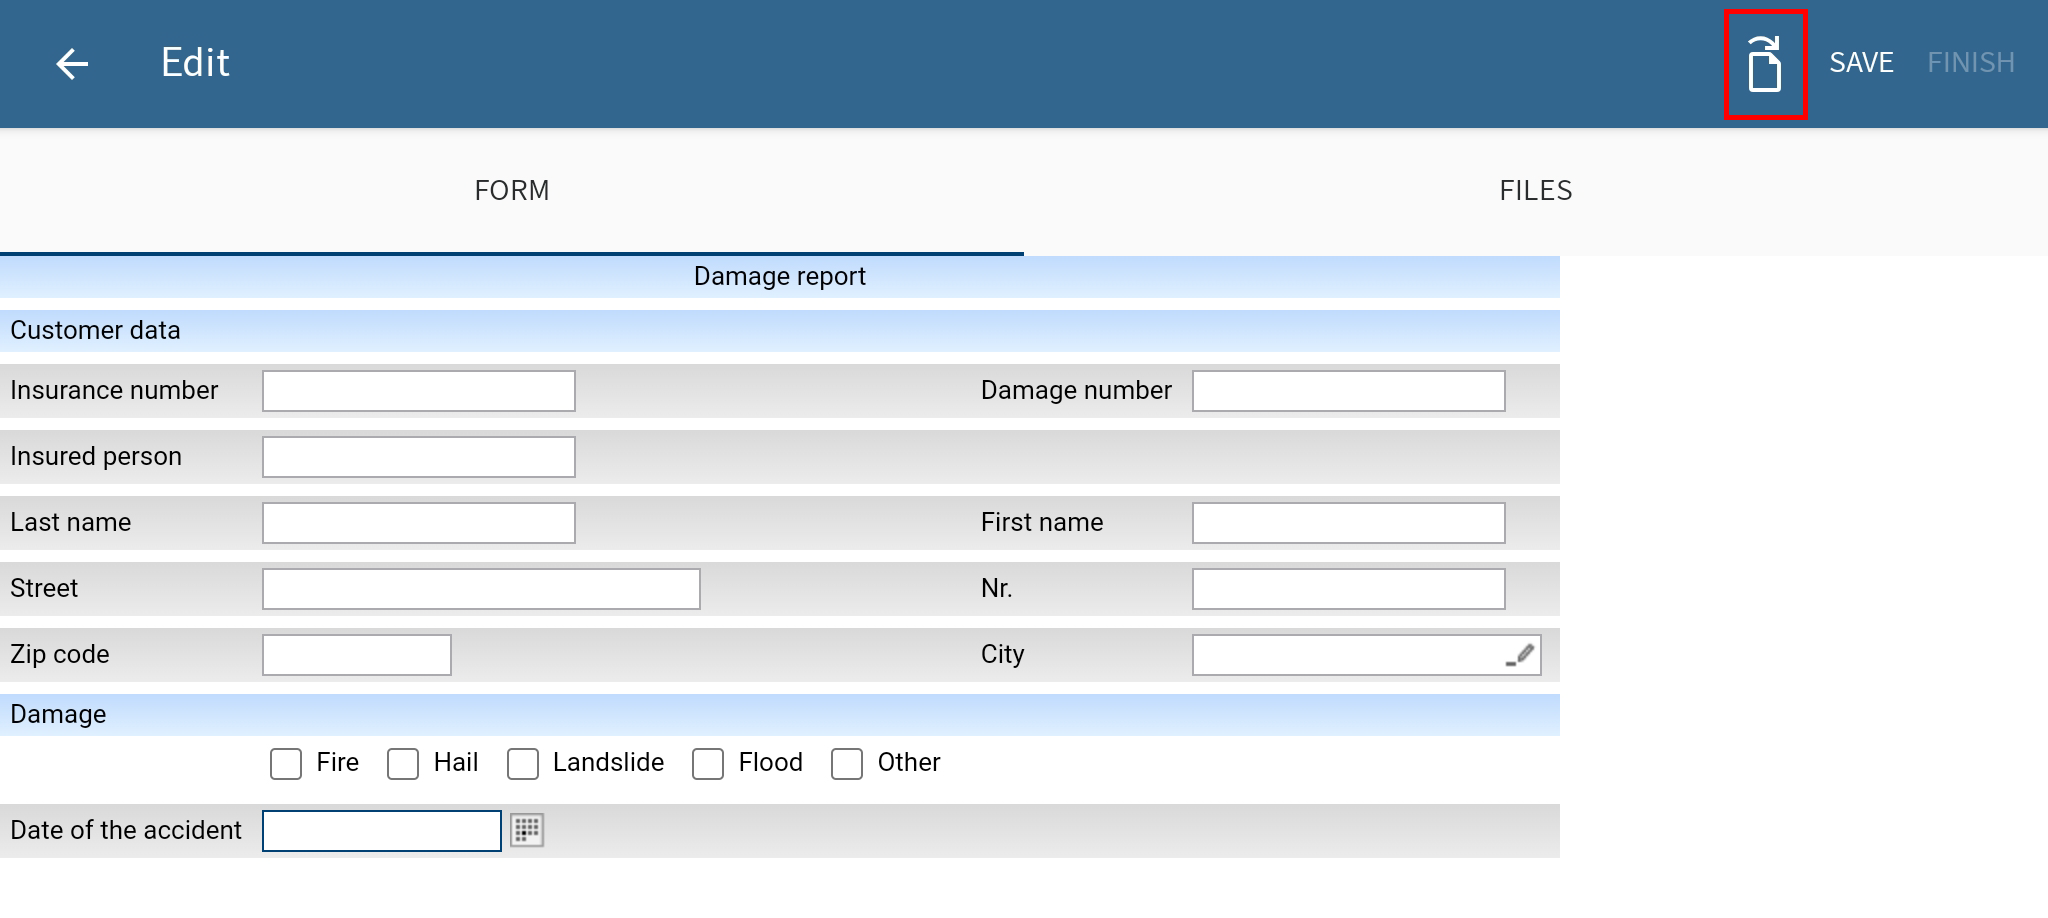
To add a file, tap the document icon on the action bar.
The Select file dialog box appears.
Select one of the following options to add a file:
- From file system: Opens the Select file: Detected file systems dialog box. Navigate through the folder structure on your device to select a file.
- With another app: Opens an external app you can use to upload files.
- Take a photo: Opens the camera app on your device to take a picture, which can be added to the data set.
Select a file.
The new file is displayed in the Edit dialog box on the FILES tab.
Remove added file
Optional: If the data set form was linked to a folder form, you can remove any attached files. Long tap the file you want to remove until the context menu opens. Tap the X icon in the context menu. The file is removed.
Change added file
Optional: If the data set form was linked to a document form, you cannot remove attached files. These data sets always require a file attachment. You can select another file to replace an existing attachment. Long tap the file you want to change until the context menu opens. Tap the document icon in the context menu and select a new file.
Optional: If you have not finished completing a data set or do not want to upload it to the Repository work area yet, you can save it. Tap SAVE. The data set is saved in the Data sets work area. The data set has the status Incomplete and is not yet loaded to the Repository work area.
Information
Once you have completed a data set for transfer to the Repository work area, you can no longer edit it.
Finish
To complete a data set for transfer to the Repository work area, tap FINISH.
Result
Depending on the setting, the data set is automatically transferred to the Repository work area or stored in the Data sets work area with the status Ready for transfer.
You can find more information in the sections Automatically transfer data set and Manually transfer data set.
# Edit data set
You can edit data sets that you have saved but not yet completed.
Method
Open the context menu for the data set.

Tap EDIT in the context menu.
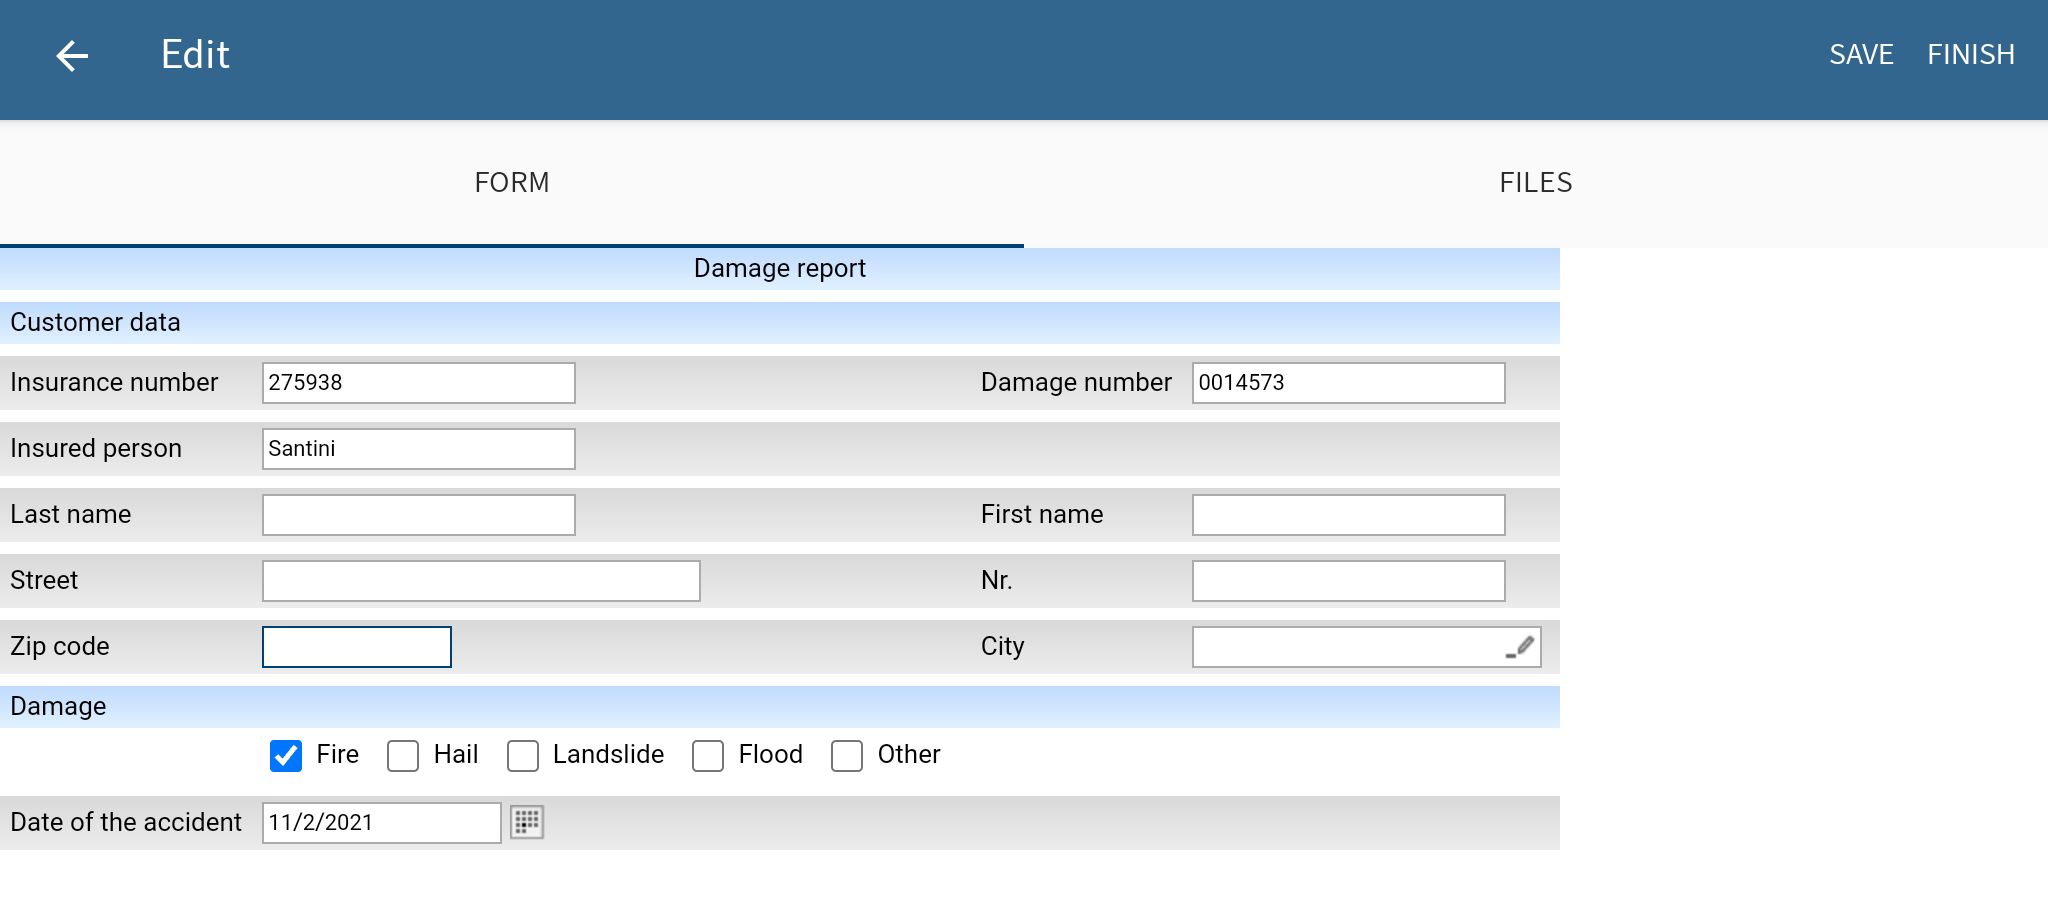
The Edit dialog box appears.
Make the desired changes.
Tap SAVE to save the data set or FINISH to load the data set to the Repository work area.
Result
You have edited the data set.
# Automatically transfer data set
You need to complete a data set before you can transfer it to the Repository work area. If your device is not connected to the Internet, the data set is saved in the Data sets work area. Completed data sets are loaded to the Repository work area as soon as your device is connected to the Internet.
Information
Once you have completed a data set for transfer to the Repository work area, you can no longer edit it.
Requirements
In the Configuration dialog box, the Automatic data set filing with any connection or Automatic data set filing only over Wi-Fi option must be enabled. You can find more information in the section Settings for transferring data sets.
Method
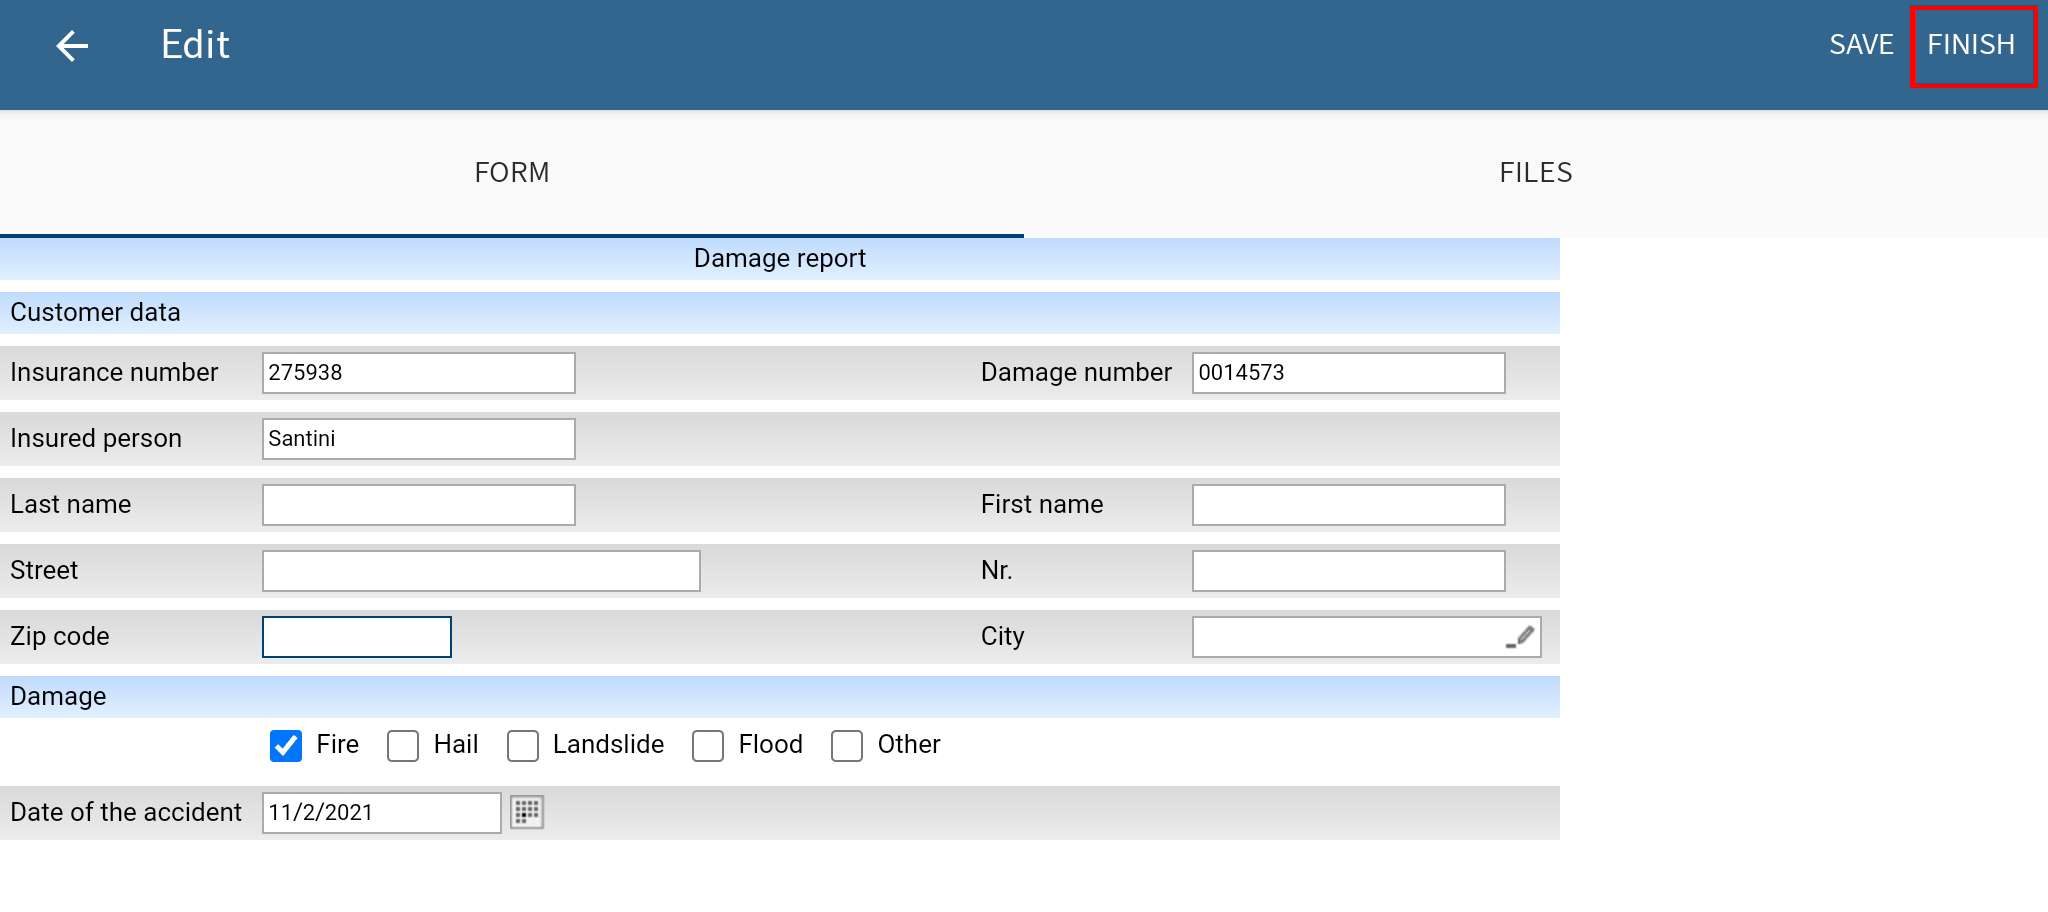
To complete a data set for transfer to the Repository work area, tap FINISH in the Edit dialog box.
Result
The Edit dialog box closes.
If your device is connected to the Internet, the data set is transferred to the Repository work area immediately. If your device is not connected to the Internet, the data set is saved in the Data sets work area. There, it is assigned the status Ready for transfer.

Completed data sets are transferred to the Repository work area as soon as your device is connected to the Internet. The filing process generally starts automatically.
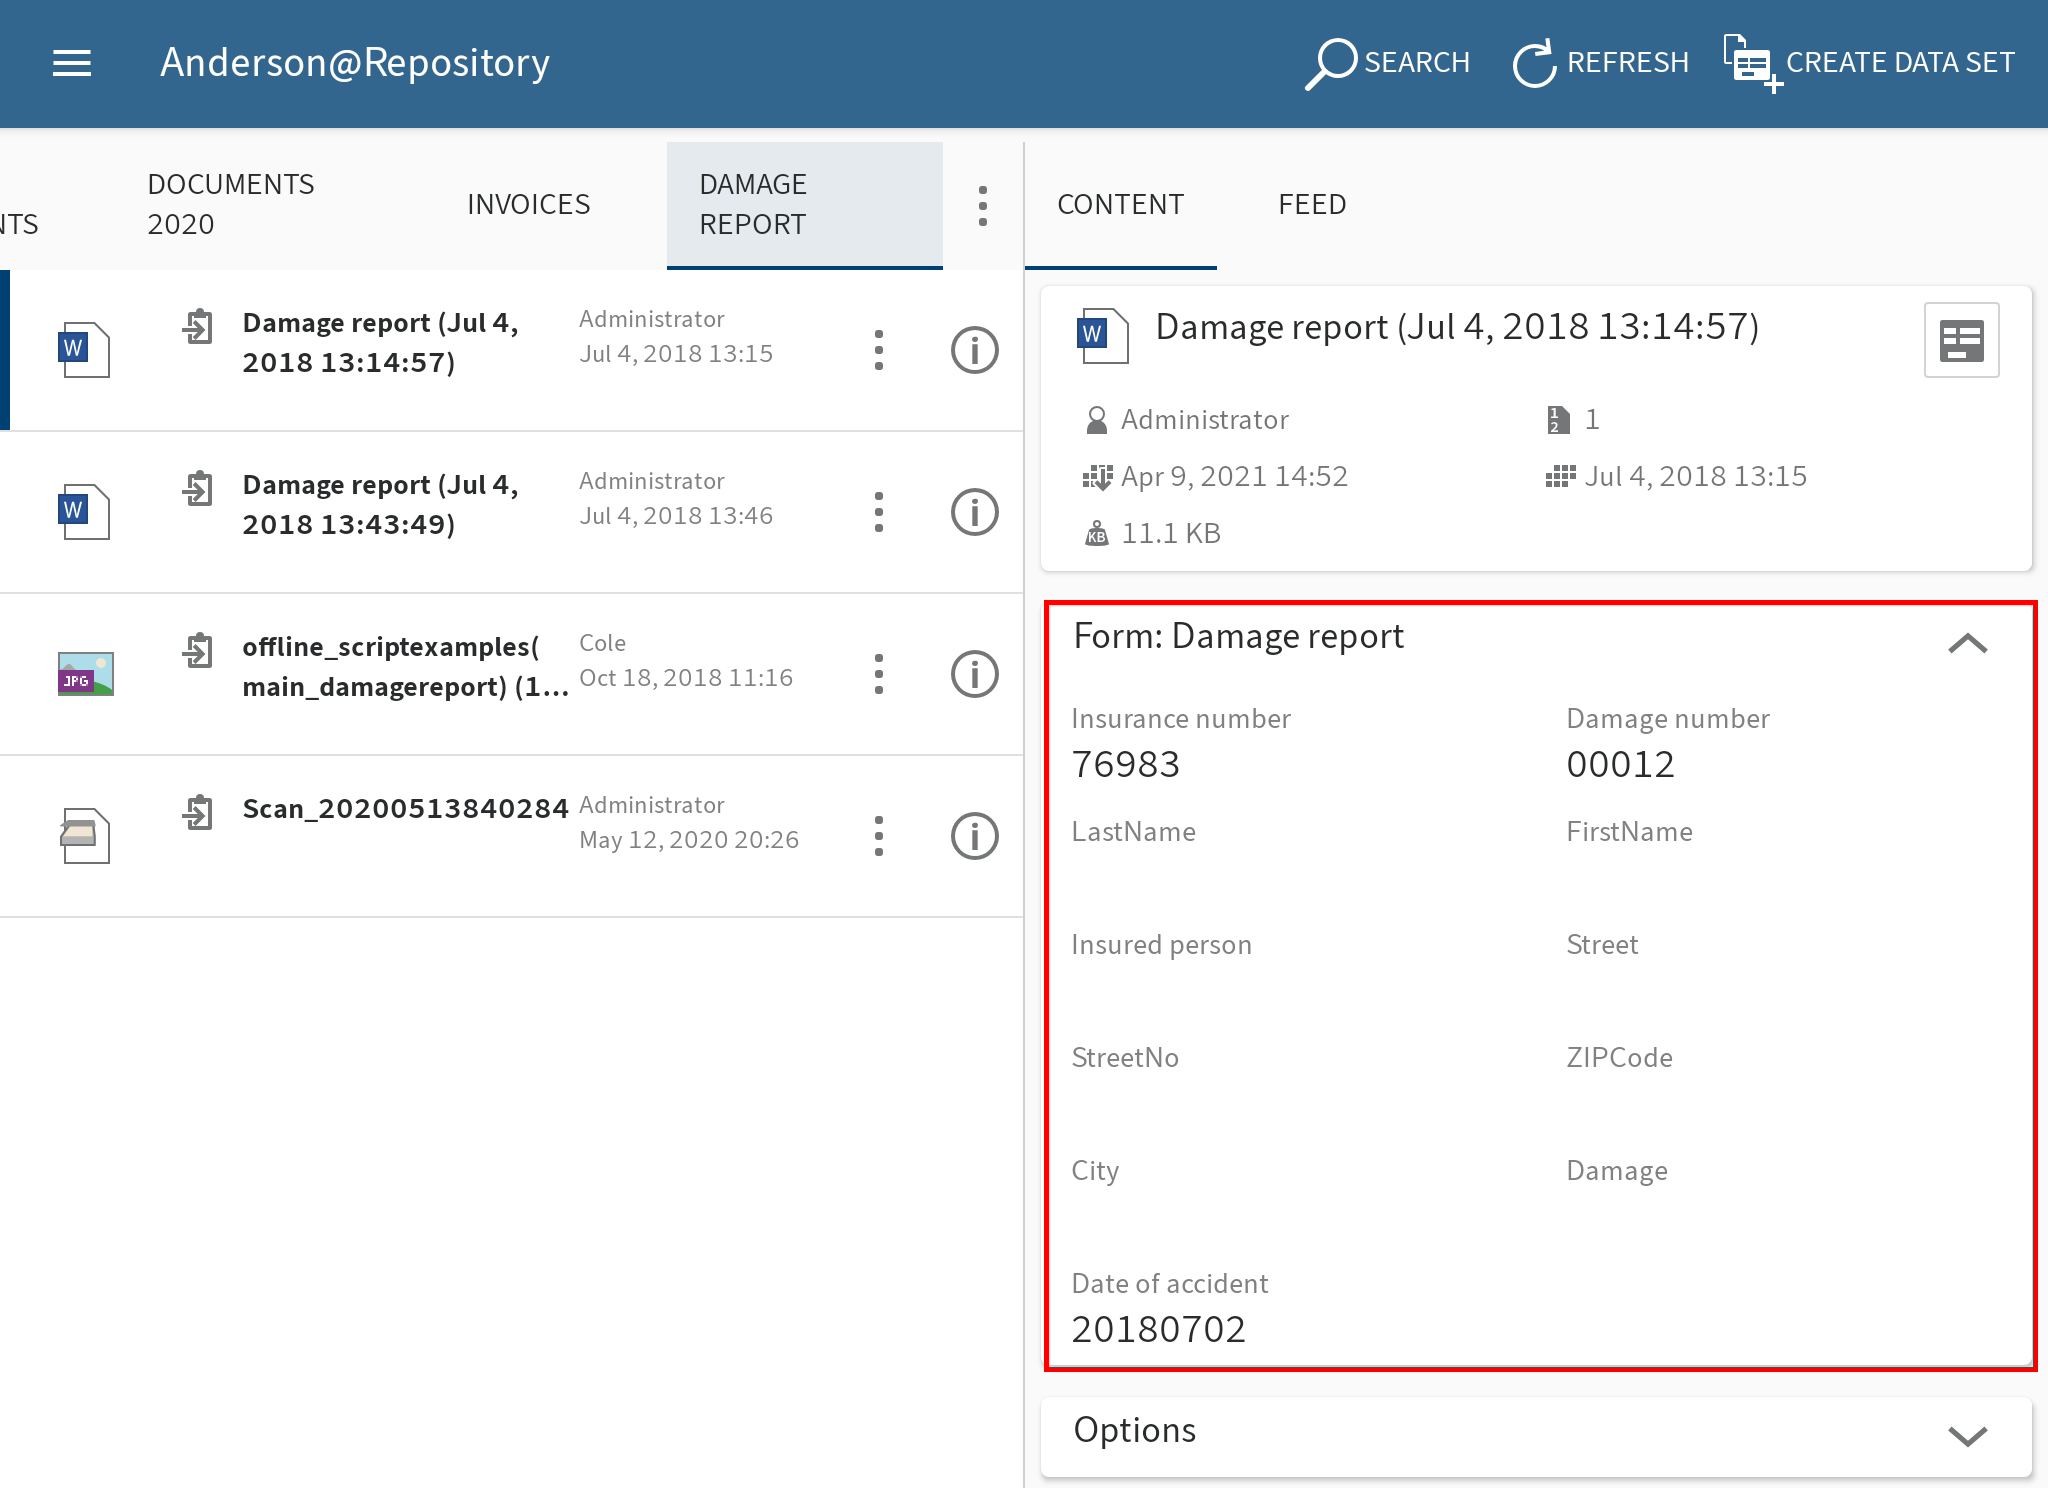
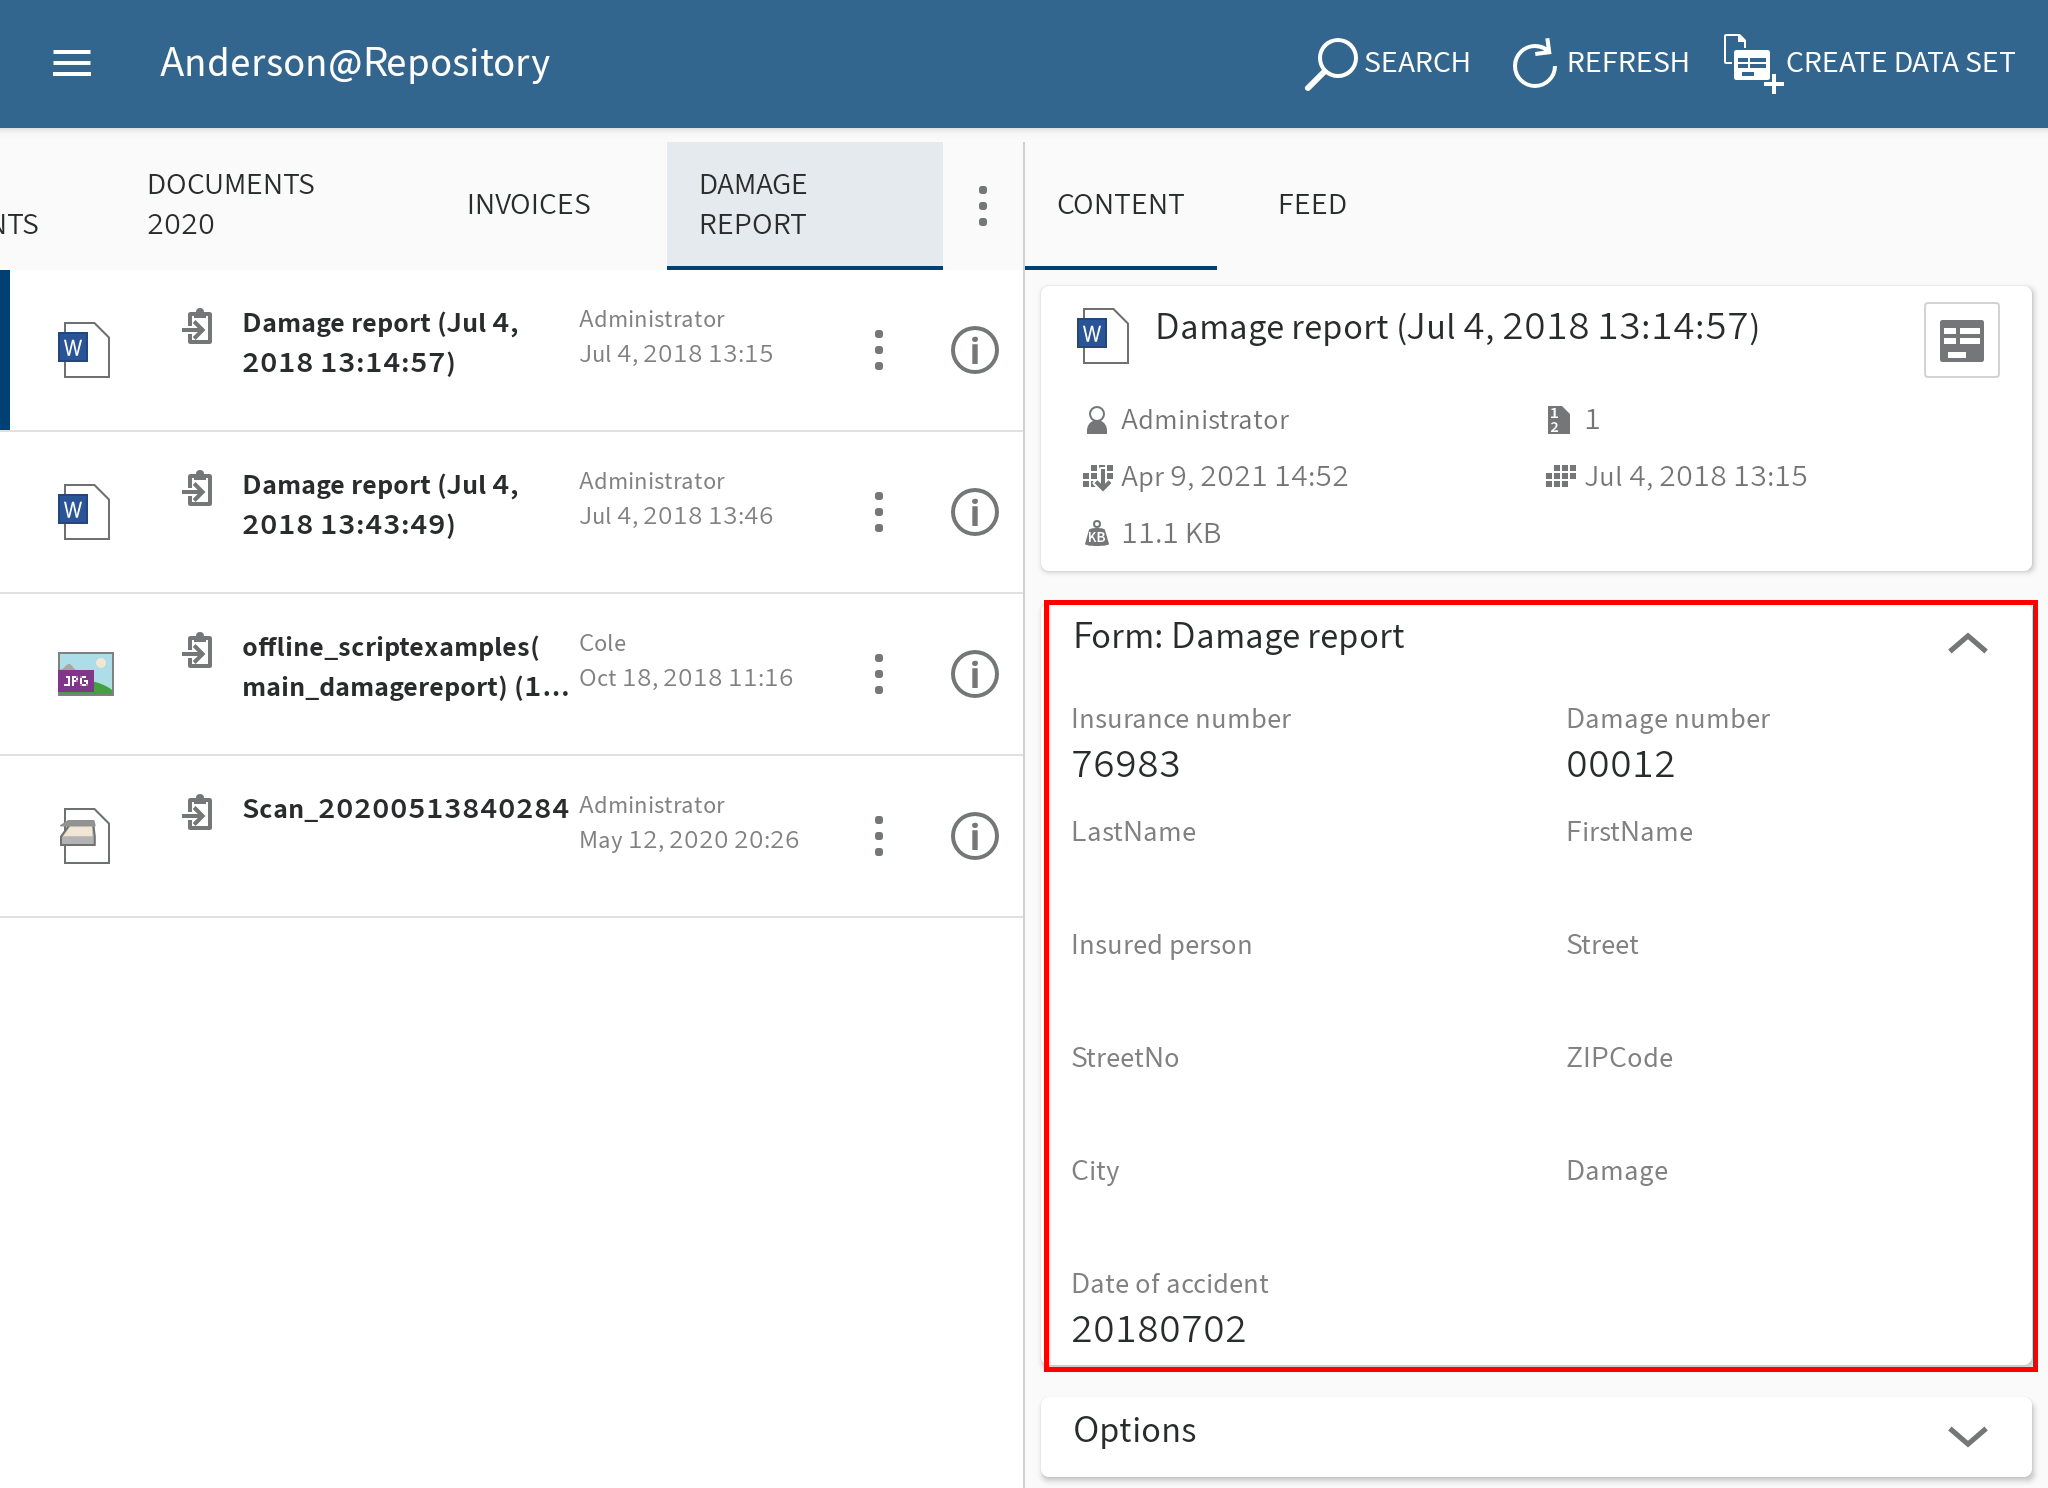
Once a data set is transferred to the Repository work area, it no longer appears in the Data sets work area. The data set can now be found at the specified location in the Repository work area. In the Form detail area in the viewer pane, you will see all information saved on the data set.
# Manually transfer data set
If automatic transfer of data sets is not enabled, you can manually start a transfer to the Repository work area. You need to complete a data set before you can transfer it to the Repository work area. The data set is saved in the Data sets work area.
Information
Once you have completed a data set for transfer to the Repository work area, you can no longer edit it.
Requirements
Your device must be connected to the Internet.
Method
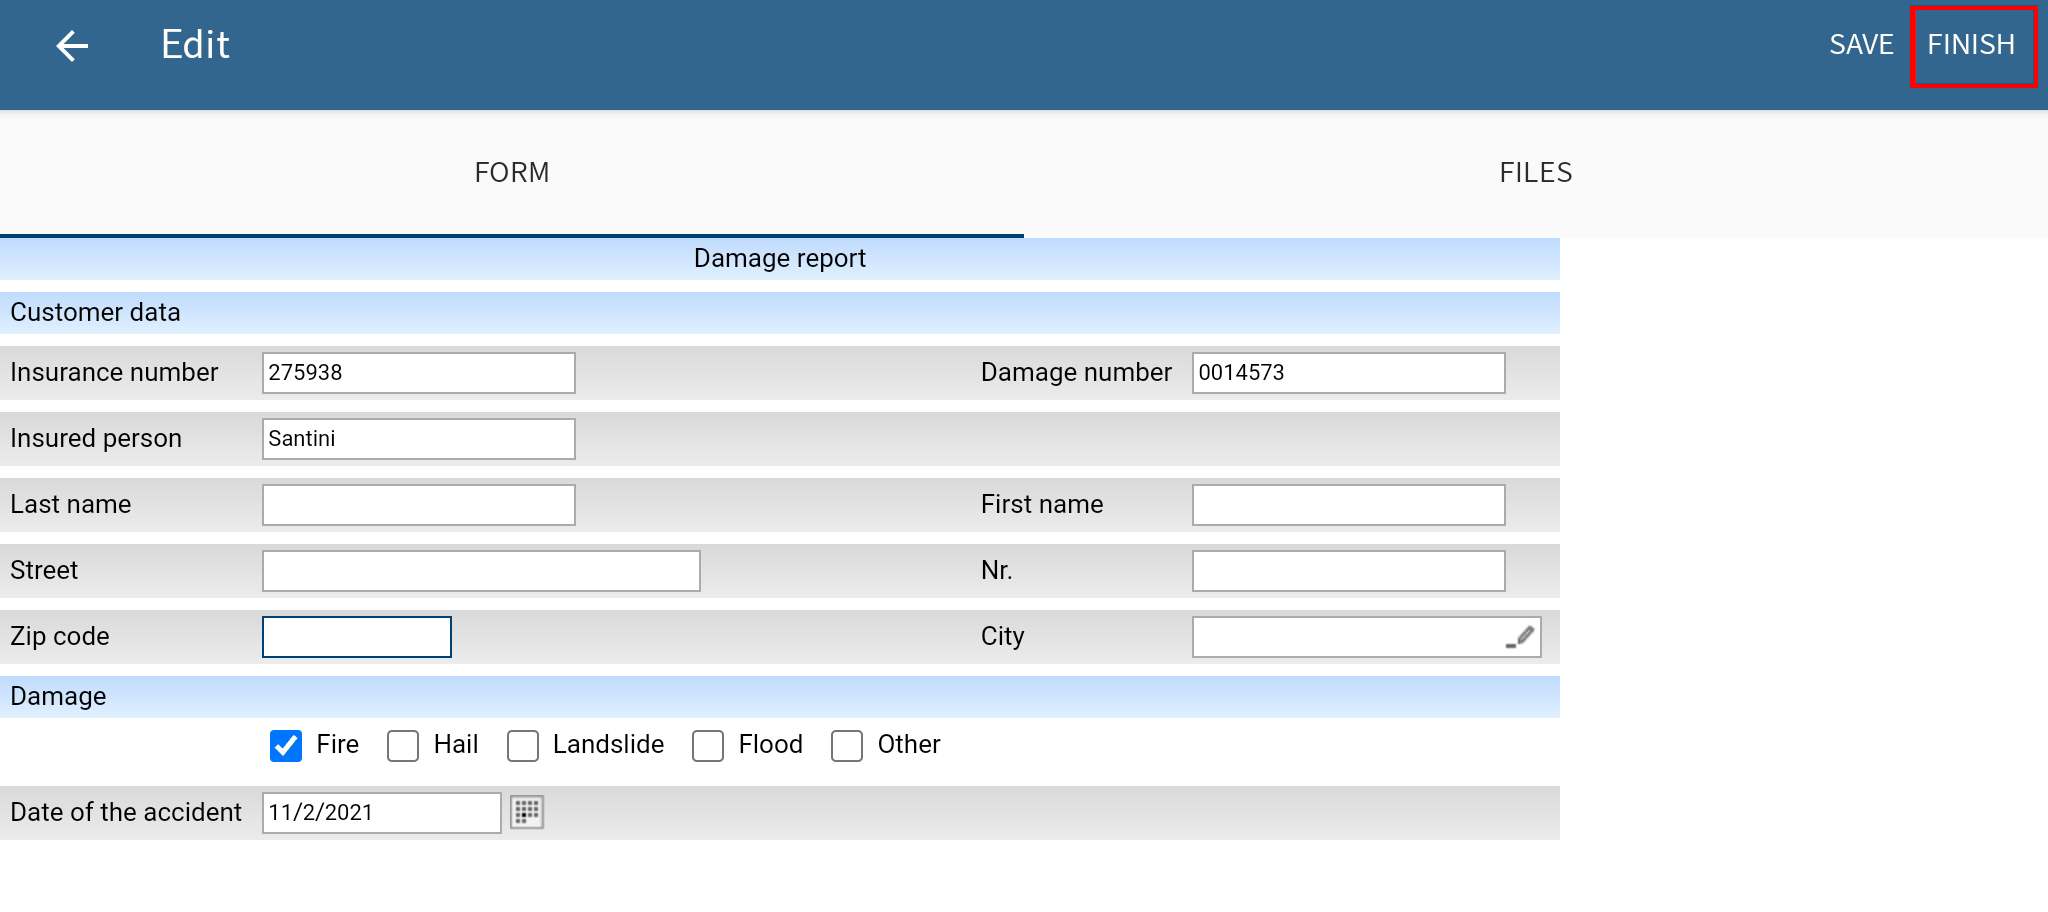
To complete a data set for transfer to the Repository work area, tap FINISH in the Edit dialog box.
The Edit dialog box closes.
The data set is saved in the Data sets work area. There, it is assigned the status Ready for transfer.

Open the context menu for the data set.

Tap TRANSFER in the context menu.
Result
The data set is loaded to the Repository work area.
Once a data set is transferred to the Repository work area, it no longer appears in the Data sets work area. The data set can now be found at the specified location in the Repository work area. In the Form detail area in the viewer pane, you will see all information saved on the data set.
# Delete data set
You can delete data sets that you do not want to transfer to the Repository work area.
Method
Open the context menu for the data set.

Tap DELETE in the context menu.
Result
You have deleted the data set.