# Tasks
The Tasks work area contains an overview of your workflows and reminders. This is where you process your tasks.
# View
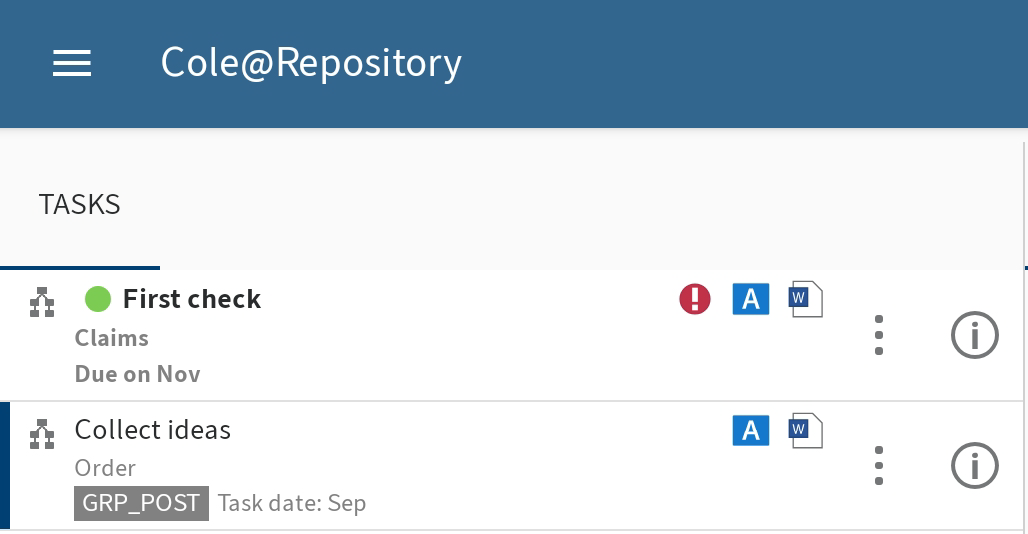
New tasks are shown in a bold font and marked with a green dot. Tasks with passed deadlines are displayed with an exclamation mark.
# Configuration
In the Configuration dialog box, you can specify which types of tasks to display and which criteria to sort the task list by. You can find more information in the section Configuration.
# Start workflow
Using workflows, you can assign other people or groups tasks.
The following options are available for starting workflows:
- Start ad hoc workflow function
- Start workflow function
Ad hoc workflows are simple, predefined workflows available in ELO. The workflows available to you when you run the Start workflow function were defined by your company.
You can learn how to start an ad hoc workflow in the chapter Start ad hoc workflow.
# 'Start workflow' function
You can start new workflows. Use workflow templates for this.
Information
This function is only available in the Repository and Clipboard work areas.
Requirements
The workflow templates have already been created in ELO. You cannot create workflows templates in the ELO app.
Method
Select the desired entry and open the context menu.
Tap START WORKFLOW in the context menu.

The Start workflow dialog box appears.
Tap SELECT TEMPLATE.
The Select template dialog box appears.
Tap the corresponding entry in the list to select a template.
The workflow name is entered to the Template and Workflow name fields.
Optional: Change the workflow name. Tap the Workflow name field and enter a new name.
Tap OK to start the workflow.
Result
The Start workflow dialog box closes. The workflow starts.
# Start ad hoc workflow
This function starts a new ad hoc workflow. Ad hoc workflows are simple, predefined workflows available in ELO. You can use an ad hoc workflow to route an item to users for approval or to notify people.
Method
Select the desired entry and open the context menu.
In the context menu (button with three dots), tap Start ad hoc workflow.
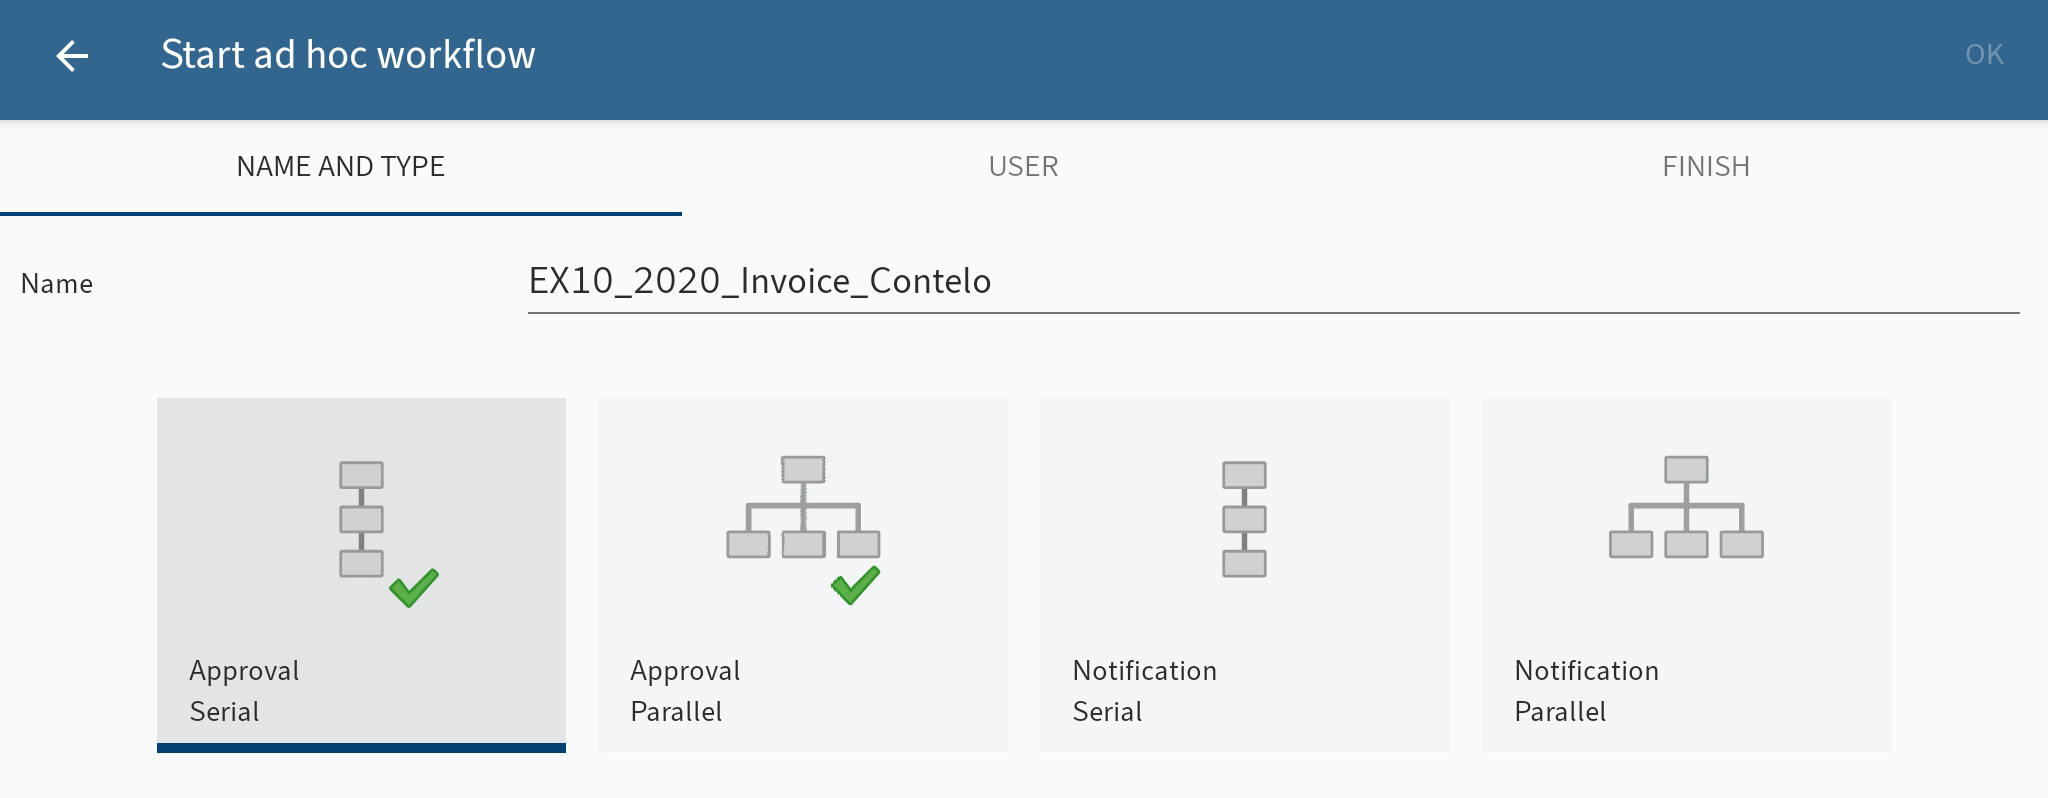
The Start ad hoc workflow dialog box opens.
In the Name field, enter a name for the workflow.
Select the type of ad hoc workflow you want to create. You can choose from the following types:
- Serial approval: The workflow is passed forward sequentially to the participants. The participants must decide whether or not to approve the workflow step. Depending on the result, the corresponding notification is sent to the selected recipient.
- Parallel approval: The workflow is distributed in parallel. All recipients receive the workflow at the same time. The participants must issue approval individually.
- Serial notification: The workflow is passed forward sequentially to the individual participants. The participants must confirm receipt of the workflow one after another. As long as the user does not confirm the workflow, the workflow is not passed forward to the next participants.
- Parallel notification: The workflow will be sent to all participants at once. The participants must confirm receipt of the workflow. Once completed, the corresponding notification is sent to the selected recipient.
Switch to the USER tab.
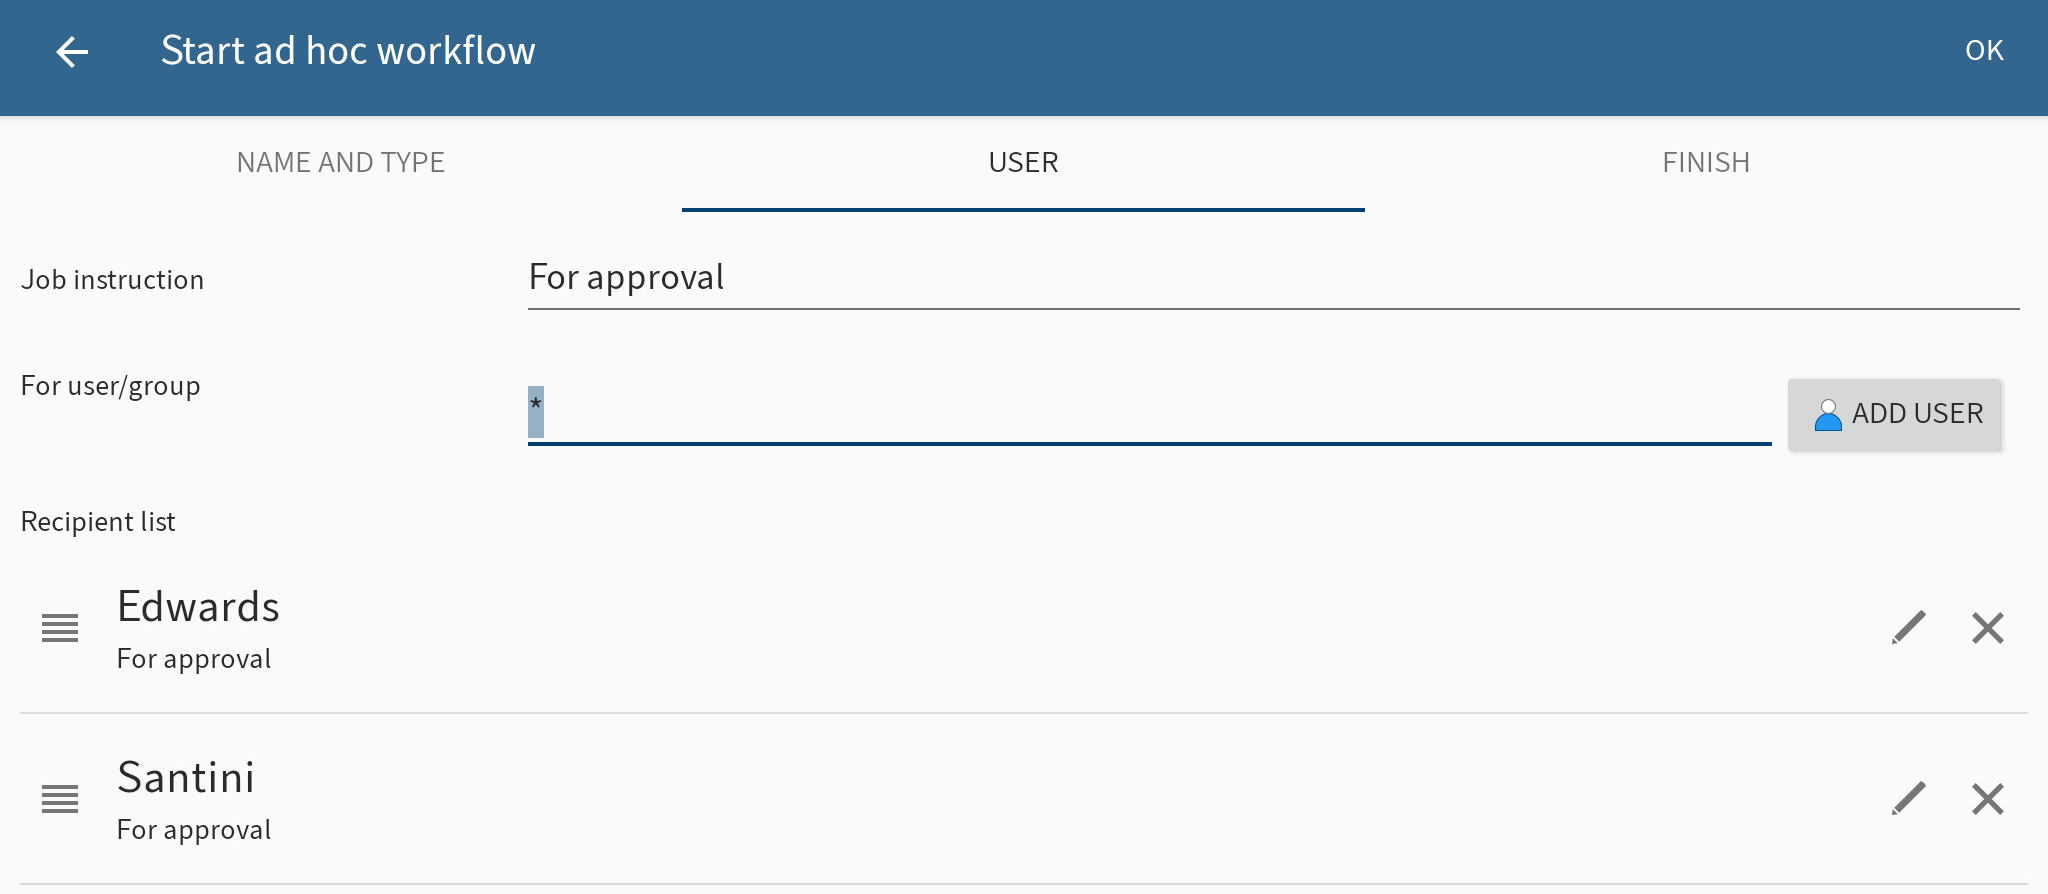
In the Job instruction field, enter the individual job instruction for the user. The user sees the job instruction in the workflow step column of the Tasks work area as soon as they have accepted the workflow.
The For user/group field is completed with an asterisk symbol by default. This means the job instruction is assigned to all users. To change the job instruction for individual users, tap the pencil icon next to the respective entry.
Add the workflow recipients using the ADD USER button.
You will see the selected users in the Recipient list.
For serial workflows, you can change the order in which the workflows are sent to the users. Tap the user in the list and move them to a new position in the list, keeping your finger pressed down.
Change to the FINISH tab.
In the Recipient field, you can see which user will be notified when the ad hoc workflow is completed. To change the recipient, tap SELECT USER.
Enter a text for the completion message in the Success message field.
Enter a text for the cancellation message in the Cancellation message field. This only applies to Approval type ad hoc workflows.
In the End script field, you can select a script that is executed after the ad hoc workflow is completed.
Requirement: Your administrator has provided an end script. You will find more information in the ELO Java Client Workflow (opens new window) documentation.
Tap OK to start the ad hoc workflow.
# Forward workflow
To transfer a workflow to the next user, select the Forward workflow function.
Method
In the Tasks work area, select the workflow you want to forward and open the context menu.
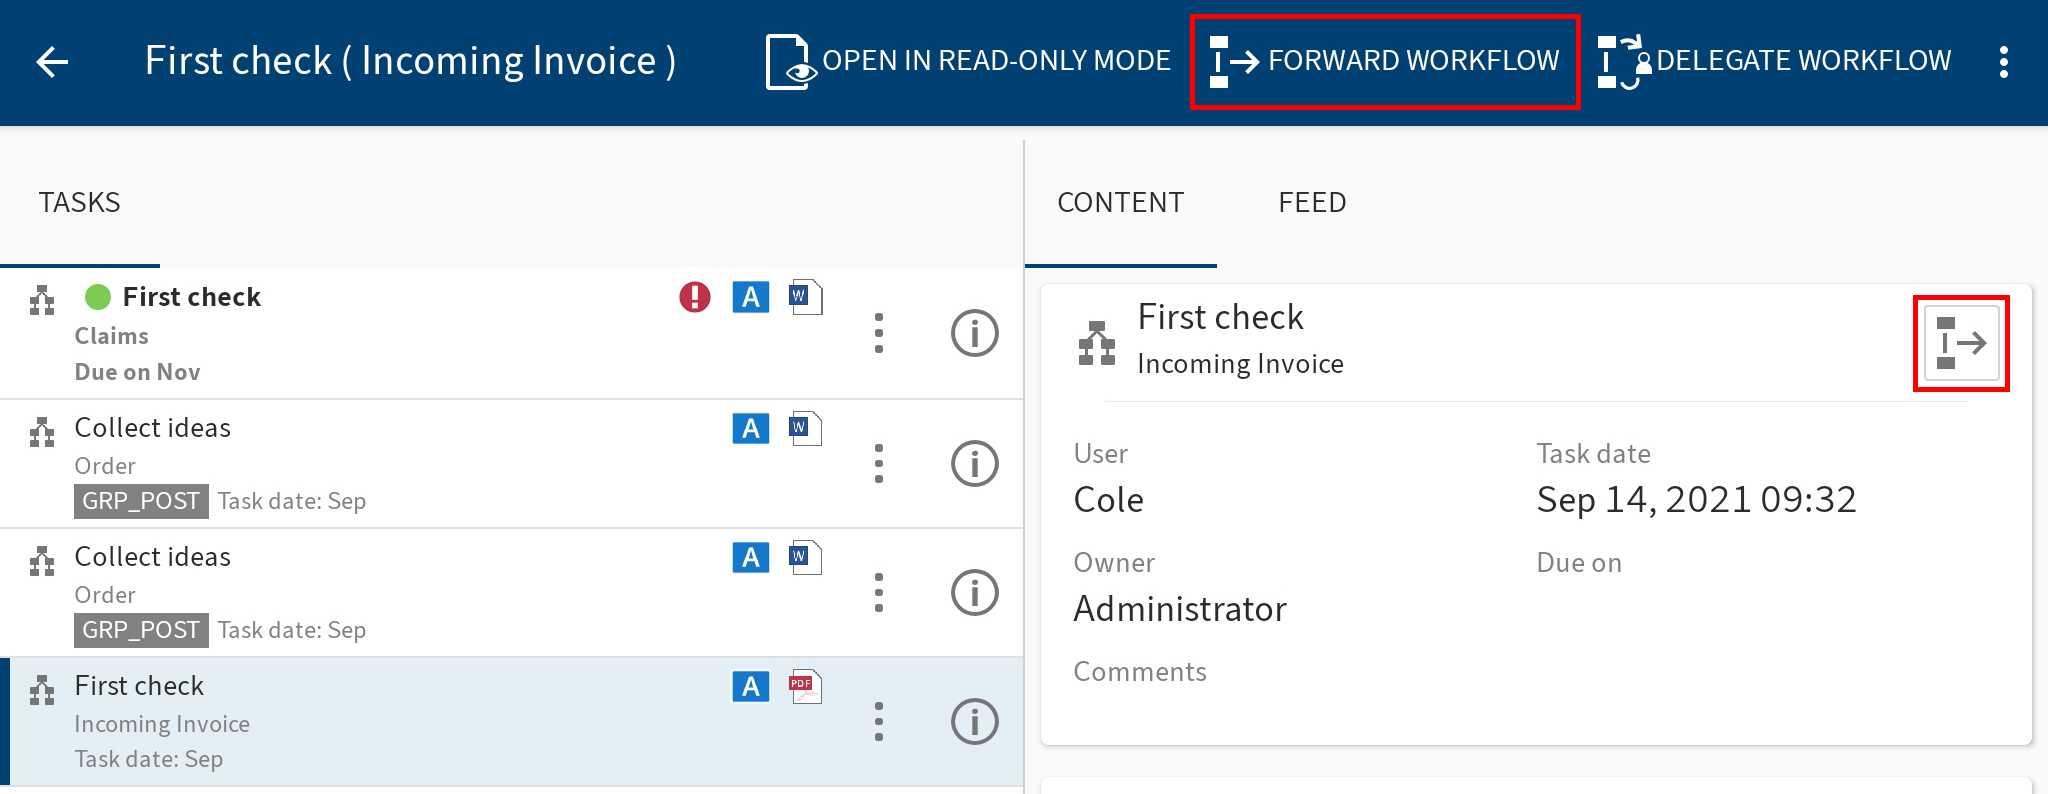
In the context menu (button with three dots), tap Forward workflow.
Alternative: In the viewer pane, tap Forward workflow to the right of the short name.

The Forward workflow dialog box appears.
Tap the user that you want to forward the workflow to.
The successor is highlighted.
Optional: Tap the Comment input field to add a note to the workflow.
Tap OK.
Result
You have forwarded the workflow to the selected user. The Forward workflow dialog box closes.
# Delegate workflow
To assign a workflow to another person, use the Delegate workflow function.
Method
Select the desired entry in the Tasks work area and open the context menu.
Tap Delegate workflow in the context menu.

The Delegate workflow dialog box appears.
Tap SELECT USER.
The Select user or group dialog box appears.
Tap an entry in the list to select a recipient.
You can make the following changes:
- Notify after processing: This option is enabled by default. This means that you get the workflow back after it has been processed to check its status. Tap to uncheck the box if you do not want to be notified.
- Information: To add a note to the workflow, tap the input field.
Tap OK.
Result
You have delegated the workflow to the selected recipient. The Delegate workflow dialog box closes.
# Accept workflow
Workflows sent to a group appear in the Tasks work area of all group members. To process this type of workflow, use the Accept workflow function. Now, only you can process the workflow, and the other group members no longer see the workflow in their tasks. This prevents multiple people from being able to process the same workflow at the same time.
Method
In the Tasks work area, select the workflow and open the context menu.

In the context menu (button with three dots), tap Accept workflow.
Alternative: In the viewer pane, tap Accept workflow to the right of the short name.
Result
The workflow is assigned to you. Other members of the group do not have access to it.
Information
If a group member selects or accepts a group task, the task is marked as read for all group members.
If a group task is returned, it remains marked as read for all group members.
# Edit workflow form
You can fill out workflow forms, save the data entered to them, and forward them.
If a workflow is based on a form, the Workflow form button is shown both in the viewer pane and the context menu of the respective workflow.
Requirements
The workflow forms must have been created in a desktop version of ELO. You cannot create workflows forms in the ELO app.
Method
In the Tasks work area, select the workflow and open the context menu.
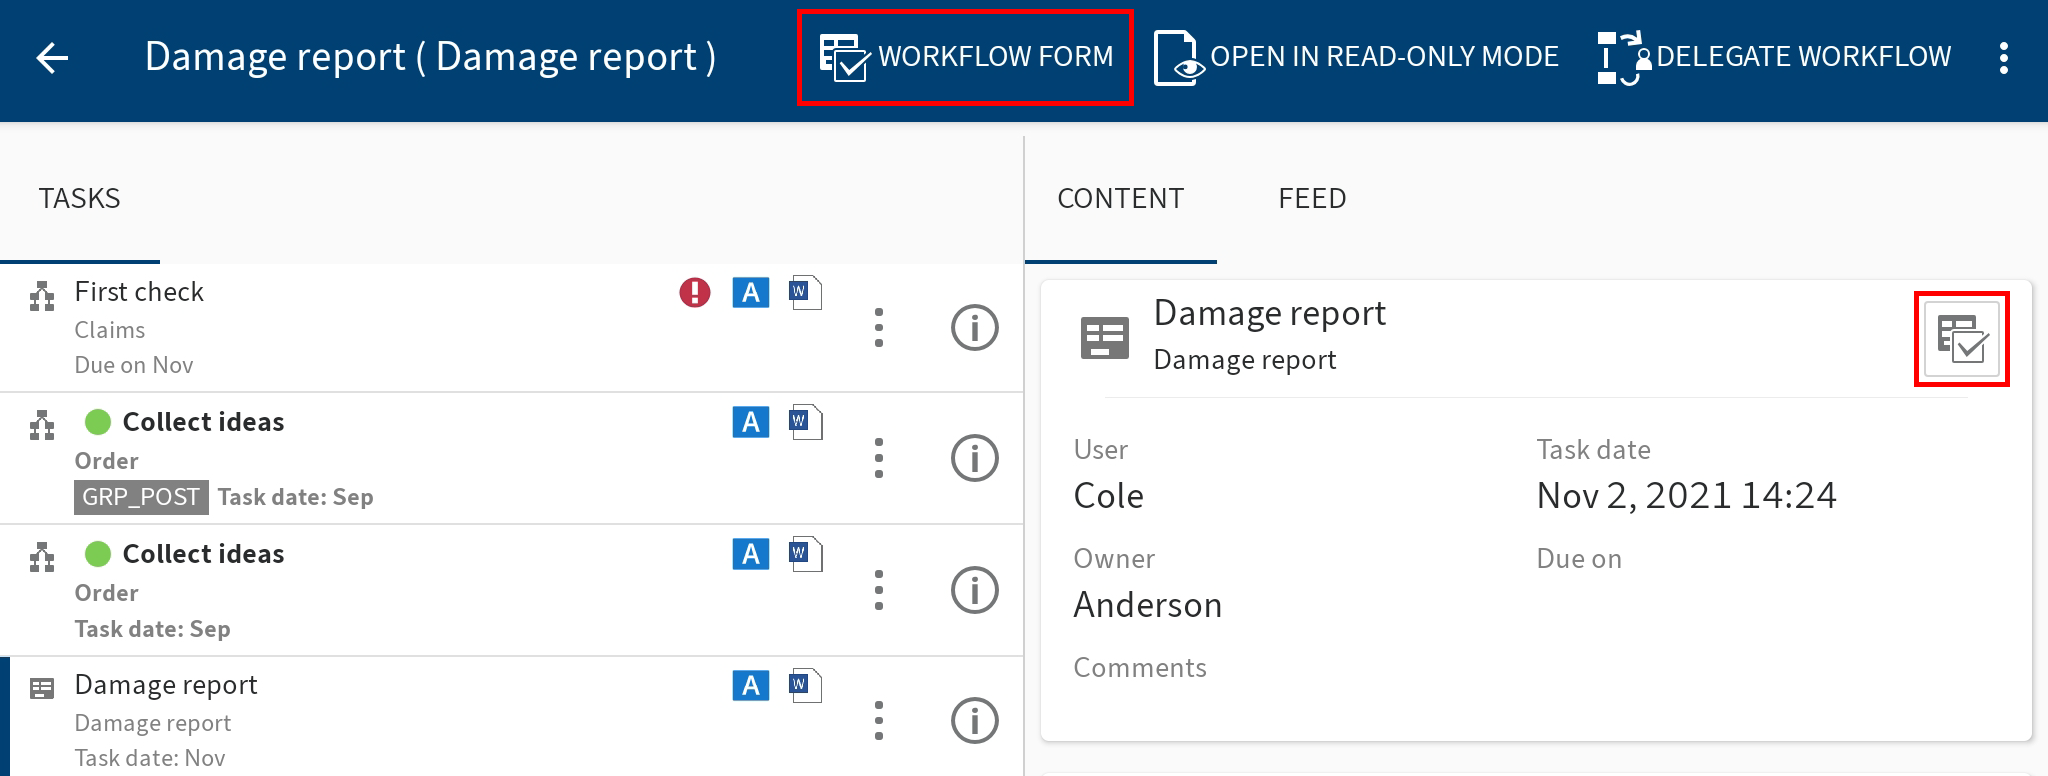
Tap the Workflow form button to open the form.
Alternative: Tap the Workflow form button in the viewer pane of the selected workflow.
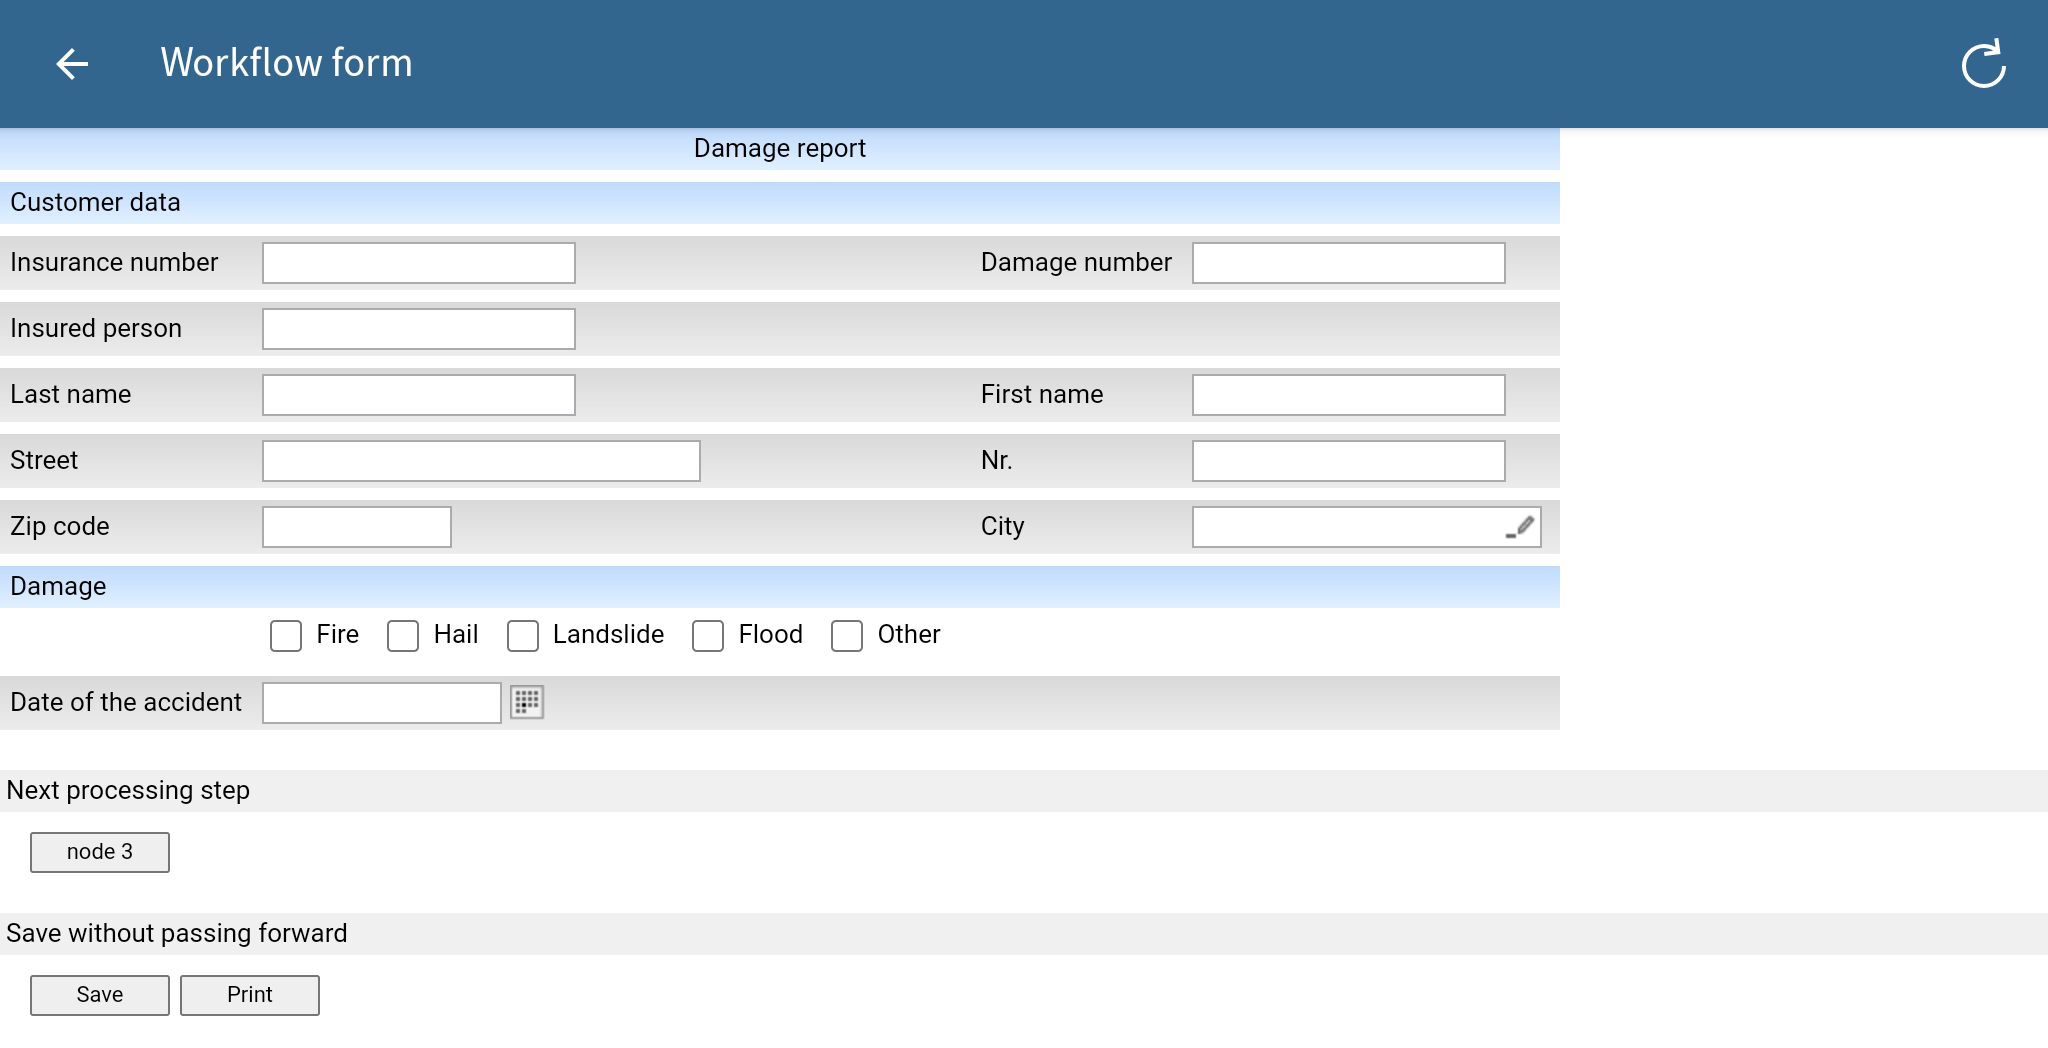
The Workflow form dialog box appears. The form is displayed.
Complete the form. You can edit different fields depending on the form.
Optional: Tap Save to save your entries. Tap Print to print the form.
Depending on the workflow structure, forms are usually forwarded to the next user/node after being processed. To forward a workflow form, tap the corresponding button under Next processing step.
Result
The form is forwarded to the next user of the workflow with the information you entered. The Workflow form dialog box closes.
# Postpone workflow
Use the Postpone workflow function to suspend processing of a workflow. You can specify a date until which a workflow will be hidden in the Tasks work area. Once the date has been reached, the workflow appears in the list again.
Method
Select the desired entry in the Tasks work area and open the context menu.
In the context menu (button with three dots), tap Postpone workflow.

The Postpone workflow dialog box appears.
To specify how long you want to postpone the workflow for, tap SET DATE.
Select a date in the calendar.
Tap OK.
Result
You have postponed the workflow. The workflow is hidden from your task list until the selected date.
# Delete workflow
You can delete workflows that you no longer need.
Method
Select the desired entry in the Tasks work area and open the context menu.
In the context menu (button with three dots), tap Delete.
The Delete workflow permanently dialog box opens.
Tap YES to confirm.
Result
You have deleted the workflow. The Delete workflow permanently dialog box closes.