# Program interface
You can customize the program interface to meet your own requirements. You can change the font size and color scheme in the client.
Change font size
You will find the settings for the font size on the Ribbon > User menu > Configuration > Display > Font.
You can change the font size in the user interface with the slider. You see a preview of the selected font size to the right of the scale. To apply the changes, select OK.
Change color scheme
You will find the settings for the color scheme on the Ribbon > User menu > Configuration > Color scheme.
You see which color scheme is currently selected under Color scheme. To select another color scheme, click the desired color. To apply the changes, select OK.
Please note
The ELO Java Client restarts automatically if you change the color scheme or the font size.
The ELO Java Client opens to the My ELO work area. The areas are described briefly in the following.
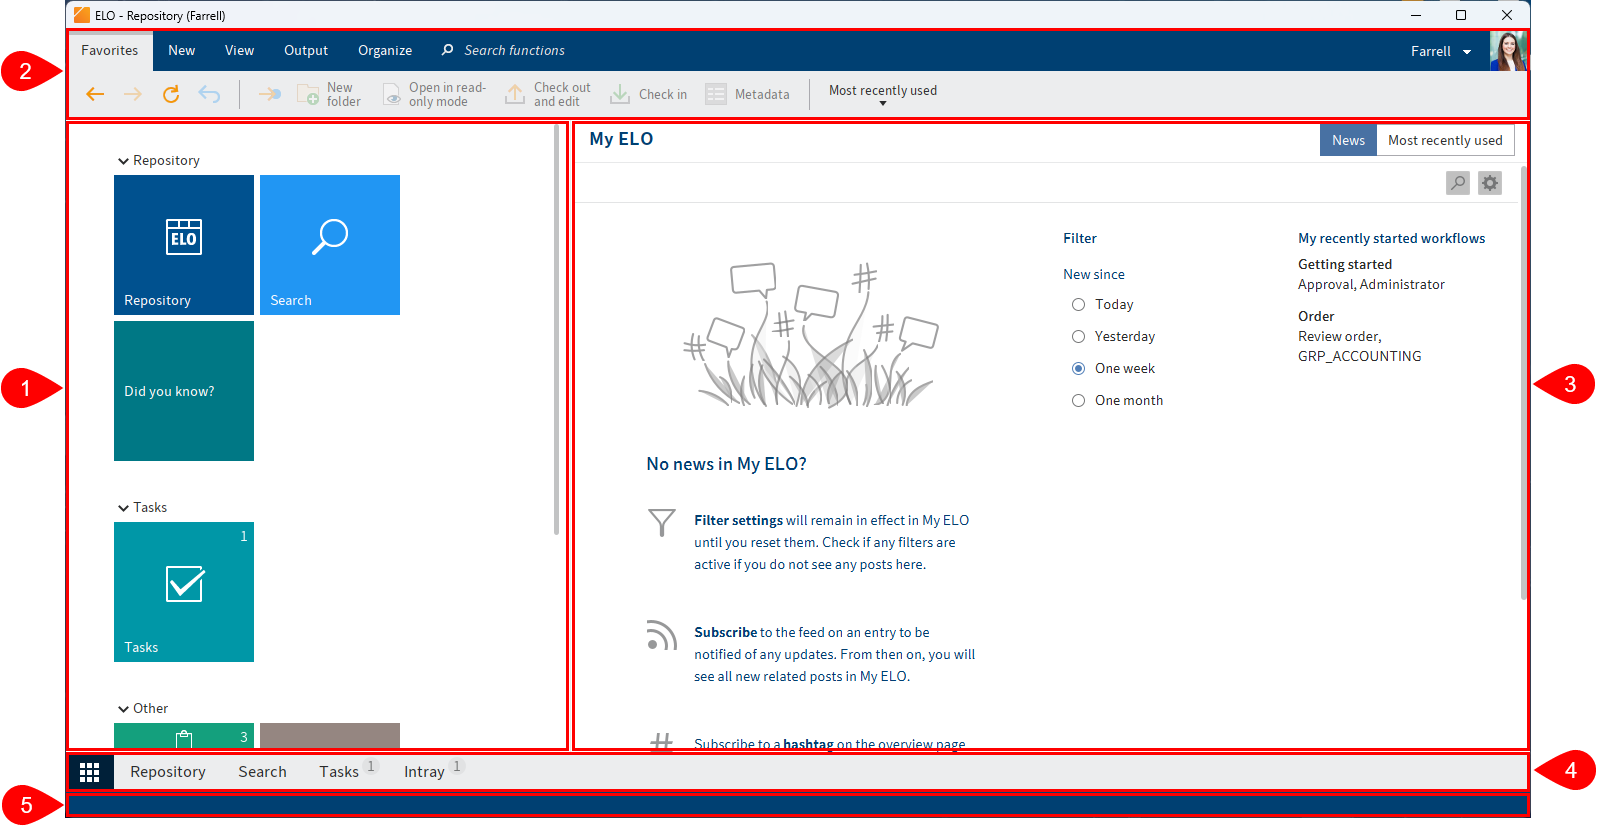
1 Tile navigation: This area is for navigating the program. The tiles take you to work areas or to selected functions.
2 Ribbon: On the ribbon, you will find the functions available to you.
3 News: The News area helps you to keep track of developments in ELO.
4 Navigation bar: Navigate between the work areas using the navigation bar.
5 Status bar: The status bar contains information on the currently selected entry or area. This includes the number of available entries or the repository path.
# What is a work area?
ELO contains different work areas. Each work area is used to complete specific tasks. Accordingly, not all functions are available in every work area.
ELO contains the following work areas:
- My ELO: This work area is on the home screen when you start the program. Tiles on the left-hand side provide access to the main areas in ELO.
- Repository: This area contains all folders and documents that you are authorized to access. This is also where you create additional folders and documents.
- Search: This area is where you search for folders and documents that are stored in the Repository work area.
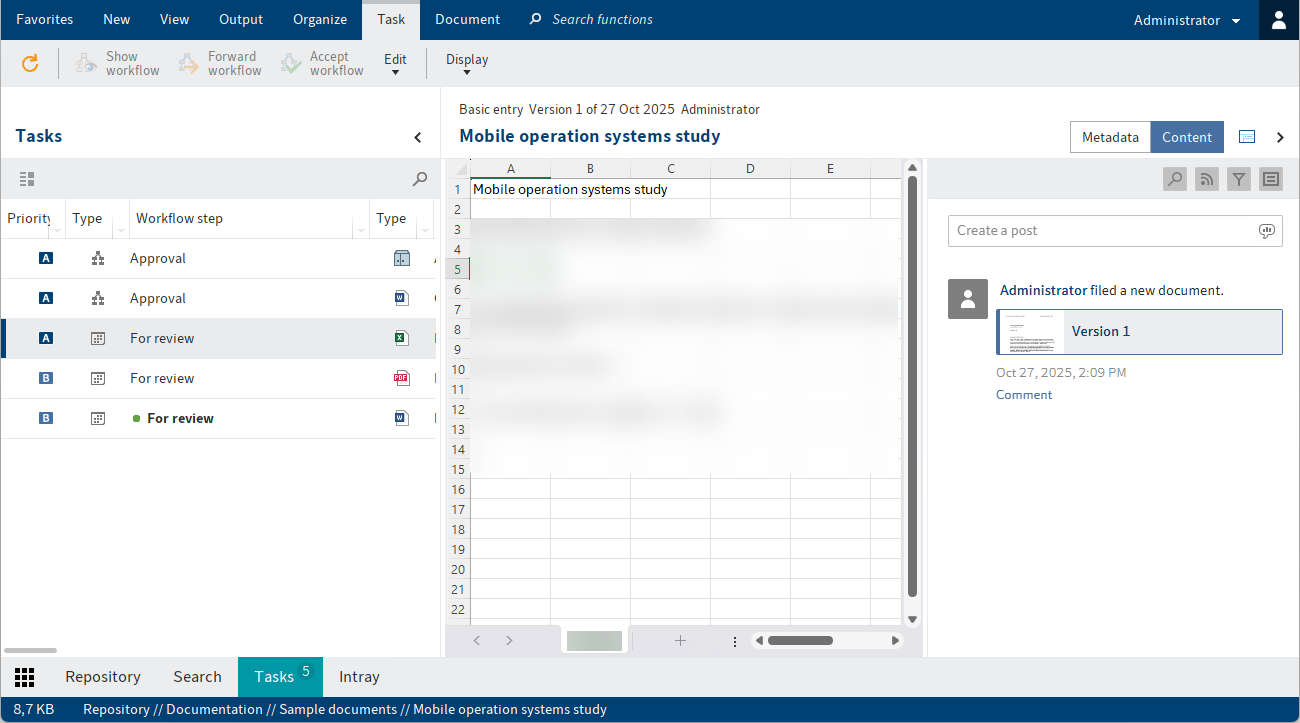
- Tasks: If you are assigned tasks, you will find them here. Tasks are always related to entries (folders or documents) in the Repository work area.
- Intray: The Intray is the central work area for incoming documents. You can store documents in ELO via the Intray.
- Clipboard: You can copy frequently used folders and documents from the Repository work area to the Clipboard. This enables you to quickly find the entries you need frequently or are currently working on.
- In use: Folders and documents that have been checked out for editing are displayed here.
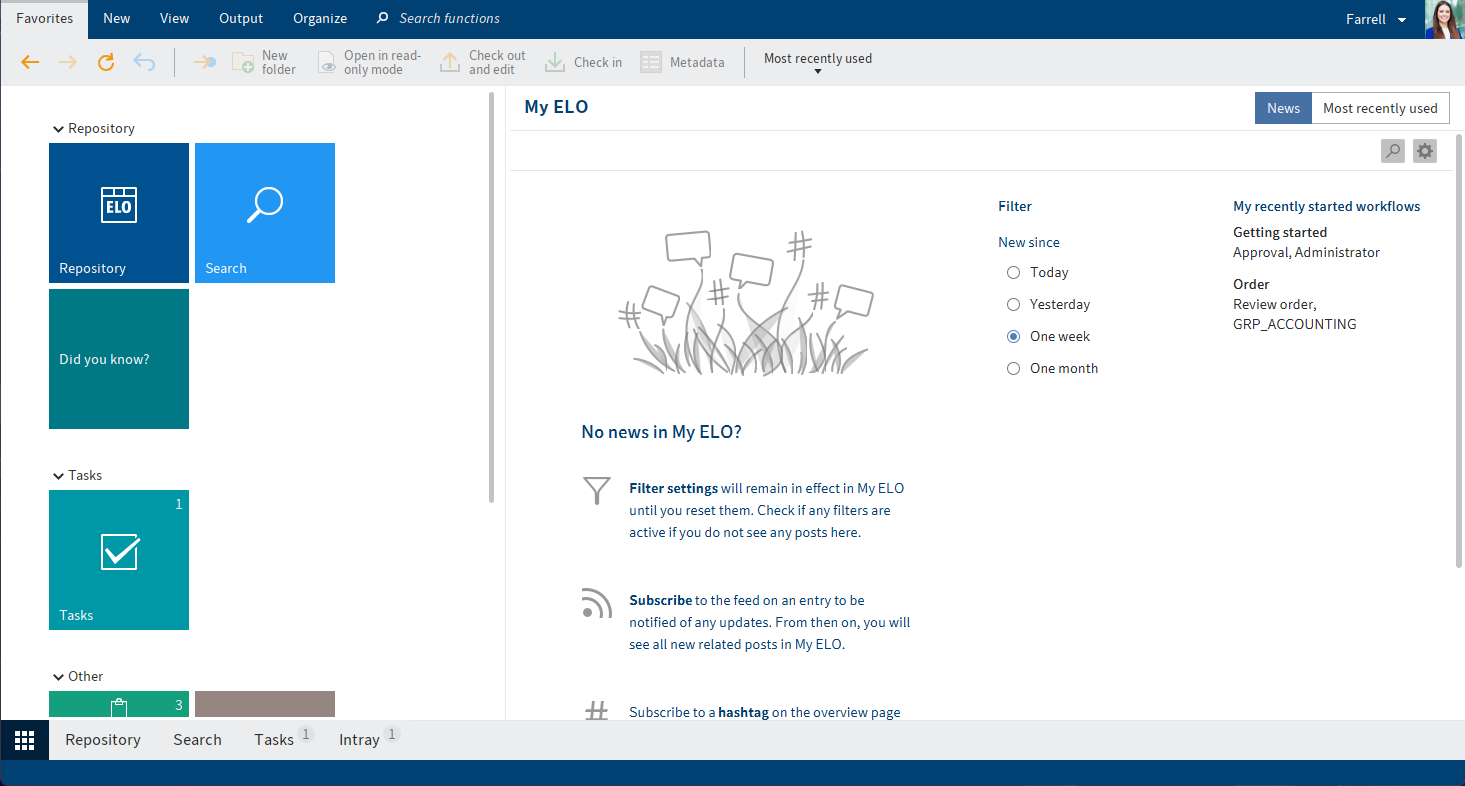
# My ELO
The My ELO work area is on the home screen when you open ELO. Tiles on the left-hand side provide access to the main areas in ELO.
You can open the My ELO work area using the 'My ELO' button in the navigation bar or using the keyboard shortcut CTRL + WINDOWS.
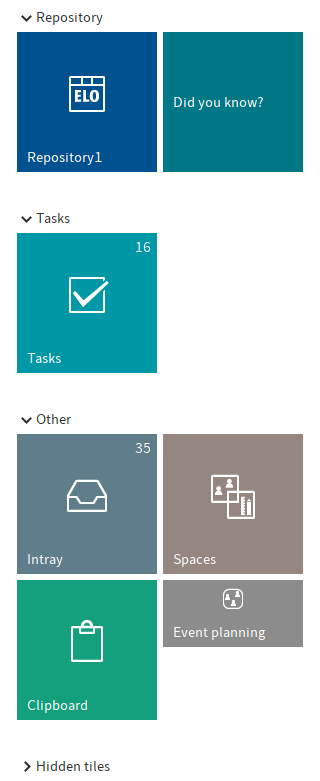
# Tile navigation
The tile navigation contains all available tiles. Tiles can be used to represent work areas, views, search favorites, spaces, and ELO apps.
You can create tiles for quick access to folders, tasks, and searches. Use the function New view (available in: Ribbon > View).
You can edit, group, and hide tiles using the context menu (right-click).
# Edit tile
You can make the following tile settings within the tile's context menu.
- Pin to the navigation bar or Unpin from the navigation bar: This function places the tile on the navigation bar or removes it. Pinning tiles makes it easier for you to switch between the work areas.
- Show tile overlay in drag-and-drop
- Shrink/enlarge tile
- Hide: When you hide tiles, they are moved to the Hidden tiles area. To restore hidden tiles, drag them to the place you want in the tile navigation.
- Delete view (only for tiles you created yourself)
Under Settings, you can change the color, the icon, and the size of the tile.
You can also enable the following options:
Diagram view: If you enable this option, a circular diagram is depicted on the tile. Depending on the entries in that particular work area or view, the diagram is made up of several segments in different colors. The colors relate to the font color selected for the entries.
Information
The Diagram view option only works when the tile size is set to Large.
Show tile overlay in drag-and-drop: If this option is enabled, the tile appears as an overlay when you drag and drop an entry to the repository. Drop the entry onto the overlay to move it to the respective area.
Information
You can also use the tile overlay to store entries in workspaces and teamspaces.
To do this, you must first open the business object (workspace) or document space(teamspace) you want to store the entry in.
Show number of entries: If this option is enabled, the number of entries in an area is displayed at the top right of the tile. This option is particularly useful in the Tasks work area. If the number next to the Tasks work area is green, you have at least one new task.
Keyboard shortcut to open the tile
Please note
Do not use a keyboard shortcut that is already being used by ELO or other programs.
Change name: You can change the name of tiles you created yourself (repository views and task views). Select Edit view.
Information
Different settings are available depending on the type of tile you want to edit.
The changes are saved automatically.
Close the tile settings by clicking the selected tile or the button with the left arrow.
You can open the tile settings for another tile by clicking the other tile.
# Groups
To sort your tiles by topic, you can create groups.
Right-click in the tile navigation or on a group name to create a new group.
You can change the order of the tiles and their allocation to groups via drag-and-drop.
Open the context menu of a group name to edit the group:
Rename group: This function is only available for your own groups.
Delete group: All tiles in the deleted group are moved to the Hidden tiles group.
Restore default settings: This option enables you to revert changes to tiles and groups in the tile navigation area and restore the default values. In the dialog box, you can choose between:
- Default settings: Restores all settings in the tile navigation area to the default values on installation.
- Same settings as at the start of the current session: Discards all changes made since the last time you started ELO. Changes made prior to that session are retained.
# News
The News area helps you keep track of changes in ELO.
You will see feed posts from different entries here. Some examples include feeds you have subscribed to or in which you have been mentioned by another user. In addition, a hashtag cloud, escalated workflows, and recently started workflows that are relevant for you are also shown in this work area.
Information
Most functions in the My ELO work area are feed functions. For more information, refer to the Feed chapter.
The News tab contains the following areas and functions:
Settings (gearwheel icon): You can edit the following settings here:
- My ELO
- Subscribed hashtags
- Polls started
Current hashtags: Here, you can see hashtags that have been used in recent weeks. Select a hashtag to show all posts marked with the hashtag.
Substitution: If you have any active substitutions, you can see who you are substituting for here and who is currently substituting for you.
Workflows: Under Workflows, you can see all workflows you are involved in. Workflows with passed deadlines are highlighted in red. Select a workflow name to go to the respective workflow in the Tasks work area.
Information
If the preview in My ELO is not large enough to show all areas, buttons appear in the toolbar for the respective areas.
# Feed functions in My ELO
# Mark post as important
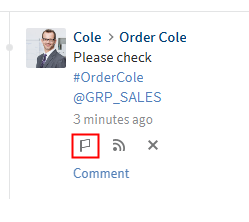
Posts older than one month are removed from My ELO. The Mark as important button (flag icon) lets you pin a post to the My ELO work area or remove it again. The post remains in the My ELO area even if it is more than a month old.
# Hide post
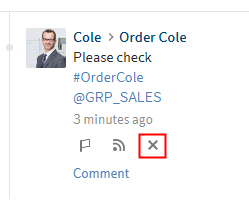
You can hide the post within your My ELO work area. Select the X icon below the post.
Information
The Remove from My ELO function only hides posts in your My ELO work area. The post is not deleted. It stays in the feed for the corresponding entry.
If you hide a post, the Undo function is displayed. Select this button to show the post again.
The Undo function is only displayed for 5 seconds by default. You can change the length of time it is displayed in My ELO > Settings > My ELO settings.
Alternative: To hide all posts in My ELO, use the Remove all posts from My ELO function. You will find this function in My ELO > Settings > My ELO settings.
Information
Posts marked as important are not removed.
# Filters
You can search the feed in the My ELO work area for specific terms (magnifying glass icon) as well as filter it by specific criteria. You can select the following filters:
- New since
- Space
- Metadata form
- Post author
- Post type: You can filter by two post types: Automatically created posts (e.g. Document version created) and posts created by users (User posts).
- Hashtag
- Additional filters: Depending on the settings, additional filters are available, e. g. filter by posts you are mentioned in.
Information
In the default settings, all filters are applied in is mode. You can also set the filters to is not mode. To change this mode, select is/is not next to the filter category.
Reset filters: To reset all filters, select the Reset filters button (arrow icon).
# Most recently used
The Most recently used area contains a list of entries that you recently viewed or edited. Click an entry to go straight to its filing location in the repository.
You can pin entries you need regularly by clicking the pin icon.
Under User menu > Configuration > Display > List of recently used entries, you can configure how many entries the list should contain and when a selected entry should be added.
# Repository
You can manage all folders and documents filed in ELO in the Repository work area.
You can open the Repository work area from the navigation bar or with the keyboard shortcut CTRL + 1.
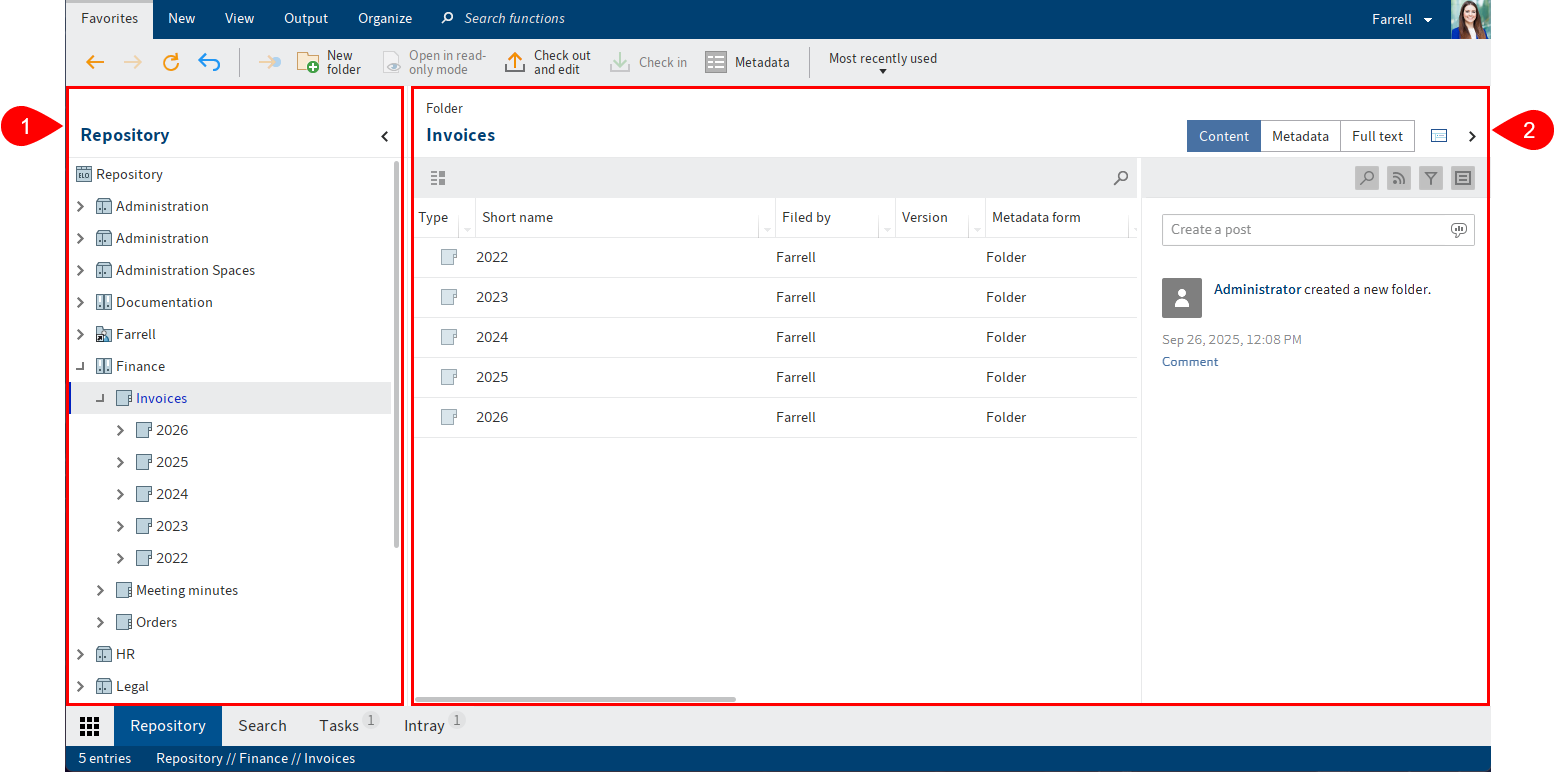
1 Repository structure: Overview of entries (folders or documents)
2 Viewer pane: View of entries selected in the tree (folders or documents)
For a detailed description of each component, refer to the Important components chapter.
If there are a lot of documents in your repository, it can be helpful to create an additional view. You can learn how to create a view in the Create tiles chapter.
# Search
In the Search work area, you can search for files and documents in ELO. The search results are displayed here. You can create search favorites and search views.
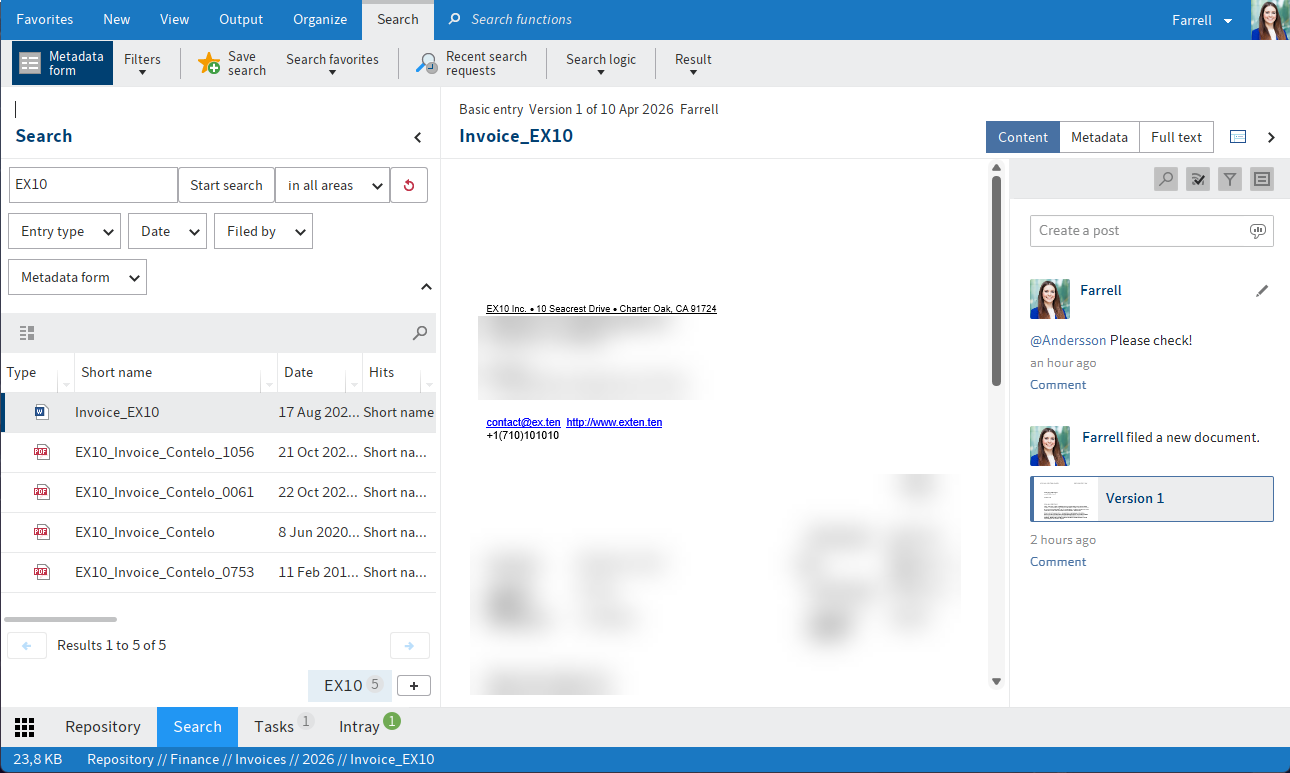
When you open the Search work area, an additional Search tab appears on the ribbon. The Search tab contains different functions, such as for searching the metadata, creating search filters, and adding search favorites.
Information
The chapter Search entries explains how to run a search, narrow down the results, and view the hits.
The Search entries chapter contains information on how to search the metadata using a form or create a dynamic folder.
Information
You can specify a keyboard shortcut that takes you straight to the search input field from a work area. Create a keyboard shortcut for the function Switch to search input field (available in: Ribbon > User menu > Configuration > Quick access to functions). For more information, refer to the chapter Configuration.
# Create search view
The New view function (plus icon at the end of the search results list) in the Search work area enables you to create a temporary search view.

A search view is used to temporarily save search results and search settings. Search views appear in a bar on top of the navigation bar.
Information
Metadata searches are automatically saved as a temporary search view.
Please note
These search views are deleted when you close ELO. If you want to save a search request, use the Save search function (in the Search work area under Ribbon > Search > Search favorites).
# ELO iSearch functions
ELO iSearch uses special search algorithms that improve the search function.
iSearch offers the following functions:
# Autocomplete
The autocomplete function provides a list of possible search terms that fit the character sequence already entered. The longer the term you enter, the more exact the suggestions are. ELO iSearch only suggests terms for matches in ELO. If no suggestions appear, there are no matches for the character string entered. To search for a suggestion, double-click on the term.
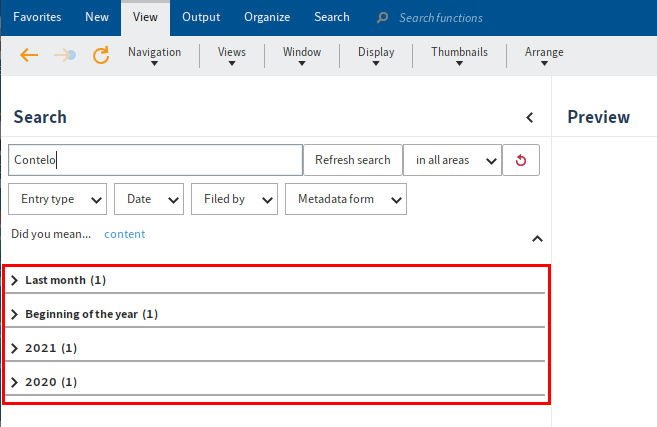
# Autocorrect
Autocorrect provides suggestions for search terms which return very few or no results. This can be especially useful if you made a typing error while entering the search term. If this is the case, ELO will suggest similar terms. A message appears underneath the search field: "Did you mean... " followed by the suggestions generated by ELO. Click on one of the suggested terms to show the search results for the chosen term.
# Linking search terms
The Boolean search function, a form of complex search, enables you to formulate search queries using the AND and OR operators.
AND connections search for matches that contain both terms.
The operators for an AND search are:
AND&&
Information
The AND connection is enabled by default. If you enter more than one term, the terms are automatically linked with AND unless you use another operator.
OR connections search for matches that contain at least one of the terms.
The operators for an OR search are:
OR,||
Example: Order, Invoice
Please note
If you search for NOT, OR, or AND via the search field or filters, you may encounter issues during your search.
# Logical parentheses
You can use logical parentheses to enter an alternative search string. Parentheses determine which terms to search for in addition to the actual search term.
For example, you may be searching for an invoice, but you are not sure if it was filed as an invoice, bill, or receipt. In this case, enter the term which should first be used to search and then add the two alternative terms in parentheses. I.e.: invoice (bill, receipt).
# Exclude terms
To exclude a term from your search, enter it in the search field and put a minus sign in front of the term. For example, if you search for the term invoice and exclude the term receipt, you must enter the following search command: invoice -receipt.
# Phrase search
To search for multiple related terms, enter the terms in the search field with quotation marks, e.g. "social media". Only entries that contain all the terms in the order entered will be found. The search is not case sensitive.
# Range search
The range search enables you to limit the search to a specific range. This makes the search faster and significantly increases the accuracy of the results.
You need to enter the ranges in square brackets and separate them with TO. For example, you want to search all folders in the range 03 to 05. Enter the search command [03 TO 05].
# Search for alternative terms
ELO iSearch provides alternatives (synonyms) for many terms. Enter a space after the search term. ELO iSearch suggests corresponding synonyms if any are available. To add a synonym to a search, click the desired suggestion.
# Wildcard search
It is also possible to use the placeholder (wildcard) *, as is common in other Windows programs, in the search. This means you can use the * placeholder to search for sequences or character strings.
Information
You can use a question mark as a wildcard. However, you will then need to enter your search term in lowercase letters. The question mark can only be used as a wildcard at the end of a word.
Search for sequences
There are several possibilities for this type of search, which will be explained with the following examples:
Let us assume you are looking for companies with "ow" in the name. Enter *ow* in the Company field of the search form. The search will return all documents containing the letters "ow" in the company name, e. g. Owen, Townsend, etc. In other words, the search looks for the range between the two asterisks.
Search "Beginning with" or "Ending with"
If you omit either of the limits marked by the *, you will define a search as beginning with or ending with. This search option can be set as the default in the metadata forms. However, the option is not visible in the metadata form.
For example, you want to search for orders with an order number starting with 15. To do so, enter 15* in the search form in the Order number field. ELO finds all documents in which the entry in the Order number field begins with 15. If you enter *er in the Company field, all the documents that have er at the end of the entry in the Company field will be found.
Information
You do not need to use the wildcard * in the Short name, Date, or Extra text fields. ELO displays all documents that contain the character string in the field in whatever form.
# Universal search
ELO lets you perform a universal search for certain attributes. This applies to all fields that use the same group as well as fields that have an identical component in the group name.
If you want to search multiple metadata forms, the group names of the fields on different keywording forms have to be identical. Using the same group creates a horizontal relation between the fields.
Identical group

Example: All numbers
The universal search can also be used if multiple fields do not use completely identical group names. However, all fields in the group name must have an identical component at the beginning of the group name.
This is useful, for example, for a universal search for numbers. Please take the following into account:
Fields for numbers must use a common characteristic (for example: NO):
- Invoice number field: NOINV group
- Order number field: NRAUFTR group
- Supplier number field: NOSUPPL group
The search form requires a field (All numbers, for example) that uses NO* as a group name.
If you use this search form with the Search metadata function, you can perform a universal search for all numbers.
For example, if you enter 2* as a search term in the field on the search form, ELO finds all documents that contain a number in the metadata that starts with 2.
# Tasks
In the Tasks work area, you will find a list of your workflows, reminders, and monitoring tasks.
You can open the Tasks work area from the navigation bar or with CTRL + 4.
For information on how to process tasks, refer to the Complete tasks with workflows chapter.
The following types of tasks are available; you can distinguish them by their icon:
| Icon | Meaning |
|---|---|
 | Workflows (workflow icon) |
 | Workflows with form (form icon) |
 | Reminders (calendar icon) |
 | Monitoring (camera icon) |
The tasks are sorted according to their priority: A (high), B (medium), and C (low). Overdue tasks are indicated by a red icon with a white exclamation mark.
New unread tasks are indicated by a green dot. You can mark a task as unread via the context menu (right-click or MENU key).
The option Show tasks due in the following number of days enables you to specify how many days in advance tasks should be shown in the task list. You will find this option under Ribbon > User menu > Configuration > Display > Task list display options.
For a better overview, you can sort the tasks by clicking on a column header.

You can filter the list by specific criteria using the triangle icon next to the column header.
You can create a filtered view for tasks, such as one showing only tasks due for follow-up or only overdue tasks. Use the function New view (available in: Ribbon > View).
Select an entry to view its contents.
Information
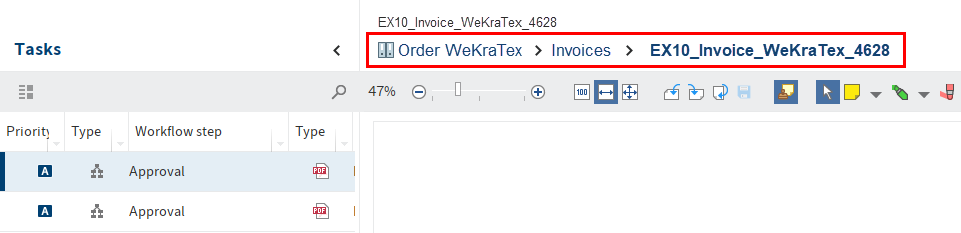
A breadcrumb is shown in the preview area for tasks for entries in a business object.
Tasks disappear from your Tasks work area in the following ways:
- Workflows:
- Actively: You forward the workflow using the form (Form or Metadata tab) or the function (Ribbon > Tasks > Forward workflow), delegate it, or hand it off.
- Passively: A group workflow is accepted by another member of the group.
- Reminders and monitoring: You delete the task (Ribbon > Organize > Delete).
# Clipboard
In the Clipboard work area, you can place individual documents or entire folders for quick access.
You can open the Clipboard work area from the navigation bar or with CTRL + 3.
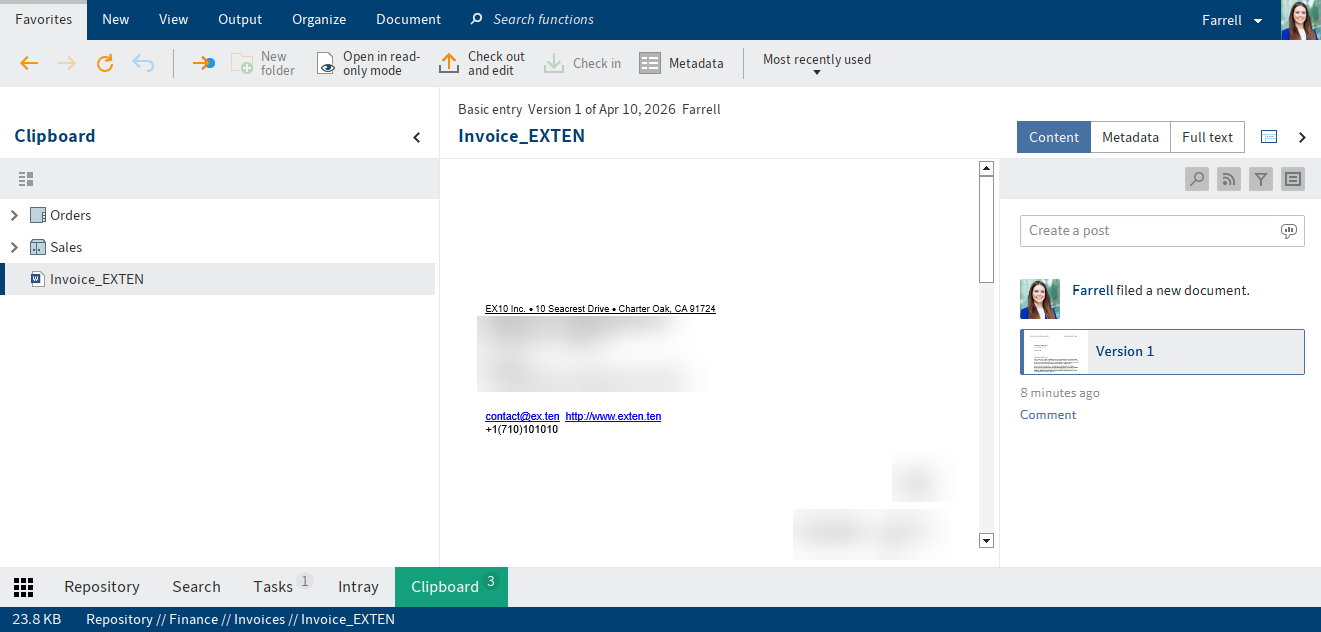
To place an entry on the Clipboard, select it and, on the ribbon, select View > Navigation > Copy to Clipboard. Alternatively, you can also drag entries to the Clipboard.
You can edit entries on the Clipboard in the same way as entries in the Repository work area. The changes are applied to the Repository work area.
Navigation and display are the same as in the 'Repository' work area.
Please note
The documents on the Clipboard are still in the Repository work area. They are displayed additionally in the Clipboard work area. The Delete function in the Clipboard work area has the same effect as in the Repository work area, i.e. the document is removed from the Repository work area.
An entry remains in the Clipboard work area until you remove it (Ribbon > View > Remove from Clipboard).
Information
If you use additional ELO clients, the Clipboards are synchronized. Switching between the individual clients, you will always find the same entries.
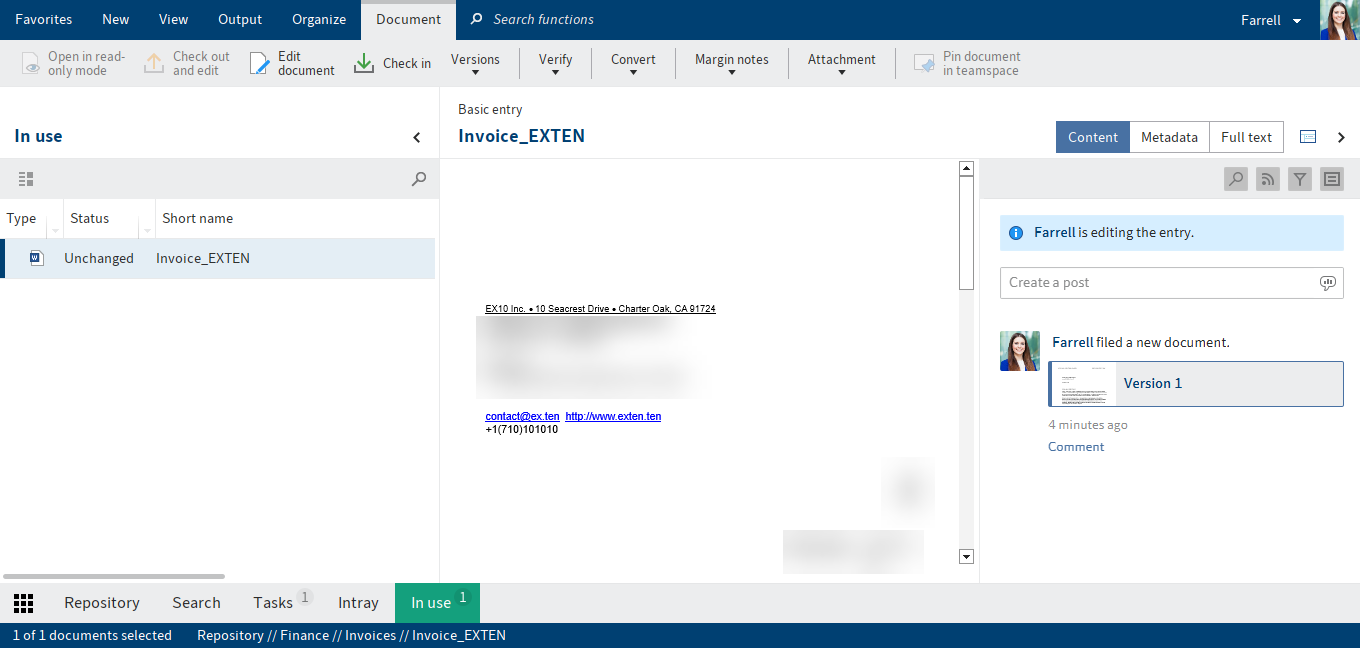
# In use
In the In use work area, you will find all the entries you have checked out for editing. The chapter Edit entries explains how to check out and edit entries.
Navigation and display are the same as in the Repository work area.
You can open the In use work area from the navigation bar or with CTRL + 5.
For a detailed description of each component, refer to the Important components chapter.
Once you check an entry back in or cancel editing, it automatically disappears from the In use work area.
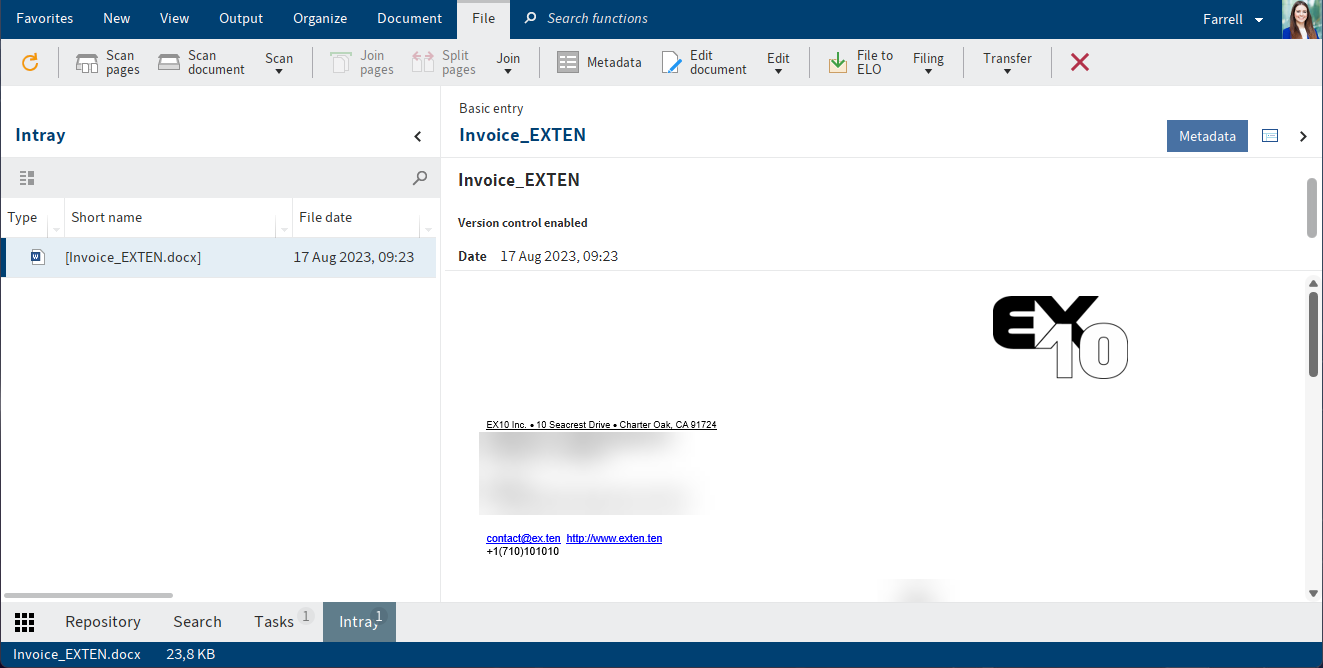
# Intray
In the Intray work area, you can collect documents before adding metadata to them and storing them in ELO. You can place documents in the Intray by using drag-and-drop or via the ribbon > 'New' tab > Insert file. You can also scan documents directly into the Intray.
You can open the Intray work area from the navigation bar or with CTRL + 2.
To file documents to ELO from the Intray work area, you need to add metadata for the documents. You can automate metadata entry and the filing process to ensure documents are filed in the correct location. Alternatively, you can specify the filing location in a dialog box every time you file a document.
Please note
Documents in the Intray work area are not yet stored in ELO. The documents are located in a special directory on your local computer. If you use ELO on different computers, the content of the Intray work area differs from computer to computer.
In the configuration, enable the option Save Intray on server when logging out to access documents in the Intray on other computers.
For more information, refer to the Scan a document to the Intray and file it and File entries via the Intray chapters.
# Spaces
Spaces are areas where you can collaborate with other users. You can file new entries and work on them with members of the space.
Workspaces in ELO provide various visualization and filtering options for different user groups, allowing you to filter entries and analyze them, for example, in charts.
The Teamspace function enables you to collaborate across teams. All teamspace members can gather and edit documents together and exchange information using the feed.
For more information, refer to the Workspaces and Teamspaces chapters.
You can find the spaces in the My ELO work area via the Spaces tile. In this area, you see all spaces that you are a member of.
In the overview of spaces, you have access to the Spaces tab.

You have the following options:
1 Create a new teamspace or a new workspace: If these buttons are disabled, there are no teamspace templates or workspace types available for creating new spaces.
2 Switch between the teamspaces and workspaces
3 Search for teamspaces or workspaces: The number of tiles decreases in accordance with your search query.
4 Navigate to a teamspace or workspace: They are shown as tiles and sorted by creation date.
# 'My ELO' button
Use the My ELO button to open the 'My ELO' work area. Alternatively, use the keyboard shortcut CTRL + Windows.

Here, you will find your news and most recently used entries, as well as the tile navigation.
If the My ELO button is green, there are new updates in My ELO.
# Ribbon
The ribbon provides access to most functions in ELO.

Information
Some functions can be accessed from the context menu. Right-click an entry to open the context menu. Alternatively, use the menu key of a selected entry.
# Tabs
The ribbon is organized into tabs. Some tabs are always shown (default tabs). Others only appear when the tab functions can be used (contextual tabs).
The default tabs are:
- Favorites: This tab contains frequently used functions that you want to access quickly. You can add other functions.
- New
- View
- Output
- Organize
The contextual tabs are:
- Document: When selecting a document
- Task: When selecting the Tasks work area
- Search: When selecting the Search work area
- File: When selecting the Intray work area
- Copy/Paste: When selecting the Copy function
- Reference: When selecting the Reference function
- Move: When selecting the Move function
- Attach pages: When selecting the Attach pages function
# Functions
The functions are arranged logically by relation. The most important functions are pinned to the ribbon. Others can be found in drop-down menus. If a function is grayed out, you cannot use it at your current position in ELO.
# Search functions
Use the search field to find functions. Selecting a function in the results list executes the function.
You can customize your ribbon so that you can find the functions you need faster. For more information, refer to the Customize the ribbon chapter.
# User menu
Selecting the user menu opens a drop-down menu, where you can adjust your account settings or access information about ELO.

Under the About menu item, you will find program information, such as version numbers, which are particularly important for support requests.
You will find more information here:
# Profile
Under User menu > Edit profile, you open your profile. In your profile, you can enter information on your professional background, your contact details, as well as upload an image.
For your profile image, use PNG, JPG, or GIF files that are at least 280 x 280 pixels. If ELO is unable to process the format or the size of the selected image, a message will appear at the bottom of the dialog box.
For larger images, you can hold down the left mouse button to drag and select the desired section of the image.
Information
You can view other user's profiles by selecting their name or profile image in a feed post.
You can access the group profile via the feed if the group has been mentioned.
# Navigation bar
Use the navigation bar to switch between areas and see your current location. This bar is always available.

You can pin all areas available as tiles in My ELO to the navigation bar by right-clicking the tile.
Hold down and drag with the left mouse button to move the individual areas on the navigation bar.
If you have enabled the option to show the number of entries on the tiles, they will also be shown on the navigation bar. To learn how to show the number of entries, refer to the chapter 'My ELO' work area.
# Toolbar

You can change the display options of the entries via the gray toolbar. The following options are available depending on the work area you are in:
 Table: The entries are displayed as a table.
- Restore table columns: Use this function to restore the default settings of the table columns in a work area. Manually set filters and sort orders are removed.
- Copy table to clipboard: Use this function to copy the currently selected table entries to the clipboard. The entries can then be inserted into an external program, e. g. Microsoft Excel.
 List: The entries are displayed as a list.
Thumbnails: Use this function to enable a thumbnail view of the list of entries. You can use the slider to adjust the size of the thumbnails.
Group:

Use this function to sort the list of entries in the list and tile view. Use the Group drop-down menu to select whether to group the list by Date, Filing date, Type, Filed by, or Metadata form.
The entries are grouped by categories, e. g. by the year in which they were filed. This function can be combined with the Sort order (search results) function.
Sort order:

Use this function to sort the list of entries in the list and tile view in the Repository and Search work areas. In the Sort order drop-down menu, you can select whether to sort the list by Date, Filing date, Type, Filed by, Short name, or Metadata form. This function can be combined with the Group function.
Expand/Collapse: Use this function to change how entries are displayed in the list and tile view in the Repository and Search work areas. You can select filter criteria for both views via the Sort order and Group drop-down menus. The Expand/Collapse function enables you to switch between the view of the parent filter criteria and a view of the search results associated with the filter criteria.
Information
The function is only enabled if the entries are displayed in a list or tile view. In addition, at least one Group filter criterion must be selected in the drop-down menu.
 Tiles: The entries are displayed as small tiles.
- Thumbnails: See details under List
- Group: See details under List
- Sort order: See details under List
- Expand/Collapse: See details under List
 Tree (search results only): This function displays the search results in a tree structure. The tree structure is created according to the selected tree view. Use the Edit tree structures function to define different tree views. The tree structures offer various sorting options for documents displayed in the Search work area.
Edit tree structures: The Edit tree structures function enables you to change the tree view in the search. You can create and edit different tree structures. A tree structure enables you to specify which sections of the tree view to include in the search results. For example, you can sort the list of search results by status.
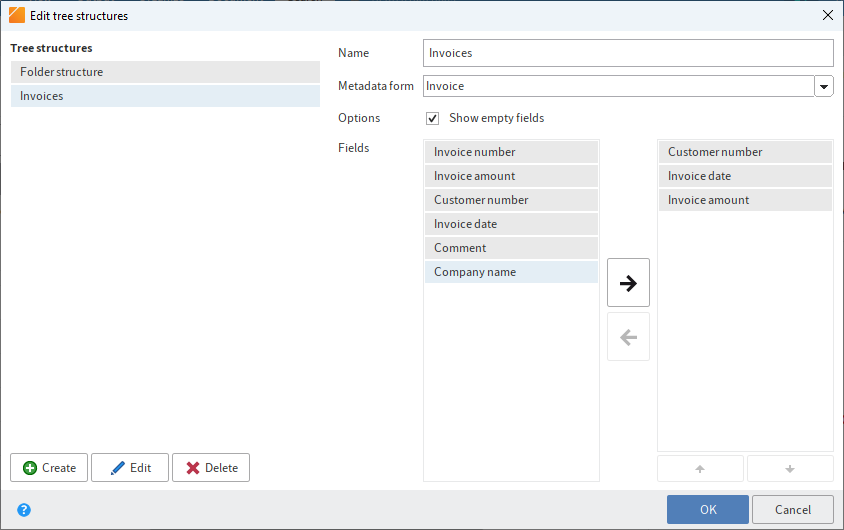
The following options are available:
Name: Enter a name for the tree structure.
Metadata form: Select a metadata form from the drop-down menu.
Show empty fields: Enable this option to also see metadata fields that do not contain any information. These fields contain spaces.
Fields: Select the fields you want to use for sorting the results.
Use the Add, Delete, and Edit functions to create and edit tree structures.
# Active substitutions
You can substitute for other users, or be substituted for by other users or by groups. You will recognize both of these cases based on the person icon.

- Orange person: A substitute is currently set for you.
- Blue person: You are currently substituting for at least one person.
Selecting the icon opens more information on your substitutions.
You will find more information here:
# Multiple windows
You can display ELO in multiple windows.
In the ribbon > View > Windows, you have the following options:
- Open a new window
- Show side by side
- Show stacked
Information
If you don't already have a second window open, the Show side by side and Show stacked functions automatically open one.