# Workspaces
Workspaces are work areas in ELO for different functional levels. With the help of filters and different views, you can edit data and analyze it in charts and tables.
Workspaces are based on workspace types. These are created by administrators and define which views and filters are available to you. They also define which objects can be created in a workspace.
You can find more information about workspace types in the ELO Workspaces (opens new window) documentation.
# Objects
An object (business object) is a special type of folder that helps organize contents into regions. You can find more information in the following sections:
Connections between objects are not established via a hierarchical structure, but by relations.
The Create object section explains how to create an object.
# Relations
You can establish a connection between objects, for example between a job application and the position it was submitted for.

You establish these connections using relation fields. Relation fields can be found in the metadata form of an object.
In the table view, a relation is indicated by a flyout (button with a chain icon).
If you've entered the corresponding position in the relation field of a job application, for example, the flyout takes you from the position to the application. This gives you an overview of all applications for a position.
The link button (chain icon) opens a quick view of the linked entry. Select the Go to button to switch to the corresponding entry.
# Workspace home screen
Refer to the Spaces section to learn how to access a workspace.
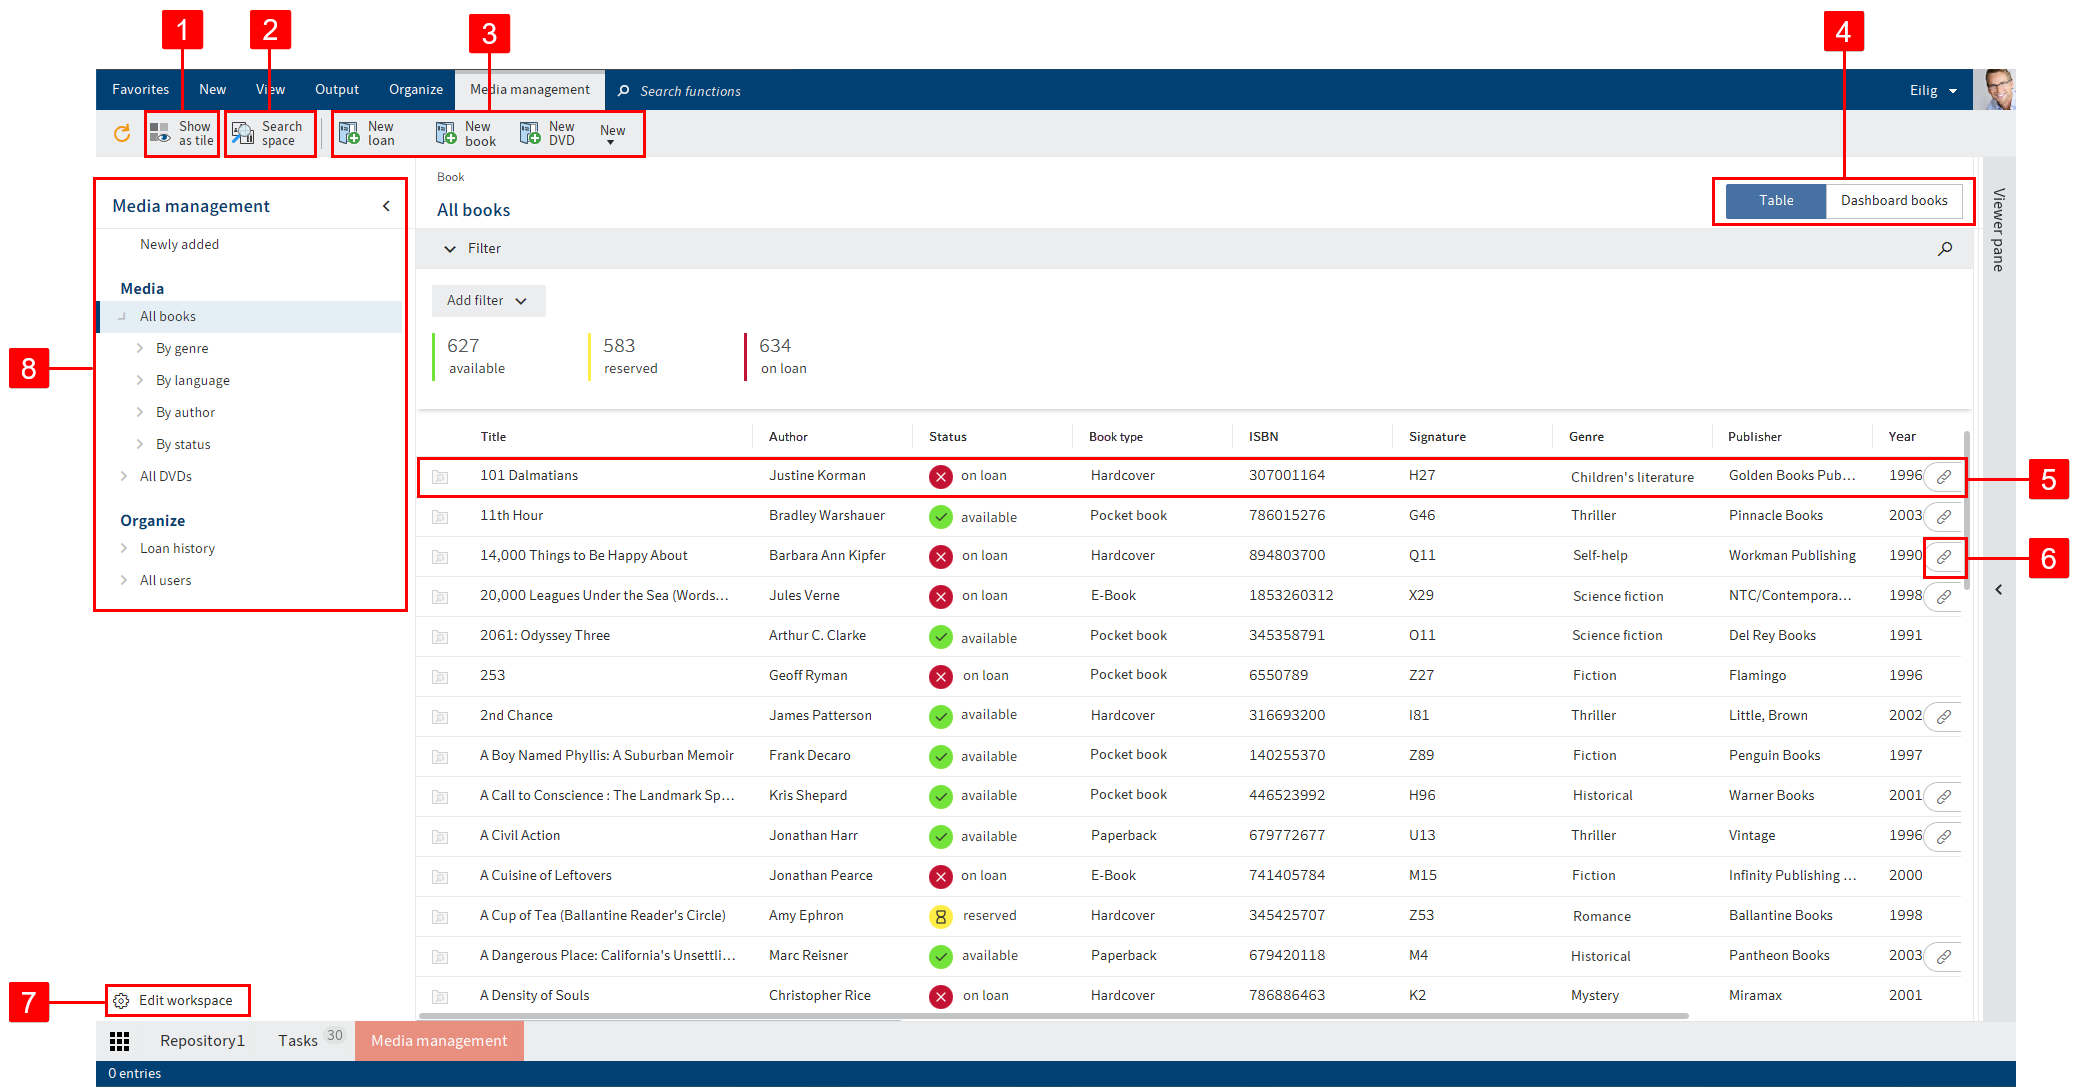
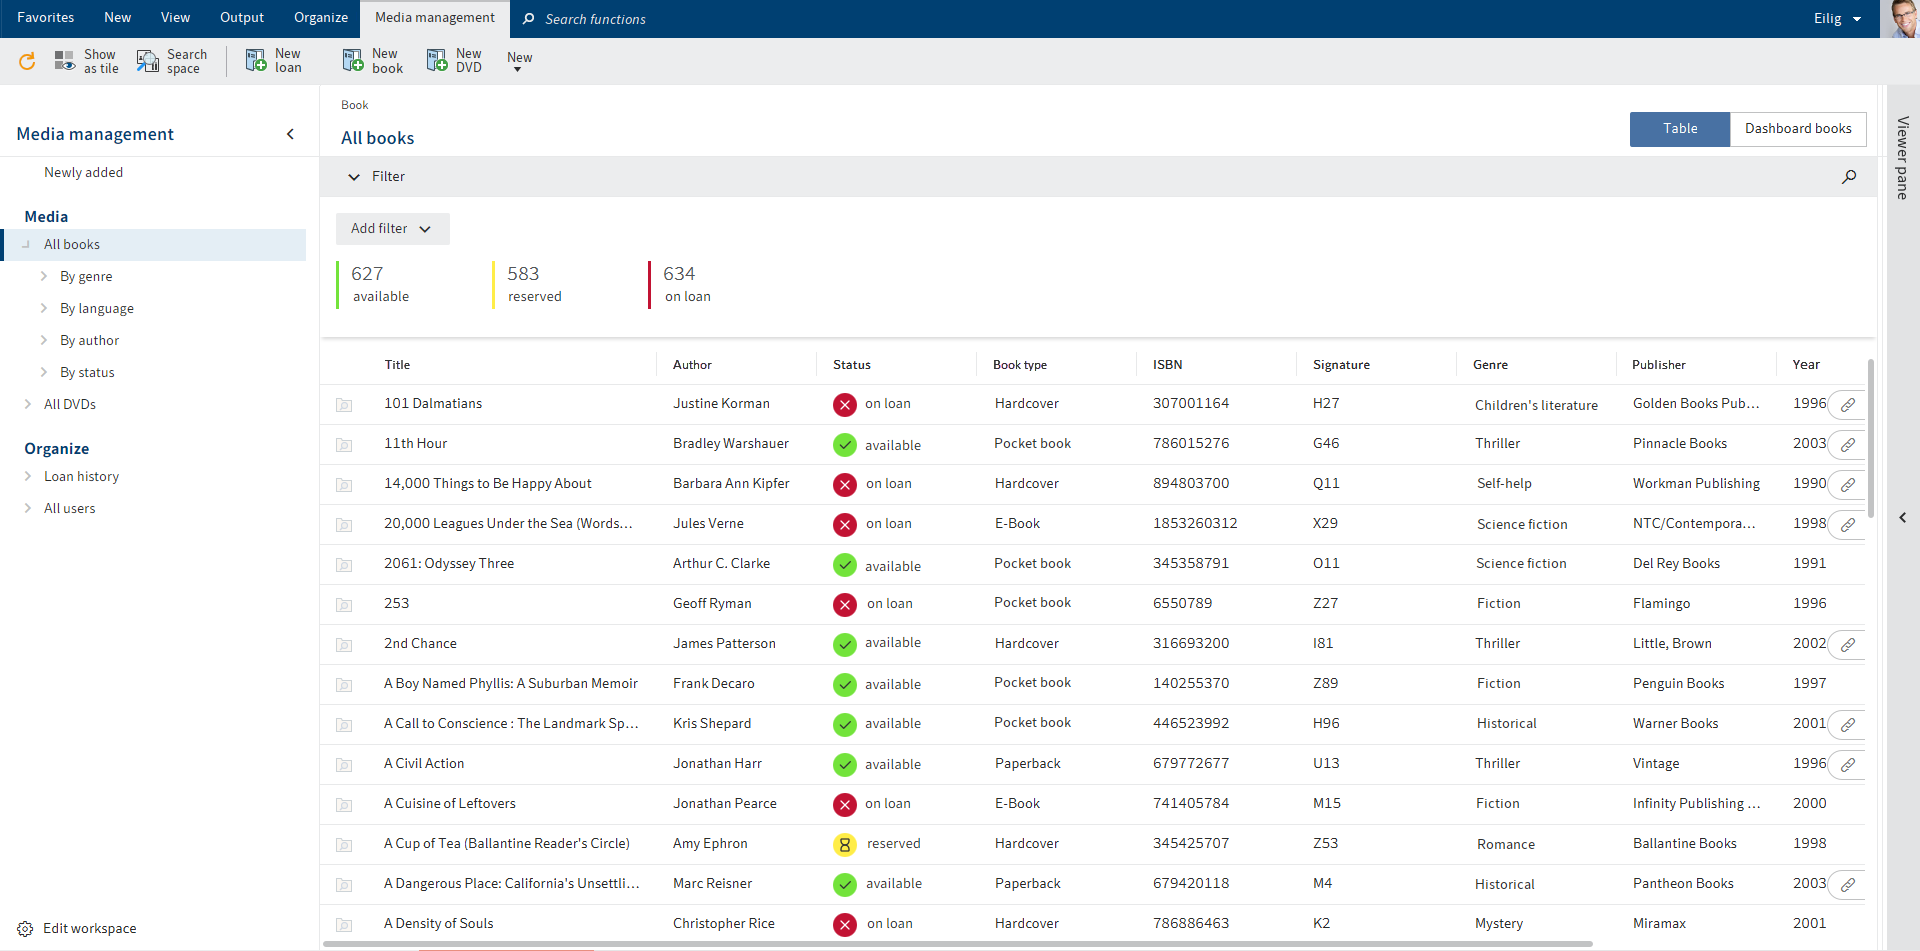
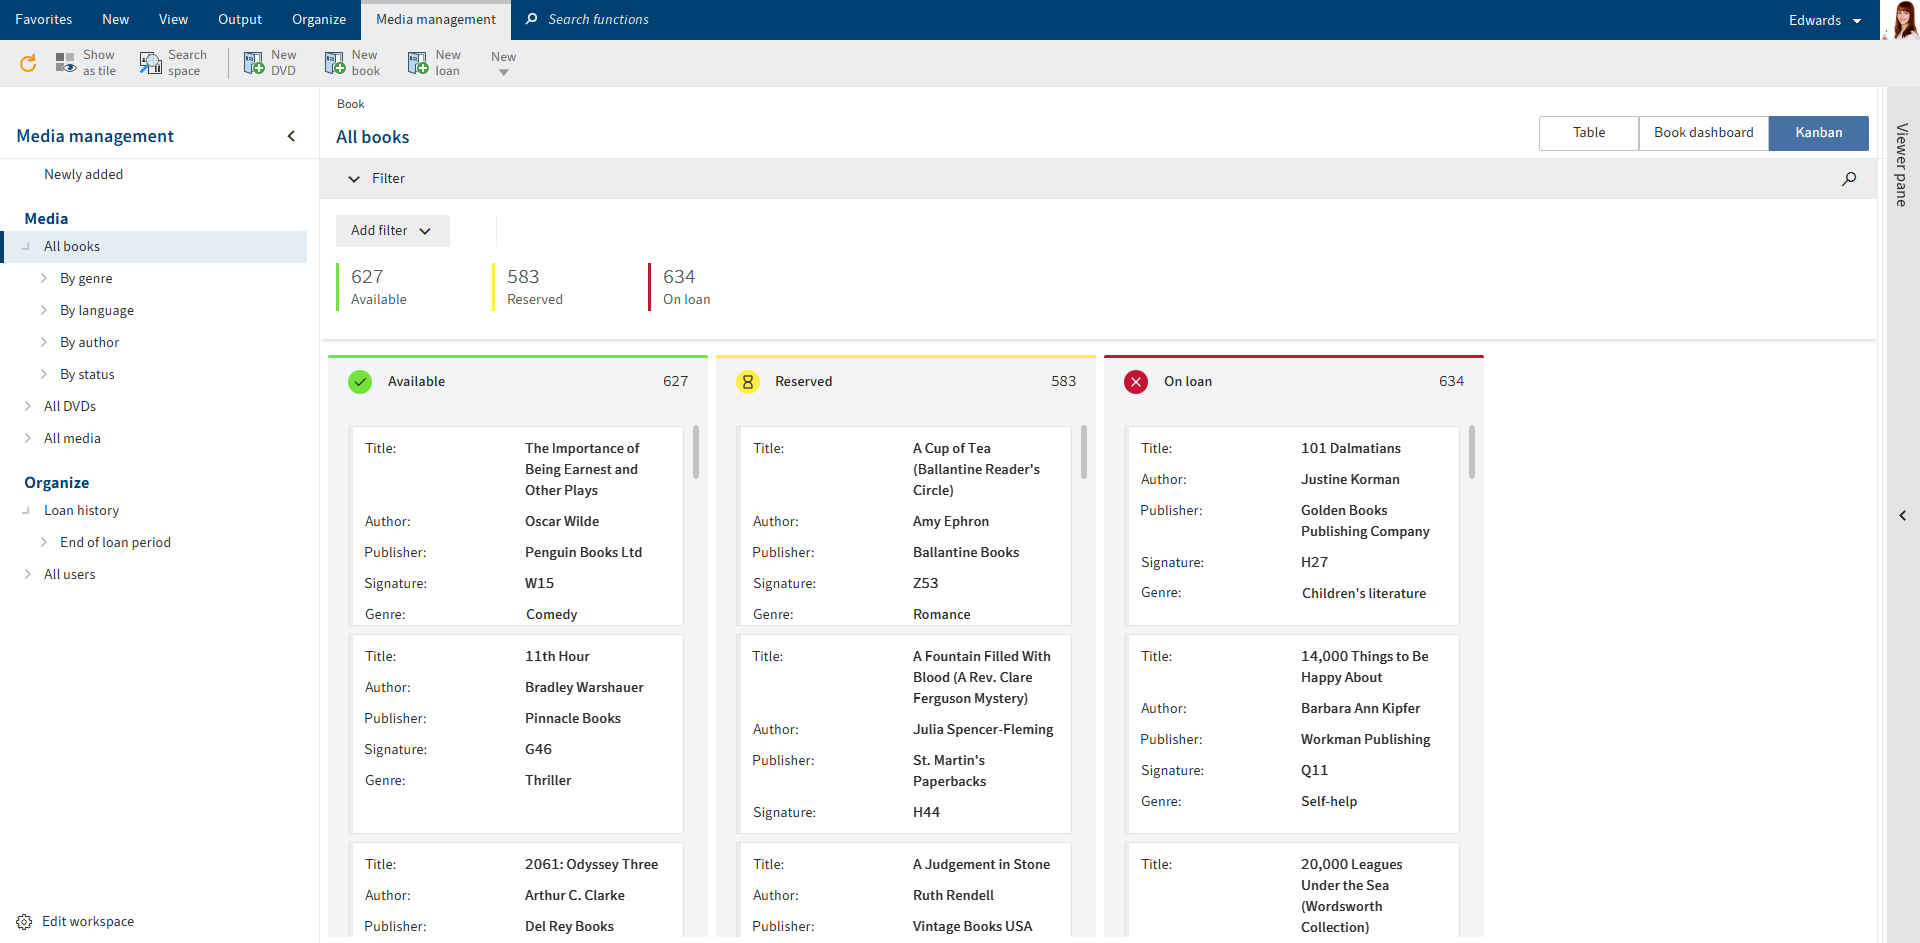
You can access all the elements of the workspace via the home screen of a workspace. The ribbon features a tab with additional workspace functions.
You have the following options:
1 Show as tile: You can create a tile in My ELO that provides quick access to the workspace.
2 Search space: You can search the entries of the selected space. Refer to the chapter on Filters for a more detailed description of the search.
3 Create new object: You can create an object. For more information, refer to the Create object and Objects sections.
4 Switch view: If multiple views have been created for a workspace, you can use the tabs to switch between views. There are tables, kanban boards, dashboards, and calendar tabs. The tabs are named and visibility is set by the administrator. These settings are customizable.
5 Show entry
6 Select relation: You can open entries that are related to the selected entry.
7 Edit workspace: You can edit the workspace if you are authorized to do so based on your role.
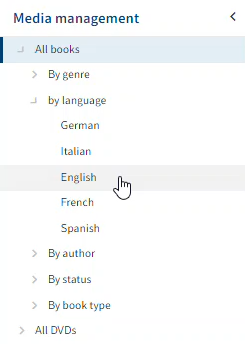
8 Workspace filter tree: You can switch between the workspace filters. Filters can be single or multi-tier.
# Edit workspace
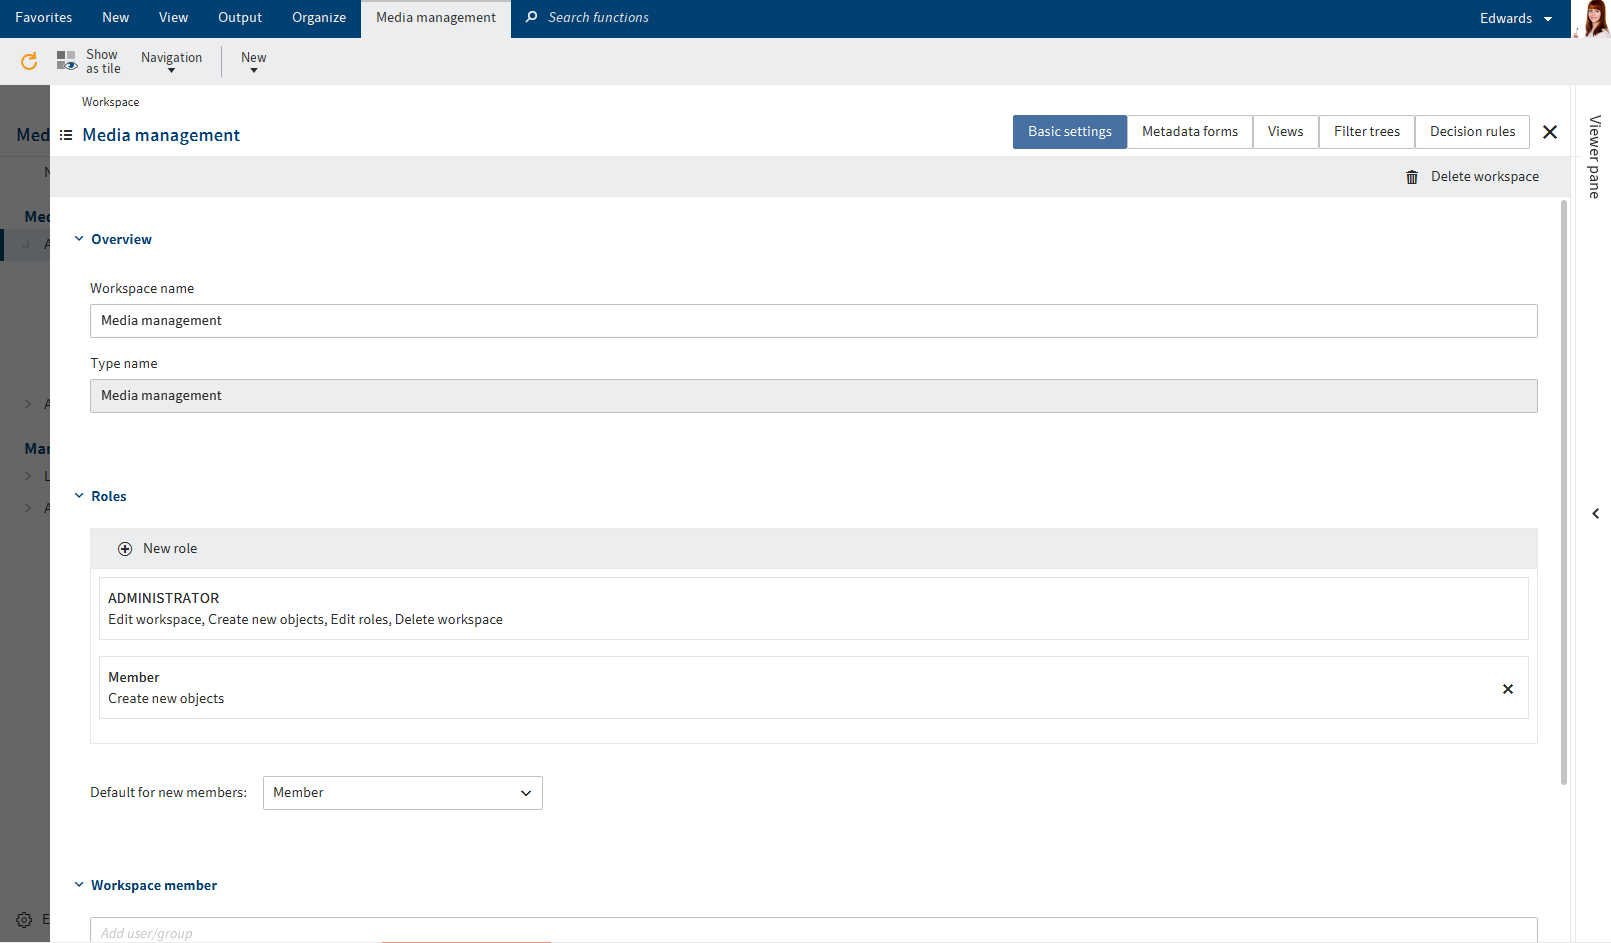
You can edit the workspace here. In the ELO packages (opens new window) documentation, you can find more information about the following:
- Basic settings (opens new window)
- Metadata forms (opens new window)
- Views (opens new window)
- Filter trees (opens new window)
- Parameters (opens new window)
- Decision rules (opens new window)
Please note
When you edit the settings in one area, it is no longer linked to the corresponding area of the workspace type. Changes to the workspace type are therefore no longer automatically applied to this area in the workspace.
The Roles area can only be edited after the workspace has been created.
The following options are only available in the workspace:
You can add members to the workspace and set roles for them.

You can delete the workspace.
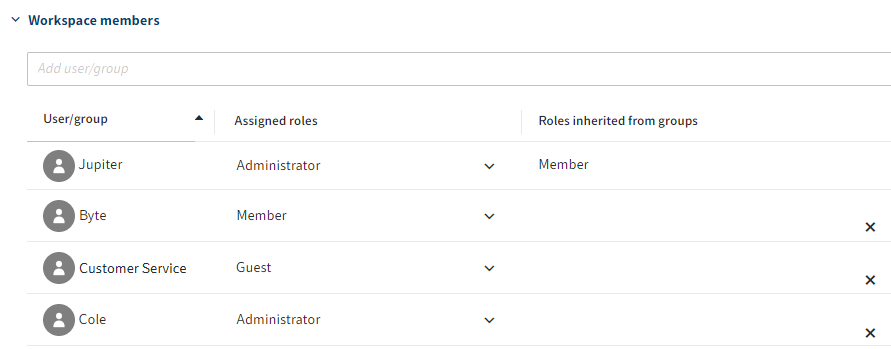
# 'Workspace members' area
You have the following options:

You can add members and groups to the workspace. If you add groups, all members of the group are granted the role set for the group.
Please
New members need to restart ELO to access the space.
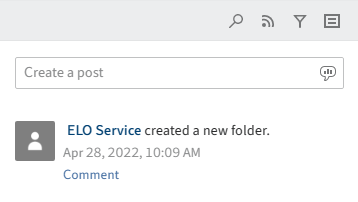
When you add workspace members and groups, a feed post is automatically created and is displayed in My ELO.

You can change the role of workspace members with the drop-down menu. Workspace members can have multiple roles. If workspace members belong to a group that has been added to the workspace, they are also granted the roles that the group has in the workspace.

You can delete workspace members. Administrators can only be deleted by administrators. The last administrator cannot be deleted.
# Search and filter
You can search and filter entries in workspace views.

You can open the search function by clicking on the magnifying glass icon in the toolbar. Enter a search term to start the search. Search hits are highlighted in yellow.
The search hits will also be displayed in other views, when you reopen the workspace, and in all ELO clients until you cancel the search.

You can set quick filters to filter entries.
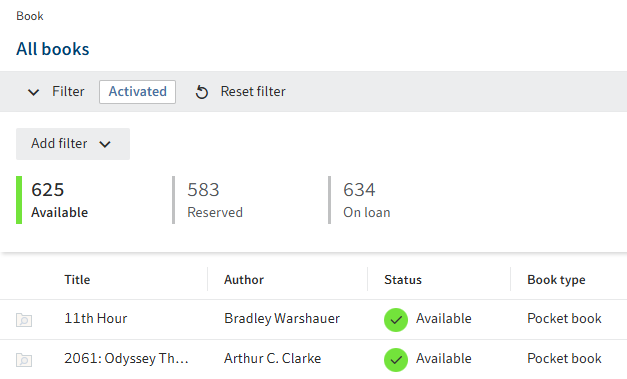
Status filters show the number of entries for each status, giving you a quick overview of your data. You can enable one or multiple status filters.
Status filters are created by the administrator.
The filters also remain active in other filter levels and views after restarting ELO as well as in other ELO clients.
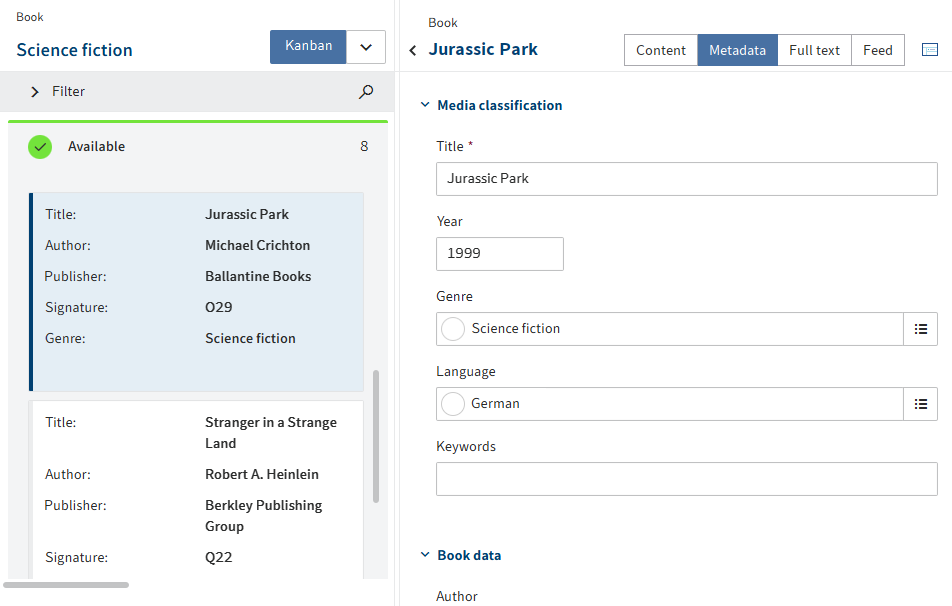
# Table
In a table, you see all the entries that match the selected filters. The selection of filters is based on the workspace type.
You have the following options:

You can open the entries. The entry is shown and you can edit it in the Metadata tab. You can insert documents and folders for an entry and open them on the Content tab. This area works like the viewer pane in the repository.

You can edit the entries using the functions on the ribbon. You can also use the context menu for documents and folders associated with an entry.
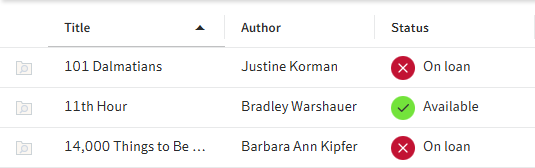
You can sort the filtered entries in the table by clicking on the column header.
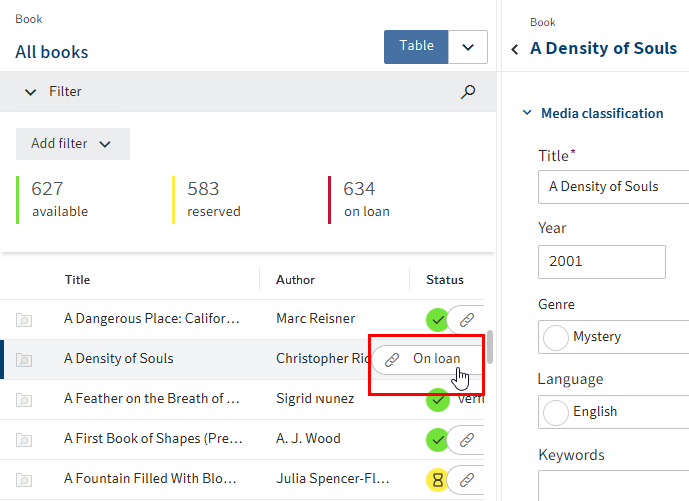
You can use flyouts to open entries that are related to the selected entry. The metadata of the entry has to contain a relation field that establishes the link. If multiple relations exist for an entry, you can open one of the associated entries using the drop-down menu in the flyout.
You can enter a feed post. The feed works as described in the chapter Feed.
# Kanban board
In a kanban board, entries are assigned to columns depending on the value of a specific status field.
You have the following options:
You can open the entries. The entry is shown and you can edit it in the Metadata tab. You can insert documents and folders for an entry and open them on the Content tab. This area works like the viewer pane in the repository.
You can edit the entries using the functions on the ribbon. You can also use the context menu for documents and folders associated with an entry.
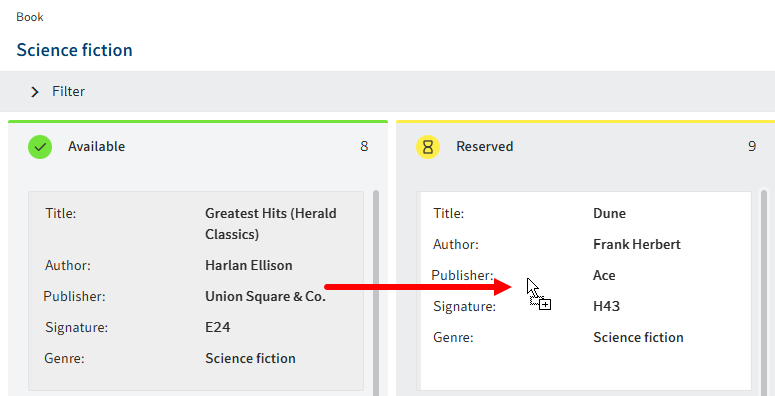
You can move entries via drag-and-drop. The corresponding value in the metadata changes.
You can enter a feed post. The feed works as described in the chapter Feed.
# Dashboard
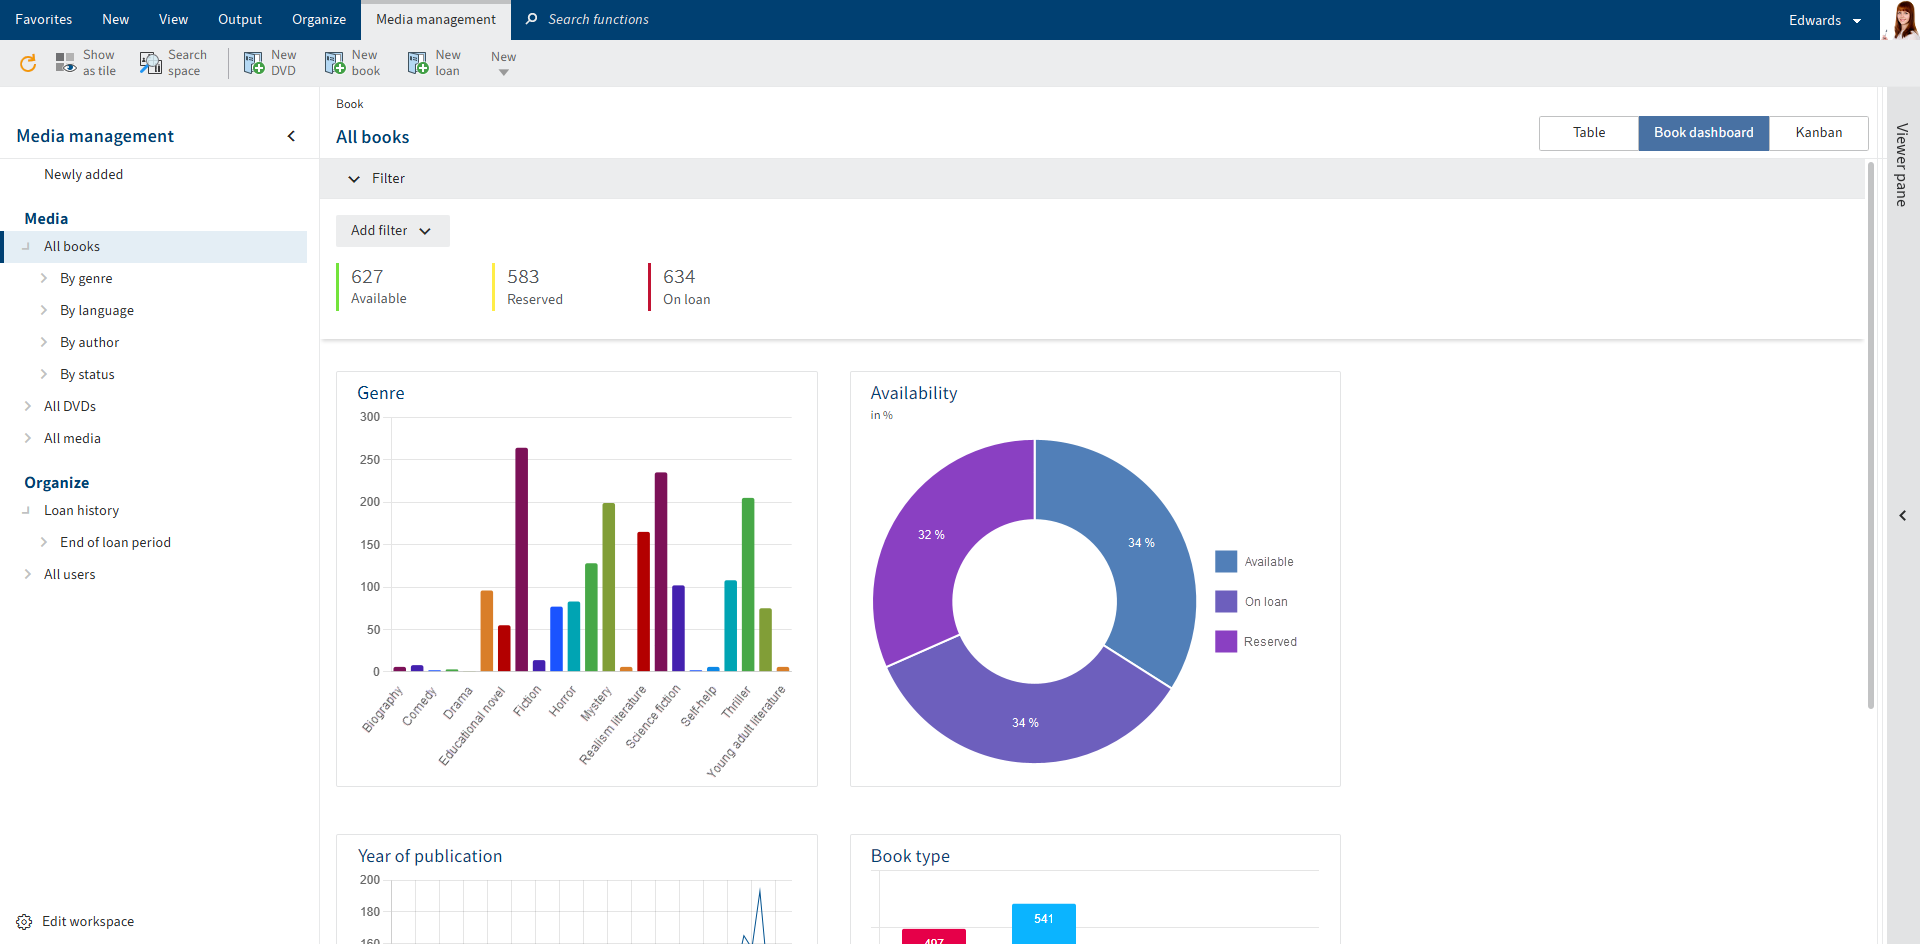
Workspace entries can be visualized in various ways in a dashboard. The types of visualization available depend on the administrative settings.
You have the following options:
You can filter the dashboards.
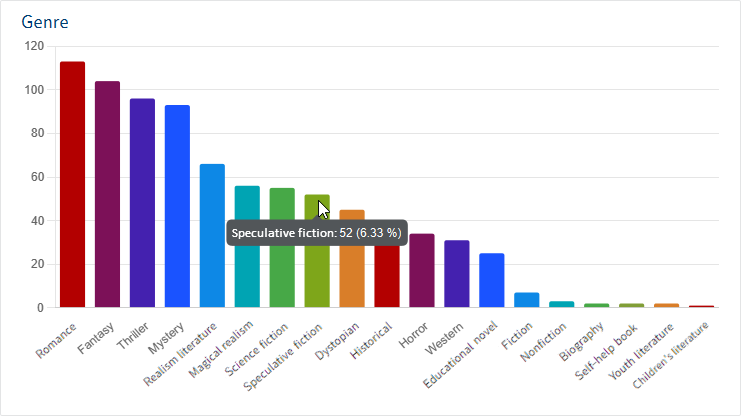
Move the cursor over the charts on the dashboard to view details.
# Calendar
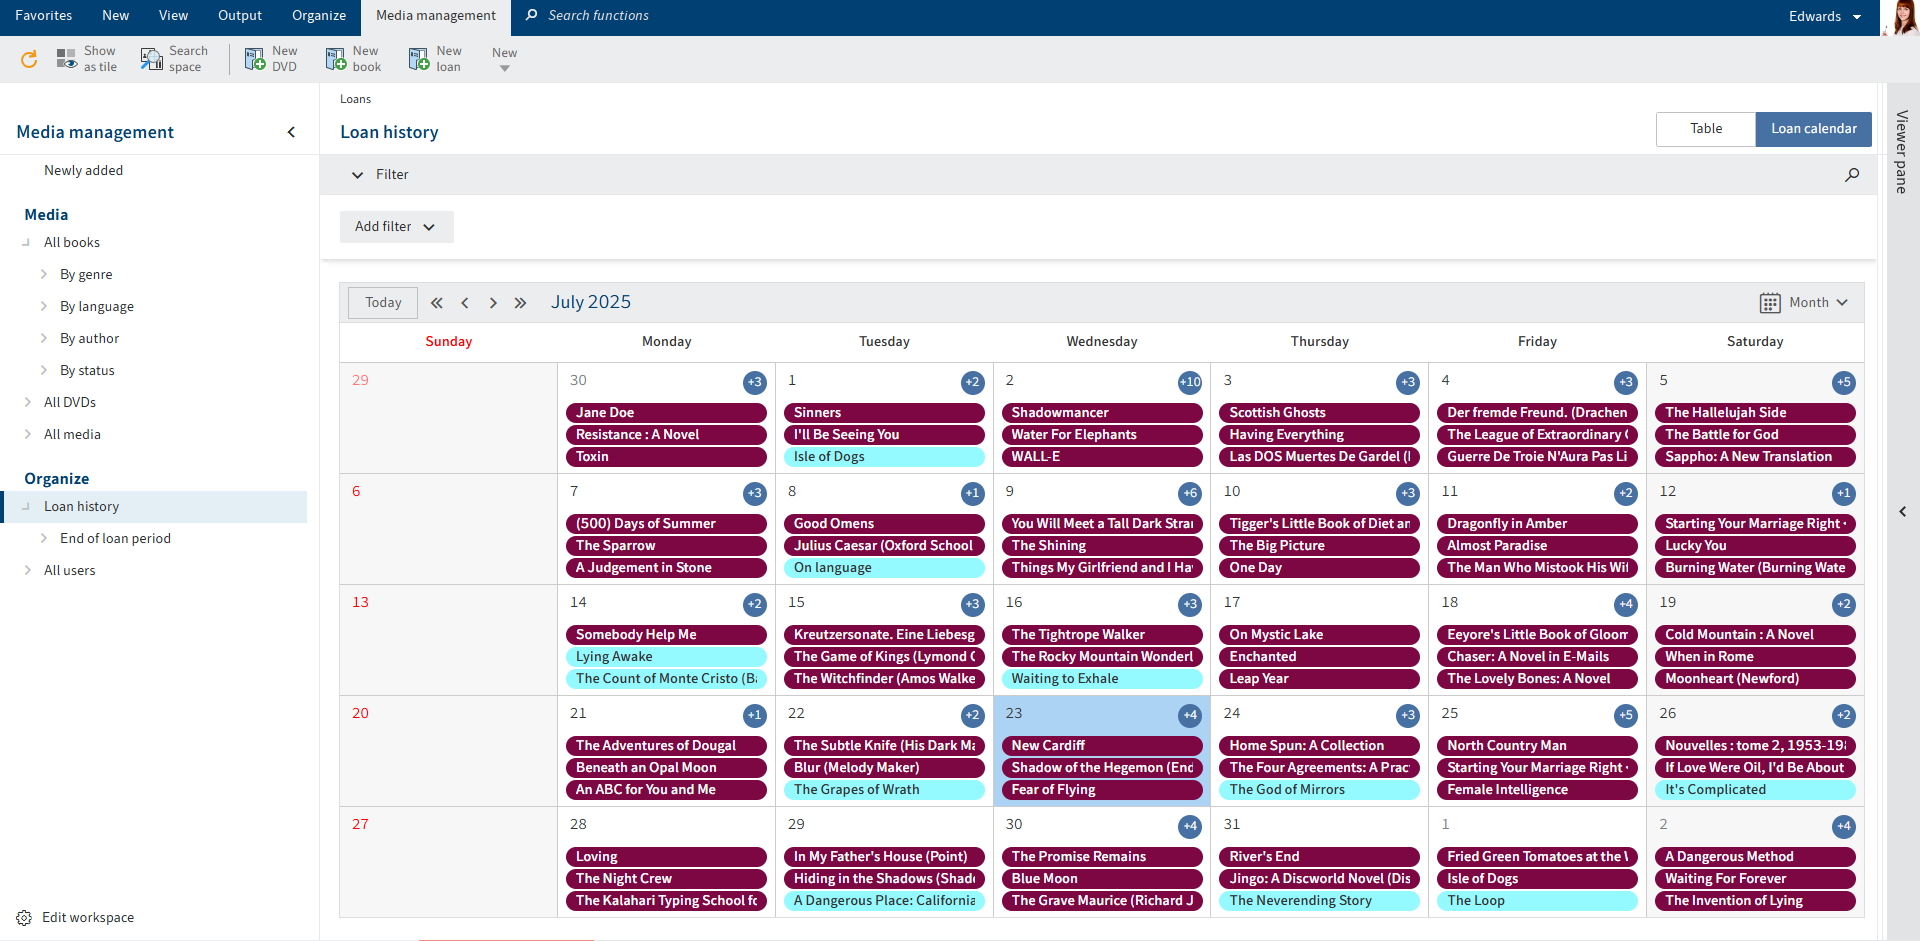
In a calendar, entries are shown organized by date. Multiple entry categories can be shown.
You can switch between the different calendar views using the drop-down menu.
You can open the entries. The entry is shown and you can edit it in the Metadata tab. You can insert documents and folders for an entry and open them on the Content tab. This area works like the viewer pane in the repository.
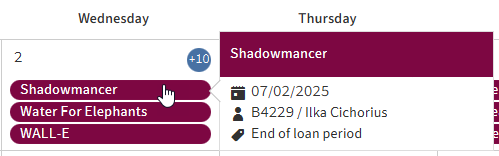
You can display details about a calendar entry by hovering the mouse over it.
# Create workspace
You can create new workspaces.
Requirements
The administrator will already have created workspace types.
Method
In My ELO, select the Spaces tile.
Select ribbon > Spaces tab > New workspace.
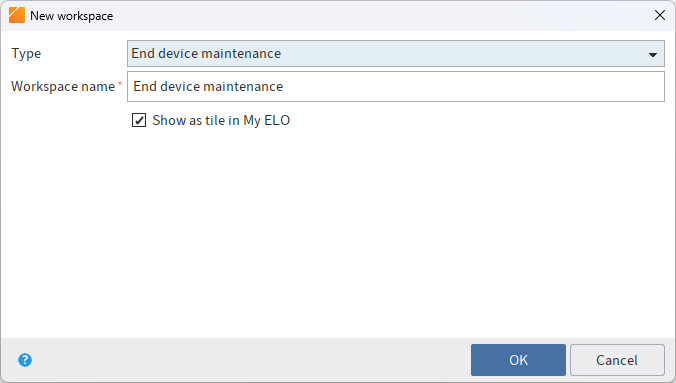
In the New workspace dialog box, select the type you want to base the workspace on.
Enter a meaningful workspace name.
Show as tile in "My ELO": You can create a tile while you are creating the workspace. This only applies to your own client. You can also create the tile later, as described in the Workspace home screen section.
Select OK.
Result
The workspace is created. You will find it as a tile in the overview of spaces.
Outlook
You will learn how to work with workspaces in the following sections:
# Create object
You can create objects.
For more information about the concept of objects, refer to the Objects section.
Requirements
- The administrator has configured the functions for the workspace type.
- Your role has permission to the functions.
Method
In My ELO, select the Spaces tile.
Open a workspace.
On the ribbon, go to the tab with the workspace functions and select the corresponding function. The administrator has configured which object types are possible for each workspace.
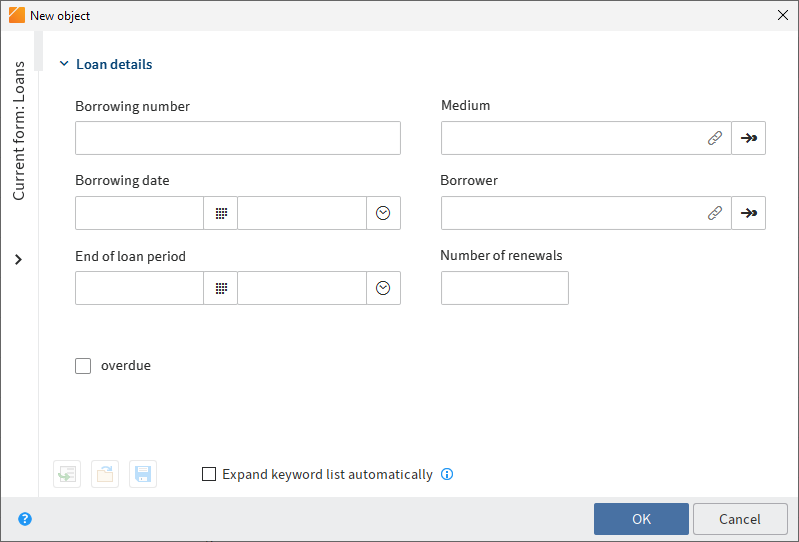
The New object dialog box appears with the metadata form appropriate for this object.
Complete the fields as required.

If your object is related to another object, you can establish a connection via relation fields. For more information about the concept of relation fields, refer to the Relations section.
Select OK.
Result
The object is created in the workspace. It can be found in the Newly added area right away and via filters after a short delay.
Outlook
You will learn how to work with workspaces in the following sections: