# Groups
# Create group
To create a group, proceed as follows:
Open the ELO Administration Console.
Open the user and group administration (System settings > User and group administration).
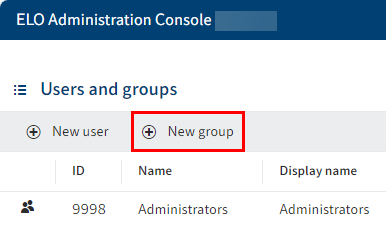
Select New group.
The Group area opens.

Configure the new group. Navigate to the Basic settings, Group membership, and User rights tabs to do so.
For more information, refer to the following section 'Configuration'.
Once you are finished with configuration, select Save group to save.
You have created a new group.
# Configuration
# Define basic settings
In the Basic settings area, you define the Group information, Properties, and additional Information.
# Group information
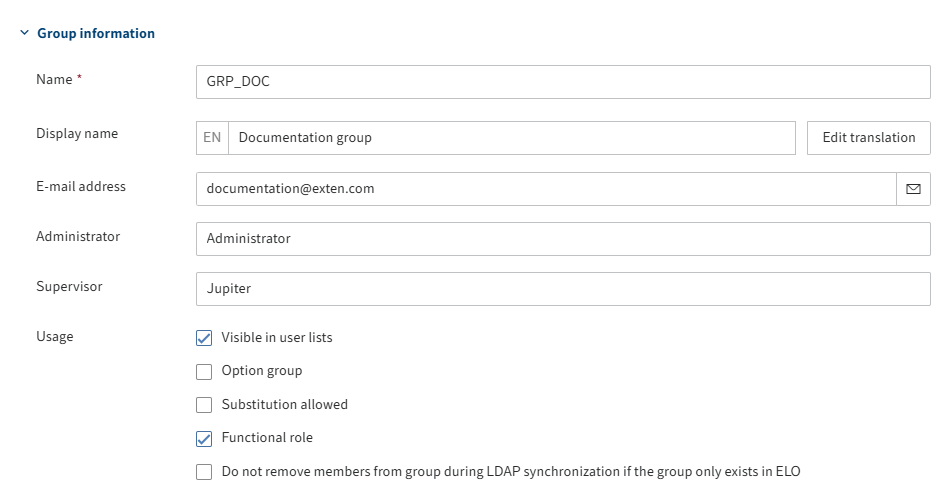
Mandatory fields are marked with a red asterisk.
| Division | Field | Explanation |
|---|---|---|
| Name | This can be changed later. Must be unique within the ELO system. | |
| Display name (optional) | Shown as the group name in the client. For groups from packages, this can only be edited in the Groups area of the corresponding package. If you want to offer translated texts, you can configure them via Edit translation. You will find more information under ELO packages > Other topics > Translations > Use translation variables (opens new window). | |
| E-mail address (optional) | Must be unique within the ELO system. Displayed in the user profile in the client and can be used in workflows, forms, and scripts. | |
| Administrator | The account used to create the new group is automatically entered. This can be changed later. Determines who may edit the master data of the group. | |
| Supervisor | Can be used in workflows, forms, and scripts. If this field is left blank, the content of the Name field is used. | |
| Use | Visible in user lists | If this option is enabled, the group will show up in the corresponding pick lists in the ELO client. If the option is disabled, the group still exists in ELO, but it is not shown in the corresponding selection lists in the ELO client. |
| Option group | Option groups are defined for the purpose of assigning specific ProfileOpts. Only these groups show up in dialog boxes where settings are made for other ELO accounts. For more information on option groups, refer to Option groups. | |
| Substitution allowed | You can control how rights are distributed via the substitution module. For groups that have the substitution right, rights can be transferred to substitutes. | |
| Functional role | If this option is enabled, members of this group can enable their functional role in the clients. This option makes sense if a user has to perform different tasks in ELO that require different permissions and rights. For more information on enabling functional roles in the clients, refer to the following documentation: - ELO Desktop Client > Personalization > Customize settings > Enable roles (opens new window) - ELO Web Client > User menu [your name] > Enable roles (opens new window) - ELO Java Client > Personalization > Customize settings > Enable roles (opens new window) | |
| Do not remove members from group during LDAP synchronization if the group only exists in ELO | If this option is enabled, an LDAP user is not removed from a local group in ELO during LDAP synchronization. |
Please note
Do not assign user rights to users exclusively through the inheritance of functional roles. These are disabled as standard and can be enabled as needed in the client.
It is not possible to pass on user rights by nesting multiple functional roles.
# Properties
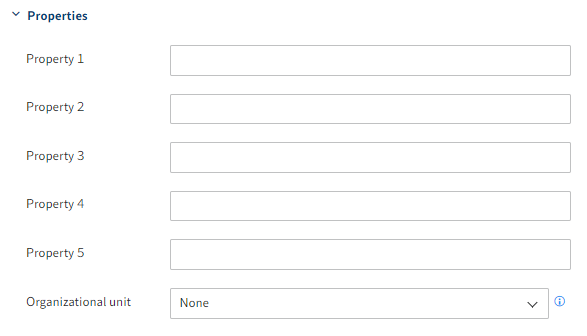
The configuration of these fields is optional.
| Field | Explanation |
|---|---|
| Property 1-5 | Information can be evaluated using scripts. |
| Organizational unit | You will find more information in the documentation under Configuration and administration > User administration > Additional configurations > Organizational units. |
# Information
| Field | Explanation |
|---|---|
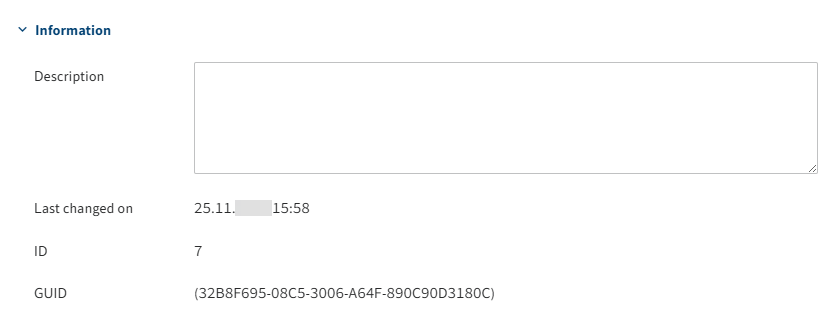
| Description (optional) | Maximum 250 characters are allowed. |
| Last changed on | Updates automatically |
| ID | Each group is automatically assigned an ID, which can be used to address the group in other functions. |
| GUID | Each group is automatically assigned a GUID. The GUID can be used to address the group in other functions. |
# Option groups
User-specific options are generally assigned to a user. However, group options are applied if there are no user-specific options. If these have not been defined, then the settings for the Everyone group are applied. If settings have not been defined for this group, there is also an ELO default value (company default setting or client default).
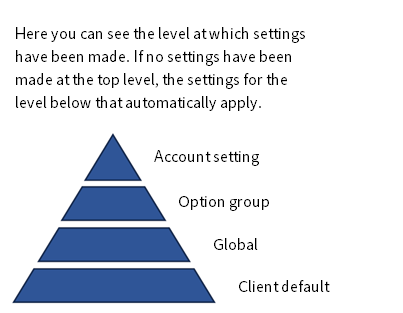
These groups allow you to control who has access to specific functions.
You can define which users can execute ELO functions from the context menu, or only from the ribbon buttons, or both at once, and can even block access to parts of the software. It is also possible to control scripts and script functions as well as icons for each option group.
This is practical for ELO workstations with special areas of responsibility, in order to improve usability and to prevent incorrect usage.
Please note
An ELO user should only be a member of one option group. Memberships in multiple option groups can result in conflicting settings.
# Define group membership
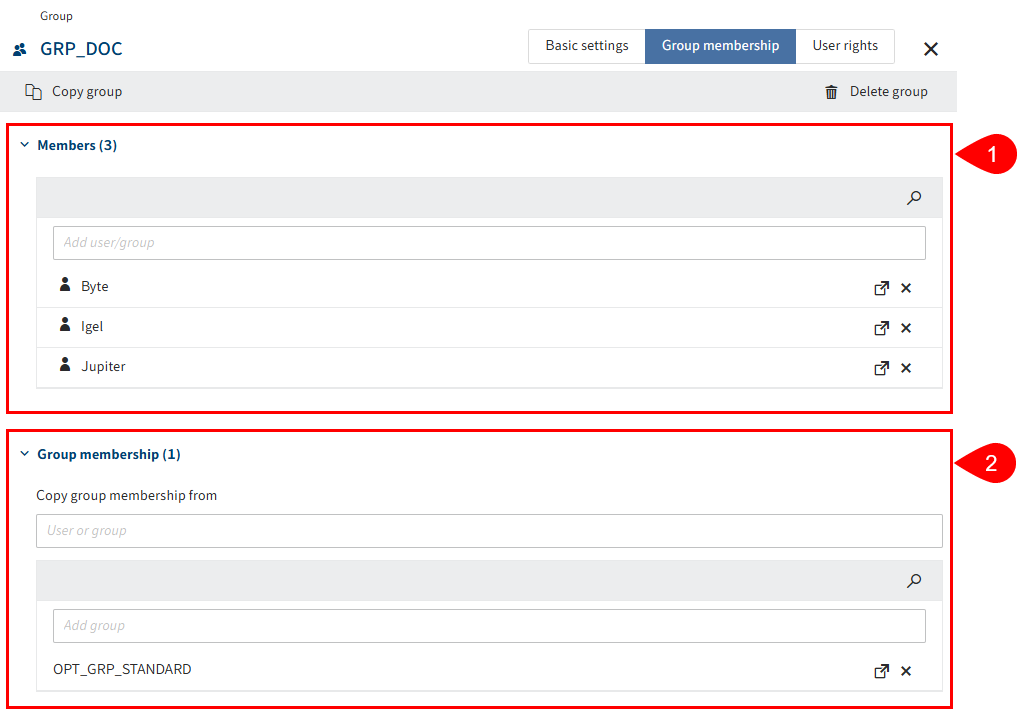
1 Members: Add existing users or groups as members. The number of group members is shown in brackets.
2 Group membership: Inherit existing group memberships from other groups or users or manually add existing groups. The number of group memberships of this group is shown in brackets.
Information
Groups can be incorporated into other groups. This allows you to implement complex combinations of rights settings and permissions concepts.
Information
If you type a space in an input field, the entire list of available users and groups will be displayed.
![]()
To reach the settings for a member or associated group, select the corresponding link icon. The settings open in a new browser tab.
# Assign user rights
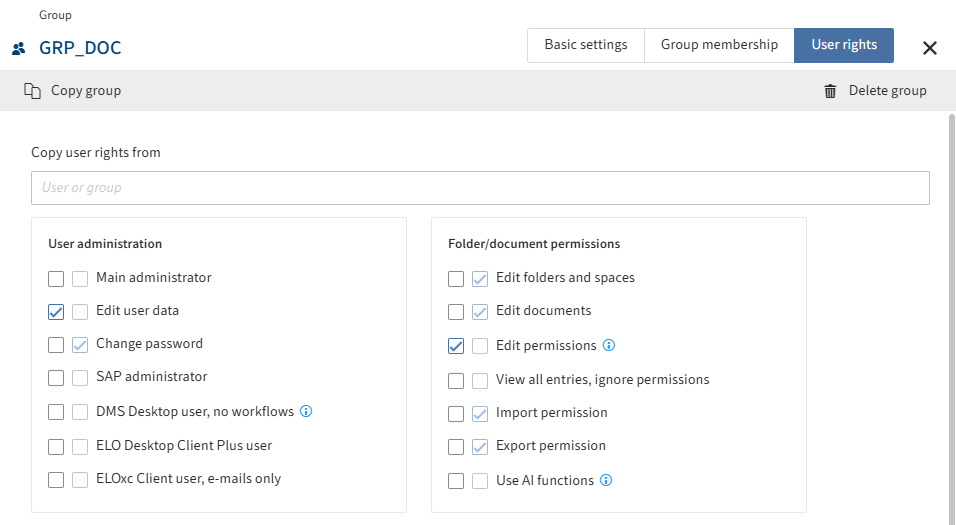
There are three options for assigning user rights:
Inheritance
You will find more information under Configuration and administration > User administration > Rights in ELO > Inheriting rights.
Manual assignment
You will find more information under Configuration and administration > User administration > Rights in ELO > User rights.
Inheriting from another group or user
Information
Ideally, all rights are inherited through groups. This makes it easier to assign and manage rights.
# Delete/hide group
Please note
When you delete a group, it is deleted permanently.
Do not delete any groups that have already been used in ELO. This can lead to inconsistencies. In this case, it is better to hide the group.
There are two ways to hide a group:
Information
The groups Administrators, Everyone, and Everyone (external) cannot be deleted.
# 'Delete group' dialog box
To hide a group in the Delete group dialog box, proceed as follows:
Open the ELO Administration Console.
Open the user and group administration (System settings > User and group administration).
Select the group you want to hide.

Select Delete group.
The Delete group dialog box appears.
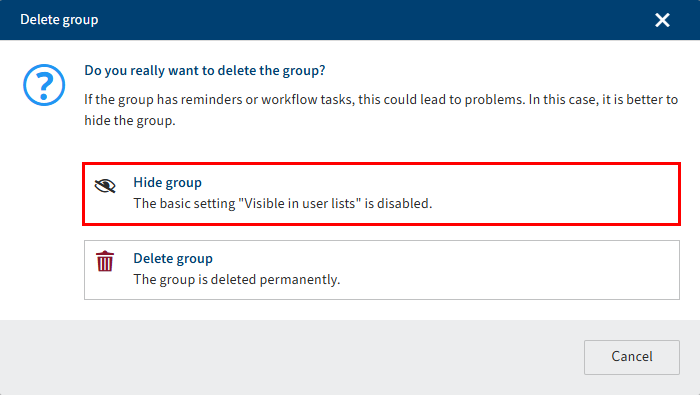
Select Hide group.
The corresponding basic setting is changed automatically. The group is hidden.
# Change basic settings manually
You can also change the basic settings manually to hide a group.
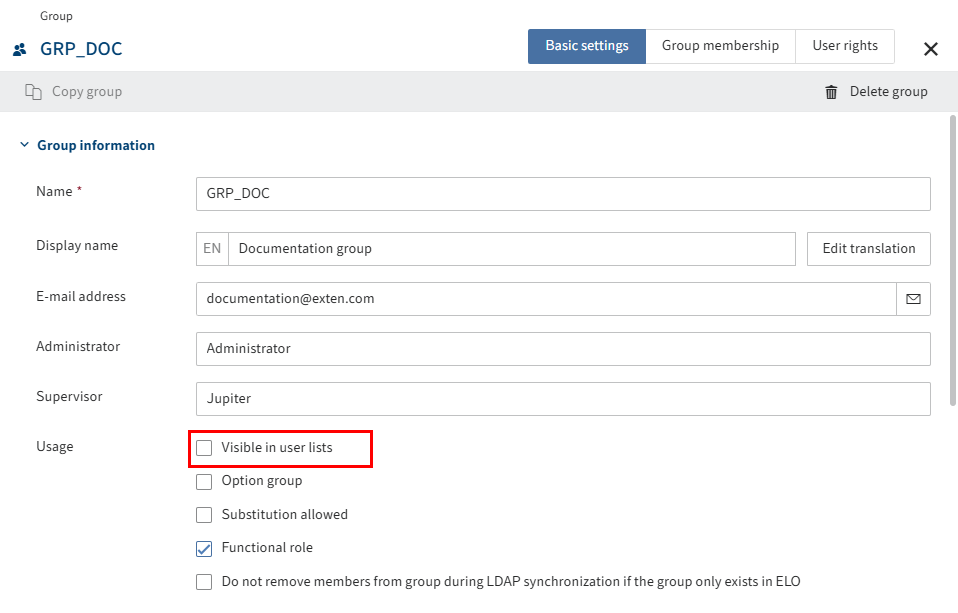
Proceed as follows:
- Open the ELO Administration Console.
- Open the user and group administration (System settings > User and group administration).
- Select the group you want to hide.
- Go to the Basic settings tab and navigate to the Group information area.
- In the Usage area, uncheck the Visible in user lists box.
The group now only exists in the background in ELO. The rights assigned via the group are maintained and previous actions with this group, such as participation in workflows, are still visible in ELO.