# Processes
# Start signature
Information
You can start the signing process separate from an existing routine.
If you want to start signing as part of a routine, you can start the function from within your Tasks work area. With the corresponding task open, click Public Sector.
Method
Select the entry you want to start a signature for.
On the Public Sector tab, click Start signature.
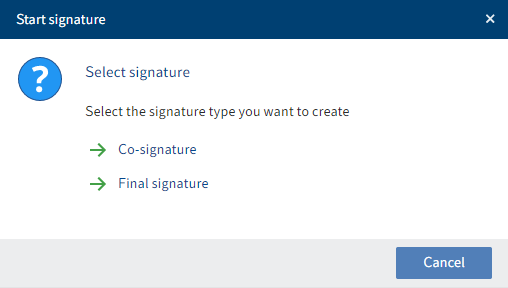
Fig.: 'Select signature' dialog box
- If multiple signature types are configured, select the desired signature type in the Select signature dialog box.
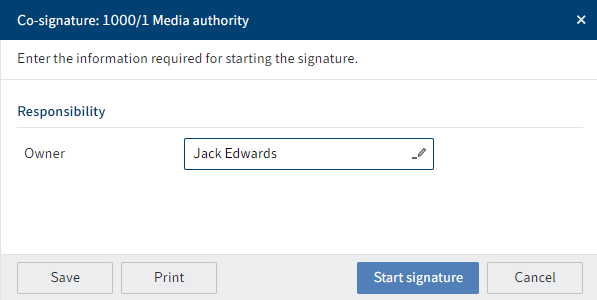
Fig.: 'Start signature' dialog box
In the Start signature dialog box, select a user or group as the recipient under Owner. Suggestions will appear as you begin to type.
Click Start signature.
Result
The selected recipient receives a task in their Tasks work area.
Outlook
Once the recipient has signed, you will see this action and, if applicable, a comment in the feed.
# Sign
Information
If you are assigned a signature task, you will find it in your Tasks work area.
Method
- Select the task in your Tasks work area.
Optional: Click Accept workflow if you received the workflow as a member of a group.
- On the Task tab, click Forward workflow.
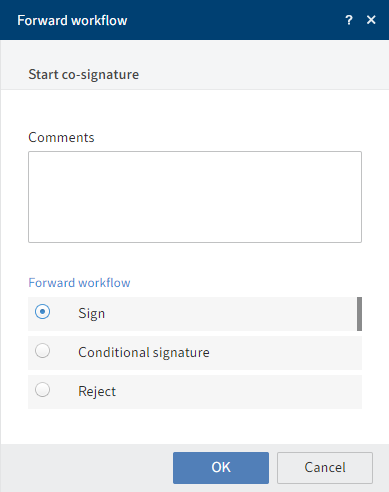
Fig.: 'Forward workflow' dialog box
In the Forward workflow dialog box, select how you want to forward the workflow.
Click OK.
Result
The workflow disappears from your tasks area. The signature is visible as a comment.
# Start directive
Information
You can start a directive separate from an existing routine.
If you want to start a directive as part of a routine, you can start the function from within your Tasks work area. With the corresponding task open, click Public Sector.
Method
Select the entry you want to start a directive for.
On the Public Sector tab, click Start directive.
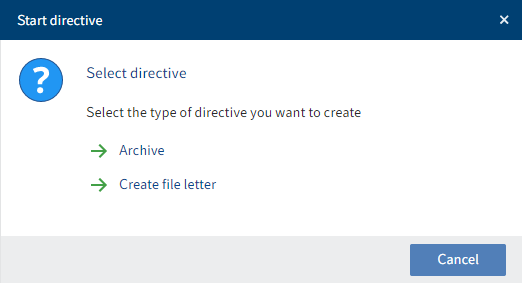
Fig.: 'Select directive' dialog box
- If multiple directive types are configured, select the desired directive type in the Select directive dialog box.
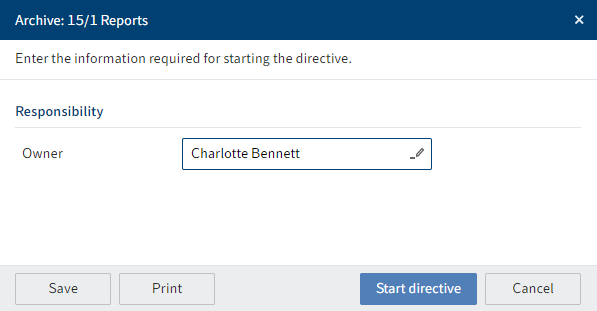
Fig.: 'Start directive' dialog box
In the Start directive dialog box, select a user or group as the recipient under Owner. Suggestions will appear as you begin to type.
Click Start directive.
Result
The selected recipient receives a task in their Tasks work area.
Outlook
Once the recipient has completed the directive, you will see this action and, if applicable, a comment in the feed.
# Run directive
Information
If you are assigned a directive, you will find it in your Tasks work area.
Method
- Select the task in your Tasks work area.
Optional: Click Accept workflow if you received the workflow as a member of a group.
- On the Task tab, click Forward workflow.
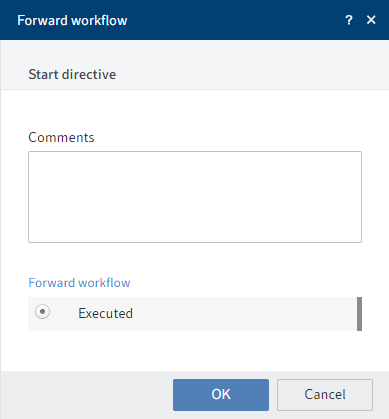
Fig.: 'Forward workflow' dialog box
- In the the Forward workflow dialog box, click OK.
Result
The workflow disappears from your tasks area. The directive is visible as a comment.