# Filling the filing plan
This chapter contains an overview of the functions in the Public Sector group on the New tab.
With these functions, you fill your filing plan.
# Create file
Information
You can create a file in your filing plan.
Requirement
At least one permitted file type has been created by the administrator.
Method
- In the filing plan, select the position where you want to create the file.
This position can be a file. Within a file, you have to create sub-files.
- On the New tab, click Public Sector > New file.
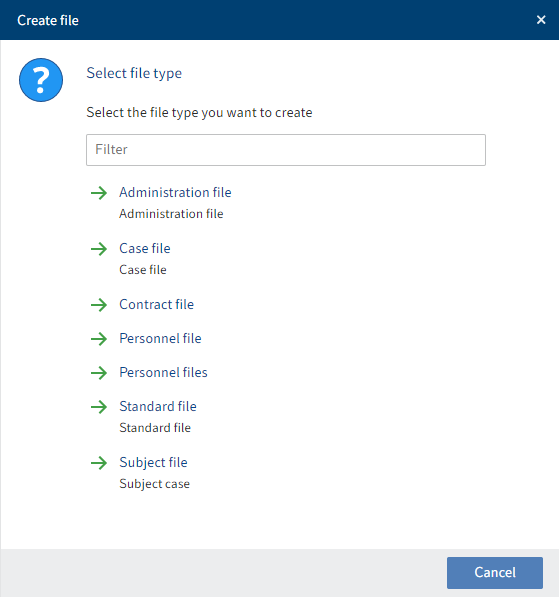
Fig.: 'Select file type' dialog box
If multiple file types are available, the Select file type dialog box opens.
- Click the file type that corresponds to your file.
Information
If the overview does not contain file type you need and you do not have permission to create new file types, you can report this to your administrator with the function Request change.
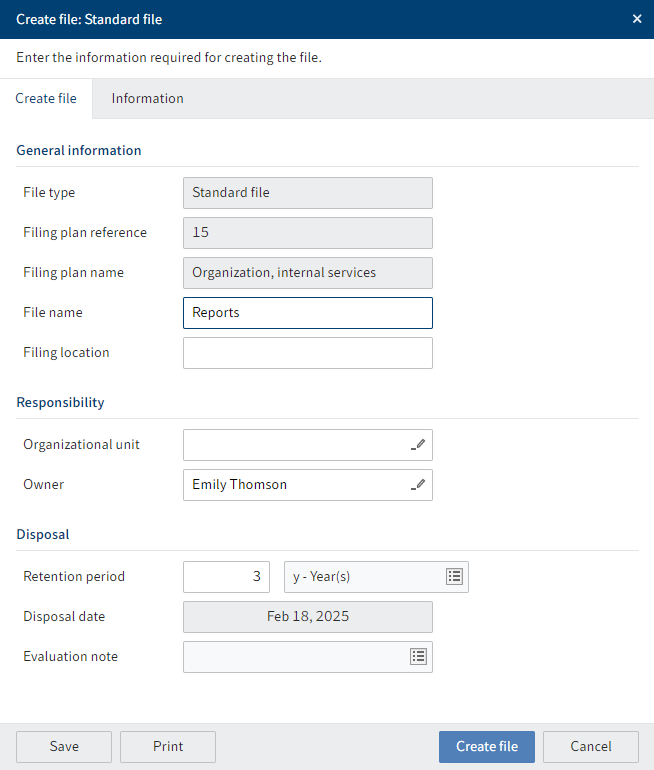
Fig.: 'Create file' dialog box
Several fields in the Create file dialog box will already be filled with information from the file type. These fields are grayed out.
Complete the other fields on the Create file and Information tabs.
Click Create file.
Parameter
| Field | Meaning |
|---|---|
| Disposal date | The disposal date is calculated automatically based on the retention date set for the group. |
| Filing location | You can indicate where the corresponding physical file can be found. |
Result
The file is created in the selected group.
The file reference is generated automatically.
If a structure has been defined for the selected filing type, it is automatically created.
Outlook
A file in ELO Public Sector corresponds to a file in a physical filing plan and can be filled like one as well.
- Sub-files can be created within the file.
- File groups allow you to keep files over several years, for example.
- Documents can further structure the file.
- Routines can also be started right in a file.
# Create sub-file
Information
You can create a sub-file for an existing file.
Requirement
At least one permitted file type has been created by the administrator.
Method
Select the file in the filing plan.
On the New tab, click Public Sector > New sub-file.
Now proceed as if you were creating a file.
Fig.: No file type available.
If this message appears, you cannot create sub-files in the selected file. If you still want to create a sub-file, you will have to submit a change request via Request change.
Result
The sub-file is created in the selected file.
The file reference is generated automatically.
If a structure has been defined for the selected filing type, it is automatically created.
Outlook
You can treat and fill sub-files like files.
# Create file group
Information
You can create a file group for an existing file, for example when a new year begins.
Requirement
The file you want to create a file group for has been closed using the Close function first.
Method
Select the file you want to create a file group for.
On the New tab, click Public Sector > New file group.
The fields in the Create file dialog box will already be filled with information from the previous file.
Result
The file group is created.
The file is identical to the structure of the previous file.
# Create document
Information
You can create a new document.
In this case, the document is a container for multiple files and contains their metadata.
Method
Select the file or the case where you want to create a document.
On the New tab, click Public Sector > New document.
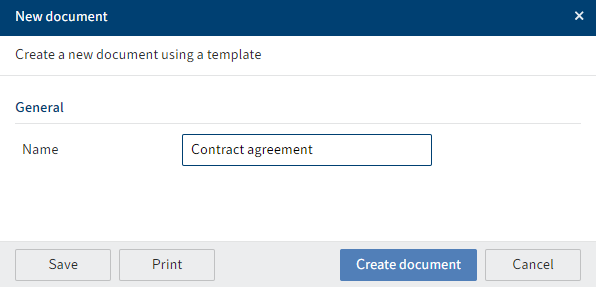
Fig.: 'New document' dialog box
Enter a name for the document.
Click Create document.
Result
The document is created at the selected position.
Outlook
The document can now be filled with record objects.
In the document form, you will find the fields Name and Value under Additional information. These fields are only relevant for the Create Word document function and are completed by administrators only.
# Create case
Information
You can create a case for processing a routine.
Requirement
At least one permitted case type has been created by the administrator.
Method
Select the file where you want to create a case.
On the New tab, click Public Sector > New case.
If multiple case types are available, select the case type you want to create in the Create case dialog box.
No case type available. No case was created: If this message appears, you cannot create cases in the selected file. If you still want to create a case, you will have to submit a change request via Request change.
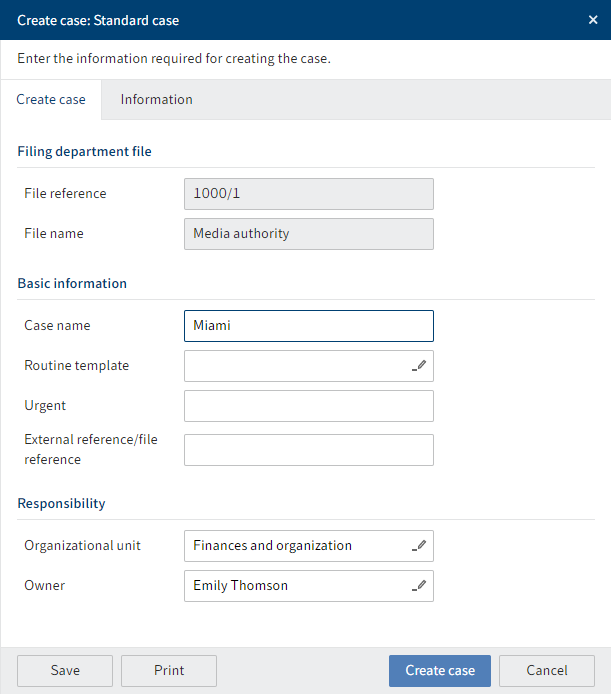
Fig.: 'Create case' dialog box
Several fields in the Create case dialog box will already be filled with information from the case type.
Complete the other fields on the Create case and Information tabs.
Click Create case.
Result
The case is created at the selected position.
Outlook
In a case, you can
# Create circulation folder
Information
You can create a circulation folder with contents from a file or case. In addition, you can file elements within a circulation folder that are not part of your filing plan. With this circulation folder, you can start one or more routines.
Method
- Select the file, case, or document you want to use to create a circulation folder.
To select multiple files, cases, or documents, select the parent element. In the table view, select the entries you want to reference in the circulation folder:
- To select multiple, specific entries, press and hold the CTRL key and click all the entries you want to select.
- To select multiple entries in a row, press the SHIFT key then click the top-most and bottom-most entry you want to select.
- On the New tab, click Public Sector > New circulation folder.
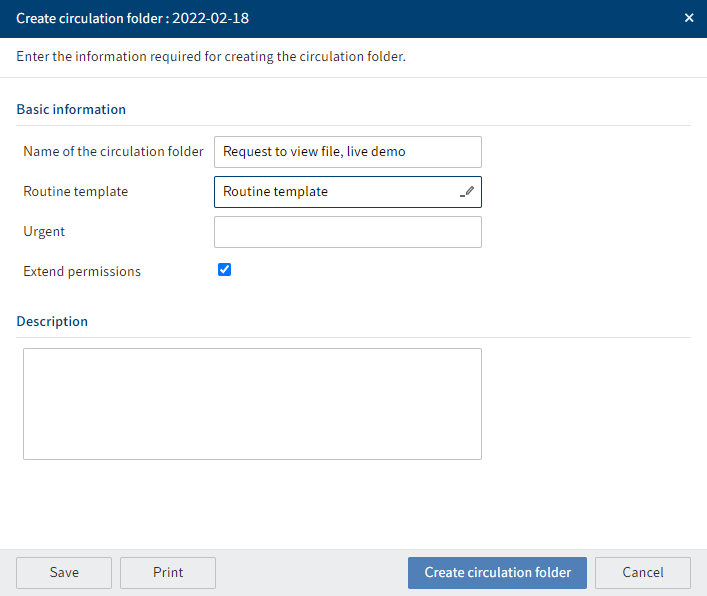
Fig.: 'Create circulation folder' dialog box
Complete the fields as required.
Click Create circulation folder.
Parameter
| Field | Meaning |
|---|---|
| Routine template | You can select a routine that has already been defined. You can change the routine before starting it if necessary. You can also leave the field blank and define a custom routine after creating the circulation folder. |
| Extend permissions | Users without permission to the contents of a circulation folder will only see the circulation folder and not its contents. If you check this box, they will also see the contents. |
Result
The circulation folder is created in the Circulation folders folder, which is not part of the filing plan.
The selected elements are referenced in the circulation folder. As a result, the circulation folder always contains the latest versions.
Outlook
Now that you have created a circulation folder, you have to start the routine.