# Importing, exporting, and maintaining filing plans
The following explains the functions of Business Solution ELO Public Sector, which are generally performed by the filing department. Additional rights are required for these functions.
This chapter addresses the following functions:
# Import filing plan
Information
You can digitalize an existing filing plan and import an entire structure.
Requirements
- This function is only available in the ELO Java Client.

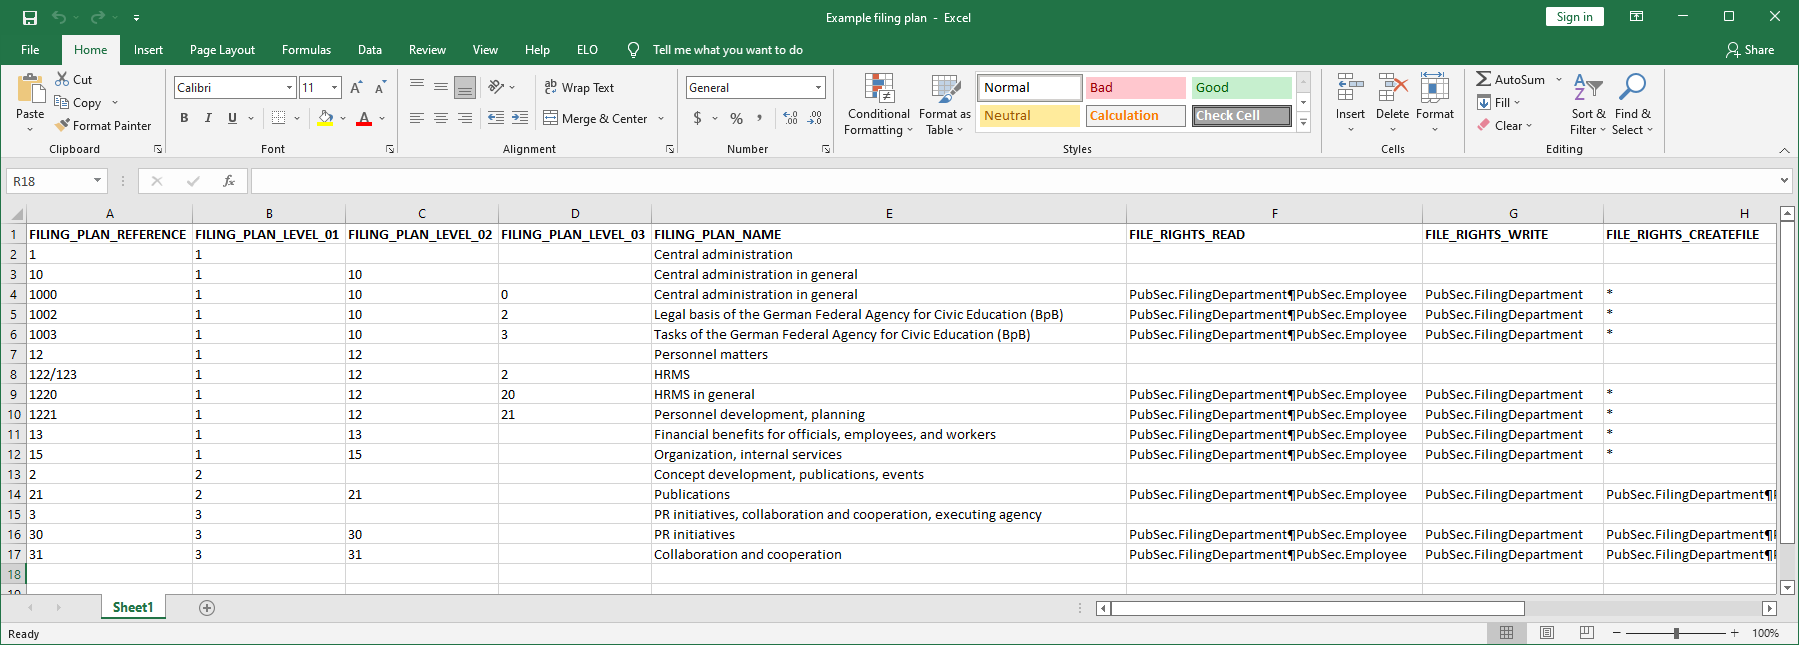
Fig.: XLS file with filing plan
- You need a CSV file or an XLS file with your filing plan.
Information
Only the first worksheet is read and processed.
- The first row of the table must contain the respective ELO fields. There is no restriction to the type and number of transferred fields here.
Method
At the top level, create a folder for the filing plan using the New > New folder function.
Select the folder you just created to import the filing plan to it.
On the Output tab, click Export/Import > Import filing plan.
In the Import filing plan dialog box, select the CSV or XLS file.

Fig.: 'Import filing plan' dialog box
- Click Load and confirm your selection in the Import filing plan dialog box.
Result
The filing plan is imported to the selected folder.
Outlook
The filing plan can now be filled by creating files in the groups of the filing plan via Create file.
You can also create additional groups.
# Create group
Information
You can also add individual groups to the filing plan.
Method
In the filing plan, select the group where you want to create additional groups.
On the New tab, click New folder.

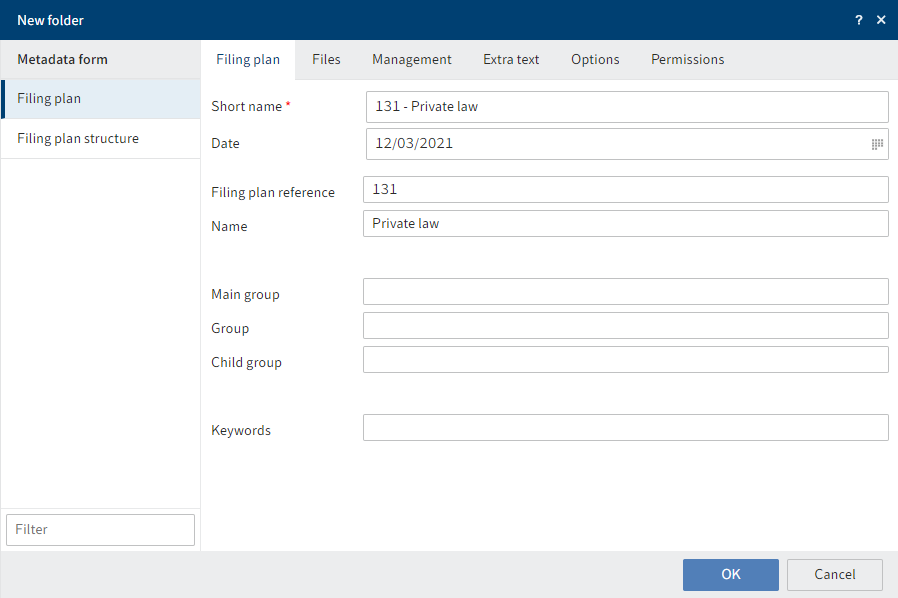
Fig.: 'New folder' dialog box, 'Filing plan' metadata form
In the New folder dialog box, keep the Filing plan metadata form.
Complete the required fields.
Click OK.
Parameter
| Tab | Field | Meaning |
|---|---|---|
| Files | Unit for retention period | Select a unit and enter a number in the Retention period field as well. |
| Retention period | If you also enter a number in addition to the unit, the retention period for elements created within this group is calculated automatically. | |
| Options | Entry type | Select sol.Filing Plan as the icon for the group. |
Keyword lists
Keyword lists are available for some of the fields. You have the following options:
- Select an element: All entries appear via the menu at the end of the field. Select the element.
- Select multiple elements: Using a separator (¶), you can string multiple elements. In this case, you can only select the first element. Right-click to insert a separator. You will have to enter the other elements manually, separated by separators.
- Select all elements: To select all elements, enter an asterisk (*).
Result
The group is created at the selected position in the filing plan.
Outlook
It can now be filled by creating files via Create file.
# Structure group
Information
You can further structure a group in your filing plan, for example by creating a folder from A to Z.
Method
In the filing plan, select the group you want to structure.
On the New tab, click New folder.

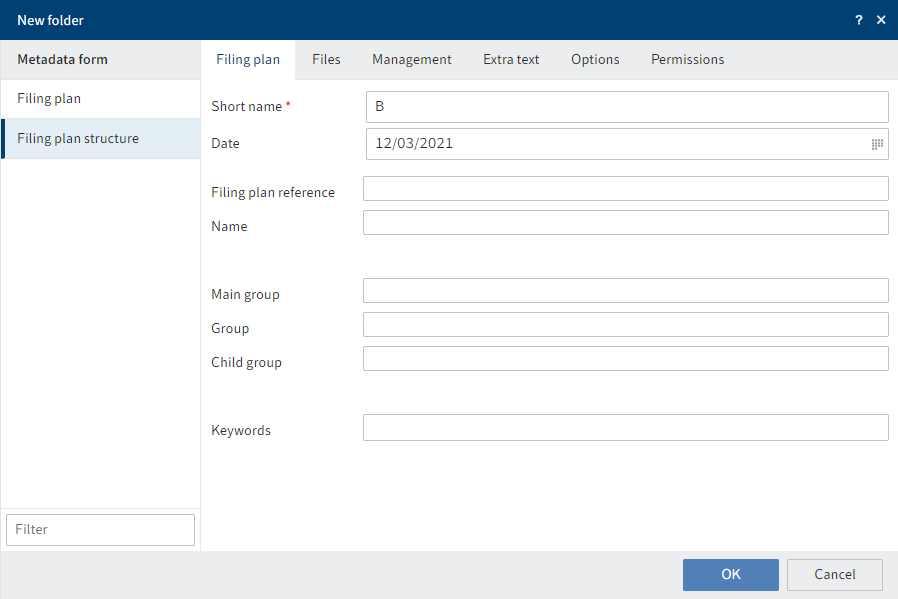
Fig.: 'New folder' dialog box, 'Filing plan structure' metadata form
- In the New folder dialog box, select the Filing plan structure metadata form.
As this metadata form may only be used to structure groups, all the fields on the Filing plan tab are disabled, with the exception of Short name and Date. The other groups are inherited from the parent group.
- Click OK.
Result
The folder is created at the selected position in the filing plan.
Outlook
It can now be filled by creating files via Create file.
# Export filing plan
Information
You can export a filing plan or part of a filing plan to transfer it to another ELO repository, for example.
Requirements
This function is only available in the ELO Java Client.
Method
- Select the filing plan or the part of the filing plan you want to export.

Fig.: Selected groups
To select multiple groups, select the parent group. In the table view, select the groups you want to export:
- To select multiple, specific groups, press and hold the CTRL key and click all the groups you want to select.
- To select multiple groups in a row, press the SHIFT key then click the top-most and bottom-most entry you want to select.
- On the Output tab, click Export/Import > Export.

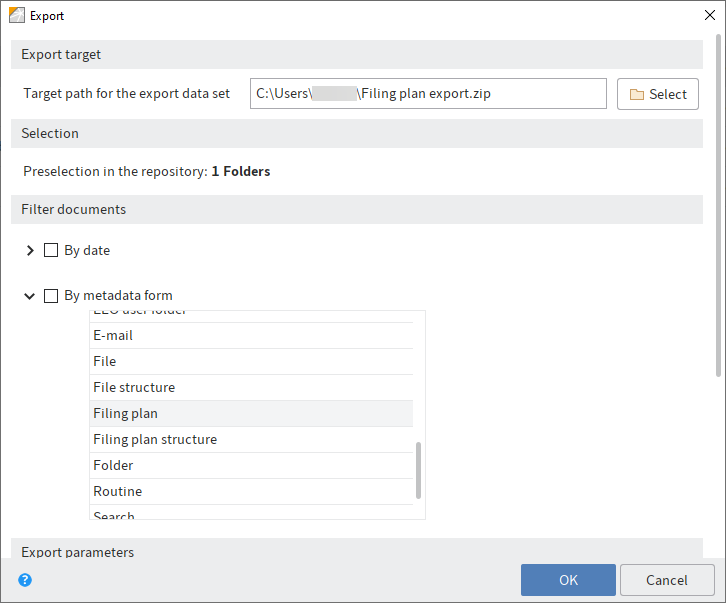
Fig.: 'Export' dialog box
In the Export dialog box, select a target path for the export.
To export only filing plan entries, filter for the Filing plan metadata form under Filter documents > By metadata form.
Click OK.
Result
The filing plan is saved at the selected target location as a ZIP file.
Outlook
In the ELO Java Client, you can import the filing plan to another ELO repository using the Output > Export/import > Import function.