# Participants
On the learning platform, participants can enroll in a course or session. Alternatively, you can also enroll participants in courses.
If users are enrolled in courses, they are created within the course in the Enrollments folder. The Enrollments folder may be located right in the course folder or, if the course has sessions, in the folder for the respective session.
Upon successful completion of a course, certificates can be issued automatically for participants.
This chapter addresses the following topics:
# Enroll participants
Information
Participants can either enroll themselves in courses or sessions on the learning platform, or you can enroll them. This section describes how to enroll participants.
Method
Select the course or session you want to enroll participants in.
On the Course tab, click Enroll participants.
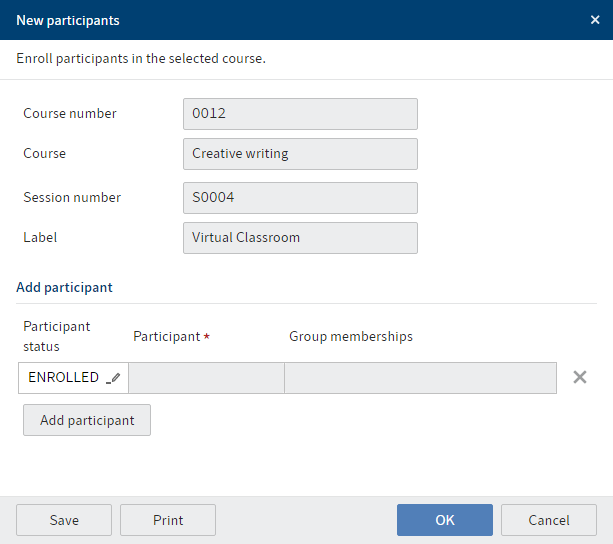
Fig.: 'New participants' dialog box
In the New participants dialog box, click Add participant.

Fig.: Select participants
In the dialog box that opens, select the participants. You can select groups or individual users.
If you would like to add a number of participants to a group, but not all of them, we recommend taking the following approach: Select the group and confirm your selection. The participants in the group are shown in the New participants dialog box. You can remove specific participants by clicking the X icon.
Click OK.
Result
The participants are created within the course folder or session folder. The newly enrolled participants are shown in the course as soon as you refresh the client (View > Refresh or F5).
Outlook
If a participant is enrolled, they can participate in the course and receive a certificate once they have completed it. The certificate is created automatically when the participant has completed an e-learning or video, or when you close the session using the Close session function.
If a participant would like to unenroll from a course, they can do so themselves on the learning platform. Alternatively, you can unenroll participants using the Cancel enrollment function, for example if a participant does not show up to a face-to-face training.
# Cancel enrollment
Information
If a participant would like to unenroll from a course, they can do so themselves on the learning platform. Alternatively, you can unenroll participants, for example if a participant does not show up to a face-to-face training.
Method
Select the session you want to unenroll participants from.
On the Course tab, click Cancel enrollment.
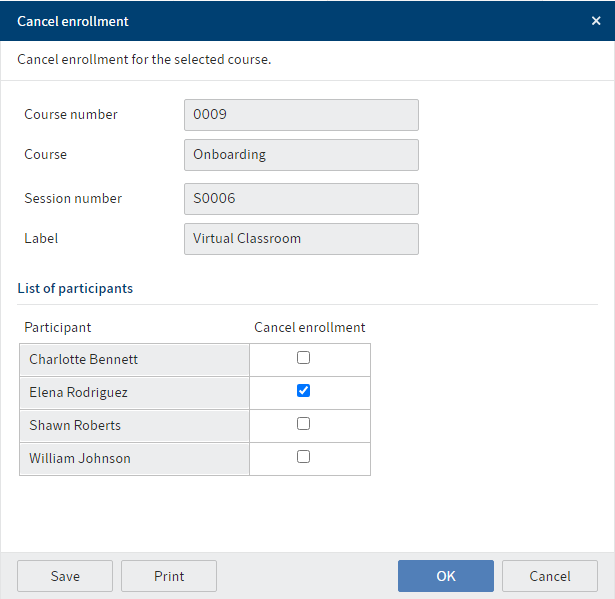
Fig.: 'Cancel enrollment' dialog box
In the Cancel enrollment dialog box, check the box next to all participants you want to remove from the session.
Click OK.
Result
The participants are unenrolled from the session. The changes are shown in the course as soon as you refresh the client (View > Refresh or F5).
# Send notification
Information
You can send a notification to a group of participants. You can send the notification to all participants or to selected groups.
Requirement
The participants must have provided e-mail addresses.
Alternative
If you want to send a message to just one person, use the Send message function.
Method
Select the course whose participants you want to send a notification to.
Click Send notification on the Course tab.
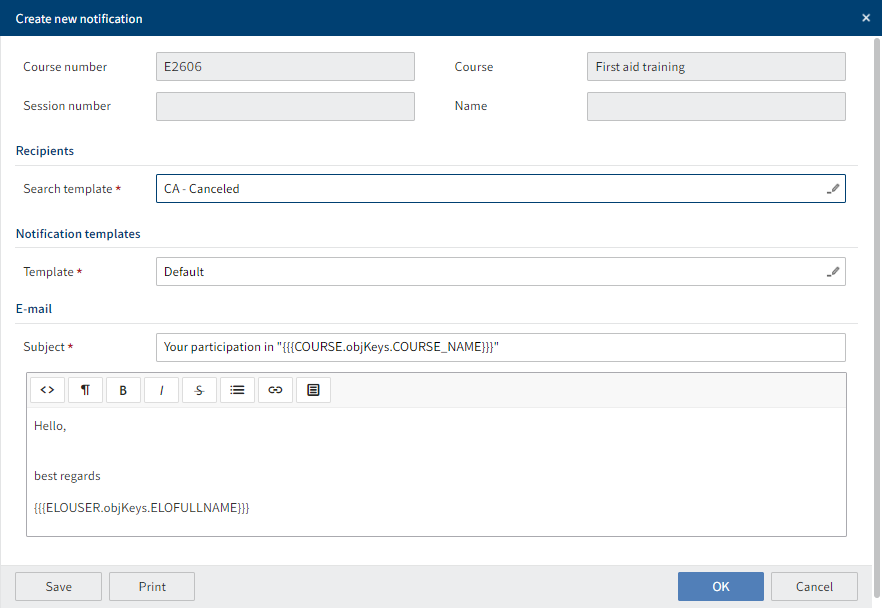
Fig.: 'Create new notification' dialog box
Select the group of recipients that you want to send the notification to.
Select a notification template.
As soon as you select the template, the E-mail area with fields for the subject and text appears. You can edit both fields and format the text.

Fig.: 'Clips' button
Field Meaning Clips Clips are text blocks that help you create your text. They contain information on the course and participant and can be inserted into the text. To use them, select the position in the text where you want to insert information and click Clips. Click OK.
Result
The e-mail is sent to the participants. The placeholders are replaced with the correct values in each case.
# Send message
Information
You can send enrolled course participants a message requesting information or containing information. If an e-mail has been entered for the participant, the message will automatically be sent to this address.
Alternative
If you want to send a message to a group, use the Send notification function.
Method
Select the participant you want to send a message to.
On the Enrollment tab, click Send message.
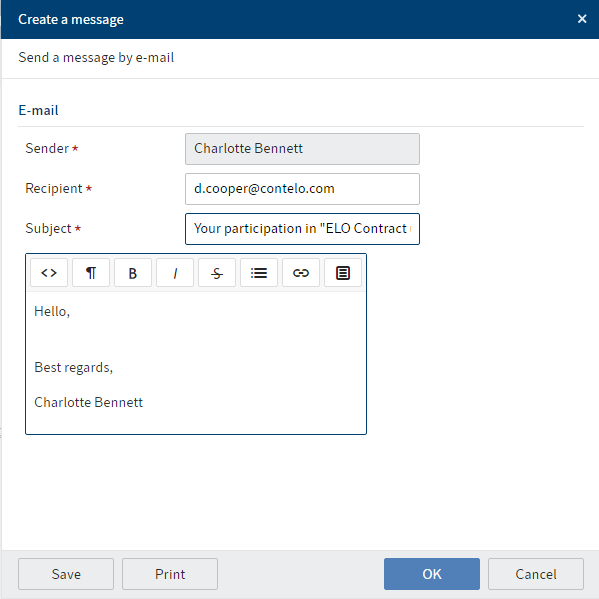
Fig.: 'Create a message' dialog box
The Create a message dialog box already contains the sender, recipient (if e-mail address was provided), and a subject.
Enter text. You can format this text as needed.
Fig.: 'Clips' button
Field Meaning Clips Clips are text blocks that help you create your text. They contain information on the course and participant and can be inserted into the text. To use them, select the position in the text where you want to insert information and click Clips. 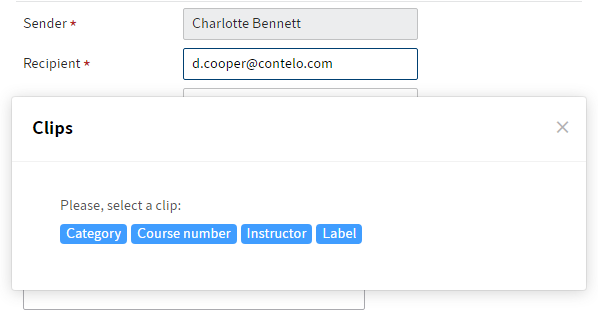
Fig.: Configured clips
Click OK.
Result
The e-mail is sent to the participants.
# Create certificate
Information
Certificates can be created in different ways.
- If a participant completes an e-learning course or video, a certificate is created automatically.
- For courses with sessions, certificates are created when the session has been closed with the Close session function.
- Certificates can also be created separately.
This chapter describes how to create a separate certificate.
Method
Select the participant you want to create a certificate for.
On the Enrollment tab, click Create certificate.
Result
The certificate is filed to the participant's folder within the course as well as the Certificates folder.