# File invoice and add documents
This chapter explains what options you have for filing an invoice and adding documents later on.
# File invoice
Information
You can file one invoice or multiple invoices simultaneously to ELO from your Intray. Filing invoices initiates a workflow that circulates the invoice to the correct departments in the company.
The following functions are available:
- File invoice
- File invoice with attachments
Invoices are either filed to a separate, automatically created folder or as a document.
If both functions are available, the invoice is filed to a separate folder.
Information
How invoices are filed depends on administrative settings.
Process: File invoice
- In the Intray, select the invoice or invoices you want to file.
To select multiple invoices, press and hold the CTRL or SHIFT keys while selecting invoices with the mouse.
- On the File tab, click Invoice > File invoice.
Process: File invoice with attachments
- In the Intray, select the invoice with attachments you want to file.
To select an invoice and its attachments, press and hold the CTRL or SHIFT keys while selecting the documents with the mouse. The document you select first gives the folder its name and should be the invoice.
Information
This function does not allow you to file multiple invoices separately at the same time. All selected documents are filed to the same folder.
- On the File tab, click Invoice > File invoice with attachments.
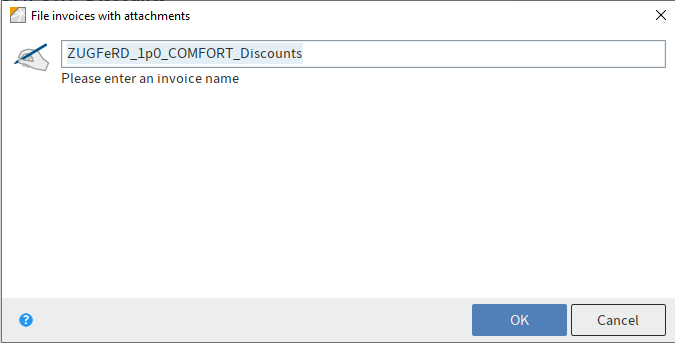
Fig.: 'File invoice with attachments' dialog box
- If necessary, enter a new name and confirm with OK.
Result
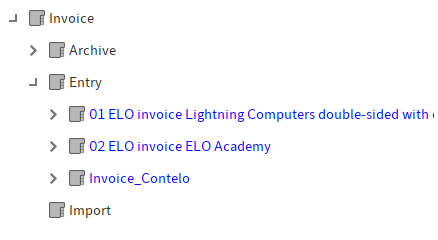
Fig.: Folder in the repository
The invoice or invoices are filed to the appropriate folder, by default // Invoice // Entry. They have the status 2 – Formal check.
Invoices in circulation are shown in a blue font.
Invoice circulation begins automatically and does not have to be initiated.
Outlook
You can track the workflow steps an invoice you have filed goes through based on feed entries.
The following chapter explains how to add documents to invoices later on.
# Add documents to invoice
Information
You can add documents to invoices later on. The approach depends on whether the invoice has been filed as a document or in a separate folder.
- Folder: File to invoice function
- Document: Add pages function
Process: File to invoice
- Select the documents or documents in the Intray that you would like to file.
To select multiple documents, press and hold the CTRL or SHIFT keys while selecting invoices with the mouse.
- On the File tab, click Invoice > File to invoice.
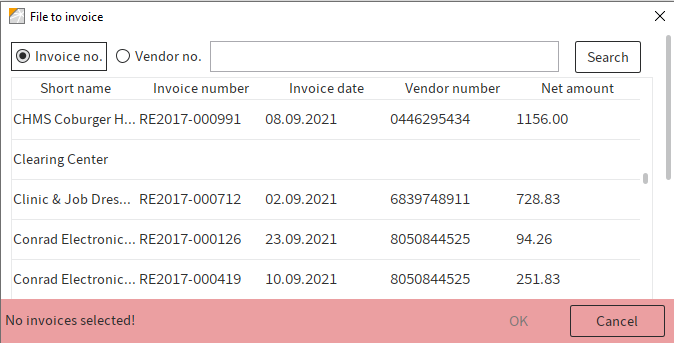
Fig. 'File to invoice' dialog box
- In the File to invoice dialog box, select the invoice.
A search function is available that allows you to filter the invoices based on their invoice number or vendor number.
Result: File to invoice
The document is filed to the folder of the selected invoice.
Process: Add pages
Select the documents or documents in the Intray that you would like to file.
On the File tab, click Filing > Add pages.
Select the invoice you want to add pages to.
Click Attach to back to add the pages.
Result: Add pages
The pages are added to the invoice.