# Monitor invoices with the dashboard
The dashboard provides an overview of all invoice documents and their statuses.
You can reach the dashboard by clicking the Invoices tile in the My ELO area.
The settings are saved on the dashboard. When you open the dashboard again, it remembers and displays your most recent view.
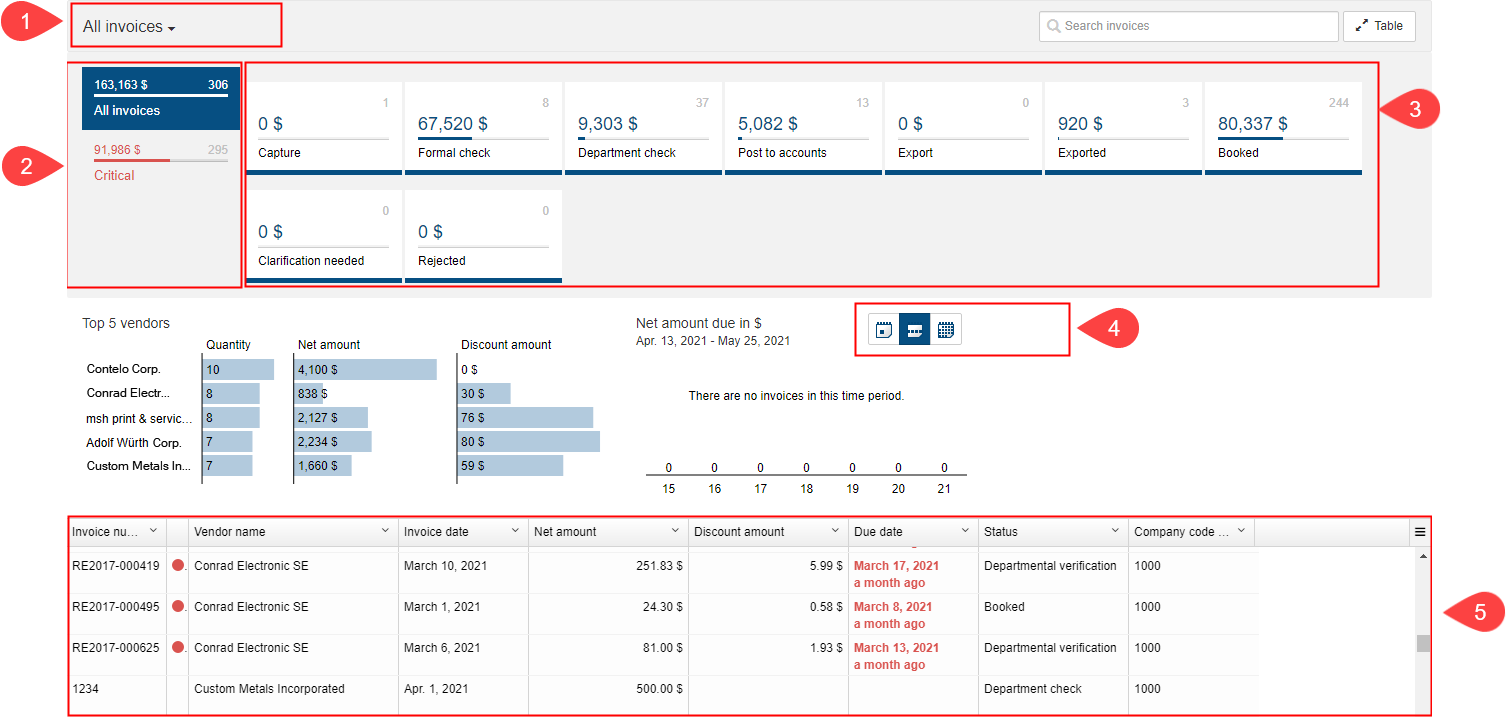
Fig.: Dashboard
The dashboard is divided into the following areas:
1 Database: In the dashboard header, use the drop-down menu (arrow icon) to select a database. A dashboard database is a list of invoices that is loaded for evaluation.
Information
If there is only one database, this database is selected permanently and no drop-down menu is available.
2 All invoices/critical: With these buttons, you can choose whether to show all invoices or only invoices with an upcoming discount deadline or processing deadline that has been reached or exceeded.
3 Status: The dashboard header contains a button for each invoice status. If a button is active, all invoices with the corresponding status are shown in the dashboard viewer pane.
4 Net amount due in $:
You can choose between the following settings:
Day view: The day view shows the amount due for the current day and the following seven days.
Week view: The week view shows the amount due for the current week and the follows six weeks.
Month view: The month view shows the amount due for the current month and the following four months.
5 Viewer pane: In the dashboard viewer pane, you will see a list of invoices. This list changes depending on the filter criteria applied. Critical invoices are marked with a red dot. Clicking an entry shows a preview of the entry. Double-clicking an entry brings you to the Repository work area.
Filter and customize the table view using the drop-down menus.

Fig.: Customizing the table view
The drop-down menus in the column headings contain the following functions:
- Sort ascending
- Sort descending
- Remove sorting: This option appears if you have sorted the column. Click Remove sorting to clear the sorting option.
Alternative: You can sort the column by clicking the column heading. Clicking once sorts in ascending order. Clicking a second time sorts in descending order. Clicking a third time clears sorting.
- Hide column
- Group: The content of a column is joined into groups. The number of invoices in each group is shown in brackets. Click the plus icon before the group to expand it and view all contained invoices. The minus icon minimizes it again. Clicking the plus icon in the header expands all groups.
Information
You can combine multiple groups. You can specify a hierarchy with the order in which you select the columns.
- Ungroup: This option appears if you have grouped items. Click Ungroup to discard the group.
- Agg: Number (only for number fields and when another column is grouped): The number of invoices in the group is shown.
- Agg: Total (only for number fields and when another column is grouped): The total of the group is shown.
- Agg: Minimum (only for number fields and when another column is grouped): The lowest value of the group is shown.
- Agg: Maximum (only for number fields and when another column is grouped): The highest value of the group is shown.
- Agg: Average (only for number fields and when another column is grouped): The average of the group is shown.

Fig.: Menu
Menu: By clicking the button with the three lines, you can show hidden columns. Clicking the Search settings button allows you to choose fields to be considered during the search. Clicking the Reset grouping button resets all groups. Clicking Reset all settings to return to the table's default settings.