# Important components
# Repository structure
The repository gives you an overview of all folders and documents that you are authorized to access. Navigate between entries in the repository here.
You have the following navigation options:
- Mouse: Click an entry using the mouse. If you click a folder, you will see the contents of the folder in the viewer pane. Clicking the arrow next to the folder expands the contents of the folder in the tree.
- Keyboard: You can navigate up and down the tree using the up and down arrow keys. Pressing the right arrow key opens a folder. Pressing the left arrow key closes the folder.
Icons in entries

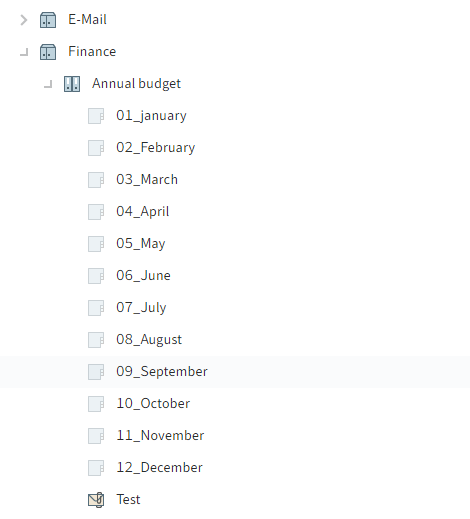
Folders or documents with an arrow icon are references. Select View > Go to on the ribbon to go to the original entry.

Documents with a yellow arrow next to the document icon and a name in brackets are checked out by the corresponding user. They can be viewed (Document > Open in read-only mode) but not edited.
# Folders
If you have selected a folder, you will see the child folders and/or documents within it.

You have the following options:
- You can search the folder (1) or change the sort order (2).
- After clicking on an entry, you can select multiple entries using the CTRL or SHIFT key. This is not possible in the repository structure.
- If you need more information on the individual entries, switch to the table view (Ribbon > View > Table). To switch back to the list view, select the Table button again. Double-clicking an entry takes you straight to this entry.
# Document

If you have selected a document, the document will be displayed.
If the document cannot be displayed, you have the following options:
- Save document: Ribbon > Output > Save as
- Open document in read-only mode: Ribbon > Document > Open in read-only mode.
- Switch to different viewing options as described below
You have the following options for viewing the contents of a document:
- Original document: Automatic if no other option is selected.
- Image preview: Available in Ribbon > View > Image preview
- Full text: Available in Ribbon > View > Full text
# Viewer pane
In the viewer pane, you will see the most recently selected entry (folder or document).
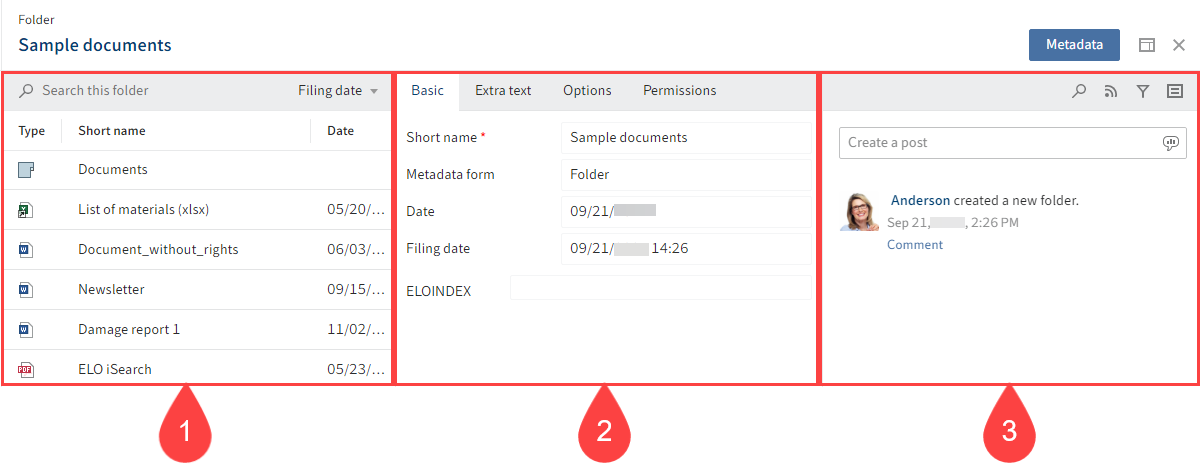
Each entry is made up of three elements:
- 1 Content
- 2 Metadata/Form
- 3 Feed
The contents and metadata/form are shown on the left, while the feed is always located on the right.

You can switch between Content and the Metadata/Form using the tabs.
Configure viewer pane

With the button next to the Content and Metadata tabs, you can show the contents and metadata adjacent to one another. You can also configure which element is shown on the left and which is shown on the right.
If you hover the mouse over a preview element, the element's location is highlighted in green in the miniature preview to the left.
For example, if you have currently selected the metadata for an entry in your viewer pane, click Content in the drop-down menu. The contents appear to the left of the metadata. To swap the position of the metadata and content, select Metadata. To return to the simple view, select the element marked green, in this case Metadata.
Information
The settings for an entry are saved automatically. They are not applied to other entries.

The X icon closes the viewer pane and expands the tree view. The viewer pane appears again when you select an entry in the tree view.
For more information, refer to the Metadata, Form, and Feed chapters.
# Show entries
On the Content tab, you will see the contents of a folder or document.
You can change how entries are shown on the View tab.
Folders
Folders are shown in list view by default. To switch to the table view, select View > Table on the ribbon. The table view shows select metadata for the individual documents.
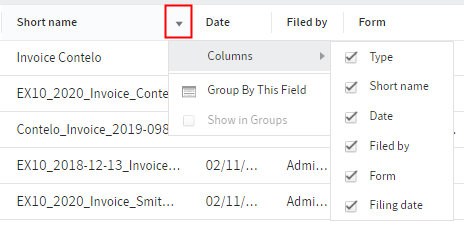
If you do not need all of the metadata, select the arrow button next to the column header. Clicking Columns opens the selection dialog box, where you can uncheck the respective boxes. You can add columns in the same dialog box.
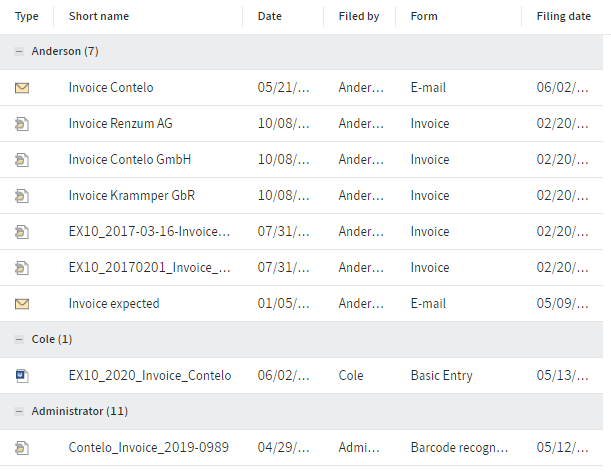
By selecting the arrow button icons, you can group documents based on their metadata. If you uncheck the Show in groups box, the table is once again shown without grouping.
Documents
- Image preview: Use this function to display documents if there is no viewer available for the original format.
- Full text: This function is useful for searches. A search field for entering terms appears below the text. This mode is also suitable if you do not have a viewer for the original format and no image preview is available.
# Metadata
Before you can file documents to ELO or create new folders, you must enter metadata for the entries. This is done by using metadata forms, which contain corresponding input fields (called fields).
The Metadata dialog box is used to enter and edit the metadata. Unless you have a different configuration, the dialog box appears automatically when you file a document or create a folder.
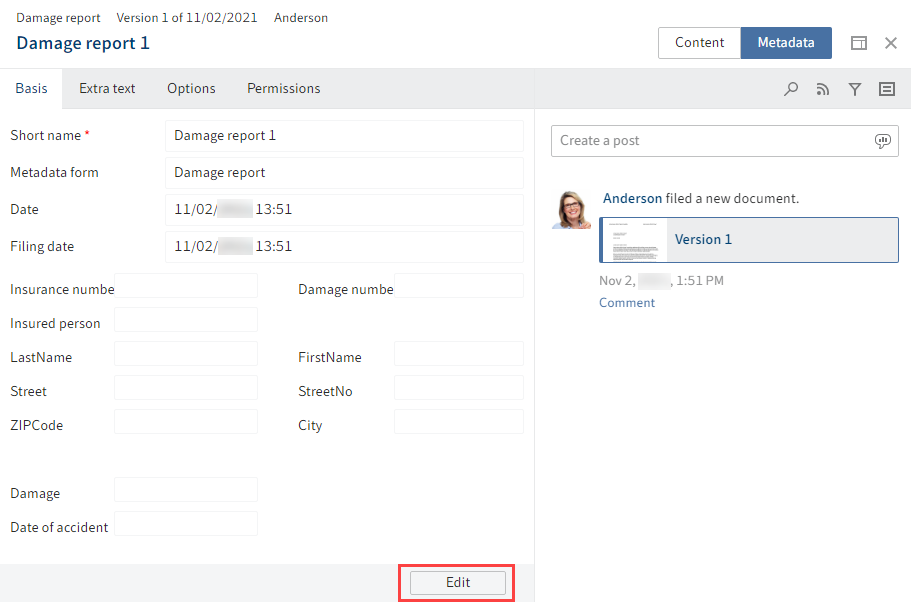
The metadata for an entry is shown on the Metadata tab. If you select the Edit button at the bottom, you can edit the metadata right in the viewer pane.
If you have selected an entry with a form, the form is displayed. In this case, you can open and edit the metadata from the ribbon by clicking Organize > Metadata.
For more information, refer to the chapter Metadata.
# Form
If you have selected an entry with a form, the form is displayed. In this case, you can open and edit the metadata from the ribbon by clicking Organize > Metadata.
You can use forms to record and forward data.
You can use forms to process workflows.
# Feed

The feed is used to share information on an entry in ELO (document or folder) and track changes. New feed posts are denoted with a green dot.
When you subscribe to a feed for an entry, any new posts in the feed are shown on your My ELO home screen.
If you tag users with @, the post will also appear in the feed on their My ELO home screen even if they have not subscribed to the feed.
The following message types are shown in the feed:
- Posts (written by a user)
- Comments (on a post)
- Polls
- Events (e.g. when a new version of a document is filed or changes are made to the working version)
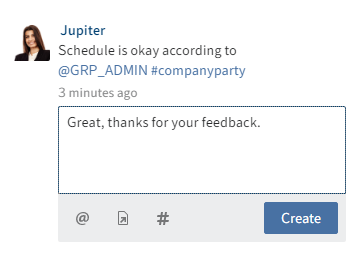
# Create a post

Use the Create a post field to comment on the respective entry in a feed. Select Create to upload the post.
Alternative: Press CTRL+ENTER to submit a post.
The text in posts, polls, and comments can be formatted as follows:
Bold: To format a part of the text in bold type, place an asterisk (*) at the beginning and end of the text section. I would like to emphasize this *again*. will appear in the ELO feed as follows: "I would like to emphasize this again."
Information
If you want the asterisk to appear as a character in the text, enter a backslash before the asterisk.
Please note
Do not enter any words that can act as search operators (NOT, OR, AND) in feed posts or hashtags. Otherwise, you may encounter issues when searching for these words.
# Create a poll

Selecting the Create poll button opens a new area in the ELO feed. In this area, you can start a user poll.

Poll duration: You can select how long you want the poll to remain open in the drop-down menu. You can also enter a specific number of days. For example, enter 14 for two weeks.
The Show more settings drop-down menu opens an area with additional settings.
- Allow multiple choice
- Show user names of participants in results: The names are visible to all users participating in the poll. If this option is disabled, the poll is anonymous for you as well.
- Allow participants to add answers
Select Create to start the poll.
Once a user has taken a poll, it can no longer be modified.
Click the X icon to delete a poll that has already started. You cannot undo this.
# Mention

Use the Mention button (@ symbol) to address a feed post to another ELO user or group. The users mentioned then see the corresponding feed post in the My ELO work area.
Alternative: As soon as you type an @ character, ELO automatically recognizes that you want to insert a mention.
# Reference

Use the Reference button (document icon with arrow) to link a feed post with an entry in ELO. The Reference dialog box appears. In the dialog box, select the entry in the tree view you want to reference.
Select the reference in the feed post to go straight to the respective entry.
Alternative:
- As soon as you type a > character, ELO automatically recognizes that you want to insert a reference. The Reference dialog box appears.
- Select the entry you want to reference and then press CTRL+C. Select the entry you want to insert the reference into and press CTRL+V in the feed post.
# Hashtag

Use the Hashtag button (# symbol) to add hashtags to a post. You can subscribe to hashtags. You can also filter the My ELO work area by hashtags.
Alternative: As soon as you type a # character, ELO automatically recognizes that you want to insert a hashtag. The hashtag drop-down menu opens.
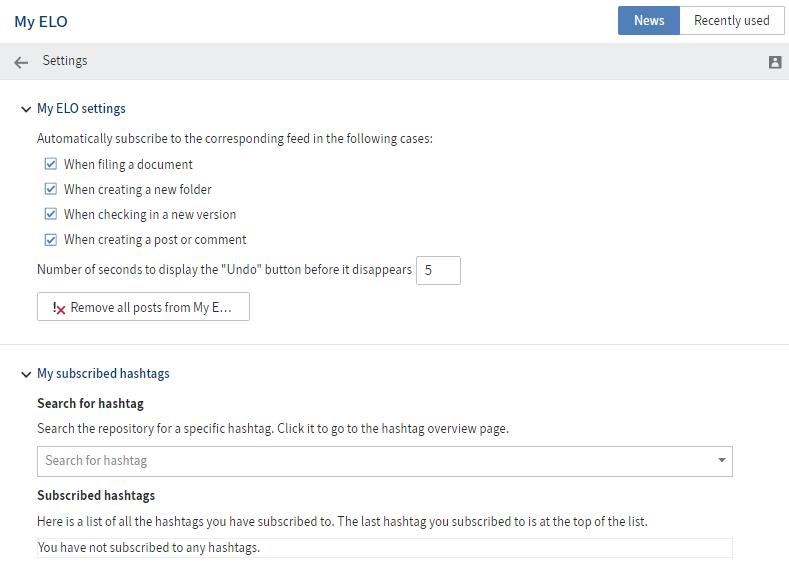
# Subscribe to a hashtag
To be notified of new posts related to a specific topic, you can subscribe to hashtags.

Select the hashtag you want to follow. You will see an overview of posts with this hashtag. Select Subscribe (antenna icon) in the upper bar.
You have subscribed to the hashtag. All posts that are marked with the corresponding hashtag appear in the My ELO work area.
# Visibility

Use the Visibility button (eye icon) to restrict who can read the post.
# Search feed

Select the Search feed button (magnifying glass icon) to search within the currently selected feed. When the search term is found, the feed is narrowed down to the corresponding posts. The matches are highlighted. You can start the search with the magnifying glass icon. To reset the search and display the entire feed, select the X icon next to the selected search term.
# Subscribe to feed

Use the Subscribe button (antenna icon) to subscribe to the feed. All feeds you have subscribed to are listed in the My ELO work area. Once a post is added to one of these feeds, you also see the post in the My ELO work area.
# Automatically subscribe to feed
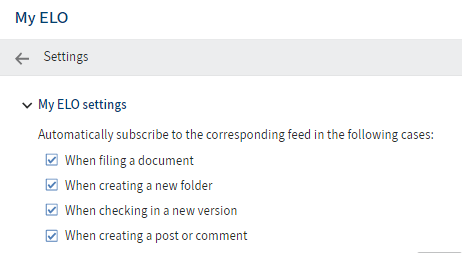
ELO provides you with the option to automatically subscribe to feeds.
You can enable the automatic feed subscription option under My ELO > Settings or User menu [your name] > Configuration > Administration > My ELO.
# Show filter options

The Show filter options button opens a window with filters for the corresponding feed. You can use these filters to restrict the feed to posts that match the respective filter.

You can also see when filters are active, even when filter options are hidden.
# Show metadata

You can select the Show metadata button (document icon) to view the metadata of the entry. The metadata form associated with the entry is always displayed. The fields of the form are only displayed if they contain data. In gen, 2 metadata forms, only the form associated with the entry is displayed, even if you have completed other fields.
# Enter a comment
You can enter comments on any post. The procedure for adding a comment is almost identical to creating a post. However, the visibility settings for a comment are bound to the visibility settings for the commented post, which is why you are unable to change the visibility settings for comments.
# Edit post

Select the Edit button (pencil icon) to edit feed posts and comments.
# Feed history
Edited entries are marked as edited below the entry. Select edited to open the editing history.
# Settings

Select the Settings button to change settings related to the feed.
# Show current hashtags

If the preview in My ELO is not large enough to show hashtag information, the Show current hashtags button will appear.
If you select the Show current hashtags button, hashtag information is displayed above the subscribed feed.
# Hashtag cloud

Hashtags that have been used in recent weeks are shown in a hashtag cloud. If you select a hashtag, you will see all feed items that contain that hashtag, provided you have the required permissions.
# Show workflows

If the preview in My ELO is not large enough to show workflow information, the Show workflows button will appear. In this case, workflow information is displayed above the subscribed feed.
# Escalated workflows

In the Escalated workflows area, you can see which escalated workflows you are involved in.
Selecting the workflow name takes you the respective workflow in the Tasks work area.
# Recently started workflows

In the My recently started workflows area, you see which workflows you have recently started.
Selecting the workflow name takes you to the entry you started the workflow on.
# Show filter options
If the preview in My ELO is not large enough to show the filters, the Show filter options button will appear.
If you select the Show filter options button, the filters are displayed above the subscribed feed.
To hide the filters, select Hide filter options.
# Filters in 'My ELO'
Various filter categories are available.

Post type The Post type is filter option lets you filter the My ELO area by the type of post. There are two basic types:
- Automatically created posts (e.g. working version changed)
- Posts created by users (e.g. user posts)
# Apply filters
To apply a filter, select the corresponding filter in the list.
# Negate filters
With the default settings, all filters are applied in is mode.

The mode can be switched to is not in all categories apart from New since. Click the word is next to the name of the filter category.
# Reset filter

To reset all filters, select the Reset filters button (arrow icon).
# Mark as important
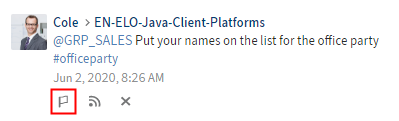
The Mark as important button (flag icon) lets you pin a post to the My ELO work area. The post remains in My ELO even if it is more than one month old. You can recognize posts that are marked as important by the red flag icon.
# Delete marker
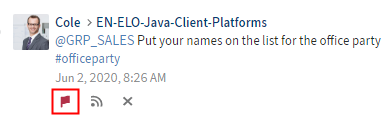
The Delete marker button (red flag icon) enables you to delete the marker you added to a post. As soon as the post is more than a month old, it will no longer be displayed in the My ELO work area.
# Hide post
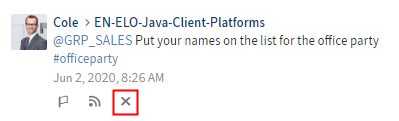
The Remove from My ELO button enables you to hide a post in your My ELO work area.
Information
The Remove from my ELO function only hide posts in the My ELO area. The entries are not deleted.

If you hide a post, the Undo function is displayed. Select this button to show the post again.
Information
The Undo function is only displayed for five seconds by default. You can change the length of time it is displayed in My ELO > Settings > My ELO settings.
# Margin notes, links, attachments
If available for the selected document, you will see the following additional elements:
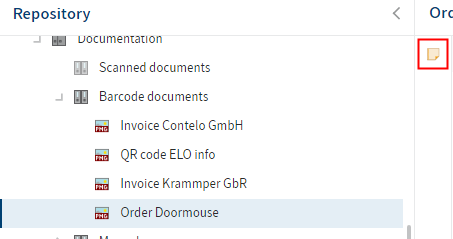
- Margin notes: You will see margin notes for an entry on the split bar. Selecting the icon opens the margin note.

- Links: The chain icon represents a link. Clicking the icon opens an overview of links. You can also create additional entries as links. The embedded dialog box does not close automatically when you select another entry. Close it by clicking Close.

- Attachments: The paper clip icon represents an attachment that was filed along with the selected document. Select the icon to open the attachment.
Attachments open in the browser or in an external program, depending on the administrative settings. If attachments are set to open in your browser, you may not be able to open some documents in read-only mode.