# File entries via the Intray
You can insert entries using the Insert file function or by dragging and dropping them onto the Intray work area and storing them in ELO from there.
Alternatively, you can scan in new documents using the Scan pages or Scan documents functions. See the Scan documents chapter for more information on this option.
The Intray features a File tab with additional functions for entries in this work area.
You can refresh the view by clicking Refresh.
Use the Delete function to permanently delete the selected document from the Intray.
You can edit documents in the Intray and store them in ELO with the following functions.
# Edit document
Keyboard shortcut: CTRL + E
This function opens the selected document for editing in an external program.
Save your changes in the external program. The changes are applied to the document in the Intray.
# Edit metadata
The Metadata function (available in: Intray work area > Ribbon > File) enables you to enter standardized information about a document, making it easier to find in the search. For detailed information, refer to the chapter Metadata.
The Delete metadata function (available in: Intray work area > Ribbon > File > Edit) enables you to delete the metadata of a document in the Intray work area. Once a document has been filed to ELO, you can edit the metadata but not delete it.
# File to ELO
Available in: Intray > Ribbon > File
Use this function to file a document from the Intray work area to ELO. Choose the desired filing location in the dialog box. Use the Go to function to show the filing location in ELO.
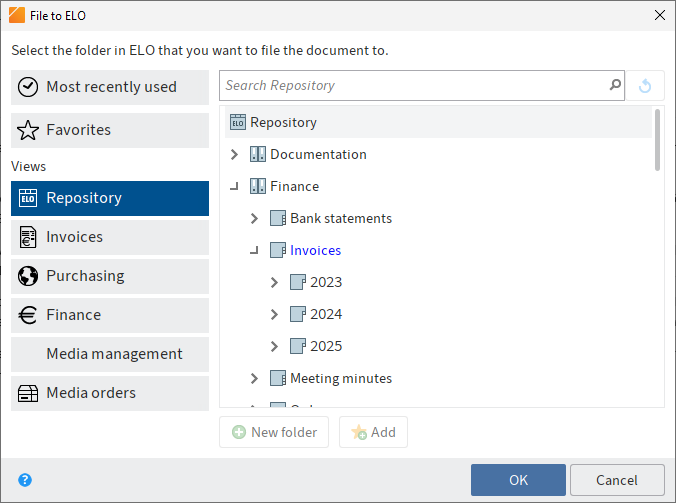
The following functions are available:
- New folder: Use this function to create a new folder at the location selected in ELO.
- Add: Use this function to create a new favorite. The favorites are listed under your Favorites and enable you to quickly select a filing location.
- Delete: Removes a previously selected favorite.
# Automatic filing
Available in: Intray > Ribbon > File > Filing
Use this function to automatically file a document to ELO. You do not have to select the filing target manually. To use this function, the document must have been assigned a metadata form that contains a filing definition.
Please note
You cannot edit metadata forms in the ELO Java Client. Contact your administrator if necessary.
# Serial filing
Available in: Intray > Ribbon > File > Filing
This function enables you to file multiple documents with the same metadata to ELO.
Requirements
There are several documents without metadata in your Intray.
Method
Open the Intray work area.
Select multiple documents by holding down the SHIFT key.
On the ribbon, select File > Filing > Serial filing.
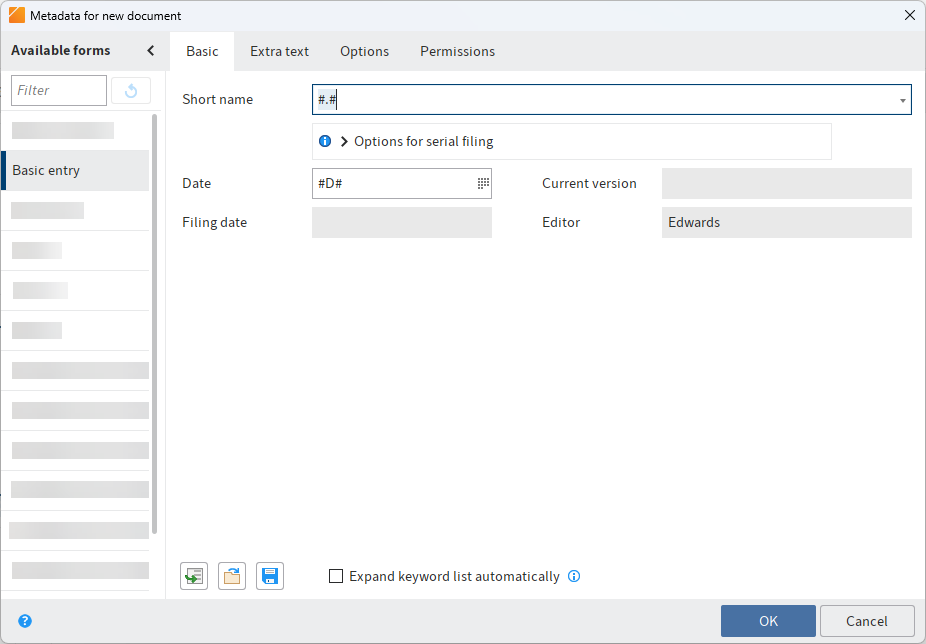
The Metadata for new document dialog box opens.
Define the settings for serial filing. For example, you can use variables to assign a consecutive number (##) during filing.
Information
You can find the possible variables in the tooltip below the short name or in the Wildcards section.
Select OK.
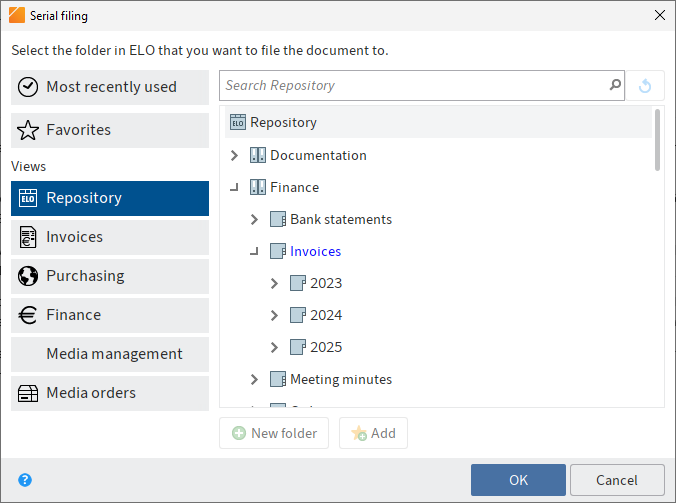
The Serial filing dialog box appears.
Choose the folder in ELO that you want to file the documents to.
The following functions are available:
- New folder: Use this function to create a new folder at the location selected in ELO.
- Add: Use this function to create a new favorite. The favorites are listed under your Favorites and enable you to quickly select a filing location.
- Delete
Select OK.
Result
The documents are filed to ELO.
# Wildcards
With serial filing, you can use the following wildcards in the short name and other fields.
| Wildcards | Function | Event example |
|---|---|---|
| #.# | The file name is inserted. | Invoice ELO Count result Grenkeleasing |
| #F# | The file name is inserted with the file extension. | Invoice ELO.tif Count result.pdf Grenkeleasing.doc |
| #E# | The file extension is inserted. | tif doc |
| #D# | The file date and the time are inserted. | 2024-07-11 15:28 2020-06-26 11:31 2019-12-02 18:03 |
| ## or #1# | The document are numbered, starting with 1. | 1 2 3 |
| #001# | The document are numbered with three digits, starting with 001. | 001 002 003 |
| Image #1# #E# | The placeholders can be combined with any text and with each other. | Image 1 png Image 2 jpg Image 3 gif |
# New version
Available in: Intray > Ribbon > File > Filing
Use this function to create a new version of a document from the Intray work area in the Repository work area.
Information
You cannot create a new version for a locked or deleted document.
# Attach pages
Available in: Intray > Ribbon > File > Filing
Information
Alternatively, the same function is also available when you drag a TIFF or PDF file to the repository and drop it on another TIFF or PDF document.
Use this function to add a TIFF or PDF document selected in the Intray work area to a document in the Repository work area.
Method
Select a TIFF or PDF document in the Intray work area.
Select File > Filing > Attach pages.

The Attach pages clipboard opens.
Select the TIFF or PDF document in the Repository work area that you want to attach the pages to.
To attach the original document at the beginning of the target document, select Attach to front. To attach the original document at the end of the target document, select Attach to back.
Result
The pages are added.
# Send to another Intray
Available in: Intray > Ribbon > File > Transfer
This function enables you to send a document to one or multiple users. You can select whether to keep a copy of the document in your Intray after sending.
# Barcode recognition
Available in: Intray > Ribbon > File > Edit
This function starts the automatic barcode recognition process. To use this function, you need the ELO Barcode module. ELO Barcode allows you to read barcode information in image files, such as scanned invoices.
For more information, refer to the ELO Barcode (opens new window) documentation.