# Add a text stamp
Select Add a text stamp.

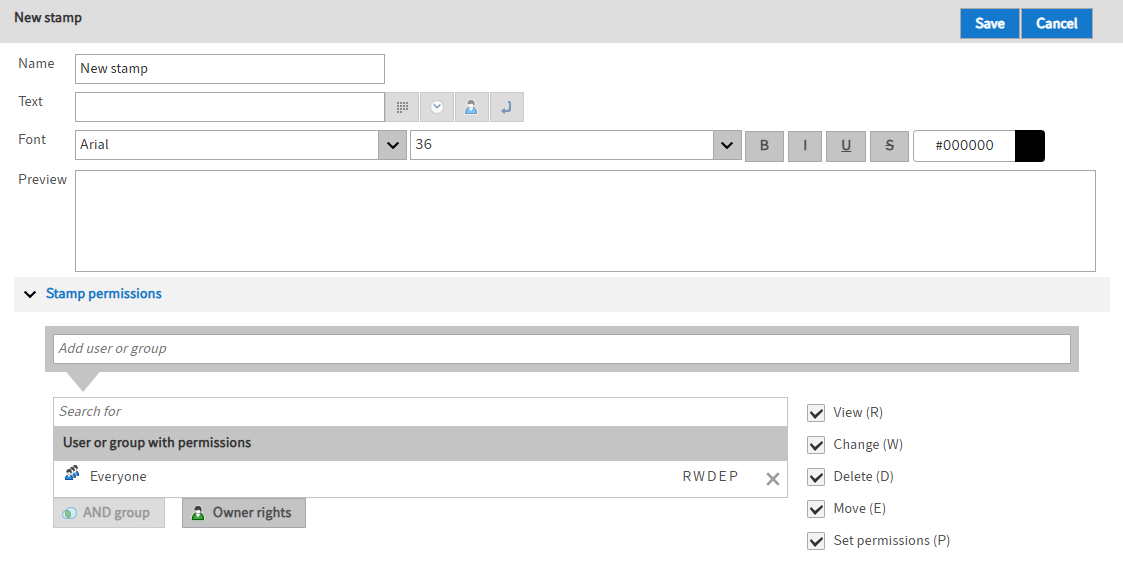
The New stamp area opens.
Enter the name of the new text stamp to the Name field.
Enter the text to the Text input field that will appear as stamped text on the document.
A preview of the stamp will appear in the Preview field. The preview is refreshed automatically every time you make a change.
Please note
New stamps can also be created in the ELO Java Client. These stamps, however, are only available to the respective user.
You will find information on creating stamps in the ELO Java Client in the documentation ELO Java Client > Important actions in detail > Add and search annotations > Add stamp (opens new window).
Optional 1: Add placeholders if required.
Date: Select the Date button to insert a placeholder for the current date (%x) at the selected position.
Time: Select the Time button to insert a placeholder for the current time (%X) at the selected position.
User: Select the User button to insert a placeholder for the user who created the stamp (%u) at the selected position.
Line break: Select the Line break button to insert a placeholder for a line break (
<br/>) at the selected position.

Optional 2: In the Font area, you can change the settings for the font type, font size, font color, and stamp format.
Optional 3: You can edit the permissions on the stamp in the Stamp permissions area.
Once you have made all settings, select Save.
The new stamp is shown in the overview of available stamps on the left-hand side.