# Configure workspace type
Once you have created a workspace type, you can configure it.
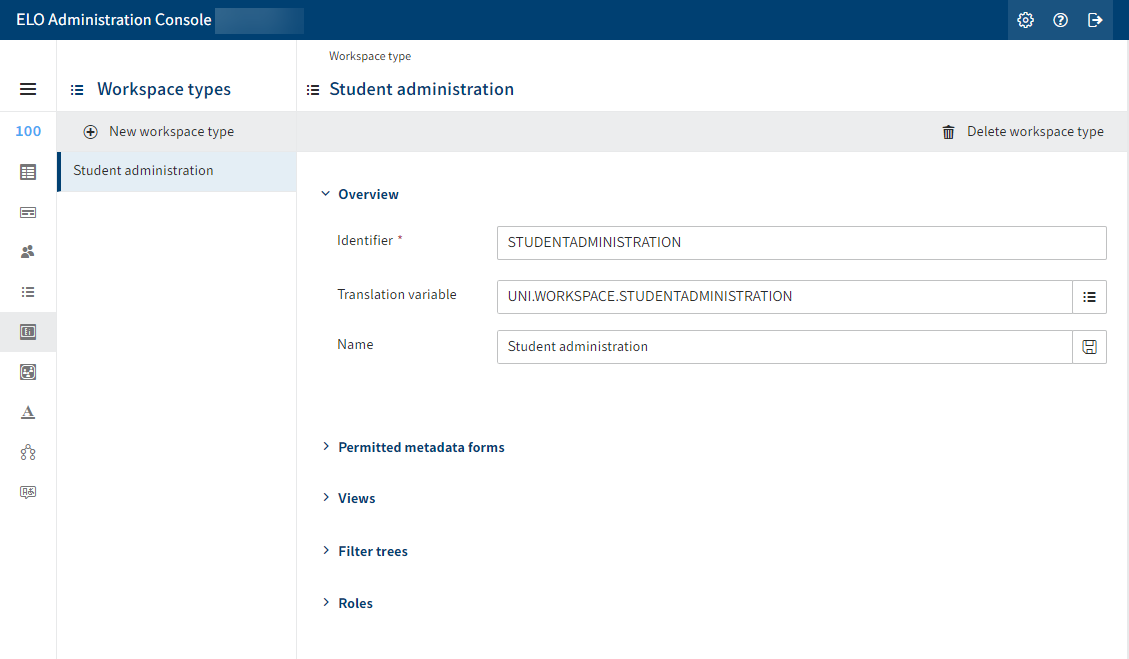
The Workspace type dialog box offers the following actions:
Enter basic data for the workspace type
Define permitted metadata forms
Create views
Add filter trees
Define roles
Delete workspace type
Please note
You can only delete a workspace type if it is not being used.
Please note
If you make changes to the workspace type after workspace instances have been created, these changes are applied to all existing workspace instances of this workspace type, unless you've already made changes in the workspace instance in the corresponding area.
Roles added to the workspace type later on are not applied to existing workspace instances.
# Enter basic data for the workspace type
Basic data about the workspace type is entered in the Overview area.
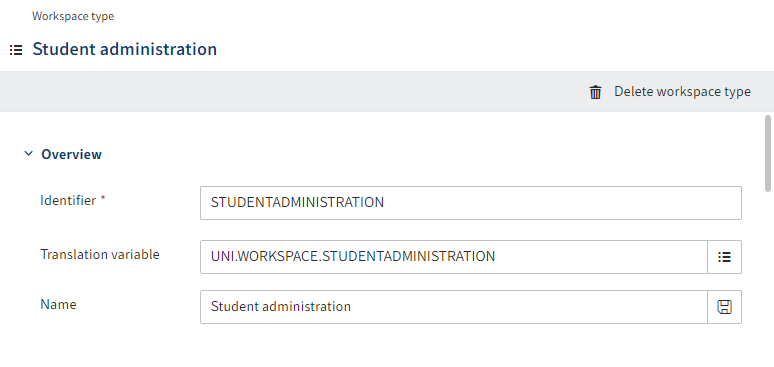
Enter a technical name in the Identifier field.
Information
Only capital letters (without umlauts and special characters), numbers, and underscores are allowed. The first character must be a letter.
Enter a translation variable into the Translation variable field.
Information
Only letters (without umlauts and special characters), numbers, periods, and underscores are allowed. The first character must be a letter.
Enter the display name for the translation variable into the Name field.
Select Save (floppy disk icon).
Alternative: Select an existing translation variable with List (list icon).
The content of the Name field will be saved as the display name for the translation variable. Here, the currently selected display language applies.
Select Save workspace type.
The workspace type is saved.
# Define permitted metadata forms
In the Permitted metadata forms area, you define which forms can be used in the workspace.
Select Add metadata forms.
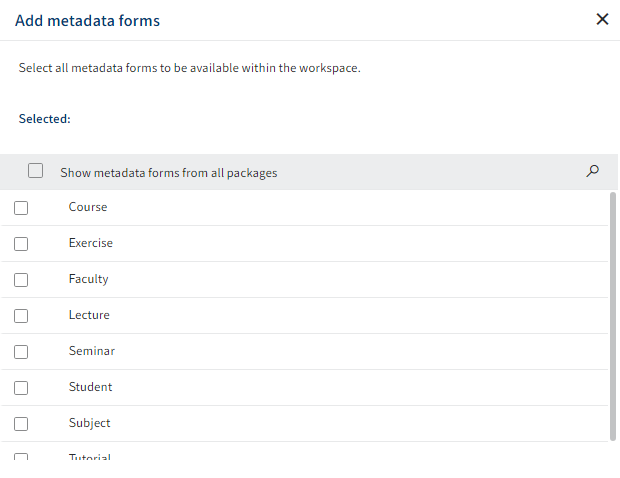
The Add metadata forms dialog box appears.
Select the metadata forms to make available in the workspace.
Select Apply.
The metadata forms will be added to the workspace type.
Option 1: Disable the option Entries may be created manually if users should not be allowed to make entries in the metadata form here.
This makes sense if the metadata form is used as an inheriting metadata form that acts as a kind of parent category but is not intended for new objects. It can, however, be used for lists and dashboards.
Option 2: Open the Advanced settings area and make an entry in the Translation variable and Name fields. The value in the Name field is displayed as a header for lists. It should be the plural form of the document type. For the Invoice metadata form, enter Invoices, for example.
Select Save workspace type.
The workspace type is saved.
# Create views
In the Views area, create different views for the workspace type.
Information
At least one metadata form must be set as a permitted form to be able to add views.
# Create view
Select New view.
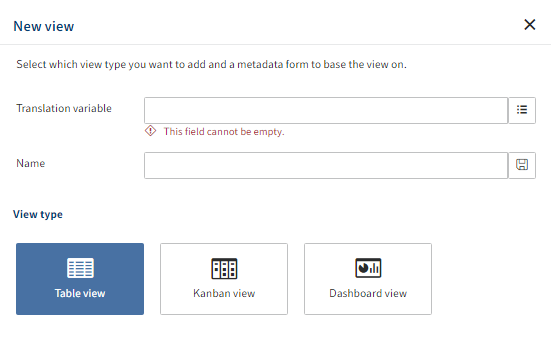
The New view dialog box opens.
Enter a translation variable into the Translation variable field.
Information
Only letters (without umlauts and special characters), numbers, periods, and underscores are allowed. The first character must be a letter.
Enter the display name for the translation variable into the Name field.
Select Save (floppy disk icon).
Alternative: Select an existing translation variable with List (list icon).
The display name for the translation variable is automatically applied to the Name field.
Select a view type.
The following choices are available:
- Table view: The workspace type data is displayed as a table. You can adjust the table columns in a later step.
- Kanban view: The workspace type data is displayed as a kanban board. A kanban board is divided into multiple columns which represent the steps of a process. A workspace element can pass through the various stages of a process. The elements are displayed as tiles or cards which can be dragged to different columns on the board. Only fields with a keyword list can be used in the kanban view.
- Dashboard view: The data of a metadata form in the workspace can be displayed in a dashboard. Dashboards serve to display various static values in charts. At least one dashboard must be set up for the metadata form. For information on how to configure dashboards for a metadata form, refer to Metadata > Metadata forms > Configure metadata forms > Create dashboards.
Select which metadata form to use for the view.
Optional: For a dashboard view, you must select a dashboard set up in the metadata form.
Select Apply.
Depending on the option selected, an associated dialog box may open. Refer to the following sections for more information on the different dialog boxes:
As soon as you've configured the view, select Save workspace type.
The workspace type is saved.
# 'Table view' dialog box
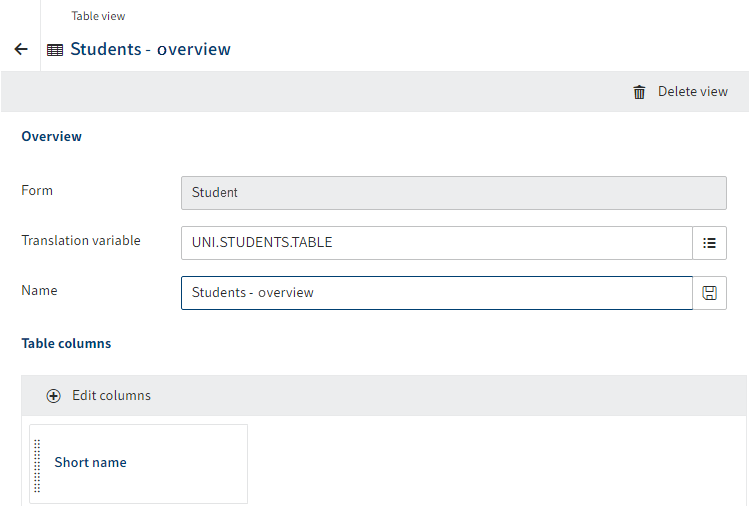
In the Table view dialog box, you can edit the selected/created table view.
Only the Short name column is selected by default.
Select Edit columns.
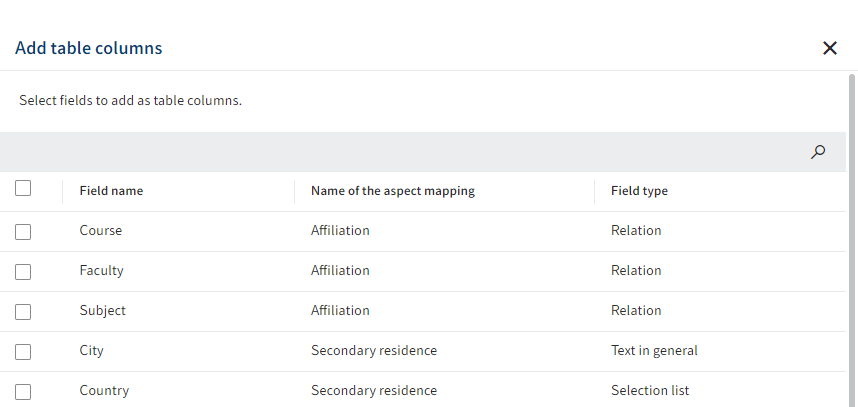
The Add table columns dialog box appears.
Select the fields to display as columns.
Select Apply.
The columns are added to the view.
Optional: Move the table columns via drag-and-drop.
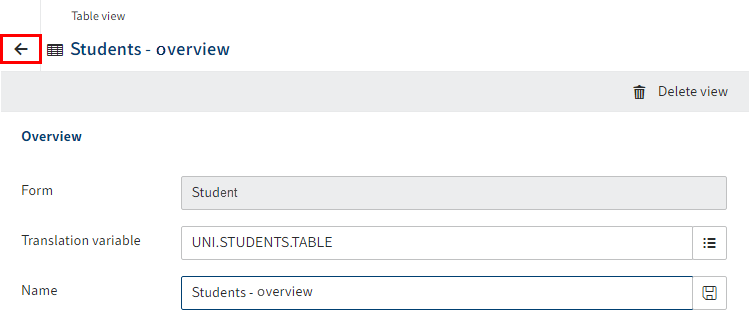
To close the Table view dialog box, select the arrow icon.
The view is saved.
# 'Kanban view' dialog box
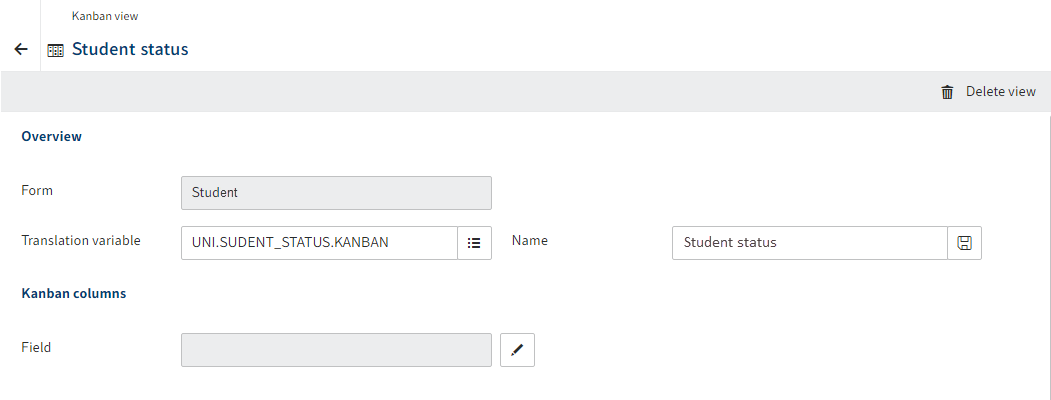
In the Kanban view dialog box, you can edit the selected/created kanban view.
Please note
The Field field must not be empty. Only fields with a keyword list can be used in the kanban view.
Create keyword lists via the Keyword lists menu item in the package. You will find more information under ELO packages > Metadata > Keyword lists.
Select the pencil icon beside the Field field.
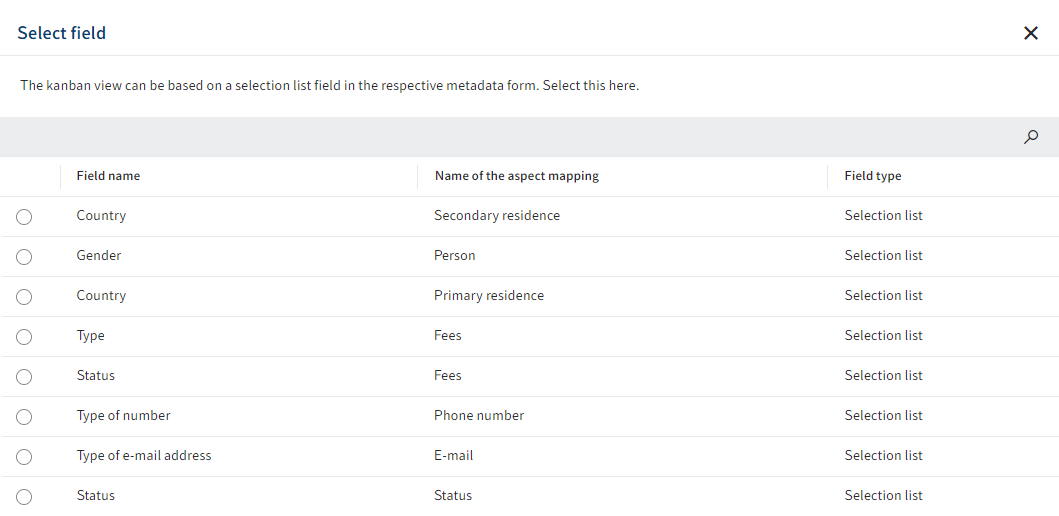
The Select field dialog box appears. The dialog box shows all fields with a keyword list.
Select a field.
Select Apply.
The Select field dialog box closes. The selected field is entered into the Field field.
Select Edit kanban columns.
The Edit kanban columns dialog box opens.
Select which list elements to display as columns in the kanban view.
Alternative: To select all elements in the list, enable the check box next to the Field name column.
Select Apply.
The Edit kanban columns dialog box closes. The selected columns are added to the view.
Optional: Move the kanban columns via drag-and-drop.
Select Edit tile contents.
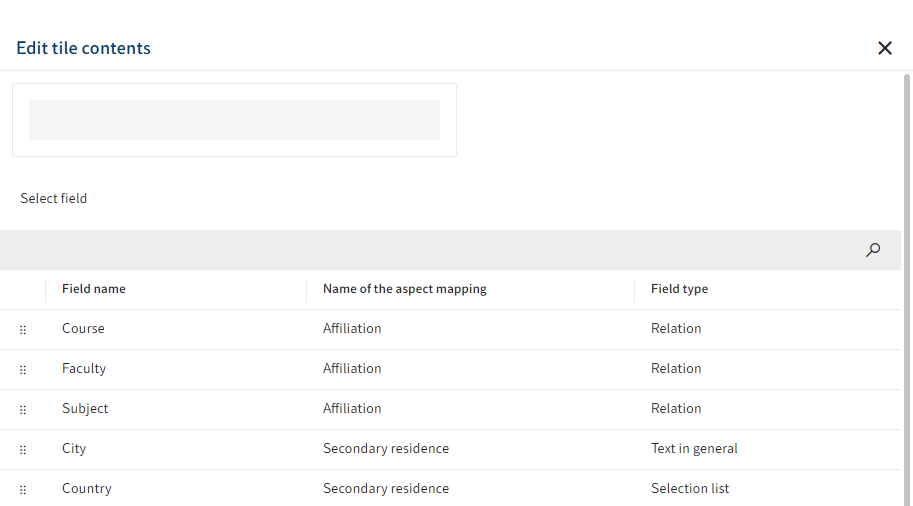
The Edit tile contents dialog box appears. You see the values of the keyword list for the selected field.
Drag the required fields to the blank line in the upper part of the dialog box.
The fields selected here will be displayed as information on the tiles.
Option 1: To search or filter the list, use the search function (magnifying glass icon).
Option 2: Repeat step 8 for additional fields.
Select Apply.
The Edit tile contents dialog box closes. The selected fields are entered as tile contents.
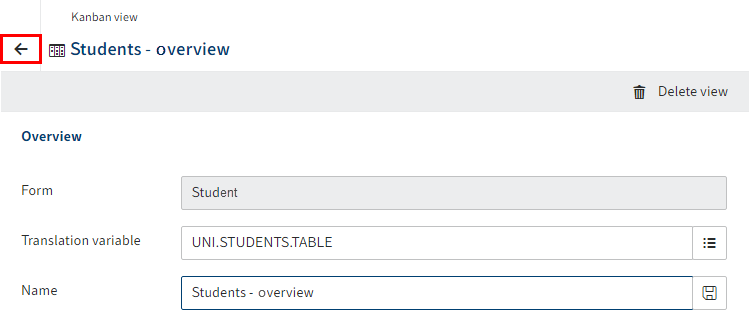
To close the Kanban view dialog box, select the arrow icon.
The view is saved.
# 'Dashboard view' dialog box
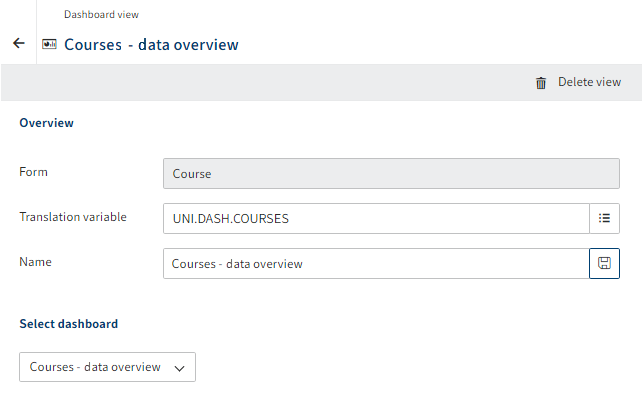
In the Dashboard view dialog box, you can edit the selected/created dashboard view.
Optional: In the Select dashboard field, you can change the dashboard to be displayed, if necessary.
Information
For information on how to configure dashboards for a metadata form, refer to ELO packages > Metadata > Metadata forms > Configure metadata forms > Create dashboards.
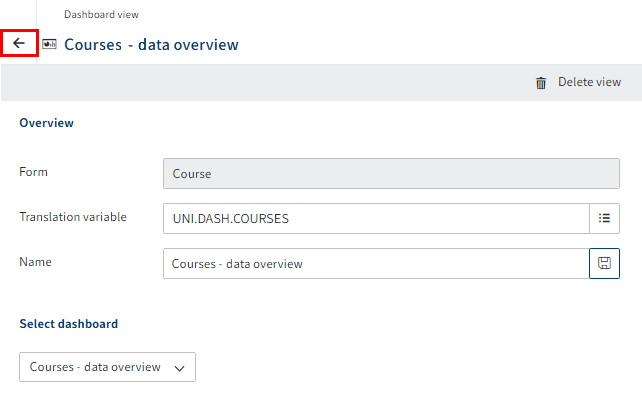
To close the Dashboard view dialog box, select the arrow icon.
The view is saved.
# Filter trees
Filter trees are used to filter the view of elements in the workspace. Different filters can be combined in filter trees.
# Add filter tree
Select New filter tree.
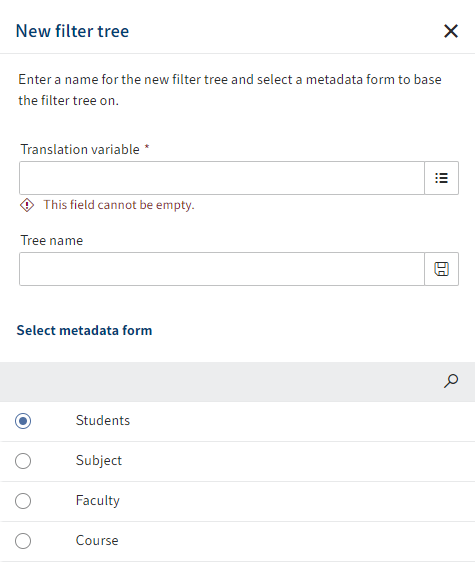
The New filter tree dialog box appears.
Enter a translation variable into the Translation variable field.
Information
Only letters (without umlauts and special characters), numbers, periods, and underscores are allowed. The first character must be a letter.
Enter the display name for the translation variable into the Tree name field.
Select Save (floppy disk icon).
Alternative: Select an existing translation variable with List (list icon).
The display name for the translation variable is automatically applied to the Tree name field.
Select a metadata form.
Select Apply.
The New filter tree dialog box closes.
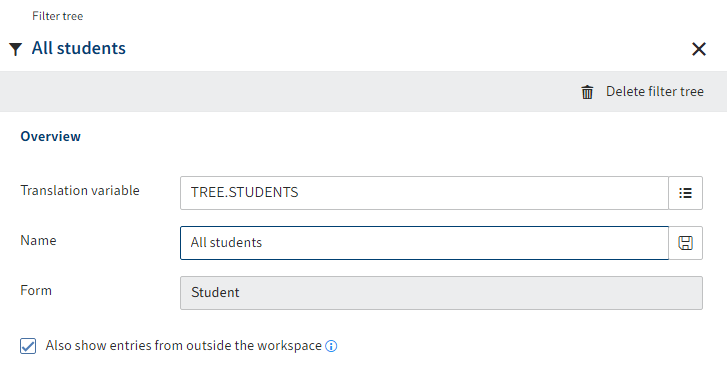
The Filter tree dialog box appears.
Optional: Check the Also show entries from outside the workspace option as well.
Please note
If this option is enabled, the contents of this filter tree are applied to all workspaces created with the same workspace type.
Select Save workspace type.
The workspace type is saved.
As soon as you select an existing filter tree, the New level and New list functions become available. Refer to the following sections for more information on these functions:
# Base filter
Base filters help refine the filtering of the view in the filter tree. They can be combined with other filters.
Open a filter tree.
In the Base filter area, select Add filter.
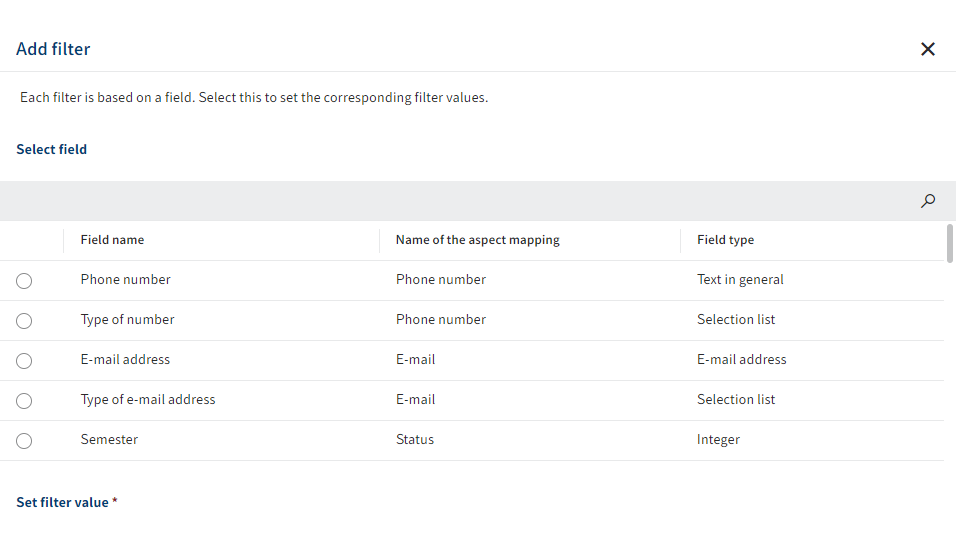
The Add filter dialog box appears.
Select a field.
Enter a filter value under Set filter value. You can select or enter different values depending on the field.
Information
For some field types, you can add conditions via Add condition. Conditions are added with an OR link.
Select Apply.
The filter is entered under Base filter.
Select Save workspace type.
The workspace type is saved.
# New level
You can refine a filter in the filter levels. This allows elements to be displayed with different filter combinations as needed.
Select a filter tree.
Select New level to create a level.
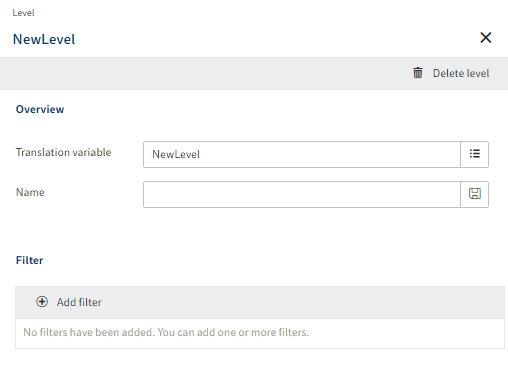
The Level dialog box appears.
Enter a translation variable into the Translation variable field.
Information
Only letters (without umlauts and special characters), numbers, periods, and underscores are allowed. The first character must be a letter.
Enter the display name for the translation variable into the Name field.
Select Save (floppy disk icon).
Alternative: Select an existing translation variable with List (list icon).
The display name for the translation variable is automatically applied to the Name field.
Select Save workspace type.
The level is entered under the selected filter tree and the workspace type is saved.
# Add filter
Add a filter to a level as follows:
Select Add filter.
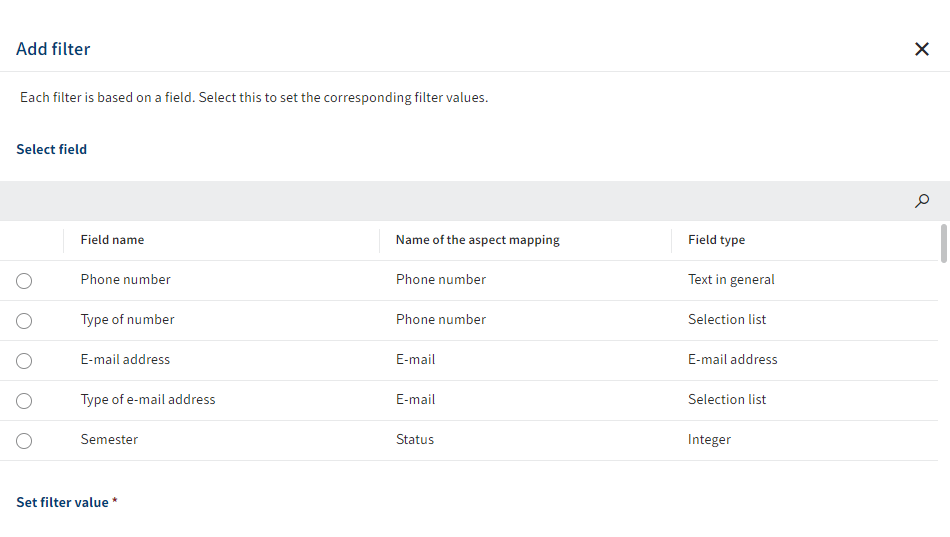
The Add filter dialog box appears.
Select a field.
Enter a filter value under Set filter value. You can enter or select different values depending on the field.
Optional: Select Add condition to add more conditions to the filter. More conditions can be added with an OR link.
Select Apply.
The filter is entered in the level.
# New list
Lists are another option to filter data in the workspace. With lists, you can create filters based on the values of a field or metadata forms with inheritance. In the workspace, the matching entries are shown under a corresponding level.
Information
In the client, lists are shown in the filter tree if there is at least one object relevant to the list.
Select a filter tree.
Optional: Select a level if required.
Select New list.
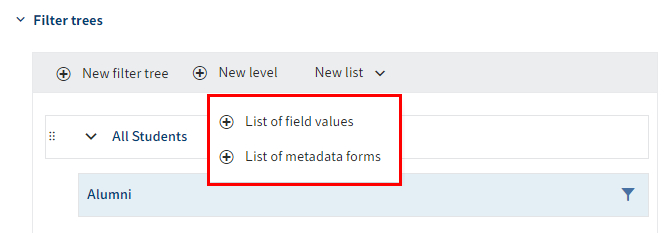
The New list drop-down menu opens.
Select a type:
- List of field values: A list based on the values of a field. This can be values you have entered or values from a keyword list.
- List of metadata forms: A list based on a metadata form and metadata forms that inherit their settings from this metadata form (child metadata forms).
Additional settings are required depending on the type. Configuration of the different types is explained in more detail in the following sections.
Configure the list depending on the selected type.
Select Save workspace type.
The list and workspace type are saved.
# Configure list of field values
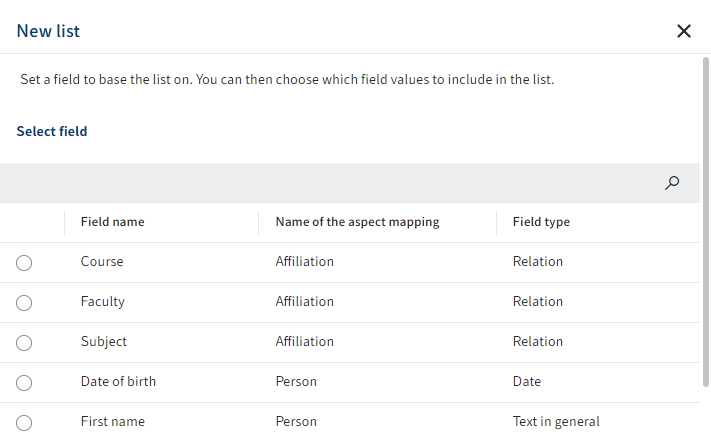
If you have selected the type List of field values from the New list drop-down menu, the New list dialog box opens.
You have to select a field that the list should be based on.
The following options are available:
Field without keyword list: The field values previously entered form the list.
Field with keyword list: You can choose whether the list should contain all or just individual values of the keyword list.
If the option Apply all keywords to the list is enabled, newly created keyword lists are also applied to existing workspace instances. The new keywords only appear in the list once they've been used in an object.
# List of metadata forms
To be able to create a list based on metadata forms, you will need a metadata form that inherits its settings to other metadata forms. These metadata forms are also referred to as child metadata forms.
If a metadata form with child metadata forms is selected, ELO automatically recognizes the child metadata forms and applies them as a value in the list.
# Define roles
Different roles can be assigned for workspaces. Roles allow you to control rights for the workspace and permissions to contents in the workspace.
In the Roles area, you can see which roles have been set up for the workspace and which settings apply for the respective roles.
Information
When creating a workspace int he client, these roles are created as groups in ELO.
The following roles are created with default settings:
- Administrator: The creator of a workspace is automatically assigned the role of Administrator. Other members can also be assigned the role of Administrator. Administrators have all the rights to the workspace and all permissions to the contents in the workspace.
- Member: Users with this role have the permissions to view, edit, and delete contents in the workspace.
Information
The Administrator role cannot be edited or deleted.
You can also set authorization options for entries that were created in a workspace. For more information, refer to the following documents:
- Space authorizations in the ELO Java Client (opens new window)
- Space authorizations in the ELO Web Client (opens new window)
# Overview of functions
- New role: Add a new role to the workspace. See the following section for additional information on this.
- Roles: Selecting one of the existing roles lets you see the role's settings and edit them if you have the rights.
- Default for new members: Select which role is set as standard for new members.
# New role
Information
Roles can only be created and edited by users with the appropriate rights.
Select New role.
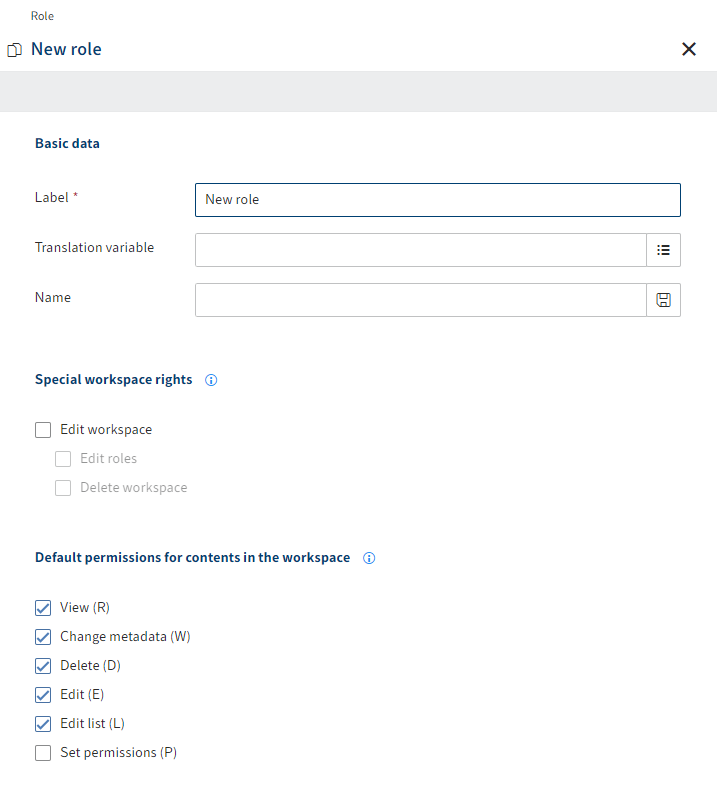
The Role dialog box opens.
Enter a technical name in the Identifier field.
Enter a translation variable into the Translation variable field.
Enter the display name for the translation variable into the Name field.
Select Save (floppy disk icon).
Alternative: Select an existing translation variable with List (list icon).
The display name for the translation variable is automatically applied to the Name field.
Select which rights and permissions this role should receive.
You can assign the following special workspace rights:
Edit workspace: Users with this right can use the Edit workspace function to make changes to a workspace. They can also change the roles assigned to members in the workspace and add new members.
Edit roles: Users with this right can edit the roles in the workspace.
Delete workspace: Users with this right can use the Edit workspace function to delete a workspace.
You can assign the following default permissions for contents in a workspace:
View (R): Users have read access to the entry. They cannot modify the entry.
Change metadata (W): Users can edit the metadata of the entry.
Delete (D): Users can delete the entry.
Edit (E) (documents only): Users can edit the selected entry. This means that they can change the working version and upload a new version.
Edit list (L) (folders only): Users can change the contents of the folder. For example, you can create documents in this folder or move or remove documents from the folder.
Set permissions (P): Users can change the permissions for the selected folder.
Information
The current workspace rights and permissions only take effect if the user has the corresponding user rights.
Select Save workspace type.
The workspace type is saved. The new role can now be used for new workspaces. Existing workspaces with this workspace type do not take on the role.