# User
# Create user
To create a user, proceed as follows:
Open the ELO Administration Console.
Open the user administration (System settings > User and group administration).
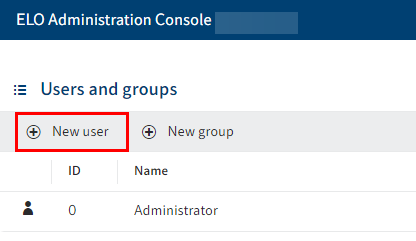
Select New user.
The User screen opens.
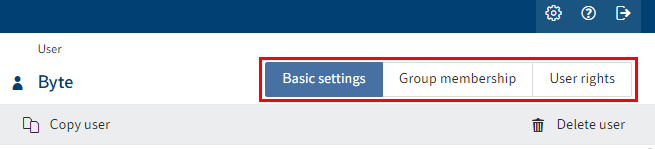
Configure the new user. Navigate to the Basic settings, Group membership, and User rights tabs to do so.
For more information, refer to the following section 'Configuration'.
Once you are finished with configuration, select Save user to save.
You created a new user.
# Configuration
# Define basic settings
In the Basic settings area, you define the settings for User information, Properties, and additional Information.
# User information
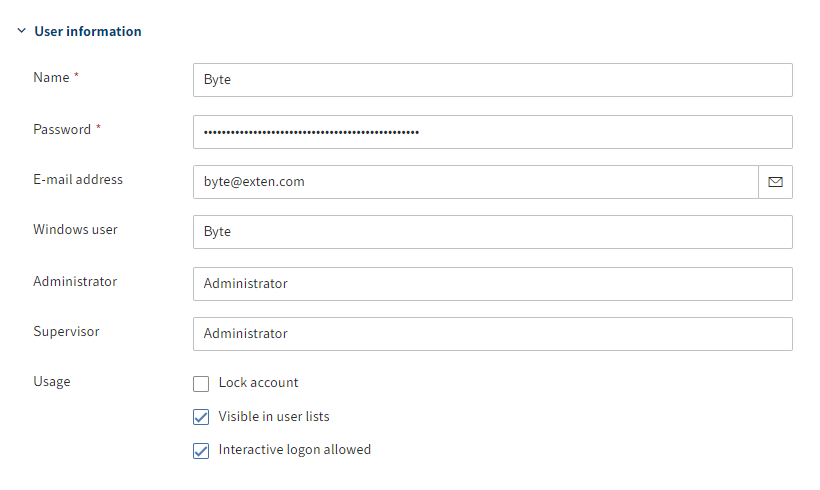
- Name: Mandatory field. This can be changed later.
- Password: Mandatory field. This can be changed later.
- E-mail address: Displayed in the user profile in the client and can be used in workflows, forms, and scripts.
- Windows user: Enter the Windows user name if required, e.g. if you are using SSO. This information can be used in workflows, forms, and scripts.
- Administrator: The user who creates the new user is automatically entered. If this user has the Main administrator right, the Administrator user is entered in the Administrator field. This can be changed later. Determines who may edit the master data of the user.
- Supervisor: Can be used in workflows, forms, and scripts. If this field is left blank, the content of the Name field is used.
- Use:
Lock account: If this option is enabled, this user will no longer be able to log on to the system. The user is still visible in the system. To hide these accounts, disable the option Visible in user lists.
Information
This option is not available to the Administrator.
Visible in user lists: If this option is enabled, the group will show up in the corresponding selection lists in the ELO client. If this option is disabled, only administrators can see this user. Any actions already performed by this user, for example filed documents or new document versions, still remain visible to everyone in the ELO client.
Information
The members of an organizational unit only see the users within their own organizational unit.
Interactive logon allowed: This option enables the user to log on to the ELO client.
Please note
This setting cannot be checked by the server. It is not considered a lock and can be bypassed.
Information
This option is not available to the Administrator.
# Properties
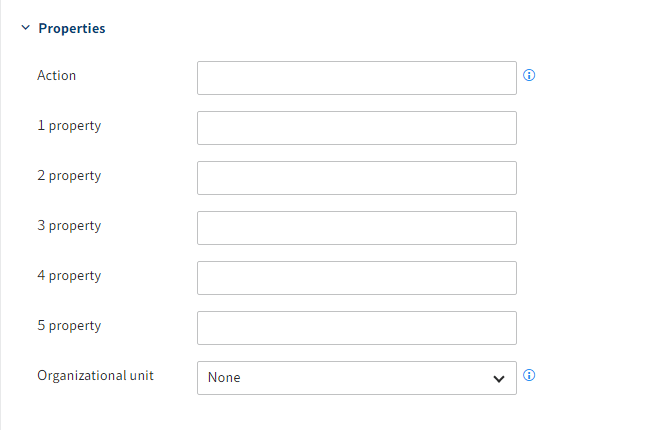
- Action: Codes entered here have an effect on the password.
- Examples:
- EX20233105: The password expires on May 31, 2023, after which it has to be renewed.
- PWf: The user must change their password when they log on for the first time.
- PW: The user can change their password when they log on for the first time.
- Examples:
- Property 1-5: Information can be evaluated using scripts.
- Organizational unit: You will find relevant information under Configuration and administration > User administration > Additional configurations > Organizational units.
# Information
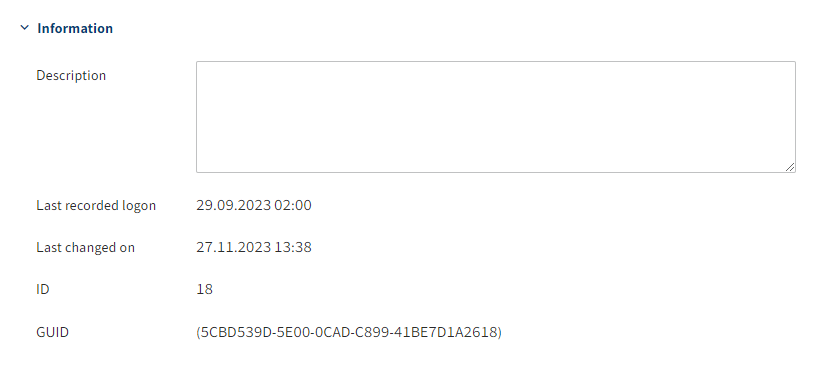
- Description: The entry can have a maximum of 250 characters.
- Last recorded logon: Is updated automatically.
- Last changed on: Is updated automatically.
- ID: Each account is automatically assigned an ID, which can be used to address the account in other functions.
- GUID: Each account is automatically assigned a GUID. The GUID can be used to address the account in other functions.
# Define group membership
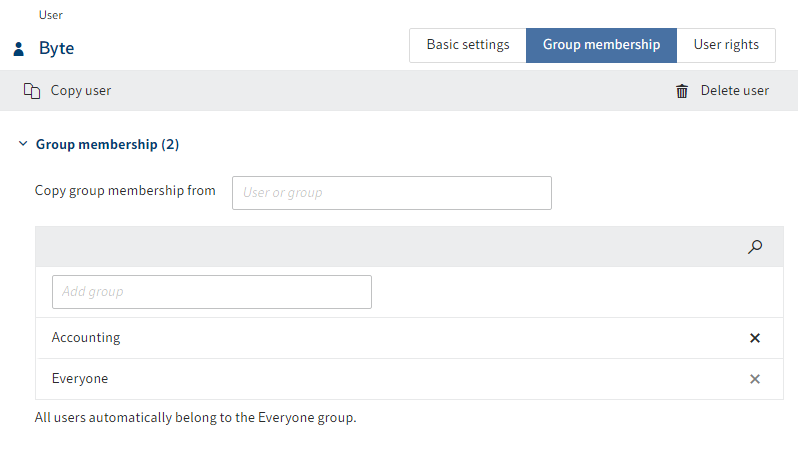
You can either inherit the group memberships from another user or group or manually add existing groups. You can add a user to one or more groups. Users are always members of the Everyone group.
Information
If you type a space in an input field, the entire list of available users and groups will be displayed.
# Assign user rights

There are three options for assigning user rights:
Inheritance
You will find more information under Configuration and administration > User administration > Rights in ELO > Inheriting rights.
Manual assignment
You will find more information under Configuration and administration > User administration > Rights in ELO > User rights.
Inheriting from another user or a group
Information
Ideally, all rights are inherited through groups. This makes it easier to assign and manage rights.
# Delete user
Please note
When you delete a user, they are deleted permanently.
Do not delete any users that have already been used in ELO. This can lead to inconsistencies. In this case, it is better to change the basic settings of the user instead of deleting the user:
- Enable Lock account
- Disable Allow interactive logon
- Disable Visible in user lists
The user can no longer log on to ELO and is not visible to other users. They now only exist in the background in ELO. Their previous actions, for example feed posts or entries in the document versions, are still visible in ELO.