# Field templates
You can define templates for fields in the Field templates area. These templates can be used to create metadata forms in the Metadata forms and fields area.
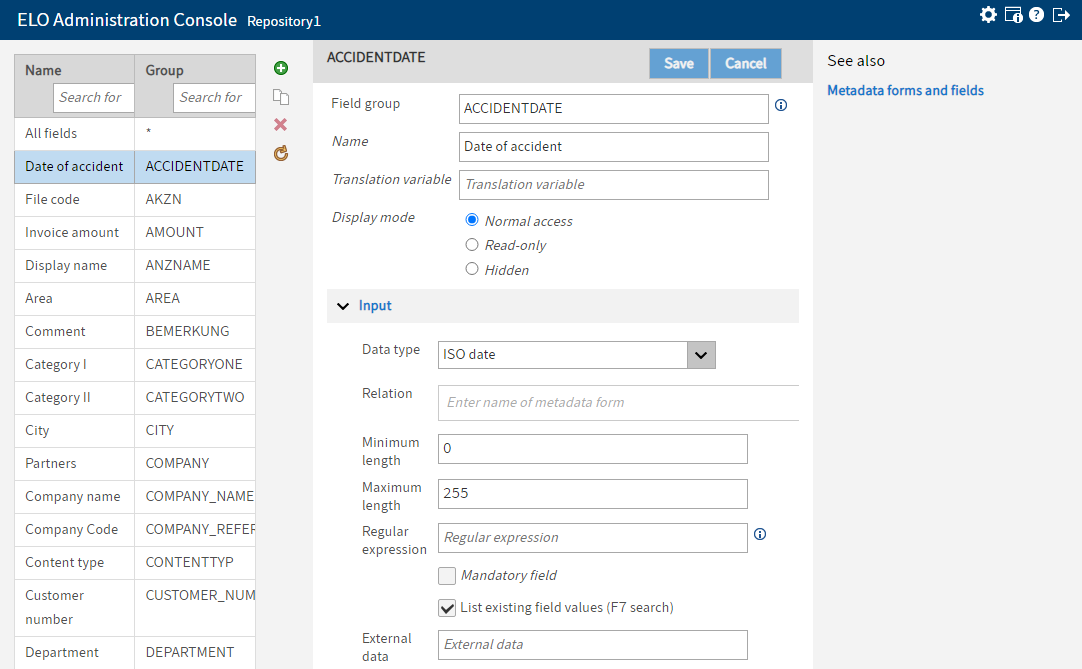
# General
Field group: Define a unique group name here.
Please note
The group names must be valid identifiers in JavaScript, as some ELO modules use the group names as JavaScript variables. Use the following list as a guideline.
- Maximum 40 characters
- Uppercase letters only
- No spaces
- No special characters
- No umlauts
- No "ß"
- No dashes
- No numbers at the beginning of the name
- No reserved words in JavaScript
Name: Define a name for the field.
Translation variable: The Translation variable field is required if you need the contents of the Name field in multiple languages. Enter the corresponding key from the respective properties file.
Display mode: The following options enable you to specify the access and visibility settings for the field.
- Normal access: The field is visible and can be edited by users.
- Read-only: The field is visible but cannot be edited by users. The contents can be transferred to the field automatically.
- Hidden: The field is hidden and therefore cannot be edited by users. The field can be used to store data that the user does not need to see, for example.
# Input
Data type: Define the data type of the field here.
Information
For more information on field types, refer to the chapter Field types.
Relation: Relation type fields are used to link a field with the metadata of another entry.
The following conditions must be met before you can transfer metadata to a Relation type field:
- There must be at least one metadata form assigned the usage Relation.
- The required metadata forms must be entered in the Relation field in the field template.
Please note
You must create the metadata form and assign it the usage Relation before you create the corresponding fields.
Minimum length: Set the minimum number of characters that need to be entered in a field.
Maximum length: Define the maximum number of characters that can be entered in a field.
Regular expression: You can use regular expressions to validate the data that was entered in a field.
Please note
An error in the expression can cause problems when entering data. Check that the regular expressions you use work properly.
Mandatory field: Use this option to define whether you want a field to be mandatory.
List existing field values (F7 search): Press the F7 key when entering metadata for a document or folder to show a list of previous entries made in the field.
External data: In this field, you can specify which data should be imported from the document metadata (such as Exif JPG data) or from the full text information and applied to the fields automatically.
To read Exif data from a JPG file, you must enter the exact identifier of the variable in the External data field.
You could use Image.Resolution or FILESIZE, for example.
Please note
The identifiers may vary depending on the manufacturer. To determine the Exif identifiers, read the Exif data with a script (see script example in the publication 99 script examples) or use an external program.
Default value: Define the default value for the field here.
Please note
When creating default values, avoid words that can act as operators for ELO iSearch (NOT, OR, AND). If words that can act as operators are used as values in fields, the corresponding filters in the ELO iSearch may result in errors.
This does not apply to fields with tokenization deactivated.
Tooltip: Create a tooltip for the field. This could contain information about the required format for entering data, for example.
Translation variable: The Translation variable field is required if you need the contents of the Tooltip field in multiple languages. Enter the corresponding key from the respective properties file.
# Properties
Field with high priority: If you enable the option Field with high priority, the information from the fields will be displayed after the file name in the tree view.
Show field when checking in: The field is displayed when checking in an entry. You can still enter metadata information at this point.
Pass on to child entries: This option enables child entries to use entries in this field. The fields must have the same group name for this to work.
Allow input inheritance from parent element: This option enables you to pass on inheritable entries from the parent field. The fields must have the same group name for this to work.
Automatically add * before search term: Adds the placeholder * before the query text when using this metadata form to search in ELO. This defines a search as ending with.
Automatically add * after search term: Adds the placeholder * after the query text when using this metadata form to search in ELO. This defines a search as beginning with. Example: If you enter 15 in this field, the search returns all documents with the entry 15 at the start of the field (ELO searches for 15*).
Disable tokenization: When this option is enabled, the contents of the short name are not split into tokens and the entire character string from the field is written to the full text database.
Exclude from iSearch: The contents of this field are excluded from ELO iSearch and the contents are not added to the full text database.
# Keyword list
The Edit keyword list link takes you to the page where you can edit the keyword list.
Entry only allowed with keyword list: Select this option to only allow entries to this field from keyword lists when entering metadata. This enables you to structure your metadata and helps prevent manual errors. You can create an individual keyword list for each field (group name). Do the same for each input field, i.e. create a keyword list for each field of a metadata form. This ensures that your metadata is standardized.
Translated keyword list: The keyword list is taken into account when using the automatic translation function. The terms in the keyword list must have been translated and entered in the translation table for this function to work.
Dynamic keyword list: A dynamic keyword list can only be integrated with the help of scripts. For more information, refer to the ELO Indexserver programming guide documentation, Dynamic keyword lists (opens new window) section.
# Field permissions
This is where you define the permissions to the field.
AND group: Select this button to group users or user groups.
# Overview of metadata forms
In the Overview of metadata forms area, you can see which metadata forms the field template is being used in.
Save: Select Save to confirm new settings or changes to the metadata form.
Cancel: Click Cancel to discard any changes or new entries for a field template. Changes are not saved.