# Basics
The ELO Workflow Client is an ELO client for approving workflows.
Tasks appear in your task list. You can see which tasks have been escalated, the priority level, and other important data. You can edit tasks for different entry types. For example, if a task is part of a folder entry, you can navigate the folder hierarchy. The ELO Workflow Client allows you to process form-based tasks.
This chapter covers the following topics:
- Installation
- Program interface
# Installation
The ELO Workflow Client installs automatically with your license. The ELO Workflow Client does not have to be installed separately.
Access to the ELO Workflow Client works through a URL. You can create a desktop shortcut to the URL or bookmark it in your browser. The URL is provided by your administrator.
# Start ELO Workflow Client
To start the ELO Workflow Client, enter the URL in your browser.
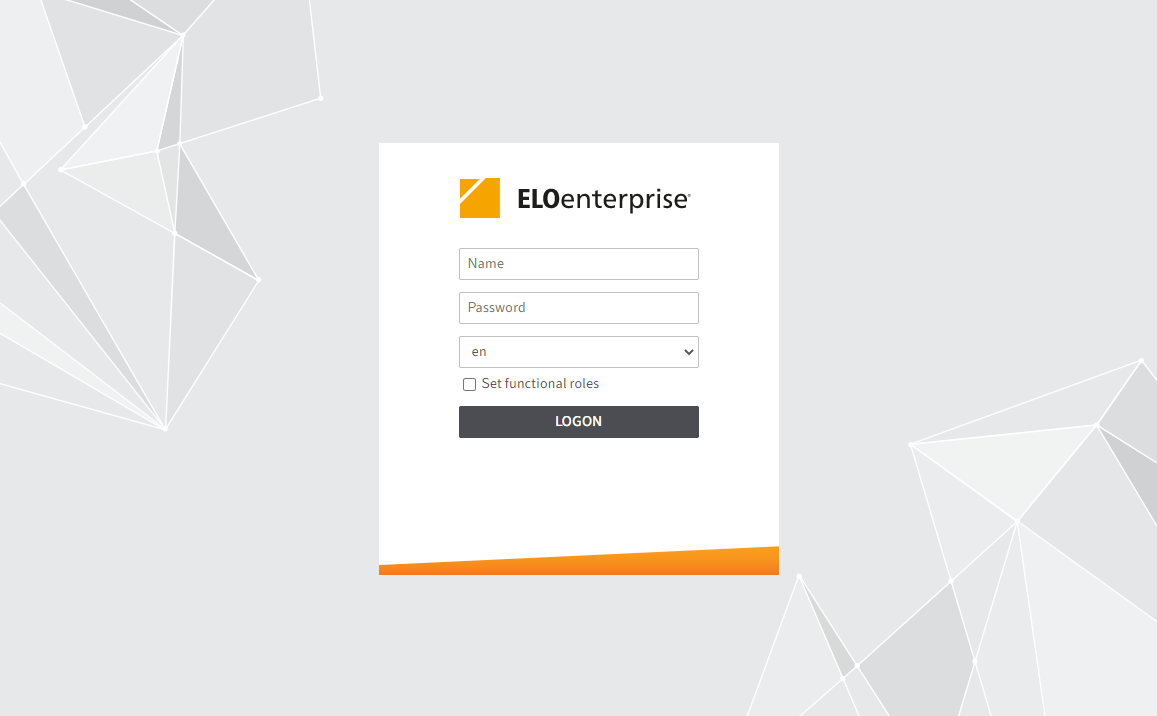
Enter your logon credentials. If you have been given a temporary password to log on with, change it during the first session using the Change password function.
Information
If you have forgotten your password, contact your system administrator.
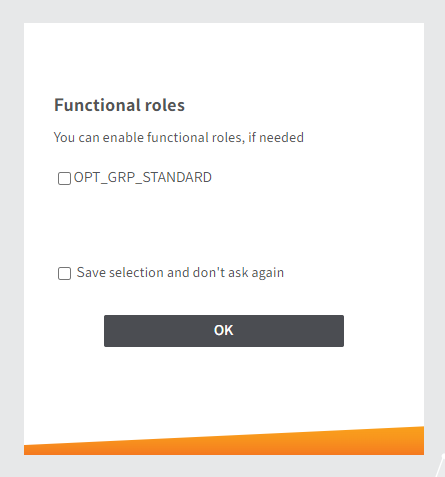
If functional roles have been defined for you, you can enable or disable them here.
If you disable your functional roles, all access and user rights associated with the role cannot be used during the session. This makes it easier to navigate the program and allows you to focus on tasks beyond the scope of the role.
# Program interface
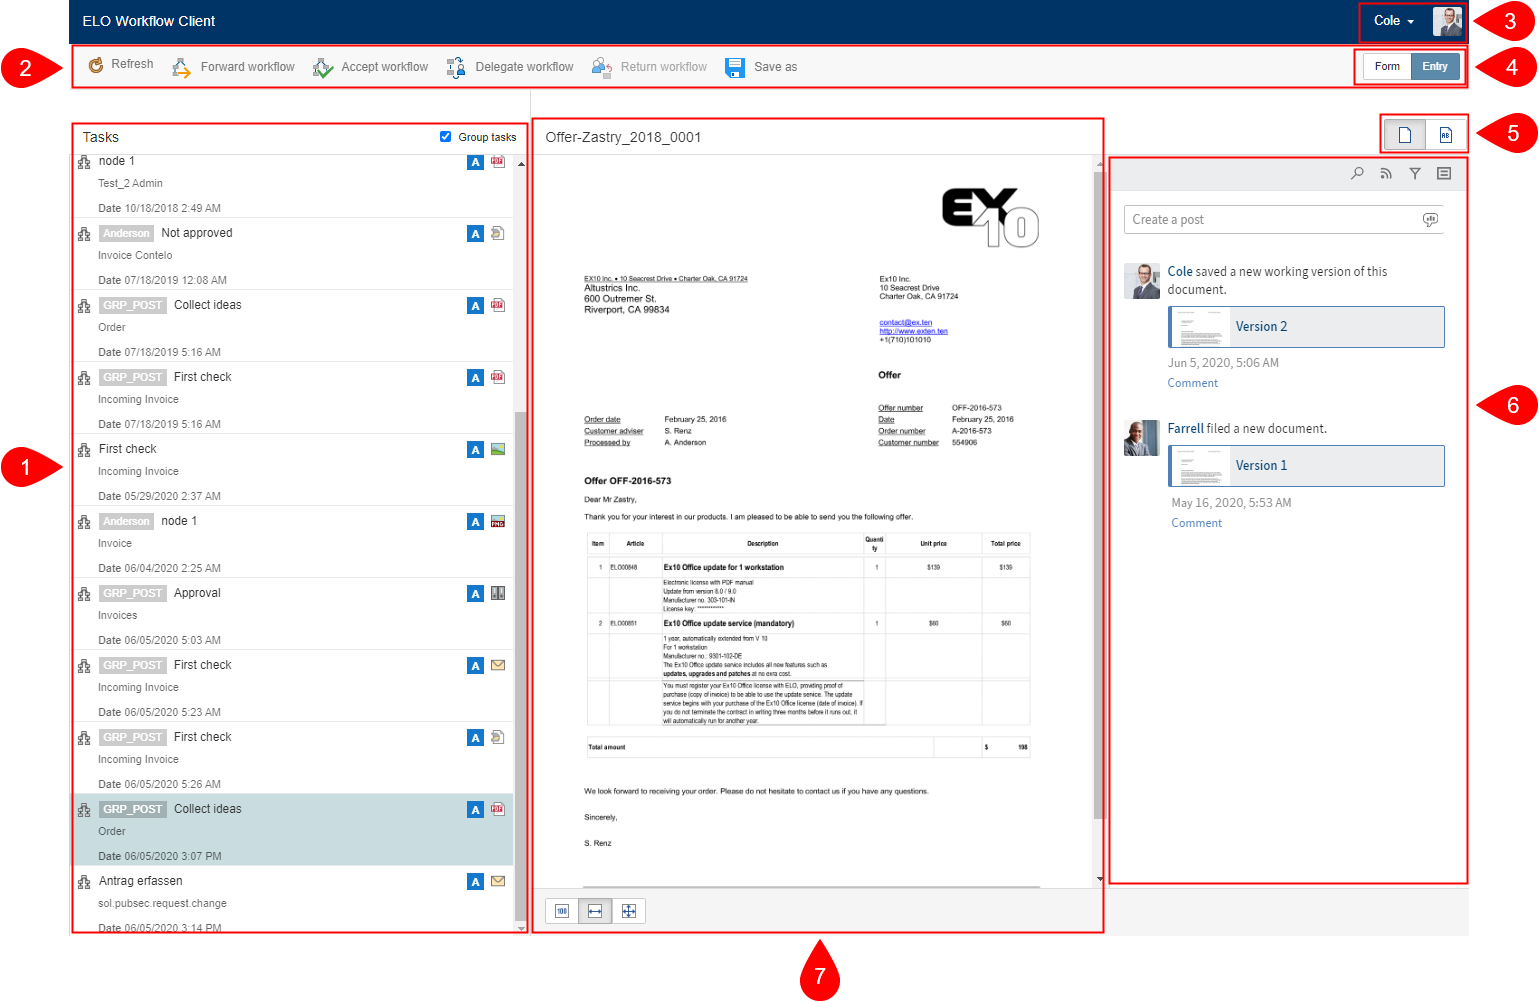
The program interface of the ELO Workflow Client comprises the following areas:
2 Ribbon
6 Feed
# Program interface in detail
This chapter explains the different areas of the program interface. When the documentation refers to an entry, it is referring to either a document or a folder.
# Task list
The task list contains all workflows. You will see all workflows you are involved in. If you set a check mark in Group tasks, you also see the workflows assigned to a group that you are a member of.
You can recognize a group task by the gray box containing the name of the group to the left of the workflow name.
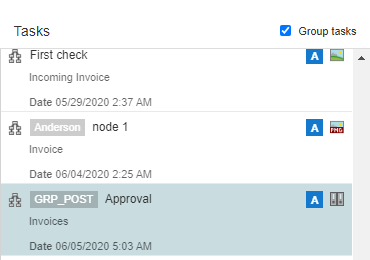
You can recognize a new task by the blue vertical bar to the left of the task and the bold title.
A task contains the following information:
- Workflow title
- Entry title
- Workflow creation date
In addition, icons underline the following aspects:
- Entry type, e.g. Word or PDF document, an e-mail, or a scanned document
- Workflow priority, e.g. A, B, or C
- An escalated workflow is denoted with a red icon with a white exclamation mark and a due date
# Ribbon
You can access all the functions you need to process your workflows on the ribbon.

These functions are:
# User menu
You can log off or change your password in the user menu.

# Views (Form/Entry)
You can switch between the views with the Form and Entry buttons. If you select a form task, the form is displayed in the viewer pane. To switch to the entry, select the Entry button.

# Views (Document/Full text)
You can switch between the views with the Document and Full text buttons. If you select an entry, the document is displayed in the viewer pane. To switch to the full text view, select the Full text button.

# Feed
The feed allows you to communicate with your colleagues about the task and the corresponding entry in the ELO Workflow Client.
This is where you get all important information relating to your workflow entry. The feed contains the following message types:
- Posts written by you or another user
- Comments on a post
- Polls
- Events, e.g. when a new version of a document is filed or changes are made to the working version
Information
With form-based tasks, the feed is only displayed if you selected the Entry button in the top right corner. If you selected the Form view, the form and other actions are displayed in the viewer pane.
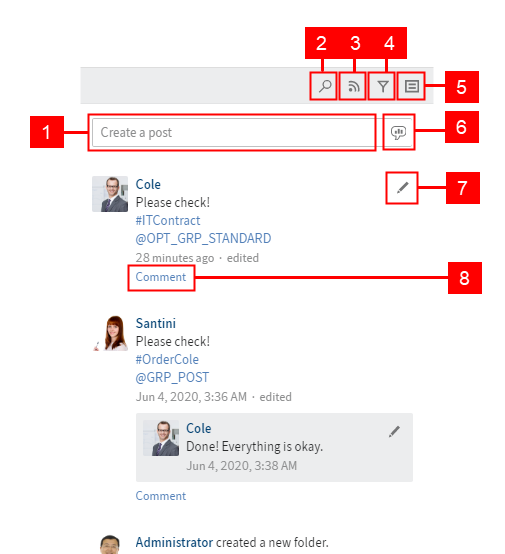
1 Create post: Use the Create a post field to write one or more posts related to an entry in your task list. To submit a post, use the Create button or the keyboard shortcut CTRL+ENTER.

Information
You cannot delete posts you have submitted.
New posts are marked with a green dot in front of the author's name.
Format the text in posts and comments with the following syntax:
Bold: Place an asterisk (*) at the beginning and end of the text section you want to highlight.
- Enter: I would like to stress this again.
- Result in the feed: I would like to stress this again.
Information
If you want the asterisk to appear as a character in the text, enter a backslash before the asterisk.
2 Search feed: Use the Search feed button to search the feed for posts, users, or hashtags related to the respective entry.

3 Subscribe to feed: Click the Subscribe button to subscribe to a feed for an entry.

Please note
Your subscription to a feed related to a specific workflow is limited to the period in which the workflow is assigned to you. Once you have forwarded the workflow, you will no longer see the feed you subscribed to.
4 Show filter options: Click the Show filter button to view filter options. You can filter the feed posts of the respective entry by users or post types. You can also see which filters are active when the filter options are hidden. Hide or show the filter options by clicking the button again.

You can negate the filters. All filters are applied in is mode. Click the word is to the right of the filter category to switch to is not mode.
5 Show metadata: Click the Show metadata button to view the metadata of the respective entry. The type of entry is not relevant.

In addition to the form, you see other information, such as the invoice number, customer number, and order date of invoices.
6 Create poll: Use the speech bubble icon to create polls. Enter the question and any number of possible answers in the input fields. You can also specify how long the poll should stay open and make additional configurations by ticking the appropriate check boxes under Show additional options.

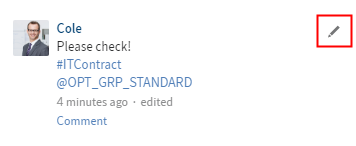
7 Edit post: Use the pencil icon to edit a post you have already created.
After you have edited a post or comment, you can view the feed history. Click the edited button that appears below your post.
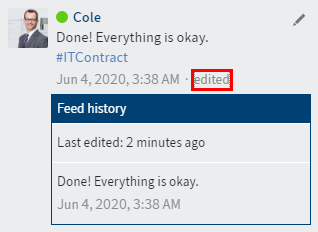
Changes to the post are indicated by a green dot in front of the name of the user who created or modified the post.
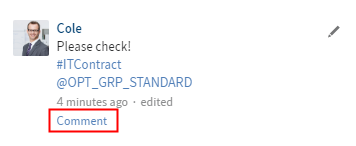
8 Enter comment: Click the Comment button to comment on your own posts or other users' posts.
The comment function has additional functions:

1 Mention user: Click the Mention user button to tag other users in your post. Alternatively, you can enter the @ symbol using the keyboard.

2 Reference entry: With the Reference entry button, you can link to other posts in your post. Alternatively, you can enter the > symbol using the keyboard.

Information
You can only reference an entry if the task contains a folder.
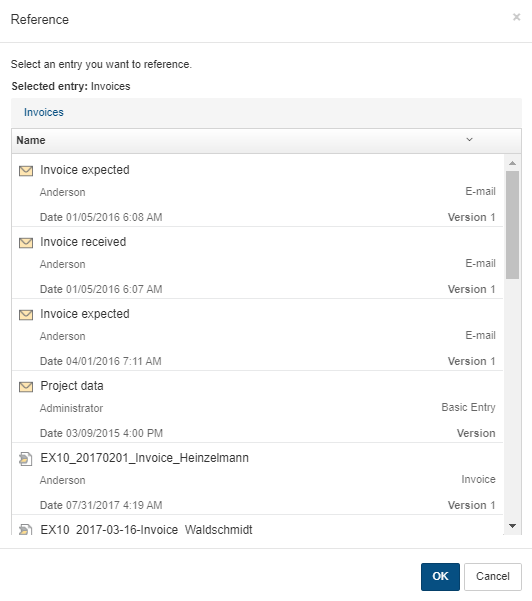
Please note
You can create a reference and see references created by other users but you are not able to access them. If you click on a reference, the following error message appears.

3 Insert hashtag: Use the Insert hashtag button to add one or more hashtags to your post. Alternatively, you can enter the # symbol using the keyboard.

4 Restrict visibility: Use the Restrict visibility button to restrict the post to specific groups. The visibility settings for a comment are bound to the visibility settings for the commented post, which is why you are unable to change the visibility settings for comments.

Additional information is displayed in the area above the input field.
XY is editing the entry: This tells you that another user with access to the repository is editing the entry.

Information
You will not get any notifications in the ELO Workflow Client if entries that are part of a workflow in your task list are being edited. This information is only displayed if another user with access to the repository is currently editing the entry.
# Viewer pane
In the viewer pane, you will see the entry associated with the selected workflow.
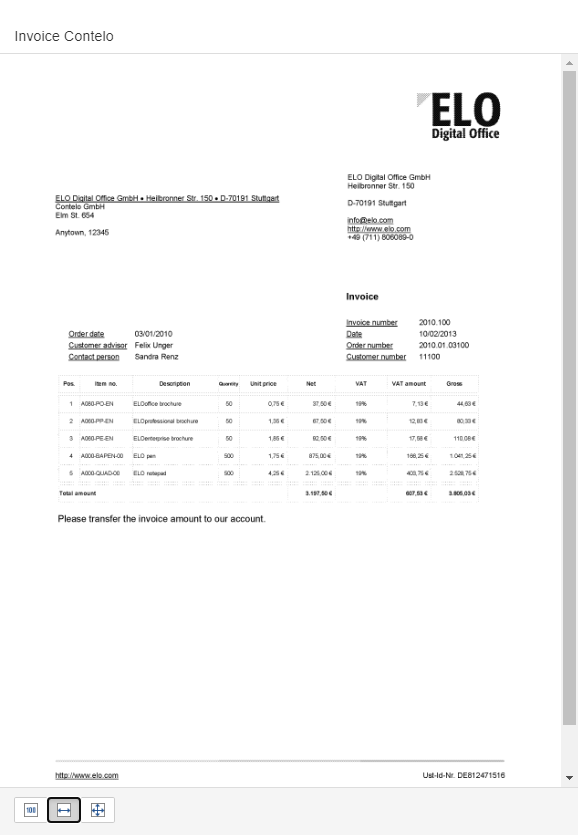
Image section
You can adjust the image section in the viewer pane with the three buttons at the bottom.

The following options are available for adjusting the image in the viewer pane:
- Zoom to 100%
- Fit image width to the frame
- Fit image size to the frame
Folder navigation
If a workflow in your task list is part of a folder entry, you can navigate the folder hierarchy. In this case, you see the folder structure instead of the viewer pane. Click the respective entry to navigate through the folder structure. To return to a previous level, use the list of individual levels above the title of the document in the viewer pane. Click to go to the respective level.

Save as
If you select a task with a Word or Excel document from your task list, the following message appears in the viewer pane:

The program suggests Save as here. Click the button. The document is downloaded and can be opened in read-only mode.
Information
If the task is part of a folder entry and you navigated to the document in this folder, the saved document may differ from the selected task.
Please note
If you download and edit a document, the changes in the workflow document are NOT visible in the ELO Workflow Client or to your colleagues. You CANNOT upload the modified document back into the ELO Workflow Client.
The following error message may appear when you select a workflow from your task list:
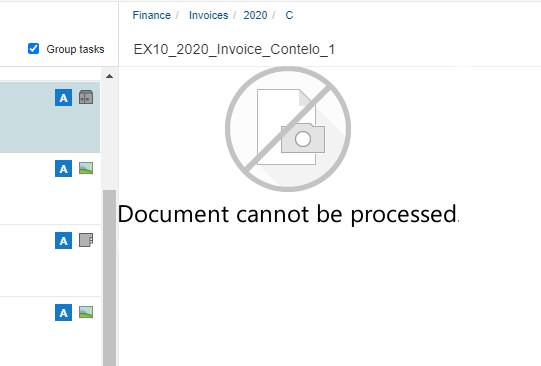
Select the Save as button on the ribbon. The document is downloaded and you can open it in read-only mode.
Text view
If you have workflows with entries with the file extension .txt, there are additional buttons in the viewer pane. These buttons are in the bottom part of the viewer pane instead of the buttons for the image section.

You can choose between two options:
- Large text
- Small text