# Initial app registration in Microsoft Azure
For ELO Azure Administration to connect to Microsoft Azure, you will have to register the app in Microsoft Azure first.
Please note
This documentation does not cover basic configuration of a Microsoft Azure environment or subscriptions, both of which are required for this.
Log on to Microsoft Azure as an administrator.
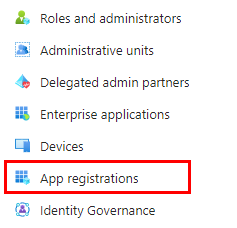
Go to App registrations.
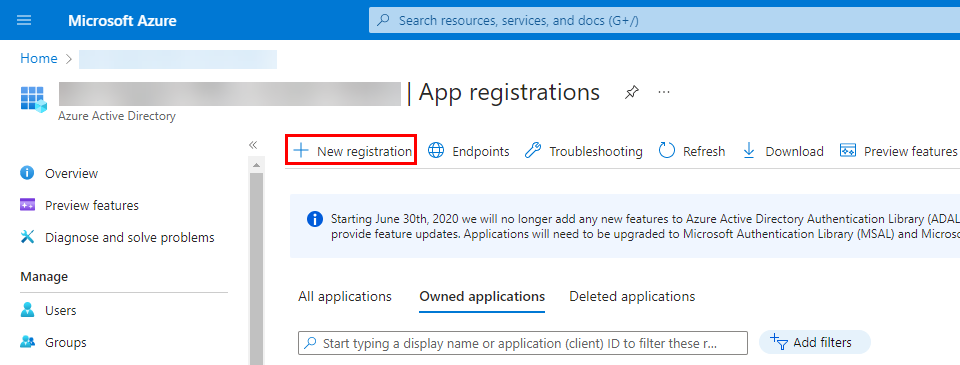
Select New registration.
The Register an application page opens.
Enter a name for the app. You can choose any name you like.
Example: ELO Azure Administration
Under Supported account types, select Accounts in any organizational directory and personal Microsoft accounts (any Microsoft Entra ID tenant – multi-tenant capable) and personal Microsoft accounts (e.g. Skype, Xbox).
Select Register.
The app is registered in Microsoft Azure.
# Authentication settings
Once registration is complete, you have to configure some settings for app authentication.
In Microsoft Azure, go to Authentication.
Select Add a platform.
The Configure platform area appears.
Select Single-page application.
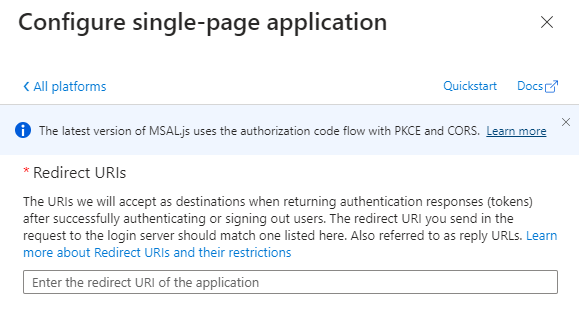
The Configure single-page application area opens.
In the Enter the redirect URI field, enter a URL as follows:
https://<Server>:<Port>/ix-<Repository>/plugin/de.elo.ix.plugin.proxy/azadministrations/auth-end/blank.htmlExample:
https://desktop-8luhtiv:9093/ix-EXTEN/plugin/de.elo.ix.plugin.proxy/azadministrations/auth-end/blank.htmlInformation
The URL must match the path to ELO Azure Administration in the respective ELO environment.
Enable the following settings:
- Access tokens (used for implicit flows)
- ID tokens (used for implicit and hybrid flows)
Save the settings with Configure.
The authentication settings are now configured.
# API permissions
The app for ELO Azure Administration requires several permissions.
Open the API permissions area.
Select Add permissions.
The Request API permissions area opens.
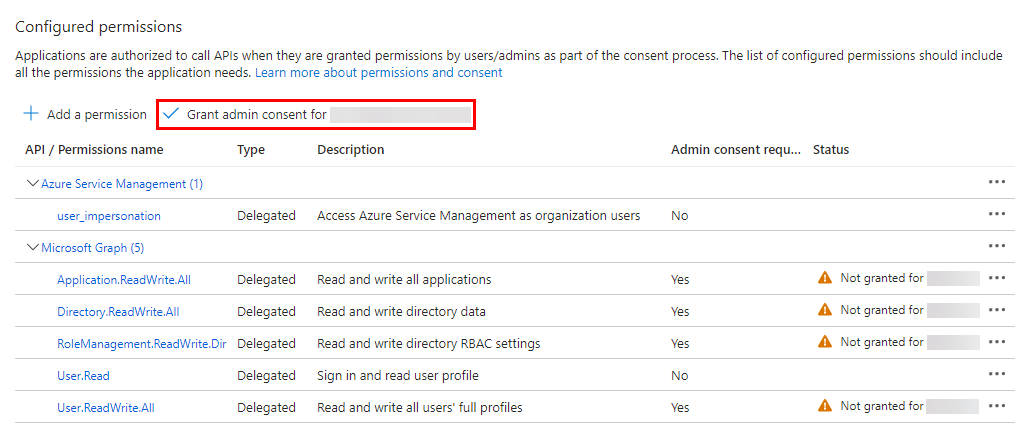
Add the following delegated permissions:
- Azure Service Management:
- user_impersonation
- Microsoft Graph:
- Application.ReadWrite.All
- Directory.ReadWrite.All
- RoleManagement.ReadWrite.Directory
- User.Read
- User.ReadWrite.All
- Azure Service Management:
Select Grant admin consent for <tenant>.
The Confirm admin consent dialog box opens.
Click Yes to confirm.
The permissions are added.
# Configuring the service
Once the app has been set up in Azure, you now have to update the configuration of the ELO Azure Administration service in the ELO system.
In Microsoft Azure, open the overview for the app you created above.
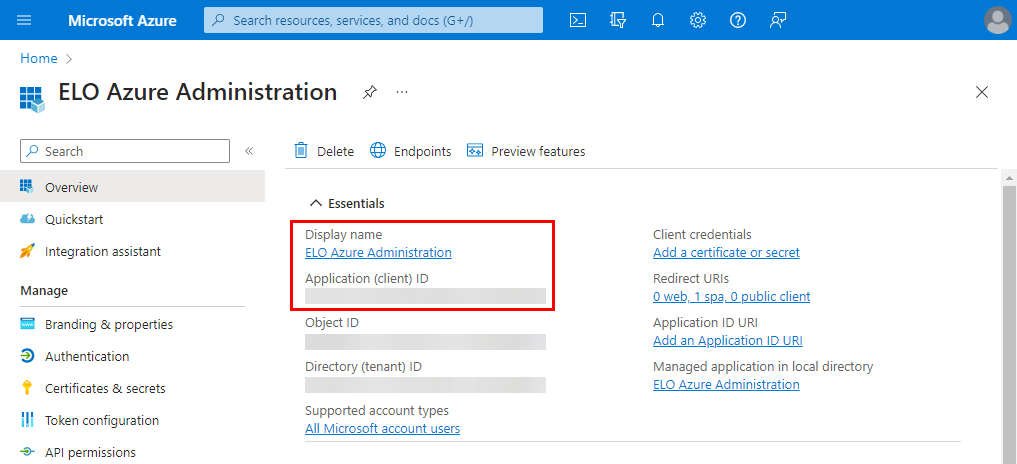
Copy the values of the following fields:
- Display name
- Application (client) ID
On the server machine running ELO, open the following directory:
<ELO>\servers\ELO-Azure-AdministrationInformation
The placeholder
<ELO>stands for the ELO installation directory.Open the appsettings.json file in a suitable editor.
You will find the following entries in the header area of the file:
  "AppsManagementDashboard": {
    "MicrosoftAppId": "",
    "MicrosoftAppName": ""
  },
Insert the copied values into the JSON file.
Example:
  "AppsManagementDashboard": {
    "MicrosoftAppId": "cc810f16-0766-49d9-a6b6-b1c8e3286cb4",
    "MicrosoftAppName": "ELO Azure Administration"
  },
Save the file.
Restart the ELO Azure Administration service.
You have finished configuring the service. You can now authenticate with Microsoft Azure via ELO Azure Administration.