# Configuration
The following describes how to configure ELO Modern Authentication.
Information
If there are multiple repositories in one ELO instance, they share a login configuration.
# 'Settings' area
You can customize the ELO Modern Authentication login page to the requirements of your company.
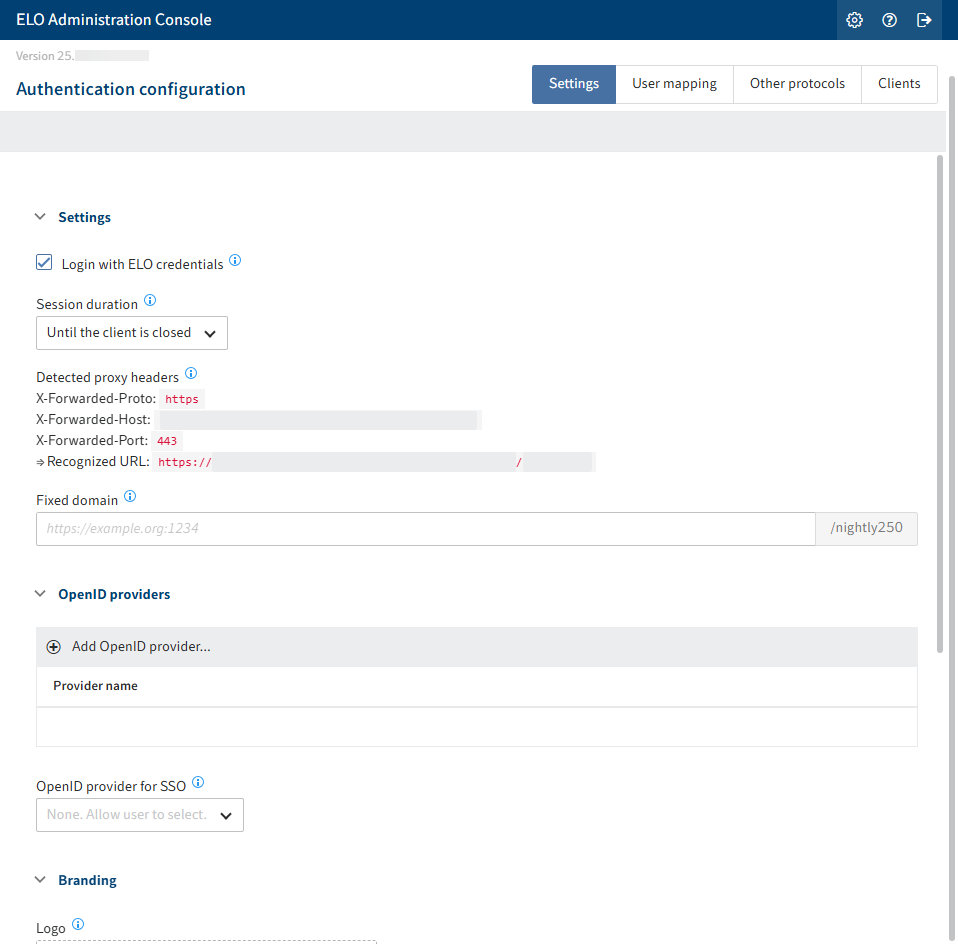
The following options are available in the Login Config area:
Enable password-based login: If this option is enabled, users can log in using an identity provider or with an ELO account name and password, as usual.
If this option is disabled, login is only possible via the identity provider. Service accounts and accounts with administrative rights form an exception here.
Session duration: Select how long a session should last. After a session has ended you have to log in again.
Information
Restarting the ELO Indexserver also ends the session.
Recognized proxy headers: Shows the proxy headers to be sent by reverse proxies and load balancers.
Fixed domain for callbacks: If you define a fixed domain for authentication, all authentication and redirects take place via this address only. This can resolve possible issues during redirects.
If this field is left blank, the URLs are determined dynamically according to the HTTP request. This also includes information provided by X-Forwarded headers from reverse proxies and load balancers.
If you want to access the repository via different domains, e.g. an intranet URL or an external URL, you will have to configure the proxies accordingly. For more information, refer to the Reverse proxies chapter.
OpenID provider for SSO: From the drop-down menu, you can select an identity provider to trigger authentication with single sign-on. If no provider is selected here, all configured providers are shown in the logon dialog box. In this case, users can select the authentication method themselves.
# Branding
You can upload logos and background images for branding purposes.
The standard, web-capable image formats can be used. The images are scaled depending on the size and resolution.
The images are added when you click Save and shown next time the ELO Modern Authentication login page is opened.
Logo: You can upload a custom logo via this field, which is shown when logging in.
If the logo is deleted, the ELO logo is displayed.
Background image: You can upload a custom background image via this button, which is shown in the background when logging in.
Information
The formats PNG and JPEG are recommended. Other formats, such as SVG, WebP, or AVIF, may not be rendered correctly in the ELO Java Client.
The recommended minimum resolution is 1920x1080. The file size should be less than 1 MB to enable fast network transfer.
If the background image is deleted, the default background is shown.
# Add OpenID provider
You must configure this first to enable authentication via one or more identity providers.
Please note
The OpenID provider must be able to be reached by the ELO server. This may require changes to the firewall settings.
Individual steps may vary and different ones may be required, depending on the provider.
Next, we will show you the process in the overview.
Select Add OpenID provider.
A drop-down menu appears.
Select the desired provider.
Supported providers:
- Microsoft
- Keycloak
- SAP
- Salesforce
- SmartWe
- Other (option to connect another OpenID-compatible identity provider)
The Select an ID for the OpenID provider dialog box appears. The name is prefilled, depending on the selection.
Optional: Change the name for the configuration.
Select OK to confirm.
The corresponding configuration area appears.
Enter the information required for the provider.
Alternative: Select Register with provider if you haven't registered with the desired OpenID provider yet. Then, transfer the registration data to the configuration.
Information
The connection via Microsoft Azure is used as an example in the Microsoft Azure configuration chapter.
Individual steps may vary, depending on the provider.
And, different preparations are required, depending on the provider.
Optional: You can enable the Hidden option to hide the identity provider in the login dialog box. However, it can still be used by apps or integrations for authentication.
Save the settings.
# Test
You can check the settings via Test login. A pop-up window opens that simulates the login page. An attempt is made to log in with the currently used account when logging in via the configured provider.
Please note
Comparison is done via the e-mail address. For this reason, the e-mail address the provider uses is also added in the ELO account in the E-mail field.
# Configure single sign-on
You can configure authentication using single sign-on (SSO) in the ELO clients to only work via a configured identity provider.
In the Settings area, go to the OpenID provider for SSO drop-down menu and select an OpenId provider to be used for authentication.
Alternatively, you can disable the option Login with ELO credentials if only one other identity provider is configured.
# 'User mapping' area
In the User mapping area, you can configure a method that can be used when comparing ELO accounts with the identity provider accounts.
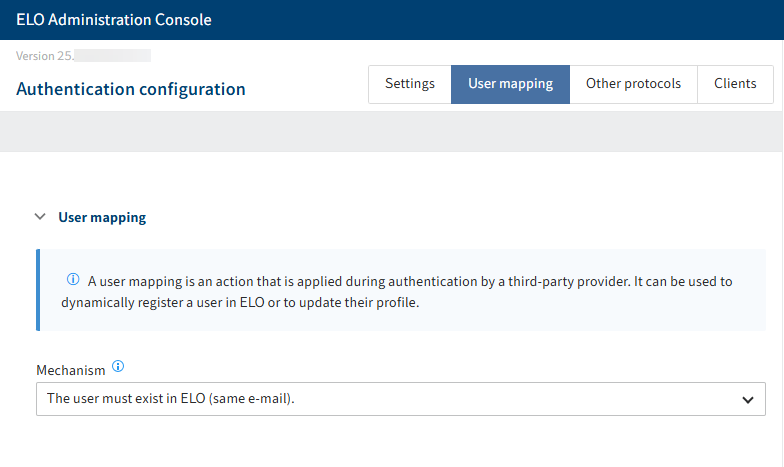
The following mechanisms are available:
User must exist in ELO
Create ELO user immediately: When logging on ELO, a new account is created provided no ELO account already exists for the entered e-mail address. In the E-mail domain restriction field, you can define which domains are permitted for authentication.
Call flow: Calls a flow to automatically create or update nodes during authentication in ELO. Once the flow has been executed, the user is signed on to ELO provided the account exists in ELO. To use this mechanism, you have to create a corresponding flow first.
The flow gets the entire OpenID UserInfo data set from the OpenID provider. With Microsoft, this can look as follows:
{
    "sub": "<Microsoft user ID>",
    "name": "Luise Lind",
    "family_name": "Lind",
    "given_name": "Luise",
    "picture": "https://graph.microsoft.com/v1...;value",
    "email": "l.lind@example.com"
}
The payloads vary depending on the OpenID provider used, but almost always contain the parameters
"sub","email", and"name".Call registered function (legacy): Can apply account mappings and create a new account or update an existing one during authentication with ELO.
For more information on registered functions, refer to the ELOauth plug-in documentation > Existing implementations > Registered function (opens new window) and Manual configuration > OAuth2 (opens new window).
# 'Other protocols' area
The Other protocols area is intended for systems that use NTLM or Kerberos.
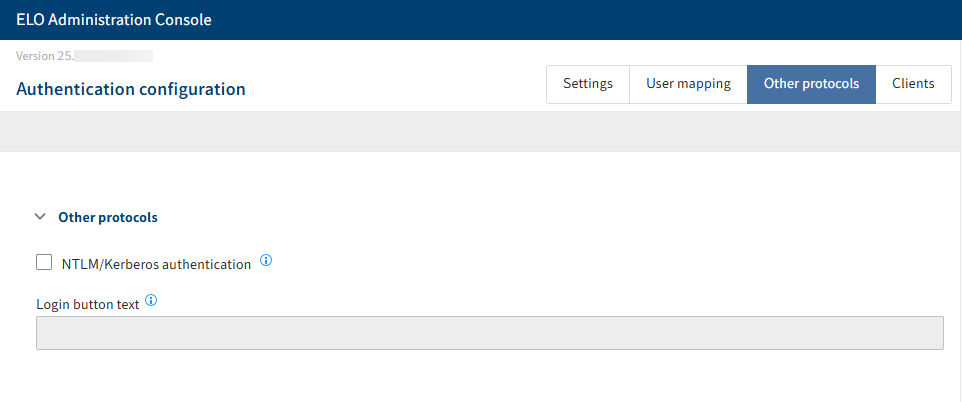
Please note
We do not recommend you use these protocols. However, this option is still offered for compatibility reasons.
# Important information
- NTLM is no being longer developed by Microsoft as of June 2024 and is therefore considered deprecated.
- The authentication protocol SAML is no longer supported.
- Kerberos and NTLM do not work in the ELO Java Client with JCNN (default) if load balancer mode is enabled upstream. If the value
ASFis set in the registry, the Business Solutions packages will not work. - Kerberos and NTLM only work in intranet environments in which the clients are controlled by the respective company.
# 'Clients' area
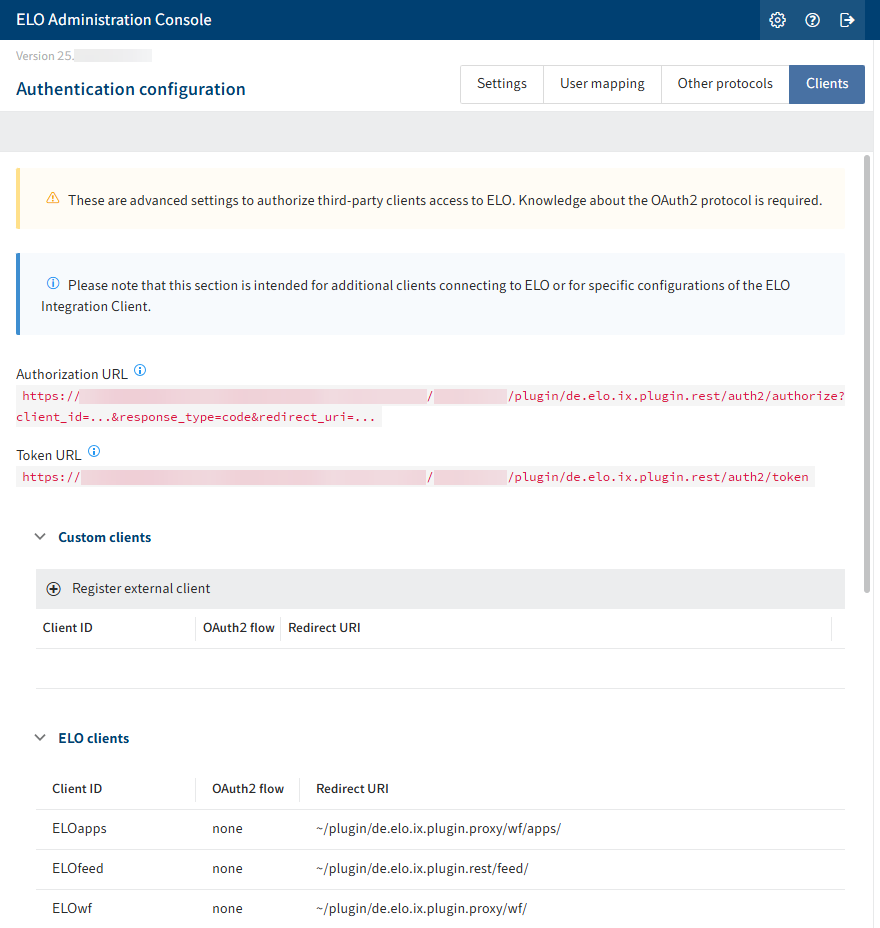
In this area, you will find advanced settings for accessing the ELO system as well as an overview of the URLs and URIs for ELO clients and modules.
Under External clients, you can connect a custom external portal or a custom application with ELO.
Please note
This requires advanced knowledge of the OAuth 2.0 protocol. You will find more information on the OAuth 2.0 Simplified (opens new window) and OAuth 2.0 (opens new window) websites.