# Getting started
You will find an overview of configuring ELO Replication at two sites here. Follow the links for more detailed information about the individual steps.
# Overview: Configuring replication at two sites
To configure ELO Replication at at least two sites, perform the following steps:
1. Install at site 1 and site 2.
Install ELO Replication at both sites using the ELO Server Setup on the Applications tab.
Open your browser and go to the ELO Application Server overview page.
To open the configuration, select /rp.
Log on to ELO Replication with your Apache Tomcat administrator account.
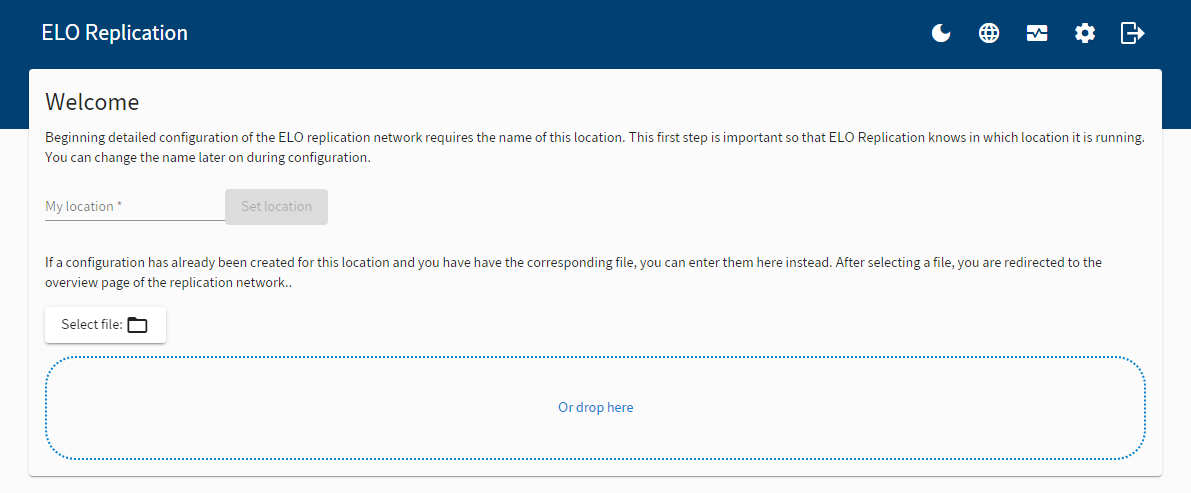
Choose a site name.
Once you have set your site, draft mode opens.
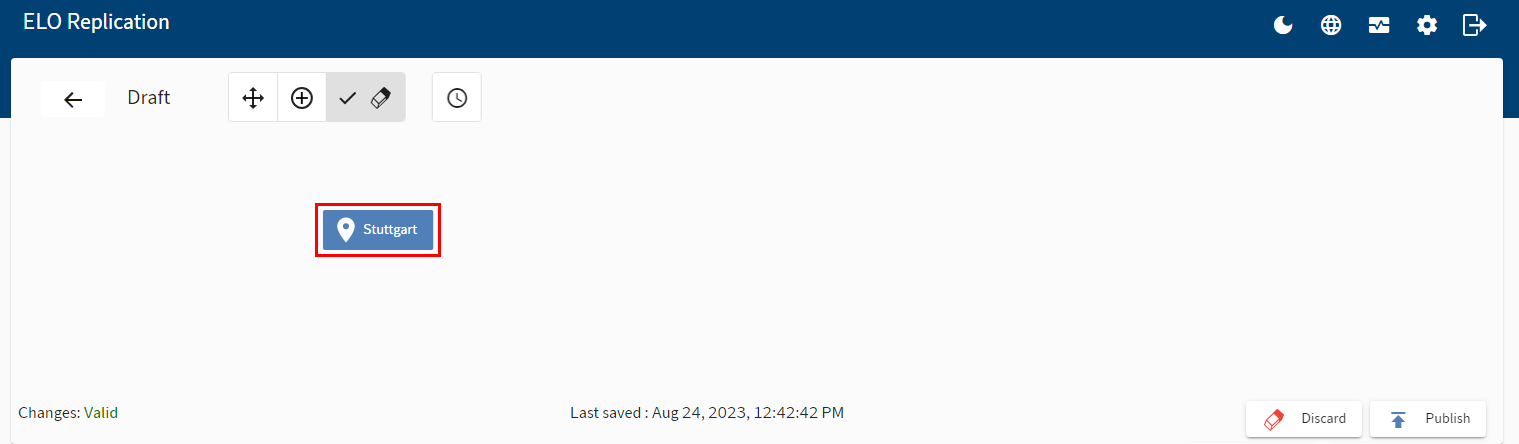
You can enter the settings for all participating sites from your site.
To add a new site, select the plus icon and then click anywhere in the viewer pane.
To add a new connection between two sites, place the mouse on a site. The connection icon appears. Press and hold down the mouse button and drag the connection to another site.
To show the setting options, select a site.
The site settings appear on the left.
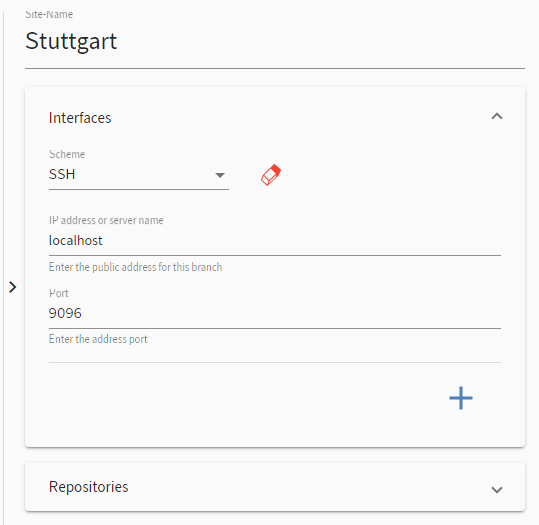
Fill out the fields accordingly.
Click the plus icon in the Repositories area to add a repository. A replication set is automatically created for each repository, which you can assign to an entry in the ELO Java Client or the ELO Web Client.
Under Scheduler for automatic transfer, define when to export data from the repository.
Please note
The specified interval time refers to the local time of the respective server. All servers hosting repositories involved in replication must be in sync in terms of time for the comparison via timestamp to work.
Please note
The scheduler calculates in hours. For example, if you enter a time from 8:00 a.m. to 6:00 p.m., replication begins at 8:00 a.m. and ends at 6:59 p.m.
In the drop-down menu you will find the preconfigured intervals Default and Import only, as well as all intervals you have created. To create new intervals or change existing ones, select the pencil icon.
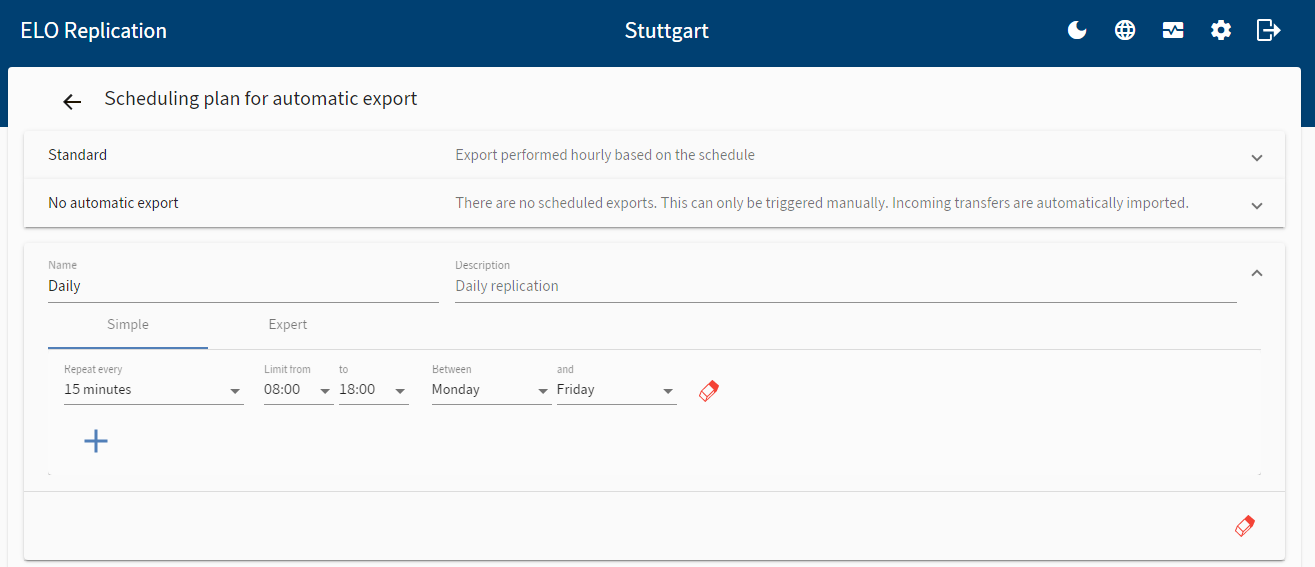
The Scheduler for automatic transfer menu opens. Clicking the plus icon adds a new schedule. Clicking the eraser icon deletes a schedule.
The input options Simple and Expert are available for the scheduler for automatic transfer. With the input option Simple, you can choose from default intervals and customize them. With the input option Expert, you can control the scheduler for automatic transfer more precisely using variables.
3. Publish replication at site 1
Once you are finished making settings, you can enable replication. In draft mode, select Publish.
Please note
During initial configuration, you will have to publish the configuration at all participating sites.
4. Send configuration file to site 2
A configuration file with your settings is created automatically for each site. Download the configuration file by selecting Download configuration on the overview page. Send the configuration file to the relevant site. There, the administrator logs on to ELO Replication and uploads the configuration file.

5. Insert configuration file at site 2
Open the configuration via the ELO Application Server overview page and log on to ELO Replication with the Apache Tomcat administrator account.
Information
You do not have to enter a site name. The site name from the configuration file is automatically applied.
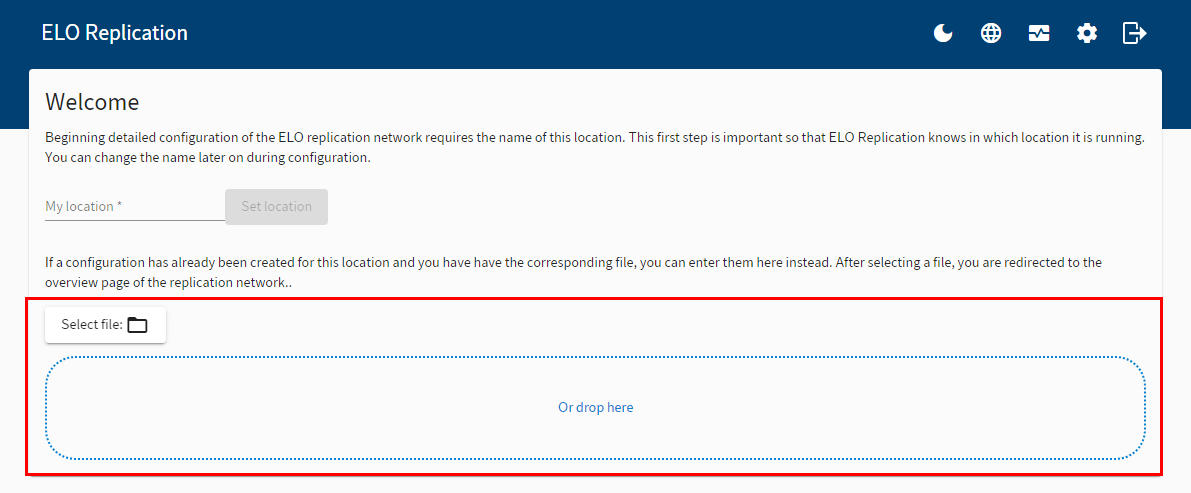
Insert the configuration file.
Confirm the site.

The settings are applied.
6. Publish replication at site 2
To enable replication, in draft mode, select Publish.
7. Assign replication sets at site 1 and/or site 2.
Once you have published the replication at the participating sites, you have to assign the individual entries replication sets. Each replication set stands for one repository. The replication set is a characteristic that you assign to individual repositories in order to replicate them in another repository. The individual entries to be replicated are selected in the ELO Java Client or ELO Web Client using the Assign replication sets function.
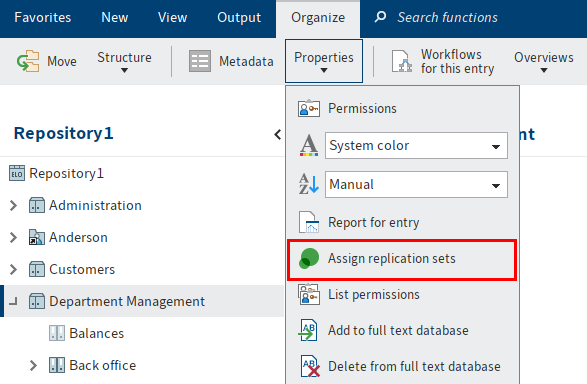
You will find the Assign replication sets functions in Ribbon > Organize > Properties.
Please note
You should log which entries you assign which replication sets.
Please note
Replication sets are inherited upward to parent folders in the repository structure. To prevent inheritance, select the Start point for replication option in the Metadata dialog box of the entry you want to replicate. In the ELO Java Client, this function is only available for folders. You will find more information in the chapter Replication set inheritance.
# Result
Once you have performed the steps above, the entries are replicated according to your settings in the configuration.