# Basics
# Overview
ELO Dropzone makes it easier for you to file incoming documents to ELO. Simply drag documents and files to a defined tile. ELO Dropzone enters the corresponding metadata and files your documents based on your own rules. This provides you with easy access to frequently used functions and enables you to file documents more easily to ELO. A database connection allows for interfaces to programs, such as ERP systems. You can then use this data for metadata, for example.
You can set up filing tiles, search tiles, script tiles, and template tiles. With a search tile, you can configure the desired search terms via the metadata fields of a metadata form. It is also possible to define search tiles that you can activate using keyboard shortcuts. With a script tile, you can call a script event-controlled. With a template tile, you can create documents from templates in ELO Dropzone.
You can also create additional variables with regular expressions in ELO Dropzone that can be used to define tiles.
# General note
The program works with the following clients:
- ELO Java Client
- ELOoffice
The function descriptions and screenshots in this manual were created using the ELO Java Client.
The following ELO Dropzone functions are not available with ELOoffice:
- Edit groups
- Load tile from collection
- Perform database search
- Create template tile
- Create e-mails
- Automatic document check-in
- Extract data from barcodes
# Installation and configuration
# Installation
ELO Dropzone is a core part of the client and as such it is installed automatically together with the ELO Java Client and ELOoffice.
# Start
ELO Dropzone is started in different ways depending on the client.
# Starting ELO Dropzone with the ELO Java Client
After installation with the ELO Java Client, a shortcut to ELO Dropzone is placed on the desktop.

Double-click the ELO Dropzone icon.
The ELO Java Client logon dialog box opens.
Log on with your user name.
ELO Dropzone and the ELO Java Client open.
# Start-up with ELOoffice
After installation, a shortcut to ELOoffice is placed on the desktop.
ELO Dropzone starts automatically with ELOoffice.
Disable: You can disable ELO Dropzone in the configuration.
ELO menu > Configuration > General > Additional modules.

Uncheck the box next to ELO Dropzone.
ELO Dropzone will no longer start automatically when you open the client.
# Program interface
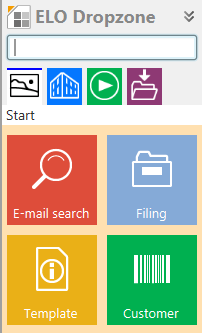
Example ELO Dropzone program interface with display groups and tiles.
# Collapse/expand

You can expand or collapse ELO Dropzone by clicking the header with the ELO Dropzone text. ELO Dropzone docks above the taskbar after you minimize it.
# Display groups

The ELO Dropzone display groups are located below the input field. Each user can decide which display groups to enable. Click Add in the context menu to select the groups to be displayed from the list of available groups. You can also remove display groups by clicking Delete.
# Buttons

The status bar at the bottom shows the following information:
1st row on the left: The currently active repository
1st row on the right: The logged on user
In addition, you will find the following buttons:
Pencil icon: Edit tiles Switches to edit mode for personal tiles. You open the edit mode for global tiles from the context menu.
Plus icon: Create a new tile
Clock icon: View ELO Dropzone history
# History
The history shows the last 20 filing processes initiated by a tile. Click one of these entries to open the corresponding entry in ELO.
# New folder in ELO
If you create and save a new tile in ELO Dropzone, the processing instructions in ELO are saved to a new folder under // Administration // Dropzone. This folder is set up automatically in ELO. The information is stored there as text files, which can be exported to other repositories.
# Context menu

Edit mode for personal tiles: Switch to the edit mode for personal tiles.
Edit mode for global tiles: Switch to the edit mode for global tiles.
Finish editing: End tile editing.
Regular expressions: Switch to the wizard for ELO Dropzone RegEx configuration.
Edit groups: Switch to the configuration for display groups.
System settings: Switch to the Edit system settings dialog box.
Add new tile: Add a new tile. A personal or global tile is added depending on whether you select the option Edit mode for personal tiles or Edit mode for global tiles. You can create up to 18 personal tiles and 18 global tiles.
Load tile from collection: Switch to the Tile collection dialog box. Here, you will find an overview of the tiles shared with other users.
Edit tile: Switch to edit mode for the tile.
Copy tile: Copy a tile and its settings. A new tile is added and the tile configurator opens.
Share tile: Share one of tiles you created with other users. A dialog box opens where you can define the target area for publishing in the tile collection.
Delete tile: Delete a tile from ELO Dropzone.
Last filed documents: Shows a list of the last twenty documents filed via ELO Dropzone.
Close ELO Dropzone: Close ELO Dropzone.
# Global and personal tiles
There are global and personal tiles.
Global tile: Created by the administrator. Global tiles can be viewed by all users. These tiles always rank higher in the hierarchy than personal tiles in ELO Dropzone.
Personal tile: Created by the user. Personal tiles can only be viewed by that user. They appear in the hierarchy below the global tiles.
# Edit system settings
Open the System settings dialog box from the context menu before creating tiles in ELO Dropzone.
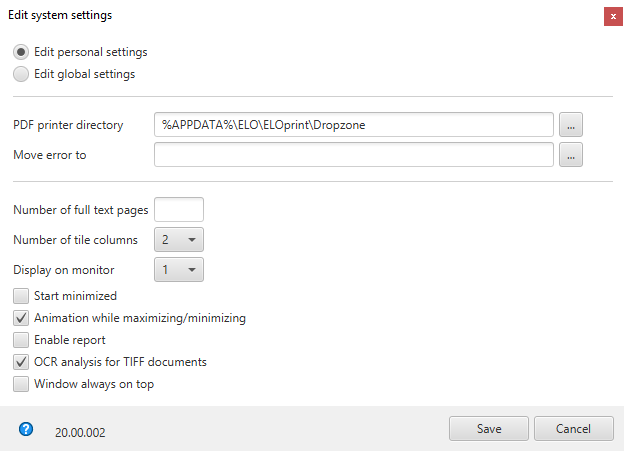
Configure all general settings for all ELO Dropzone tiles here. In the tile configuration, you can make changes to individual tiles at a later point in time.
Use the radio buttons to select whether you want to make personal or global settings.
PDF printer directory: Select the file path for monitoring the PDF printer directory in the PDF printer directory text field. If there are PDF documents in this directory, they are filed based on the specifications of the tiles created in ELO Dropzone. Define the specifications for the individual tiles in the tile configuration.
Move error to: With the Move error to field, you can configure the file path where unrecognized PDF documents in the PDF printer directory are moved to.
Number of pages for full text analysis: Use the value in the Number of pages for full text analysis field to determine the maximum number of pages per document to be processed during OCR preprocessing. Analyzes documents in PDF and TIFF format.
Number of tile columns: Define how many tile columns you want to have. Choose to show the tiles in one, two, or three columns.
Display on monitor: When you have multiple monitors, you can display ELO Dropzone on a monitor other than the primary monitor. If ELO Dropzone is configured on an invalid monitor, it automatically switches back to the primary monitor.
Start minimized: If you check the Start minimized box, ELO Dropzone always starts docked onto the taskbar.
Animation while expanding/collapsing: Select the Animation while expanding/collapsing check box to enable an animation when expanding and collapsing ELO Dropzone. If this check box is not enabled, the size changes immediately.
Enable report: When you select the Enable report check box, a report file called ELOdropzone(x).txt is created in the user's temporary directory. The directory is located here: C:\Users\<Username>\AppData\Local\Temp.
OCR analysis for TIFF documents: Enable the OCR analysis for TIFF documents option to switch on OCR. Uncheck the box if you do not require OCR and do not want it to affect your system's performance.
Window always on top: Enable the Window always on top check box to keep ELO Dropzone in the foreground. The change will take effect once you restart ELO Dropzone.
Information
Refer to the Administration chapter to learn how to make changes to the configuration via the extra text of the metadata form.
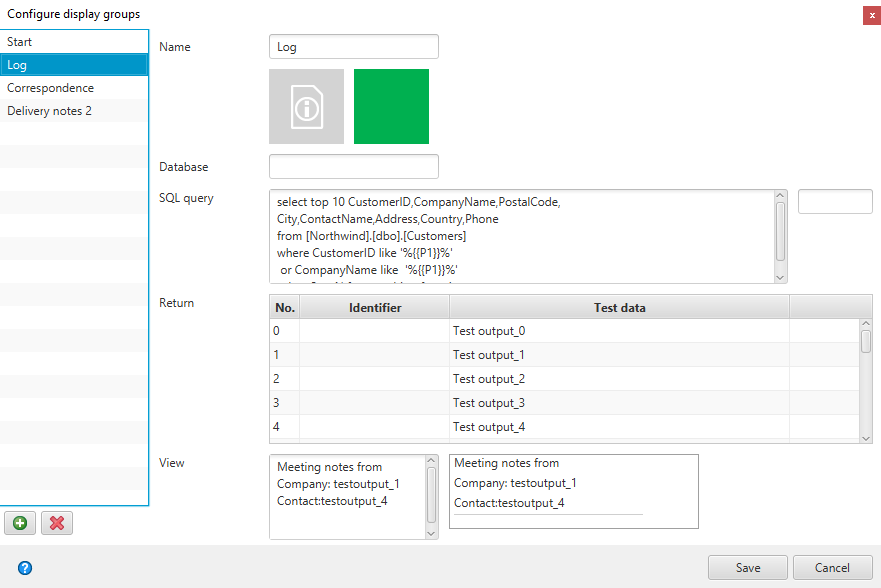
# Configure display groups
You can form groups for each work area. This helps you structure ELO Dropzone, as the tiles are spread across different display groups. Areas are defined by the administrator. Individual users can dynamically determine which groups they'd like to see. It is also possible to move individual tiles between work areas. You can also access the database directly via the individual display groups. Information from the selected database can then be used for the metadata. If you have created custom groups and already defined tiles, you have to explicitly add the existing tiles to your groups. The first display group should always be called Start. All tiles that are not assigned to a display group are automatically added to the Start group. As no database query is necessary in the Start display group, you can leave the other fields blank.
Open the Configure display groups dialog box from the ELO Dropzone context menu. Click Edit groups.
The Configure display groups dialog box opens.
On the left, you can see the display groups created up to now.
Plus icon: Add a new display group.
Delete icon: Delete a display group selected on the left.
Name: Enter a name for the display group.
Icon: To change the icon for the display group, click the gray tile icon.
Color: Click the color square to change the color of the display group.
Database: To connect to an external database, the database has to be configured on the ELO Indexserver (ELOix). This configuration in ELOix has a name, which has to be specified here. If you use the same database as ELO, you can leave the field blank and do not have to configure anything for ELOix.
Information
Please read the ELO Indexserver Programming Guide for more information. The Access to external databases chapter describes in detail how to set up a database connection pool on the application server.
SQL query: Formulate an SQL query in this field. In the example above (see figure), the Microsoft sample database (Northwind) is accessed. You should know what tables and column names exist in the selected SQL database. Select the columns you want to use as variables in the return. You can prepare and test the SQL query in a tool of your choice, for example SQL Server Management Studio. Once the query returns the desired results in the tool, you can replace the query text with a placeholder for user input. The placeholder is:
{{P1}}
Filter field beside SQL query: If the database query works properly, you can test the SQL statement via this filter field. The first selected data set is entered to the Return table. This allows you to configure the return step by step. You can define an identifier for the return for each selected data set.
Return: Define the variable in the the Identifier column per number. In the Identifier column, double-click the field you'd like to change. Complete your entry by pressing the ENTER key. If you click elsewhere, your input will be discarded. With the arrow keys, you can navigate between fields and activate the desired field by pressing the ENTER key in order to edit it. You can transform any columns of the database into variables. Ideally, you can configure the variables using the filter field (see above). Choose variable names that clearly indicate where the variables come from. The result is a better structured group, helping you to prevent errors in assigning variables to metadata fields in the tile definition.
Display: Configure what is displayed and how. You can drag the defined variables from the Return field to the desired position in the Display field. You can also enter fixed texts. The test output is shown in the field on the right.
Save: Once you have finished configuring the display group, click Save.
Cancel: The configuration for the selected display group is not saved.
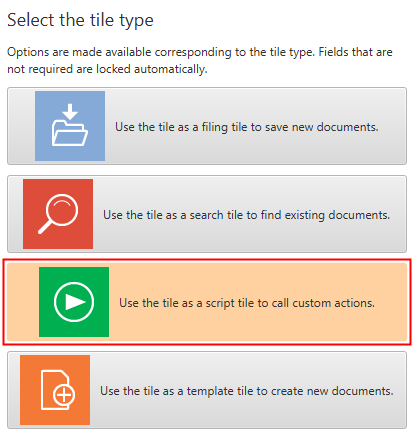
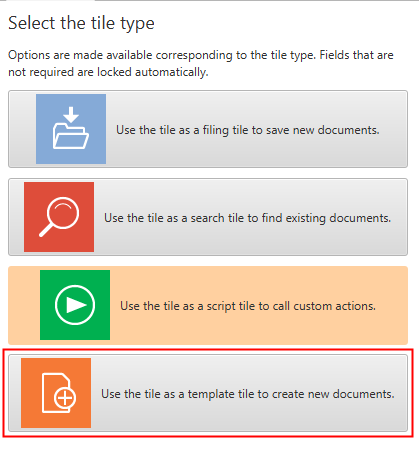
# Tile types
You can create four different tile types in ELO Dropzone:
- Filing tile
- Search tile
- Script tile
- Template tile
The configuration for these tile types is described in the following.
# Setting up a filing tile
# Adding a new tile
Right-click the middle window of ELO Dropzone.

The ELO Dropzone context menu appears.
Click the Edit mode for personal tiles menu item.
Alternative: Click Edit mode for global tiles to create a global filing tile.
Alternative: Click the button with the pencil icon.
ELO Dropzone switches to edit mode. The sand-colored background indicates that you are in edit mode.
Open the ELO Dropzone context menu.
Click the Add new tile menu item.

A new tile appears.
# Defining filing tiles
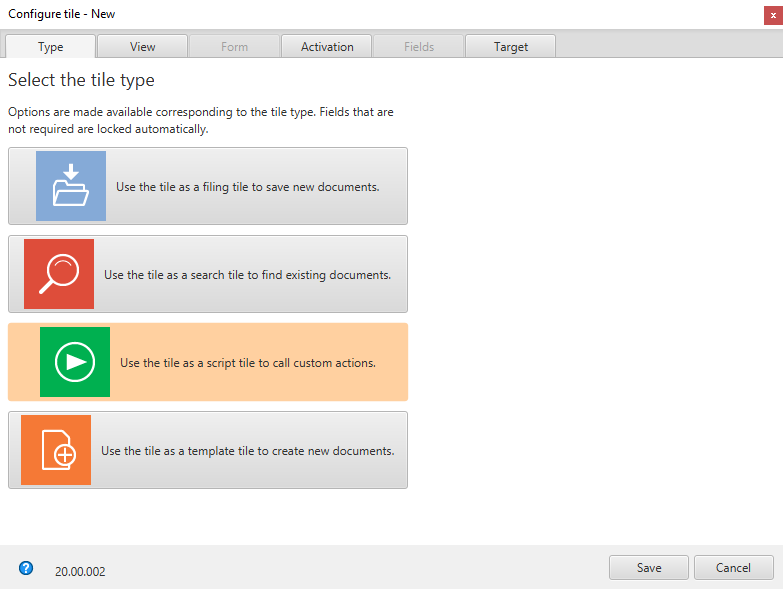
Double-click the new tile.
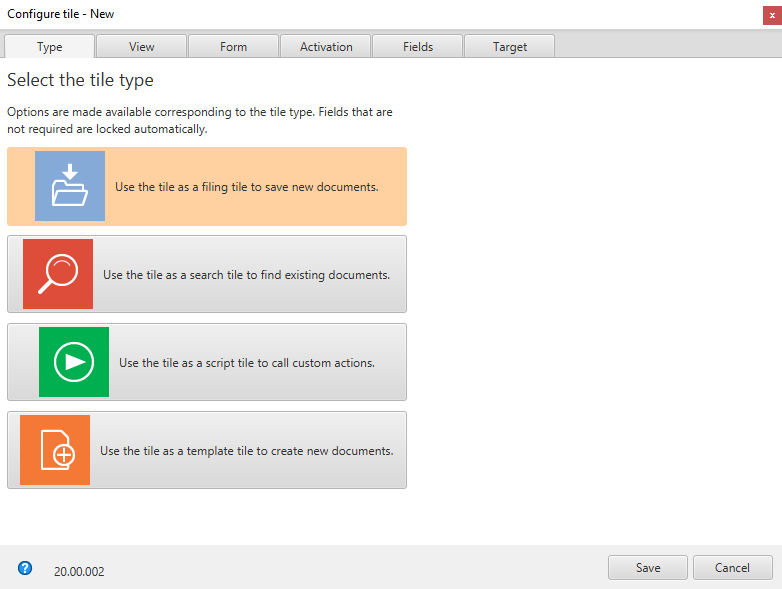
The Configure tile dialog box appears. The Type tab is open.

Click the filing tile icon.
The Filing tile type is selected.
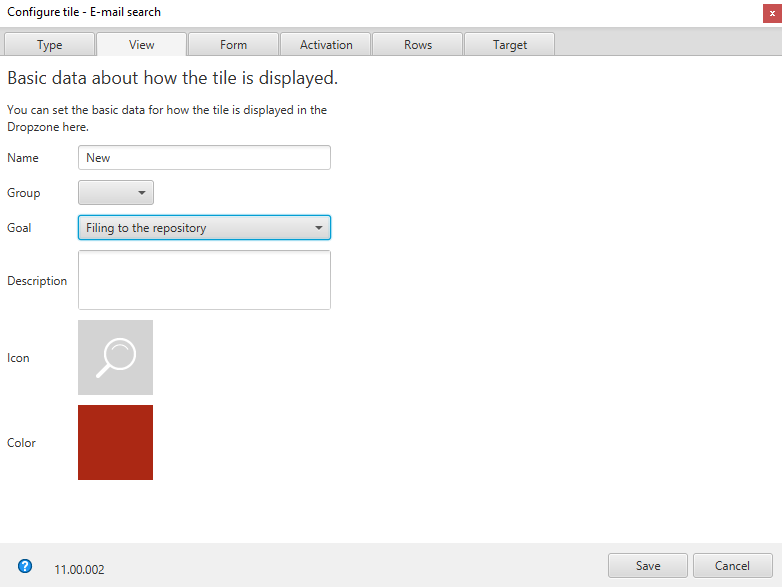
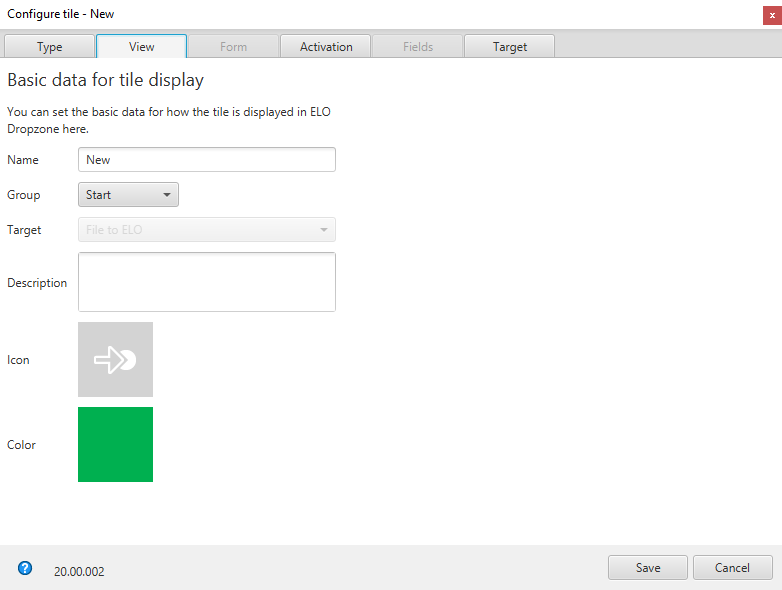
# View
Click the View tab.
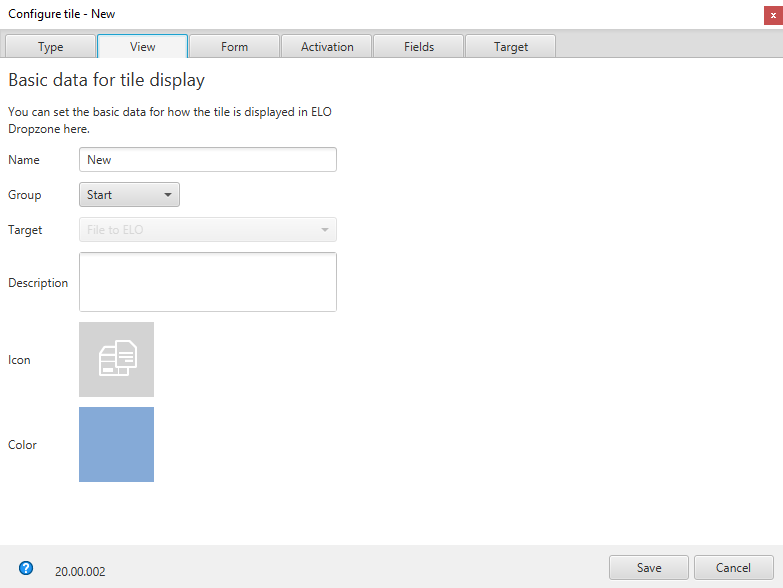
The View tab opens.
Click the Name field and enter a name for the filing tile.
Click the Group field and assign the tiles to the desired display group via the drop-down menu.
Click the Description field and enter what you want to use the tile for. The description of a tile is particularly useful when you want to make the tile available to other users in the Tile collection.
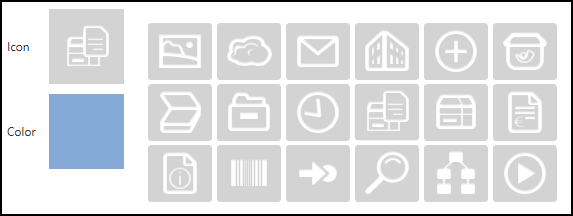
Click the gray tile to change the tile icon.

The available tile icons appear.
Click an icon.
Click the colored square to change the color of the tile.

The available colors appear.
Click a color.
You have set the basic data for how the tile is displayed in the work area.
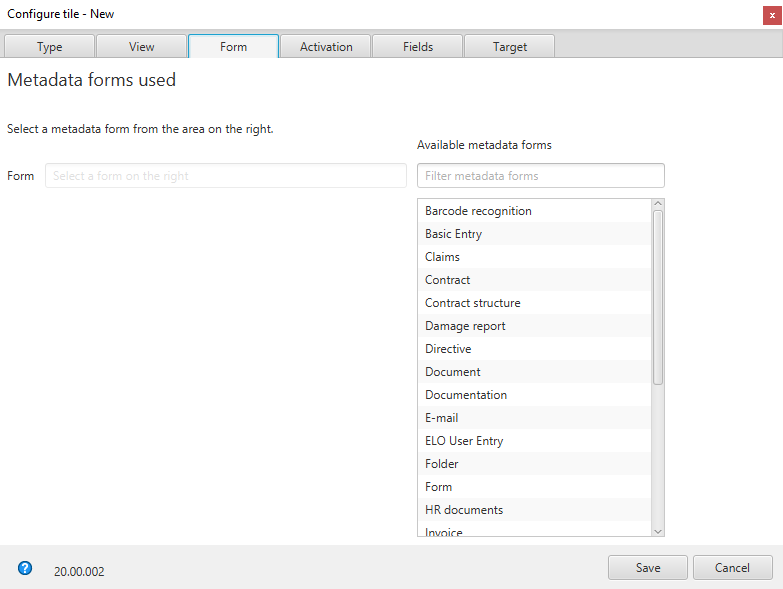
# Metadata form
Click the Form tab.
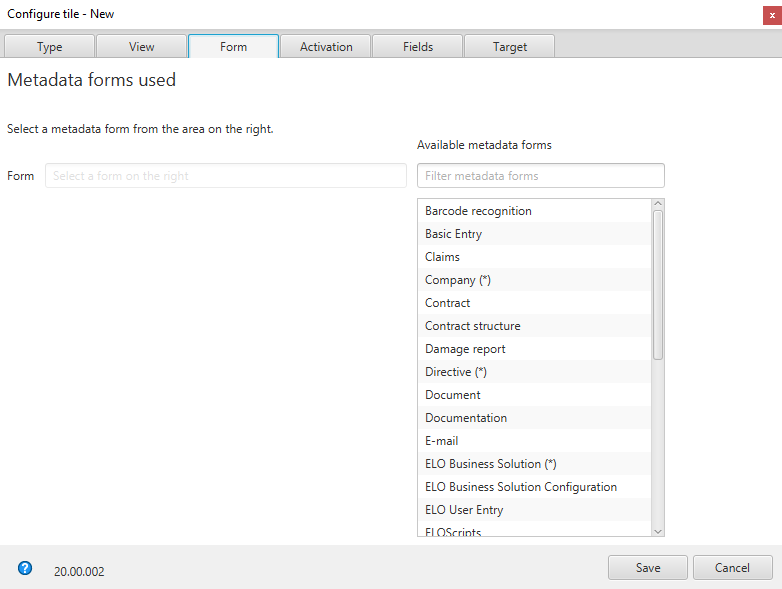
The Form tab opens.
Click one of the available metadata forms.
You have linked the tile to a metadata form.
Information
If you use a folder-only form, a folder is created when entering the metadata and the document is saved to this folder with the Free entry metadata form.
Please note
Metadata forms assigned the document status Non-modifiable cannot be used in ELO Dropzone. This is because ELO Dropzone files the logical document and then adds the file.
# Activation
The Activation tab offers additional options for defining tiles. The choice of options depends on the selected tile type.
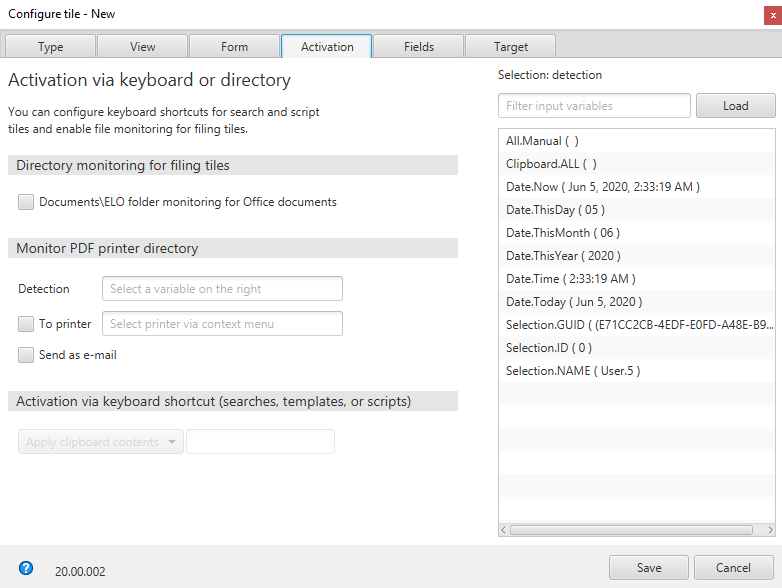
You can enable directory monitoring for filing tiles.

If you select the option Documents\ELO folder monitoring for Office documents, the filing tile becomes a monitoring tile.
ELO Dropzone monitors the following path in the Windows file system:
C:\Users\<Windows user>\Documents\ELO\<tile name>
If a Microsoft Office document is saved to one of these child folders, it is filed to ELO automatically according to the settings for that tile.
If you click Cancel to stop entering metadata for a document from the folder monitoring, the document is saved to the Not filed folder in the file system: C:\Users\<Windows user>\Documents\ELO\Not filed.
Under Monitor PDF printer directory, you can automatically file documents to an output directory of a virtual PDF printer.
Define the output directory via the system settings: Context menu > System settings > PDF printer directory.

Drag a variable to the Recognition field.
The corresponding documents are recognized in the output directory based on this variable. If the Recognition field remains empty, the PDF printer directory is not monitored.
Information
To create additional variables with regular expressions, refer to the chapter on Regular expressions.
Optional: Right-click the To printer field to open the list of available printers. You can use this printer to print your document.
- Select a printer.
Optional: When the Send as e-mail option is enabled, the detected documents from the printer directory are attached to an e-mail and sent.
You need a script to enable this option. Building a script requires administrator rights.
For the ELO Java Client, file the JS.SendMail script to // Administration // Java Client Scripting Base.
The sample script should look like this.
function fromVBS_SendMail(param) {
  var data = fromString(param)
  var fileName = data["File.Path"]
  var name = data["File.NameNoExt"]
  if (fileName) {
    workspace.sendMail(name, "", "", [fileName])
    return
  }
}
function fromString(param) {
  var result = new Object()
  var lines = param.split("\n")
  for (var i = 0; i < lines.length; i++) {
    var line = lines[i]
    var ipos = line.indexOf("\t")
    if (ipos > 0) {
      var key = line.substring(0, ipos)
      var value = line.substring(ipos + 1)
      result[key] = value
    }
  }
  return result
}
For ELOoffice, you need to create a script with the name JS.SendMail.VBS via the ELO menu > System settings > Scripts.
The script looks like this:
Set ELO = CreateObject("ELO.office")
Set oOutlook=CreateObject("Outlook.Application")
msg = ELO.GetCookie("JS.PARAM")
Data = Split(msg, vbLf)
for i = 0 to UBound(Data)
Line = Data(i)
if Left(Line, 9) = "File.Path" Then
Parts = Split( Line, vbTab )
Set oMail=oOutlook.CreateItem(0)
oMail.Subject = "From Dropzone"
call oMail.Attachments.Add(Parts(1), 0, 1)
oMail.Display
end if
Next
You need to create the JS.SendMail script via the ELO menu > System settings > Scripts in the ELO Windows Client. This requires administrator rights.
Use the above VB script JS.SendMail to do this (see ELOoffice). You need to change the script in one place: Enter the object name ELO.professional instead of ELO.professional in the first line of the script.
# Fields
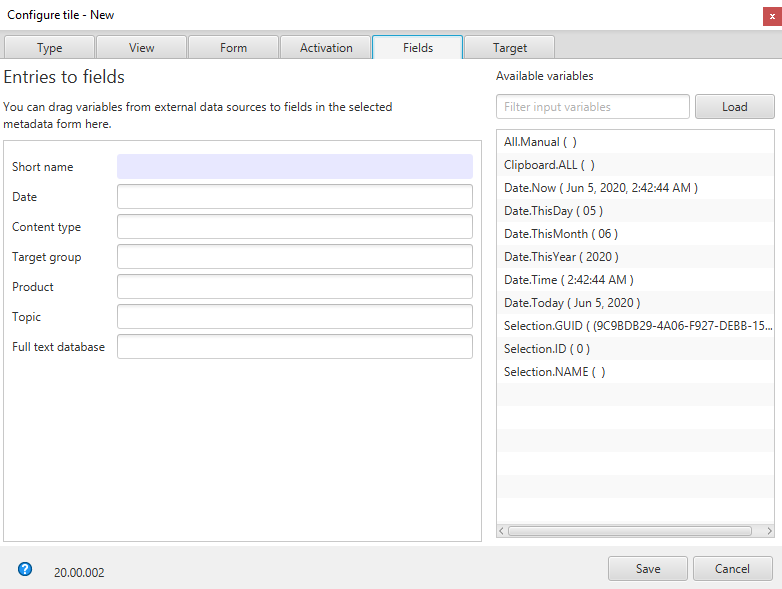
Click the Fields tab.

The Fields tab opens.
On the left, you see all fields of the selected metadata form. You see the existing variables in the Available variables area.
Load a sample document via the Load button to import additional variables. For example, if you load a Word document, Word opens briefly to analyze the document. ELO Dropzone then adds the detected metadata to the list of available variables.
In addition to the method described above, there is a more effective method of reading metadata. When you are in edit mode, you can drag and drop the file to the desired tile. The tile configuration menu opens automatically. You now find metadata variables for the file in the corresponding tabs. The number of variables you can choose from depends on the file type.
You can add metadata using the form fields in Microsoft Word, for example. In the form field properties, you can enter a value to the Text box field. Afterwards, you can select this variable from the list in the tile configuration with the syntax
Word.\<form field name>.It is also possible to read header data in Microsoft Word documents. Once you have dragged the document containing headers to a tile, the variable Header.x shows up in the list of available variables.
Now assign or drag and drop the available variables or fixed text to the fields of the selected metadata form.
The variables are displayed in the fields in curly brackets. This information means that every time a document is processed using this tile, ELO immediately recognizes which data to read.
Information
You can also drag multiple variables to one field with this method.
You can also read just parts of metadata, such as the first three letters of a first or last name. To do this, enter the position of the first letter to be read and the number of letters to be read after the data inside the curly bracket. For example, entering {All.Author(1,3)} only reads the first three letters starting from the first character.
# Target
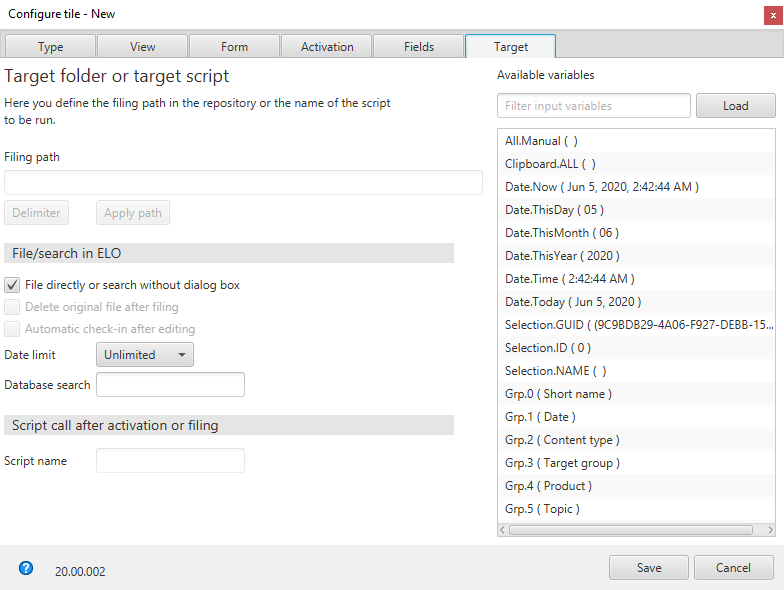
Click the Target tab once you have defined the assignment of the fields.
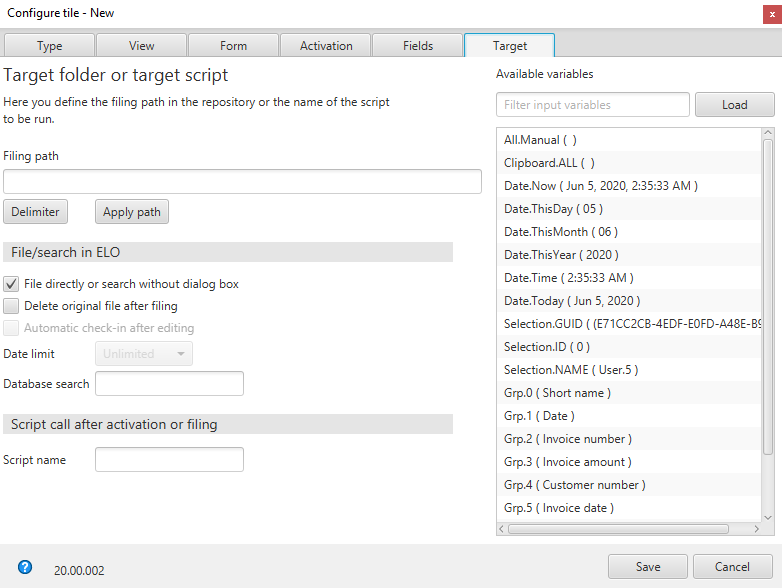
The Target tab opens.
Enter the filing path in the ELO repository to the Filing path field.
The following applies for path definitions in ELO Dropzone:
- Use the Delimiter button to create a pilcrow symbol for separating the folder levels.
- The definition must start with a separator.
- Do not end a path with a separator as the path will otherwise be displayed incorrectly.
- You can enter both full and relative target paths.
- The name for the individual fields in a metadata form begins with Grp.. Accordingly, the short name would be Grp.0, the date would be Grp.1, the third field would be Grp.2 and so on.
- Other available variables include Clipboard.ALL for reading the Clipboard or Date.ThisMonth for the month of filing.
- If you want to define a second filing target as a reference, separate the first and second definition with a pipe symbol ("|").
- If the pipe symbol occurs in the path definition, you can separate the reference paths with the Unicode character "‼". When this character appears in the path definition, it is used as the separator and the pipe symbol is ignored.
- If you have not created any reference paths and you still want to permit the pipe symbol in the text, insert the "!!" character at the end. This generates an empty reference path that is ignored.
Here is an example of a target path with a multiple filing definition:
¶Orders¶{Date.This.Year}¶{Date.ThisMonth}|Orders¶{Grp.2(1,1)}¶{Grp.2}
Alternative: Clicking Apply path uses the path selected in ELO as the filing target.
You see all the Available variables on the right-hand side. You can drag these variables to the path in ELO.
Click Load to load a sample document to the configuration. ELO automatically reads all the metadata in the document. You can now drag individual metadata to the fields.
If the filing path does not exist, it will be created automatically.
In the File to/search in ELO area, the File directly or search without dialog box option is selected. The file is filed directly without confirmation.
Optional: Check the Delete original file after filing box to delete the original file after filing.
Optional: Database search: Run a database query. The value entered here overrules manual entries in the Direct entry field.
# Save
Click Save once you have made all changes.
The Configure tile dialog box closes. The new filing tile appears in ELO Dropzone. ELO Dropzone remains in edit mode.
Right-click the context menu and the Finish editing entry in ELO Dropzone to finish editing.

# Result
You have created a filing tile. You can now drag documents onto tiles to file them to ELO.
# Setting up a search tile
# Type
With a search tile in ELO Dropzone, you can configure the desired search terms via the metadata fields of a metadata form. It is also possible to define search tiles that you can activate using keyboard shortcuts. You can create multiple keyboard shortcuts for different searches.
# Adding a new tile
Right-click the middle window of ELO Dropzone.

The ELO Dropzone context menu appears.
Click the Edit mode for personal tiles menu item.
Alternative: Click Edit mode for global tiles to create a global search tile.
Alternative: Click the button with the pencil icon.
ELO Dropzone switches to edit mode. The sand-colored background indicates that you are in edit mode.
Open the ELO Dropzone context menu.
Click the Add new tile menu item.

A new tile appears.
# Defining a search tile
Double-click the new tile.
The Configure tile dialog box appears. The Type tab is open.
Click the magnifying glass icon.
The Search tile type is selected.
# View
Click the View tab.
The View tab opens.
Click the Name field and enter a name for the search tile.
Click the Group field and assign the tiles to the desired display group via the drop-down menu.
Click the Description field and enter what you want to use the tile for. The description of a tile is particularly useful when you want to make the tile available to other users in the Tile collection.
Click the gray tile to change the tile icon.
The available tile icons appear.
Click an icon.
Click the colored square to change the color of the tile.
The available colors appear.
Click a color.
You have defined the tile name, tile icon, and tile color.
# Metadata form
Click the Form tab.
The Form tab opens.
Click one of the available metadata forms.
You have linked the tile to a metadata form.
# Fields
Click the Fields tab.
The Fields tab opens. On the left, you see all fields of the selected metadata form. You see the existing variables in the Available variables area.
Information
Load a sample document via the Load button to import additional variables.
Optional: Use the fields of the selected metadata form to specify search terms. You have the following options:
- Enter a search term.
- Drag a variable to a index field.
Information
You can combine the two methods.
# Target
Click the Target tab once you have defined the search terms.
The Target tab opens.
Optional: If the File directly or search without dialog box option is enabled, the search is automatically run with the information entered to the Fields tab. The search results appear directly in the ELO client.
When the option is disabled, the Search metadata dialog box appears when you activate the search tile. In this case, you can enter or change search terms manually.
Restrict the ELO search using the Date limit field. The following six options are available in the drop-down menu: Unlimited, One week, One month, One quarter, One year, Three years.
Optional: Run a database query. The value entered here overrules manual entries in the Direct entry field.
Click Save once you have made all changes.
The Configure tile dialog box closes. The new search tile appears in ELO Dropzone. ELO Dropzone remains in edit mode.
Right-click the context menu in ELO Dropzone to finish editing.
You have now set up a search tile. You can start the search process by clicking the search tile.
# Alternative: Activation via keyboard shortcut
The Activation tab offers additional options for defining tiles. The available options depend on the selected tile type.
You can create keyboard shortcuts for search tiles. The following applies:
- The keyboard shortcut activates the search.
- The selected action is run and the respective contents are transferred as a variable.
Please note
Keep in mind when selecting keyboard shortcuts that some may already be in use by other programs.
You can choose one of the following actions from a drop-down menu when configuring a keyboard shortcut for the search.
- Apply Clipboard contents
- Copy with CTRL+C
- Copy with double-click
- OCR window contents
- Only activate
Apply Clipboard contents
The contents of the Windows Clipboard are applied.
Select the menu item Apply Clipboard contents in the drop-down menu of the Activation via keyboard shortcut (search, templates, or scripts) area.
Click the field in the Activation via keyboard shortcut (search, templates, or scripts) area.
The cursor blinks in the field.
Enter the desired keyboard shortcut.

The keyboard shortcut is shown in the field.
Switch to the Fields tab.
Assign a field with the variable {Clipboard.ALL} to the short name in the Entries to fields area. In this example, we want to search the Short name field.
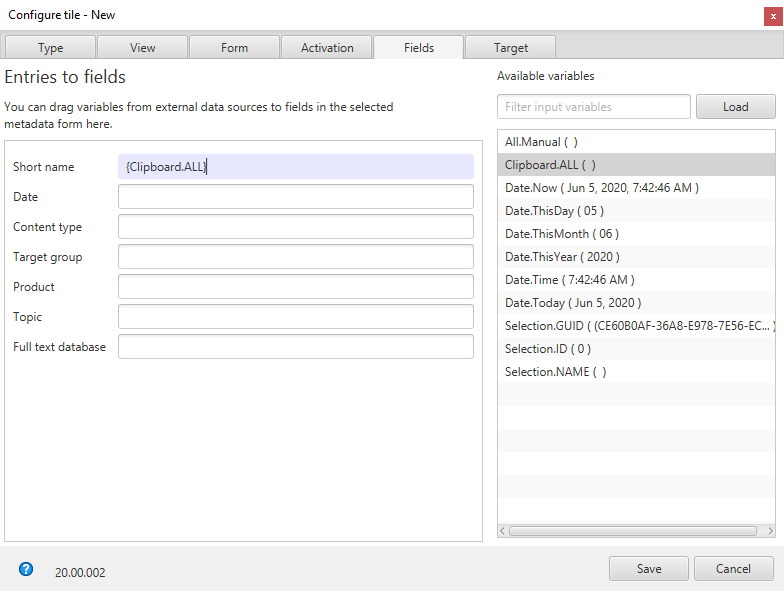
You have now activated the search from the Clipboard.
Copy with CTRL+C
Simulates a copy process with CTRL+C.
Select the menu item Copy with CTRL+C in the drop-down menu of the Activation via keyboard shortcut (search, templates, or scripts) area.
Click the field in the Activation via keyboard shortcut (search, templates, or scripts) area.
The cursor blinks in the field.
Enter the desired keyboard shortcut.

The keyboard shortcut is shown in the field.
Switch to the Fields tab.
Assign a field with the variable {Clipboard.ALL} to the short name in the Entries to fields area.
You have now activated the CTRL+C search.
Copy with double-click
Simulates a copy process with double-click from the current mouse position.
Select the menu item Copy with double-click in the drop-down menu of the Activation via keyboard shortcut (search, templates, or scripts) area.
Click the field in the Activation via keyboard shortcut (search, templates, or scripts) area.
The cursor blinks in the field.
Enter the desired keyboard shortcut.

The keyboard shortcut is shown in the field.
Switch to the Fields tab.
Assign a field with the variable {Clipboard.ALL} to the short name in the Entries to fields area.
You have now activated the double-click search.
Information
Please keep in mind that a double-click simply highlights a word at the cursor position. Therefore, it is not possible to search for multiple words.
OCR window contents
Evaluates the current window contents, e.g. of TIFF or JPG images, using OCR.
Select the menu item OCR window contents in the drop-down menu of the Activation via keyboard shortcut (search, templates, or scripts) area.
Click the field in the Activation via keyboard shortcut (search, templates, or scripts) area.
The cursor blinks in the field.
Enter the desired keyboard shortcut.

The keyboard shortcut is shown in the field.
Switch to the Fields tab.
Assign a field with the variable {Clipboard.ALL} to the short name in the Entries to fields area.
You have now activated the search using OCR window contents.
Only activate
Enables the defined keyboard shortcut without running a Clipboard action.
Select the menu item Only activate in the drop-down menu of the Activation via keyboard shortcut (search, templates, or scripts) area.
Click the field in the Activation via keyboard shortcut (search, templates, or scripts) area.
The cursor blinks in the field.
Enter the desired keyboard shortcut.

The keyboard shortcut is shown in the field.
You have now activated the Only activate search.
# Setting up a script tile
# Adding a new tile
Right-click the middle window of ELO Dropzone.
The ELO Dropzone context menu appears.
Click the Edit mode for personal tiles menu item.
Alternative: Click Edit mode for global tiles to create a global script tile.
Alternative: Click the button with the pencil icon.
ELO Dropzone switches to edit mode. The sand-colored background indicates that you are in edit mode.
Open the ELO Dropzone context menu.
Click the Add new tile menu item.
A new tile appears.
Information
There are only a few settings that you can make when configuring a script tile. Only the tabs Type, Display, Activation, and Target are available.
# Defining a script tile
Double-click the new tile.
The Configure tile dialog box appears. The Type tab is open.
Click the icon for script tiles.
The script tile type is selected.
# View
Click the View tab.
The View tab opens.
Click in the Name field and enter a name for the script tile.
Click the Group field and assign the tiles to the desired display group via the drop-down menu.
Click the Description field and enter what you want to use the tile for. The description of a tile is particularly useful when you want to make the tile available to other users in the Tile collection.
Click the gray tile to change the tile icon.

The available tile icons appear.
Click an icon.
Click the colored square to change the color of the tile.
The available colors appear.
Click a color.
You have defined the tile name, tile icon, and tile color.
# Activation
The Activation tab offers additional options for defining tiles. The available options depend on the selected tile type.
You can create keyboard shortcuts for script tiles. The following applies:
- The keyboard shortcut activates the script.
- The selected action is run and the respective contents are transferred as a variable.
Please note
Keep in mind when selecting keyboard shortcuts that some may already be in use by other programs.
You can choose one of the following actions from a drop-down menu when configuring a keyboard shortcut for the script.
- Apply Clipboard contents
- Copy with CTRL+C
- Copy with double-click
- OCR window contents
- Only activate Apply Clipboard contents
The contents of the Windows Clipboard are applied.
Select the menu item Apply Clipboard contents in the drop-down menu of the Activation via keyboard shortcut (search, templates, or scripts) area.
Click the field in the Activation via keyboard shortcut (search, templates, or scripts) area.
The cursor blinks in the field.
- Enter the desired keyboard shortcut.

The keyboard shortcut is shown in the field.
- Switch to the Target tab.
Optional: Run a database query. The value entered here overrules manual entries in the Direct entry field.
- Enter the desired script name to the Script call after activation or filing area. Make sure you enter the name of the method and not the file name of the script.
You have now activated the script from the Clipboard.
Copy with CTRL+C
Simulates a copy process with CTRL+C.
Select the menu item Copy with CTRL+C in the drop-down menu of the Activation via keyboard shortcut (search, templates, or scripts) area.
Click the field in the Activation via keyboard shortcut (search, templates, or scripts) area.
The cursor blinks in the field.
Enter the desired keyboard shortcut.
The keyboard shortcut is shown in the field.
Switch to the Target tab.
Enter the desired script name to the Script call after activation or filing area.
You have now activated the script via CTRL+C.
Copy with double-click
Simulates a copy process with double-click from the current mouse position.
Select the menu item Copy with double-click in the drop-down menu of the Activation via keyboard shortcut (search, templates, or scripts) area.
Click the field in the Activation via keyboard shortcut (search, templates, or scripts) area.
The cursor blinks in the field.
Enter the desired keyboard shortcut.
The keyboard shortcut is shown in the field.
Switch to the Target tab.
Enter the desired script name to the Script call after activation or filing area.
You have now activated the script via double-click.
OCR window contents
Evaluates the current window contents, e.g. of TIFF or JPG images, using OCR.
Select the menu item OCR window contents in the drop-down menu of the Activation via keyboard shortcut (search, templates, or scripts) area.
Click the field in the Activation via keyboard shortcut (search, templates, or scripts) area.
The cursor blinks in the field.
Enter the desired keyboard shortcut.
The keyboard shortcut is shown in the field.
Switch to the Target tab.
Enter the desired script name to the Script call after activation or filing area.
You have now activated a keyboard shortcut for scripts via OCR window contents.
Only activate
Enables the defined keyboard shortcut without running a Clipboard action.
Select the menu item Only activate in the drop-down menu of the Activation via keyboard shortcut (search, templates, or scripts) area.
Click the field in the Activation via keyboard shortcut (search, templates, scripts) area.
The cursor blinks in the field.
Enter the desired keyboard shortcut.
The keyboard shortcut is shown in the field.
You have now activated the Only activate search.
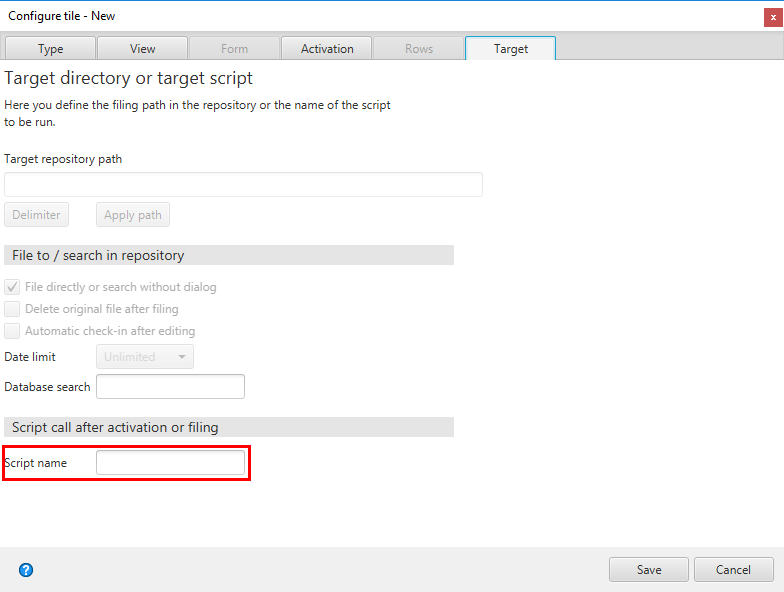
# Target
You can enter the name of the executing script here.
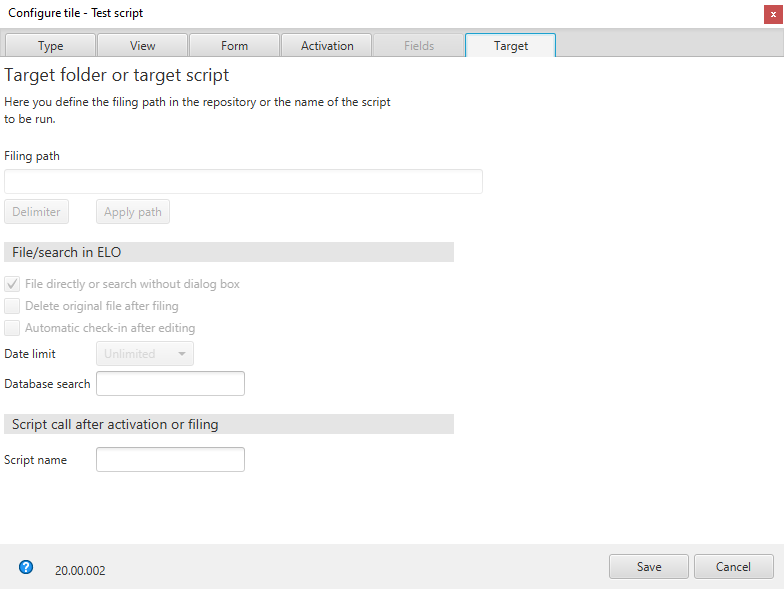
Enter the desired script call to the Script call after activation or filing area.
For security reasons, however, you cannot call arbitrary scripts via ELO Dropzone. As with COM requests, the script must correspond to a predefined naming convention:
JS.<name>
The script files must be located in the script folder of the ELO Java Client.
A script file can include multiple functions for multiple script tiles.
# Example
The script call JS.Test activates the following function:
function fromVBS_Test(param) {
workspace.showInfoBox("ELO", param);
}
Please note
Because there is no scroll function in ELO Dropzone, there is a limit to the number of tiles you can create. The number of tiles you can create depends on your screen resolution settings.
# Setting up a template tile
With a template tile, you can create documents from Microsoft Word templates in ELO Dropzone. Clicking the template tile creates new documents, which will be assigned the corresponding metadata after saving.
# Preparations
Start Microsoft Word.
Prepare a template document in Microsoft Word, for example a template for meeting notes, and save this document on your Windows file system.
In ELO Dropzone, switch to Edit mode.
Select a group created for this specific database search. Refer to the Configure display groups section for information on how to configure the database query. For this example, we will use a group with a pre-configured database query for a meeting notes template.
Using the top input field in ELO Dropzone, run a database search and select an entry you want to take variables from.

Click the desired entry or select it with the ENTER key. The selected entry is shown below the display groups. This allows you to see what entry is used for automatic metadata entry at all times.
Drag the created template document to a free space in ELO Dropzone.
The wizard for configuring a template tile opens. At the same time, the template document opens and closes quickly in Microsoft Word.
# Type
- Click the icon for template tiles.
The template document in Microsoft Word opens.
- Click the View tab.
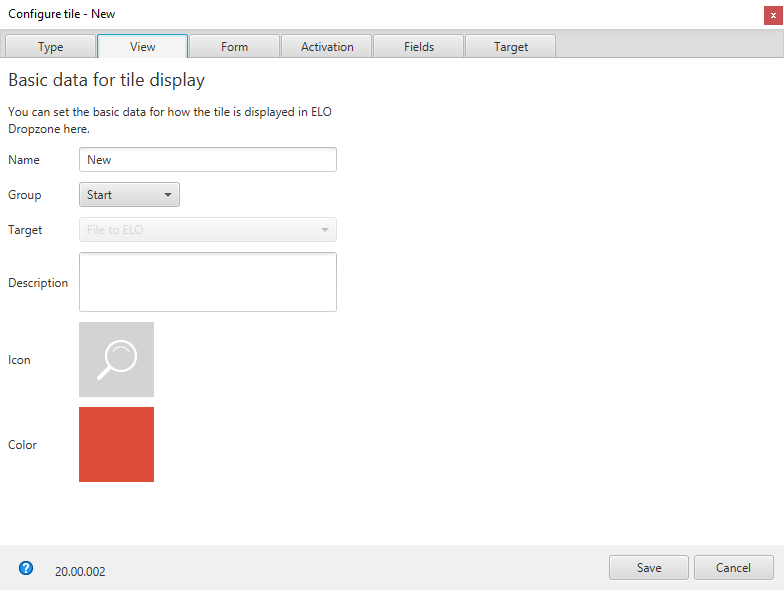
# View
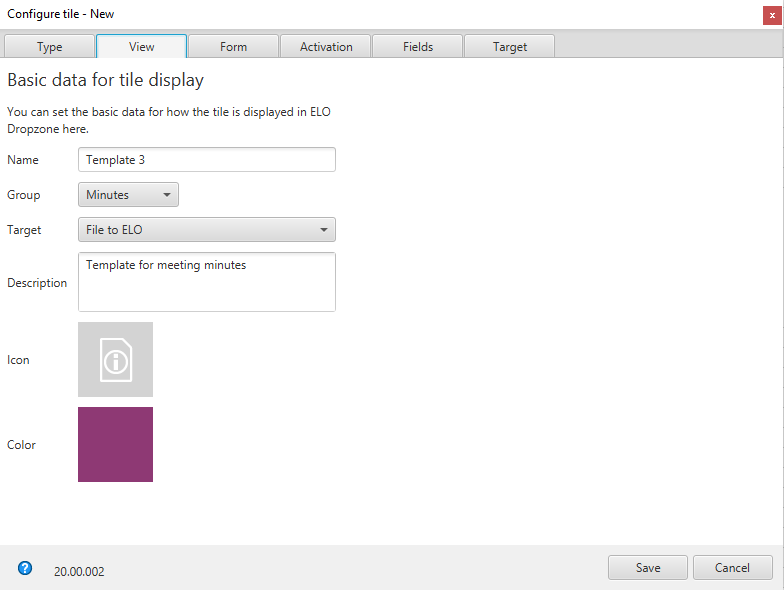
The View tab opens.
Click the Name field and enter a name for the template tile.
Click the Group field and assign the tiles to the desired display group via the drop-down menu.
Click the Target field and from the drop-down menu, select whether the tile should trigger the File to ELO function or create a Microsoft Outlook e-mail (with or without attachment).
Click the Description field and enter what you want to use the tile for. The description of a tile is particularly useful when you want to make the tile available to other users in the Tile collection.
Click the gray tile to change the tile icon.
Click the colored square to change the color of the tile.
You have set the basic data for how the tile is displayed in the work area.
# Metadata form
Click the Form tab.
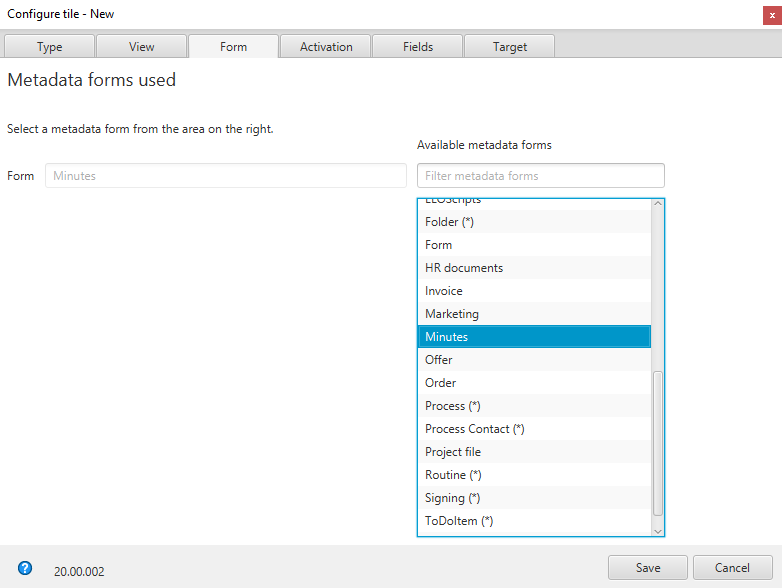
The Form tab opens.
Click one of the available metadata forms.
You have linked the tile to a metadata form.
# Activation
Click the Activation tab.
Optional: Set a keyboard shortcut for the template tile. Use the drop-down menu to choose the type of activation. In the following field, set the desired keyboard shortcut.
# Fields
Click the Fields tab.
Assign the available variables to the fields of the selected metadata form via drag-and-drop.
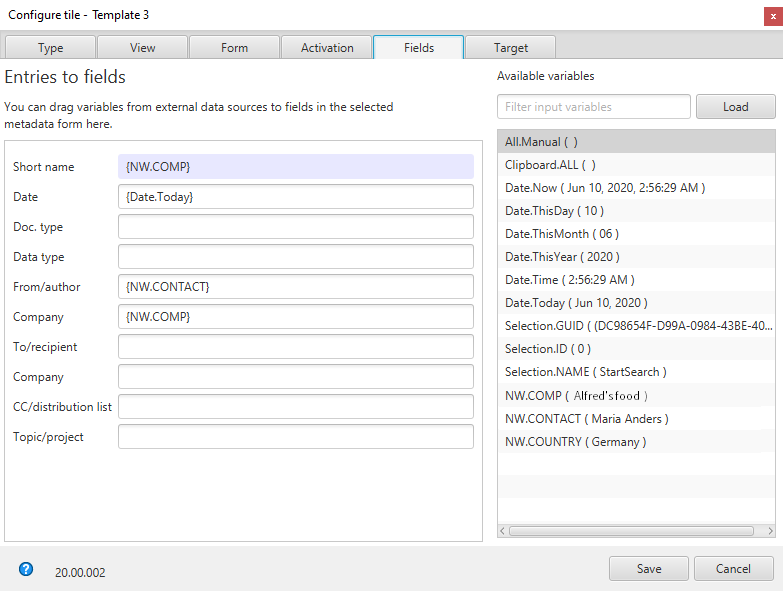
From the list of available variables, drag the desired variables to the right position in the template document.

The variables are displayed in double curly brackets.
# Target

Click the Target tab.
Enter the filing path to the Filing path field. Clicking Apply path uses the path selected in ELO as the target path.
Optional: If the File directly or search without dialog box is enabled, the document is automatically filed without a dialog box appearing.
Optional: Enable the Automatic check-in after editing option. After it has been edited in Microsoft Word, the document is automatically checked back in.
Optional: Run a database query using the Database search field. This value overrules entries to the top input field in ELO Dropzone.
Click Save once you have made all changes.
Save and close the template document in Microsoft Word.
The Configure tile dialog box closes. The new template tile appears in ELO Dropzone. ELO Dropzone remains in edit mode.
Right-click the context menu in ELO Dropzone to finish editing.
# Use
You have set up a template tile. If you have configured a group and a template tile for meeting notes as shown in this example, you can now search for the entry via the Database search input field, then confirm and open the template tile.

The document with metadata that is filed to the ELO repository appears in the open Microsoft Word for editing. The variables are automatically filled with the data from the database search.
# Create e-mail from template tile
You can configure a template tile to create an e-mail in Microsoft Outlook in place of the Filing path target. To do so, make changes to your template, for example.
Open the ELO Dropzone context menu.
Click Edit mode for personal tiles.
Click an existing template tile to modify it.
# View
Click the View tab.
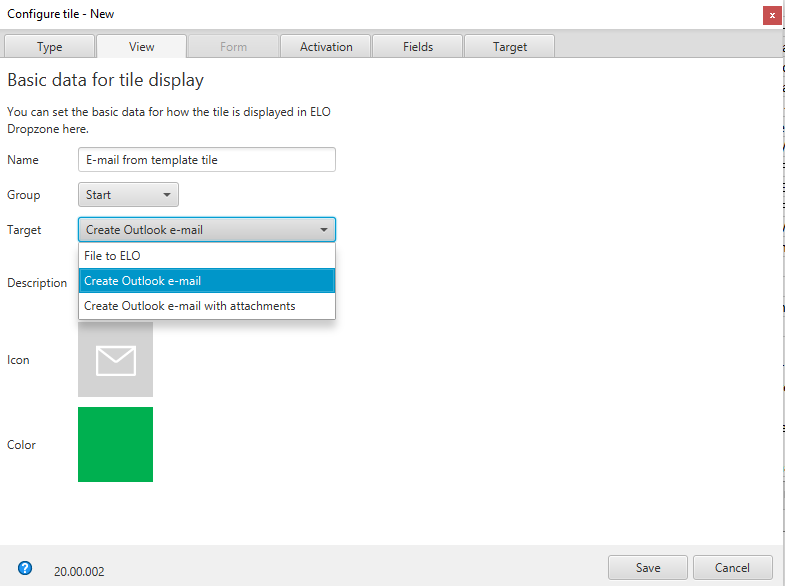
In the Target area, use the drop-down menu to select either Create Outlook e-mail or Create Outlook e-mail with attachments.
Create Outlook e-mail: Clicking the tile automatically opens an e-mail in Microsoft Outlook.
Create Outlook e-mail with attachments: Clicking the tile automatically opens an e-mail in Microsoft Outlook. It is also possible to add an attachment to the e-mail. The attachment can be a document from ELO or the Windows file system. To add an attachment from ELO, select the document in ELO and activate the tile. You can also drag a document from the Windows file system onto the tile.
# Activation
Click the Activation tab.
Optional: Set a keyboard shortcut for the tile. Use the drop-down menu to choose the type of activation. In the following field, set the desired keyboard shortcut.
# Fields
Click the Fields tab.
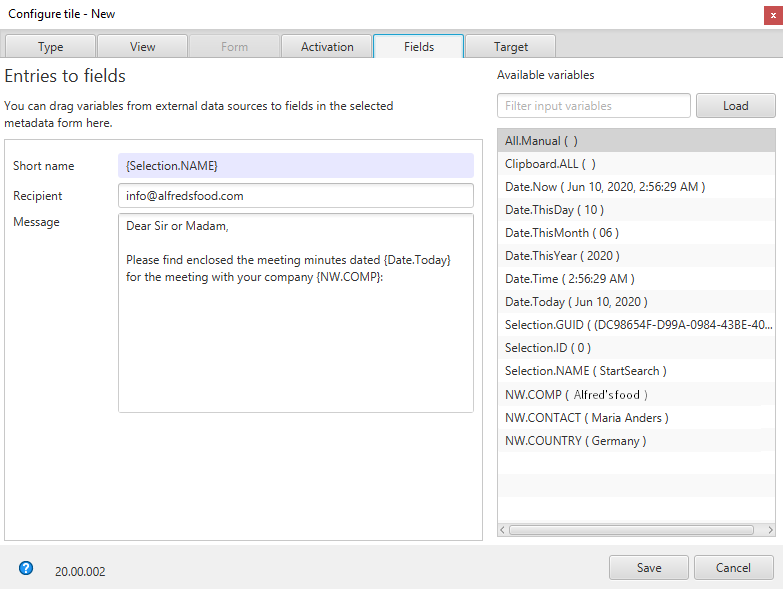
Enter the subject of the e-mail to the Short name field.
Enter the e-mail address of the recipient to the Recipient field.
Enter text to the Message field. This text will then appear in the body of the e-mail. HTML coding is permitted.
Save the tile configuration and close edit mode.
# Regular expressions
You can also create additional variables with regular expressions in ELO Dropzone that can be used to define tiles. Regular expressions can be used as filter criteria in the text search by compared the text with the pattern of the regular expression. For example, it is possible to select all words from a list of words that start with the letter S and end in the letter D – without having to explicitly specify the words in between or the number of letters. This section guides you through the wizard for creating regular expressions.
# Opening the wizard
Open the wizard for regular expressions as follows:
Open the ELO Dropzone context menu.

Click the Regular expressions menu item.
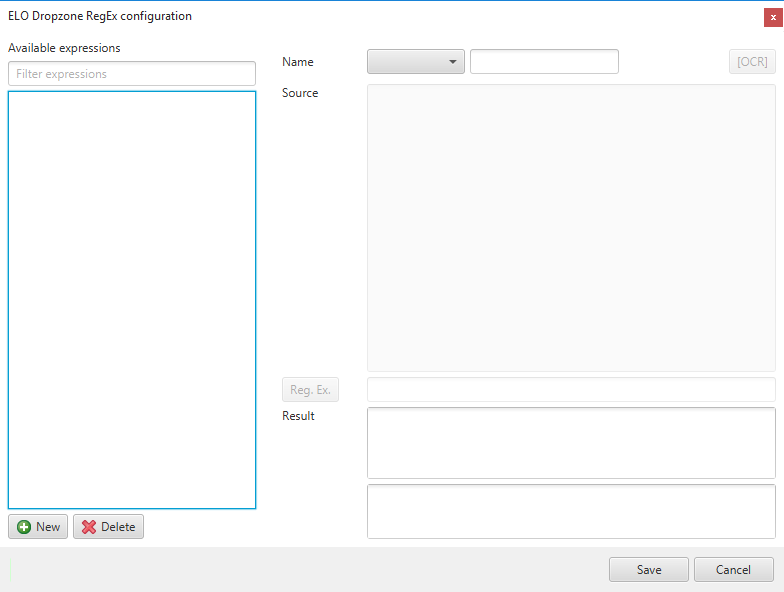
The ELO Dropzone RegEx configuration wizard for creating regular expressions opens.
# Available expressions

You see all regular expressions defined so far in the Available expressions column.
# New

Use the New button to add a new regular expression.
# Delete

Use the Delete button to delete the selected regular expression.
# Type, name, and source

Select the type of regular expression and enter a name to the Name field. Use the Source area to load sample documents or enter sample information.
You can select the following types from the drop-down menu.
Text: Refers to information from the full text content of a file. This can be a Microsoft Word or PDF document. The keywords from a PDF are added to the full text database. To see which information can be read, drag a sample document to the Source area. Alternative: Copy the required full text contents to the Source area.
Title: Refers to information that can be extracted from the window titles of all running programs. The extracted window titles are displayed in the Source field.
File: Refers to a file path. To see which information can be read, drag a sample document to the Source area.
Clipboard: Refers to information that can be extracted from the contents of the Windows Clipboard. The contents of the Windows Clipboard are displayed in the Source area.
Barcode: Refers to information from a document with barcodes. Drag a sample document to the Source area. ELO Dropzone recognizes all barcodes in the entire document. If a document has multiple barcodes, you will have to use regular expressions to separate the individual barcodes.
OCR: If you click [OCR], you can also evaluate the current window contents with OCR.
Open the OCR-readable file (e.g. a TIFF image) you want to evaluate.
Click [OCR].
Click the window contents of the file.
The OCR text is displayed in the Source field.
# Reg. Ex. and result

Once you have selected the type, entered the name, and loaded a sample document, you can adjust the regular expression in the Reg.Ex. field to obtain the desired results pattern.
You have the following options:
- Entries via a submenu
- Direct entry via the Reg. Ex. input field
The following describes the method via the submenu:
# Example: Website
Click the Reg. Ex. button to create the regular expression.
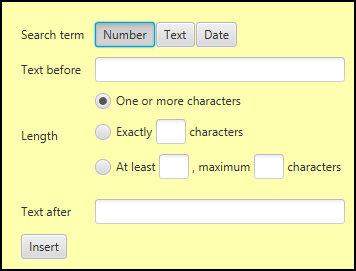
The submenu for creating the regular expression opens.
Determine the type of character (numbers, text or date) that you are looking for using the buttons in the Search term area. Different settings are available depending on the selected type.

Define the regular expression via the fields in the submenu.
To search for the name of a website that you know uses a specific domain, define the expression as in the figure above.
Click Insert to apply your regular expression.

The regular expression is entered to the Reg. Ex. input field.
Information
Click the area below the submenu if you want to stop creating the regular expression.

In the Result area, you see the search result found for the regular expression you entered.
Information
This only returns the character string determined via the part of the regular expression in parentheses.
Optional: Manually adjust the regular expression in the Reg. Ex. input field until the regular expression returns the desired result.
# Save
Click Save to save the regular expression once you have defined the regular expression.
The ELO Dropzone RegEx configuration dialog box closes.
# Example with multiple groups
The following example shows how to get return values from multiple groups.
Create a new Text type regular expression.

Enter a sample text to the Source area. In our example, we want to get the two values from Rechnung and Invoice.

In the Reg.Ex. area, enter the regular expression as shown in the image above. With the DZRESULT annotation, the second group is also selected. In our example, this is Invoice.
With this selection, you receive both return values, in this case "4711" and "12345".
# Using tiles
Newly defined regular expressions are saved to ELO in the extra text of the Global folder: Administration // Dropzone // Global
The regular expressions can be used to define tiles as additional variables.
Information
If required, load a sample document to see all existing variables.
# Additional display

In the header area of ELO Dropzone, you see the window title of the last program you opened if it matches the last regular expression you created for the Title type.
# Overview
The table below contains a list of basic regular expressions and their meanings.
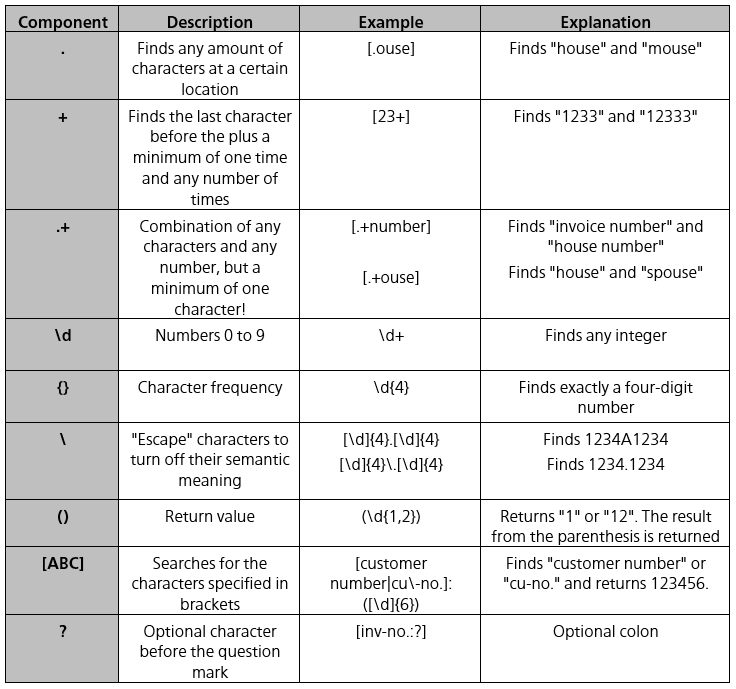
Information
If you want to use a regular expression to create all types of line breaks, \n is not specific enough. In this case, use the regular expression (?:\r\n|\n|\r).
# Tile collection
You can share tiles you created yourself with other users in the ELO Java Client. Other users can then access shared tiles via the Tile collection and import them into their own ELO Dropzone.
# Preparations
To use the Share tile function in ELO Dropzone, the administrator must make the following preparations in the ELO Java Client.
Set up a new child folder with the name Store in the folder // Administration // Dropzone.
Create additional child folders in the Store folder. The child folders can be named as required. For example, you can create a folder for each department or depending on the filing type.

The user needs the permission Edit lists (L) for this child folder to share tiles. The user needs Read (R) permission to import tiles from a part of the tile collection. The administrator can set these permissions for every child folder via the metadata.
# Share tile
Share a tile you configured yourself with other users.
- Open the context menu in ELO Dropzone by right-clicking and then clicking Edit mode for personal tiles.
Information
To ensure that the shared tile and its function are easy to identify in the tile collection, we recommend that you enter a meaningful description of its function in the Description field of the tile configuration.
Right-click the tile that you want to share with other users.

The ELO Dropzone context menu appears.
Click Share tile.
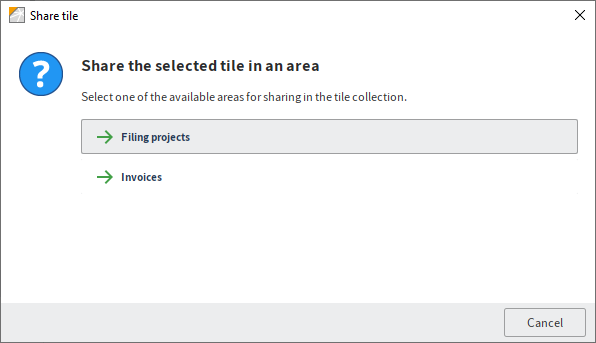
The Share tile dialog box appears.
Click to select the area in the tile collection where you want to publish your tile.
The tile is filed as a copy in the selected target area and is now available to other users with the corresponding rights.
Please note
Tiles in the Tile collection cannot be overwritten. If you change the configuration of a tile that has already been shared and want to publish it, you will need to upload the tile again. Manually delete the old tile in the ELO Java Client under // Administration // Dropzone // Store // <child folder>.
# Import tile
Import a tile from the Tile collection.
Open the context menu in ELO Dropzone by right-clicking and then clicking Edit mode for personal tiles.
Right-click to open the context menu and then click Load tile from collection.
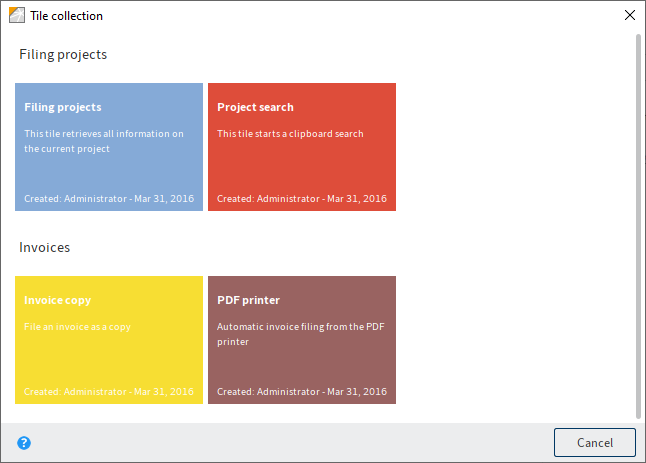
The Tile collection dialog box appears.
Click the tile that you want to import. Additional information is available to help you select the tile to import: The area to which the tile was copied, the tile name, the creator of the tile, and the creation date.
The tile selected from the Tile collection is copied into your own ELO Dropzone.
# Activate a tile from another application
Tiles can be activated via the OLE interface of the ELO Java Client or via an elodms link.
You can download and import a file from an e-mail message or a website in ELO. You only need to enter an appropriately formatted elodms URL to do this. In this case, the elodms link always starts with the following parameters:
elodms://dz/\<tile name\>|
The URL can either contain a file name or an HTTP address. If you use a file name, it must be visible locally on the client computer. The file name is then added to the elodms link with URL encoding.
Example: elodms://dz/Rechnung|c:\rechnung.tif
If you use an HTTP download address, you have to add the identifier http, followed by a pipe symbol and the extension (such as PDF). This is followed by another pipe symbol and then the download address. This part must be URL-encoded for a valid link to result.
Example: elodms://dz/Report|http|pdf|www.forum.elo.com%2Fscript%2FAddNoteConfirmFlow.pdf
You can, for example, send this elodms URL as an e-mail attachment. When the recipient of this e-mail clicks the link, the file is downloaded and transferred to the tile specified – as if you had dragged it to the tile.