# Complete tasks with workflows
# Start workflow
Using workflows, you can assign individual users or groups tasks.
An integrated escalation management function allows you to track whether the set deadlines are met once a workflow is started.
The Start workflow function gives you access to workflows with different levels of complexity designed for specific processes within your company.
Method
Select the document you want to start a workflow on.
Information
You can also start workflows on folders.
On the toolbar, select New > Start workflow.
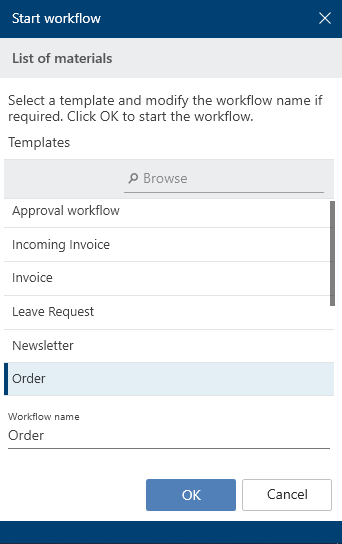
The Start workflow dialog box appears.
Templates: Select a workflow template here. You can search for the right template in the search field.
Workflow name: The name of the template is automatically entered as the workflow name. You can change this name as needed.
Select an appropriate template and confirm with OK.
Result
The workflow starts.
Outlook
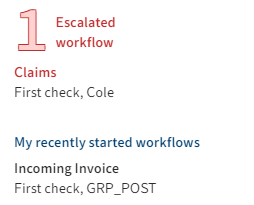
Once you have started a workflow, it will appear in My ELO under My recently started workflows.
If one of your workflows was escalated, you will see the Escalated workflows area.
# Edit workflow
If you were selected as the editor in a workflow, the workflow appears in your Tasks work area.
You can receive workflows as a user, as a group member, or as a substitute.

You will recognize a workflow based on the workflow icon.
A new workflow is marked with a green dot and bolded font.
When you receive a workflow, you have the following options:
- Edit workflow with a form
- Forward workflow function
- Accept workflow function
- Return workflow function
- Delegate workflow function
# Edit workflow with a form
For workflows with forms, you can open the form by selecting the Form button. This button is only available in full-screen mode.
Method
- Edit the fields of the form as indicated in the task.
- To forward the workflow after editing the form, select the corresponding button within the form.
# Forward workflow function
When you receive a workflow task, it will appear in your Tasks work area.
After you have completed your task, forward the workflow to the next editor.
Related functions
- Edit workflow with a form: If the workflow you receive contains a form, forward it using the form.
- Return workflow
- Delegate workflow
Method
Select the workflow that you want to forward.
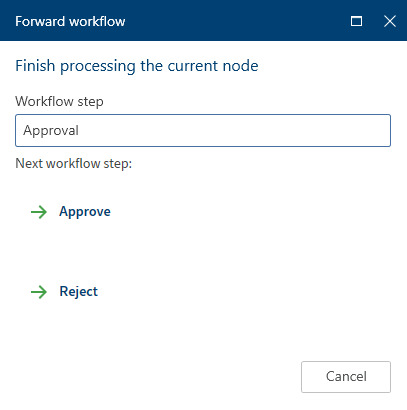
On the toolbar, select Task > Forward workflow.
If you have received a workflow and this button is disabled, this is for one of the following reasons:
- You received the workflow as part of a group. In this case, you have to accept it first by selecting Accept workflow.
Information
If you are unable to accept a group task, you need the corresponding role. You can enable roles via User menu [your name] > Enable roles.
- The workflow contains a form. The form opens in the viewer pane. In this case, forward the workflow by selecting the button on the form.
Select the workflow step.
Result
The workflow is forwarded and disappears from your tasks area.
# 'Accept workflow' function
If you have received a workflow as part of a group, you have to accept it before you can process and forward it. This prevents the workflow from being processed by multiple users at once.
Method
Select the workflow that you want to accept.
On the toolbar, select Task > Accept workflow.
Keyboard shortcut: ENTER key
Once the workflow is accepted, it is removed from the Tasks work area of the other group members. Use the Return workflow function to undo accepting the workflow.
Information
If a group member selects or accepts a group task, the task is marked as read for all group members.
If a group task is returned, it remains marked as read for all group members.
# 'Return workflow' function
You can return a workflow you received as a group member and accepted with the Accept workflow function.
Related function
Method
Select the workflow you want to return.
On the toolbar, select Task > Return workflow.
The workflow now appears in the Tasks work area of all group members the workflow was sent to.
# 'Delegate workflow' function
You can delegate your workflow step.
Related function
Method
Select the workflow that you want to delegate.
On the toolbar, select Task > Delegate workflow.
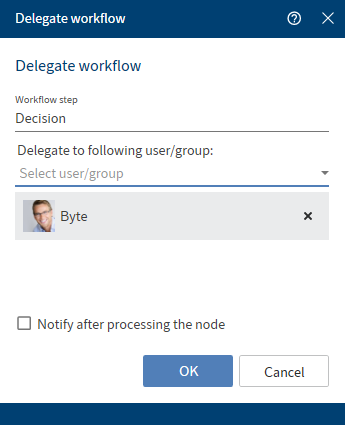
You can select one user or group, or multiple users or groups.
Delegate to following user/group: From the drop-down menu, select which user or group you want to delegate the workflow to.
Notify after processing the node: If this box is checked, the workflow is assigned back to you after the selected user/group has processed the workflow node.
# Refresh
With the Refresh button (keyboard shortcut: F5 key), changes recently made by other users are immediately applied.
This means that tasks can disappear from the task list in your Tasks work area if they have been accepted by other users in the meantime.
New tasks are denoted with a green dot.