# Entry types (gen. 1)
Entry types indicate what type of entry you are dealing with at a glance. The icons that are used can be customized.
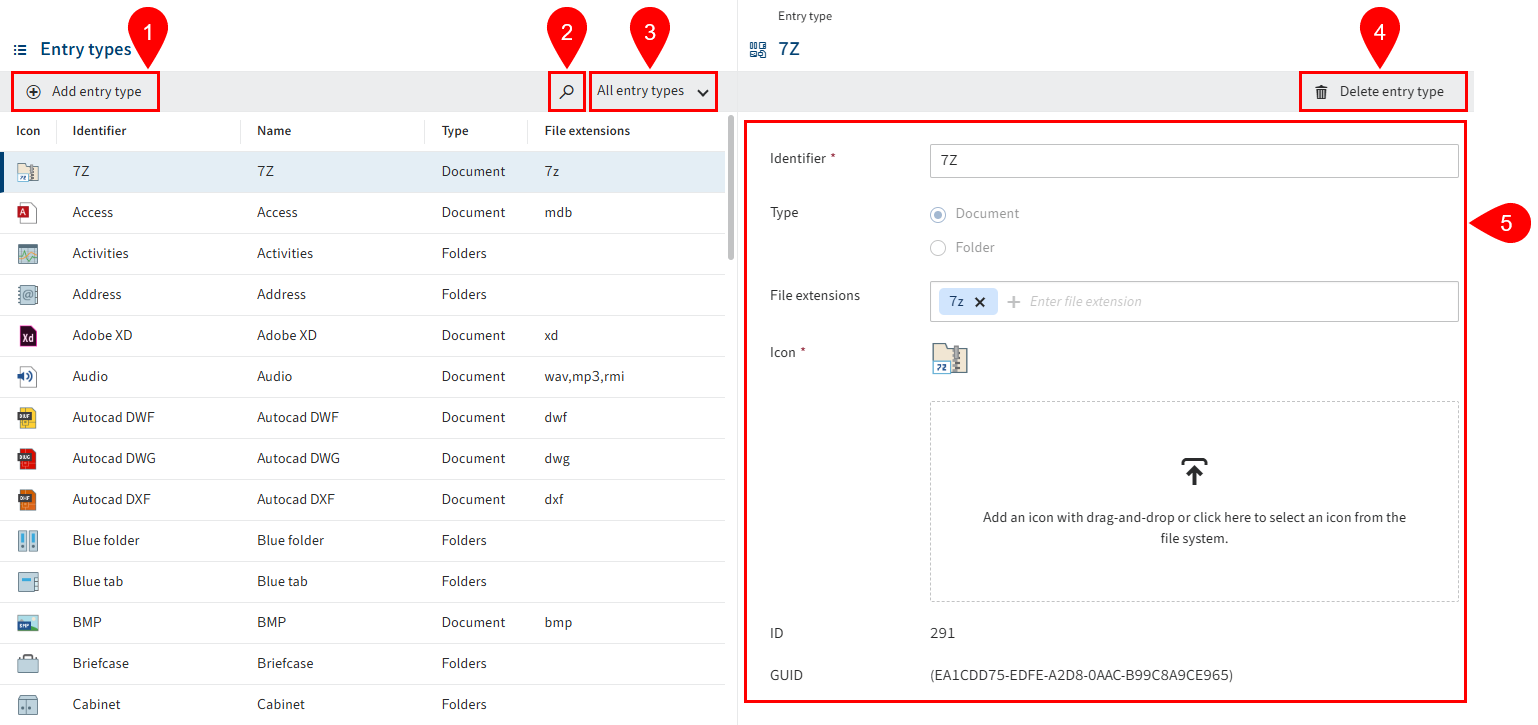
In this area, you manage the entry types outside of packages. The ELO Server Setup provides a default set of entry types.
The following actions are available in the Entry types area:
2 Search entry type
3 Filter entry types
4 Delete entry type
5 Configure entry type
# Add entry type
To add an entry type, follow the steps below.
Select Add entry type.
Enter a technical name in the Identifier field.
Information
The identifier must be unique.
Under Type, select the purpose (document or folder) of the entry type.
Optional: For the Document type, enter one or more extensions linked to the entry type. If a document with an appropriate extension is filed, the respective entry type is then assigned automatically.
Upload an icon for the entry type.
- Allowed file formats:
- SVG
- ICO
- Allowed file formats:
Select Save entry type.
The entry type is created and can be used.
Information
Entry types are prepared for web pages by a background process in ELOwf. This must be triggered manually after adding entry types by selecting the Refresh tile and entry type icons button in the Refresh drop-down menu of the ELO App Manager (opens new window).
# Top level in the repository
You can configure a custom icon for the root element in the repository (also referred to as top level).
![]()
You will find the settings under the Repository entry type.
The ID for this entry type is set to the value 9999.