# Basics
This chapter explains some of the basics in the ELO Administration Console.
# System requirements
You will find more information related to the system requirements in the ELO system requirements (opens new window) documentation.
Please note
The version of the ELO Administration Console must be compatible with the corresponding ELO Indexserver. Refer to the information in the ELO Server Setup.
# Installation
You can install the ELO Administration Console using the ELO Server Setup program.
For more information, refer to the documentation ELO server > Installation and operation > Installation (opens new window).
Please note
If the ELO system can be accessed from the Internet, we recommend preventing access to the ELO Administration Console. You can achieve this by blocking the path, for example:
https://<ELO server>:<port>/ix-<repository name>/plugin/de.elo.ix.plugin.proxy/ac
For more information, refer to the documentation ELO server - Installation and operation > Example installation - Providing web access to ELO > Web server configuration (opens new window).
# Start and login
Starting with ELO 23.5, users log in with ELO Modern Authentication. For more information, refer to the ELO Modern Authentication (Auth2) documentation.
To start the ELO Administration Console, enter the URL in the browser as follows:
https://<ELO server with installed ELOac>:<Port>/ix-<target-repository>/plugin/auth2/sign-in
Example: https://eloserver:9093/ix-EXTEN/plugin/auth2/sign-in
After logging in with ELO Modern Authentication, you can choose whether you want to be redirected to the ELO Administration Console, to the configuration of ELO Modern Authentication (Auth2 administration), or to the ELO Web Client.
Information
You can open the ELO Administration Console directly using the following syntax:
https://<ELO server>:<port>/ix-<target repository>/plugin/de.elo.ix.plugin.proxy/ac/
Example: https://eloserver:9093/ix-EXTEN/plugin/de.elo.ix.plugin.proxy/ac/
If you are running multiple repositories, you can switch to another repository by changing the URL.
Information
Save the different URLs as a bookmark or link for quick access to the different URLs.
# Login screen
If you have entered a correct URL, the login screen appears.
Information
If single sign-on (SSO) is enabled and a valid session exists, you will be redirected to the ELO Administration Console home screen.
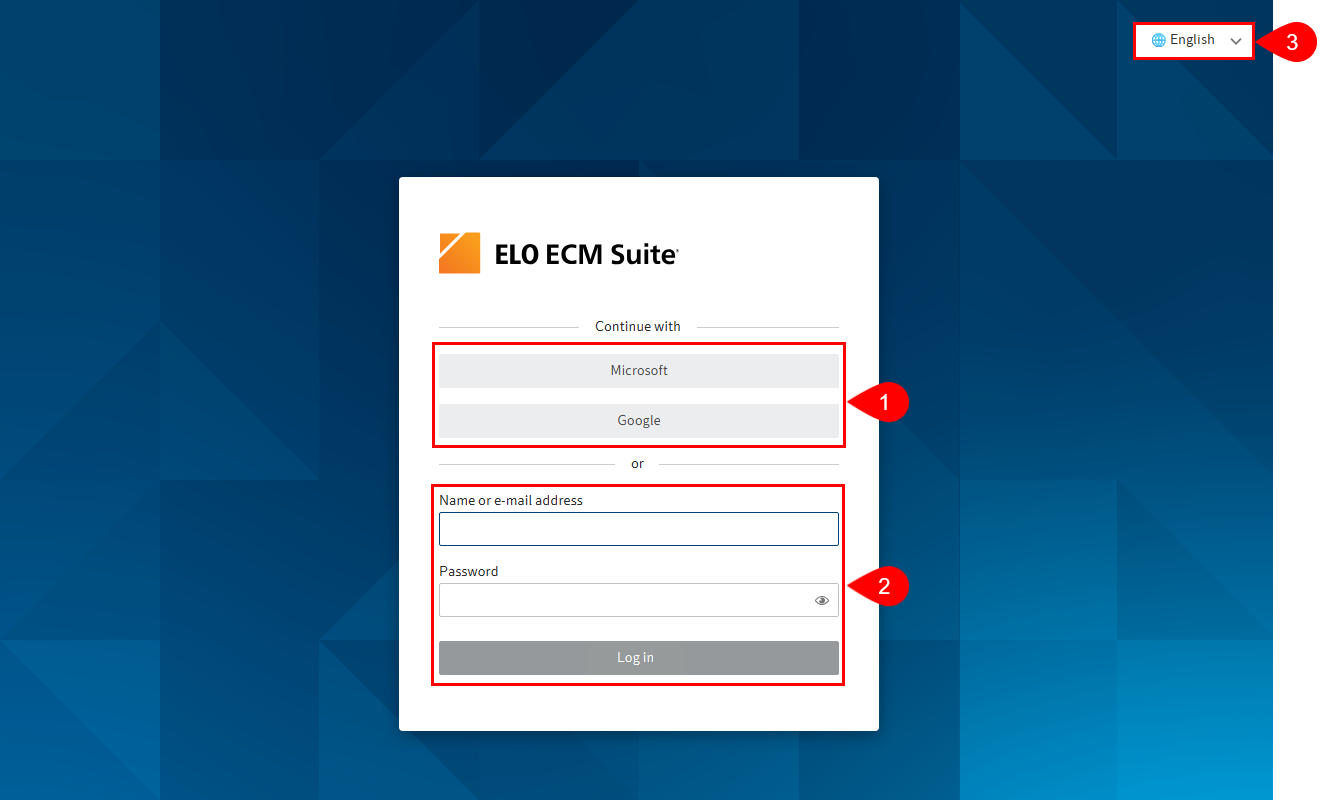
Depending on the configuration, you have the following options on the login page:
1 Log in with an identity provider if you have made the corresponding setting in the configuration.
2 Log in with ELO account data if you haven't configured an OpenID identity provider or you want to log in via ELO directly.
3 Select language
Beachten Sie
You cannot log in with the user ID.
Example: You cannot log in as an administrator with the ID 0 but must enter the name or e-mail address.
Information
A user's functional roles are automatically enabled when the user logs in to the ELO Administration Console.
# Initial login
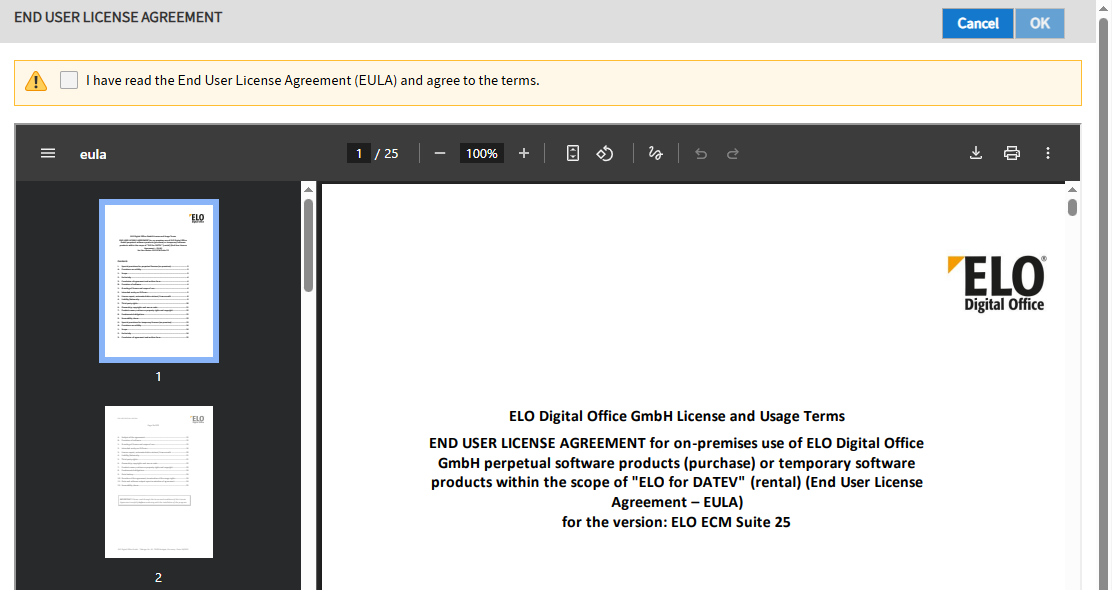
The first time you log in, you must accept the end user license agreement (End User License Agreement).
Please note
Until you accept the license agreement, the ELO Indexserver displays the message EULA must get accepted and cannot be used.
# ELO Cloud Business Edition
In environments based on ELO Cloud Business Edition, you must change the password of the Administrator account in addition to accepting the license agreement.
For more information, refer to the ELO Cloud Business Edition (opens new window) documentation.
# Menu area
The home screen of the ELO Administration Console consists of the menu area.
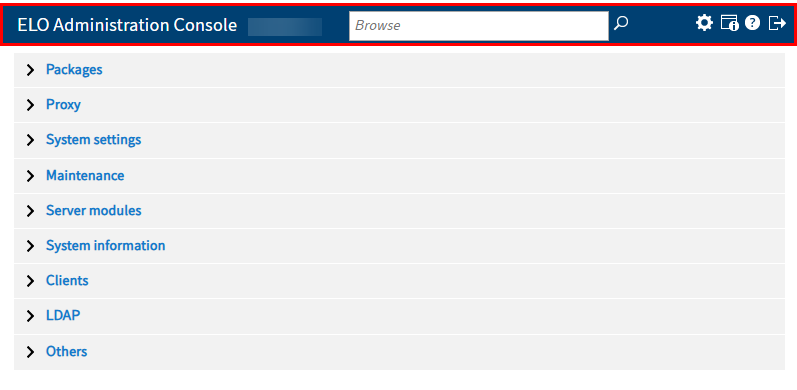
The upper section of the menu area, the topbar, contains the following areas:
- ELO Administration Console
<name of repository>: This is where you open the ELO Administration Console home screen with the groups. - Browse: Searches the settings and options in the ELO Administration Console.
- Configuration: You can edit the configuration here.
- Information about the repository and the ELO Administration Console: This is where you can edit the settings for the current repository and the program.
- Help: Open the help page.
- Log out: Log out of the program.
The Configuration, Information about the repository and the ELO Administration Console, and Log out areas are explained in more detail in the following sections of this chapter.

Below the header, you see the different areas of the ELO Administration Console, which are organized into the following groups:
- Packages
- Proxy
- System settings
- Maintenance
- Server modules
- System information
- Clients
- LDAP
- Others
You can find more information about the different groups of the ELO Administration Console in the following chapters.
# Configuration
In the Configuration section, you can define basic settings as well as the layout and behavior of the ELO Administration Console.
# Change setting
Select the respective setting to make changes.
The setting switches to edit mode.
Open the drop-down menu.
Select the desired option.
Click Save (green check mark) to confirm your changes.
The new setting is applied.
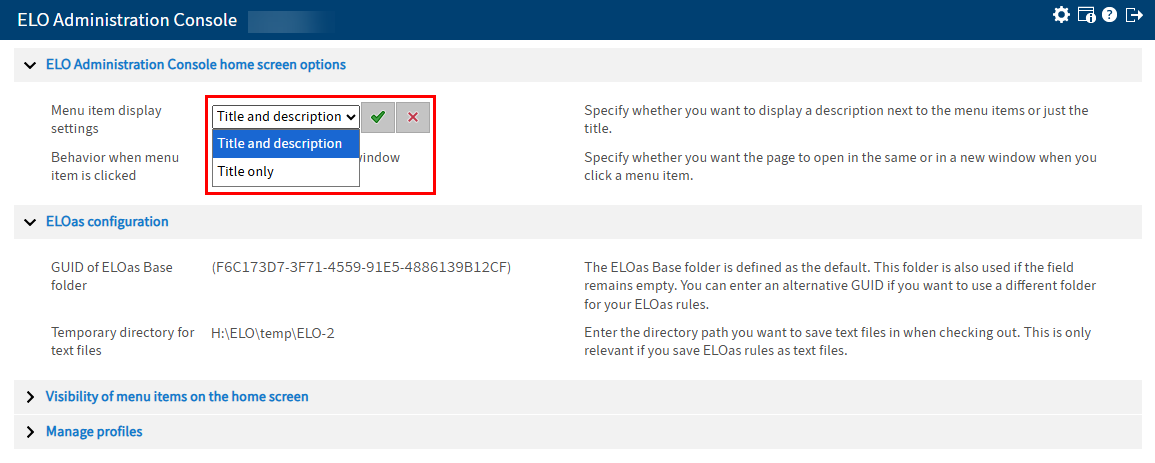
# ELO Administration Console home screen options

Menu item display settings: Specify whether you want to display a description next to the menu items or just the title.
Behavior when menu item is clicked: Specify whether you want the page to open in a new window or in the same window when you select a menu item, or whether parent or top is entered for HTML frames.
# ELOas configuration

GUID of ELOas Base folder: The ELOas Base folder is defined as the default. This folder is also used if the field is left blank. You can enter an alternative GUID if you want to use a different folder for your ELOas rules.
Temporary directory for text files: Enter the directory path you want to save text files in when checking out. This is only relevant if you save ELOas rules as text files.
# Visibility of menu items on the home screen
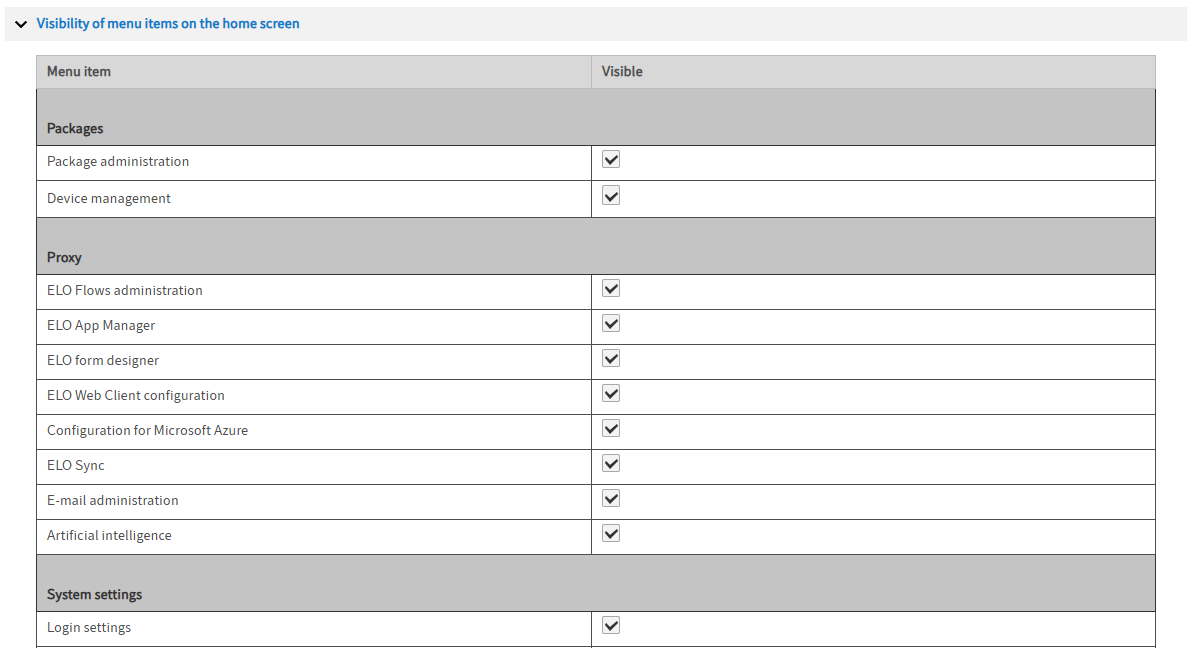
Under Visibility of menu items on the home screen, you define which areas are available in the ELO Administration Console. Enable or disable the various options by selecting the check boxes.
# Manage profiles
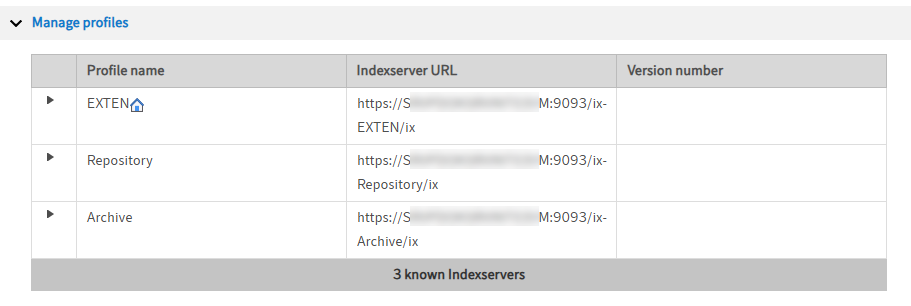
You can edit the profile settings in the Manage profiles area.
Select the entry of the profile you want to edit in the table.
The program switches to edit mode.
Profile name: Edit the name of the profile in the Profile name field.
Indexserver URL: You see the Indexserver URL of the profile in the Indexserver URL field.
Hide during login: To hide the profile when logging in to the ELO Administration Console, enable the Hide during login option.
Proxy redirect logic: If you access the ELO Administration Console from the Apache Tomcat Manager page, you can use the redirect logic to select which ELO Indexserver you want to connect to. You can change the default behavior with the Proxy redirect logic field.
The following values apply:
-1 = Redirect is not allowed.
0 = Redirect is allowed (default).
1 and higher = Redirect is allowed. The higher the number, the lower the redirect priority.
Repository GUID: The Repository GUID field contains the GUID of the repository. This is also the GUID of the top level in the repository.
Select Save.
Alternative: Click Cancel to discard the changes to the profile.
# Information about the repository and the ELO Administration Console
The Information about the repository and the ELO Administration Console button ("i" icon) takes you to the Information about the current user and repository area. This area contains information about the active user and repository.
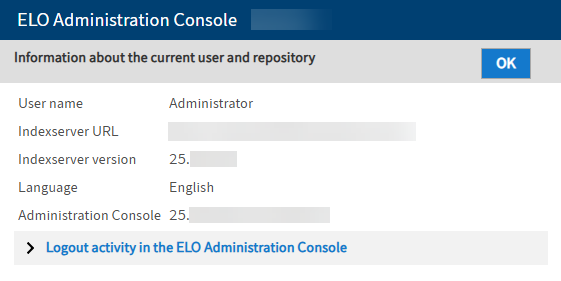
The information includes the user name, the Indexserver URL, the version number of the ELO Indexserver, the language, and the ELO Administration Console version.
The Login activity in the ELO Administration Console area contains information about which users have logged on to the ELO Administration Console and at which time, as well as the corresponding session ID.
Click OK to leave the page and return to the ELO Administration Console home screen.
# Log out

Click Log out (door icon) to log out of the ELO Administration Console.
# Simple operation
For ease of use, some areas in the ELO Administration Console can be controlled via the keyboard.
The functions are currently enabled in the following areas:
- User and group administration
- Groups (in packages)
- Translations (in packages)
You can use the following keyboard shortcuts:
| Keyboard shortcut | Action | Note |
|---|---|---|
| TAB | Navigate forwards | |
| SHIFT + TAB | Navigate backwards | |
| ENTER/SPACE | Select element; action is started/configuration area opens | |
| RIGHT ARROW | Navigate right in the table columns | |
| LEFT ARROW | Navigate left in the table columns | |
| UP ARROW | Navigate up in the selected table column | |
| DOWN ARROW | Navigate down in the selected table column | |
| PAGE UP | Scroll up in the table (multiple lines) | Does not work from the table header |
| PAGE DOWN | Scroll down in the table (multiple lines) | Does not work from the table header |
| POS1/HOME | Jump to the first column in the table | Does not work from the table header |
| END | Jump to the last column in the table | Does not work from the table header |
| CTRL + POS1/HOME | Jump to the first line in the table | Does not work from the table header |
| CTRL + END | Jump to the last line in the table | Does not work from the table header |