# Reverse proxies
ELO Modern Authentication is generally compatible with reverse proxies provided they send the X-Forwarded header.
# Basics
ELO Modern Authentication is operated as follows:
- The user authenticates themselves using the identity provider or locally, depending on the use case.
- After authentication, the browser returns to ELO.
Users are always assigned based on the configured e-mail address.
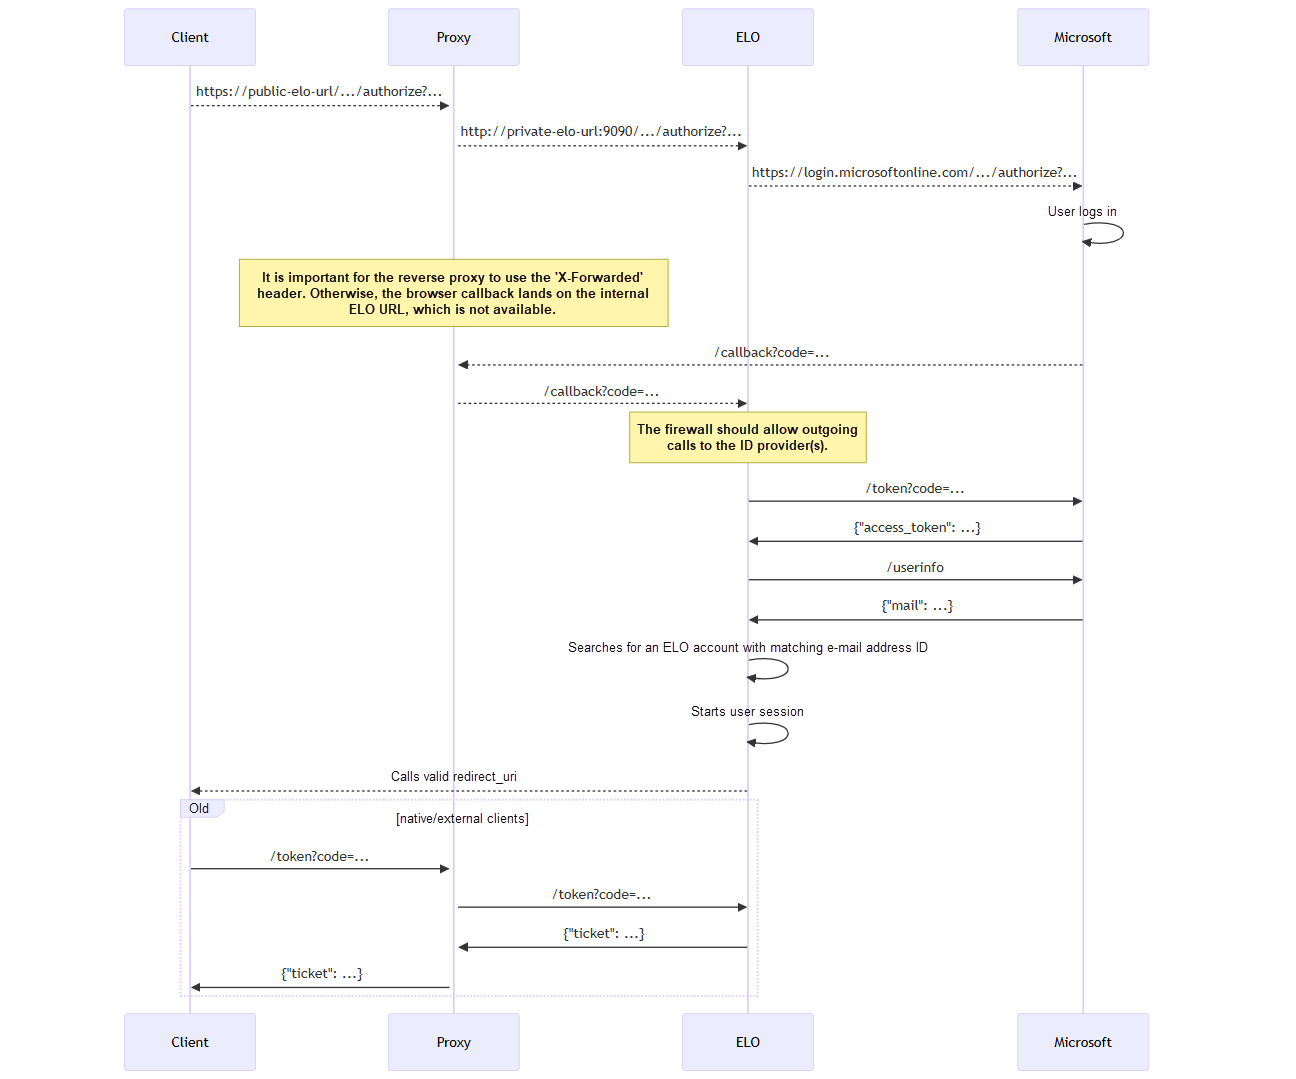
# Process
The following plan shows the general process for authentication via ELO Modern Authentication and Microsoft Azure.
# Example
https://example.org --proxy to-> http://private-network-vm:9090
In this example, the proxy should send the following header with every HTTP request:
X-Forwarded-Proto: https
X-Forwarded-Host: example.org
X-Forwarded-Port: 443
Otherwise, the Auth2 plug-in is only aware of the local URL http://private-network-vm:9090, but not of the fact that the request has been forwarded. This results in incorrect redirects and other issues.
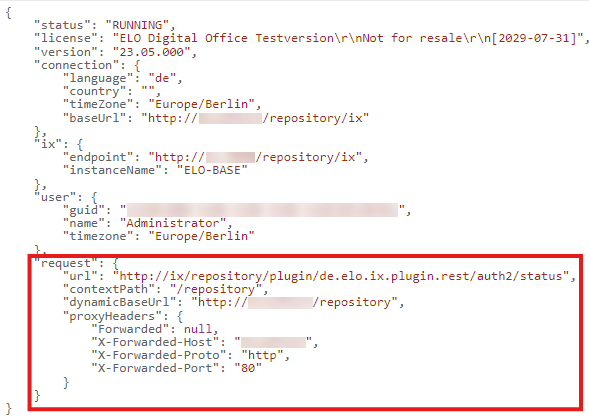
# Check header settings
Some reverse proxies add this header automatically, and with others this is optional. For some reverse proxies, this has to be configured explicitly.
To check whether the header is configured correctly, log on the ELO Administration Console with your user name and password. If the logon process is not completed due to an incorrect redirect, you can access the Status page of ELO Modern Authentication:
https://<server>:<port>/ix-<repository>/plugin/de.elo.ix.plugin.rest/auth2/status
Under request, the status page indicates whether the proxy forwards the headers correctly and what the received URLs look like.
- Restart the ELO Indexserver.
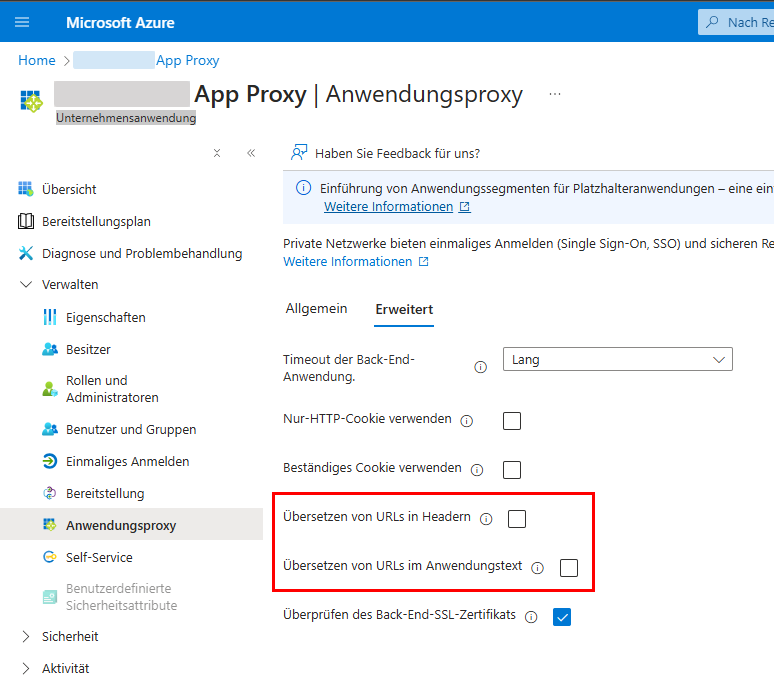
# Microsoft application proxy
If the message Invalid redirect_uri/response_type is output in the browser during authentication with ELO Modern Authentication (Auth2) via a Microsoft Entra application proxy, the following configuration can be changed in the Microsoft Azure Portal for successful authentication.
Sign in to the Microsoft Azure Portal: https://portal.azure.com/ (opens new window).
Select Microsoft Entra ID.
In the sidebar, select Organize > Enterprise Applications.
Select the corresponding app.
The app overview appears.
In the sidebar, select Organize > Application Proxy.
Select the Advanced tab.
Disable the options Translate Urls in headers and Translate Urls in application body.