# Using WebDAV on MAC OS X
NTLM authentication is not used on Mac OS X. Instead, Linux uses basic authentication. For this reason, we recommend that you secure the data transfer through SSL.
# Command line
Use the following command:
mount -t webdav http://<server name>:<port>/ix-<repository name>/ixwebdav/<mount point >Replace the placeholders with your own values.
# Finder
In the Finder, select Go to > Connect to server.
Enter the Internet address of ELO WebDAV into Server address.
Select Connect.
Information
While working with the Finder, many temporary files will be generated, uploaded to ELO, and deleted again afterwards. Additionally, the files are also created in the ELO root folder. For this reason, the user who is logged on must have write permissions to the root folder.
# Cyberduck
Unlike the Finder, the free Cyberduck tool does not generate temporary files.
After installing Cyberduck, start Cyberduck from your dock or program folder.
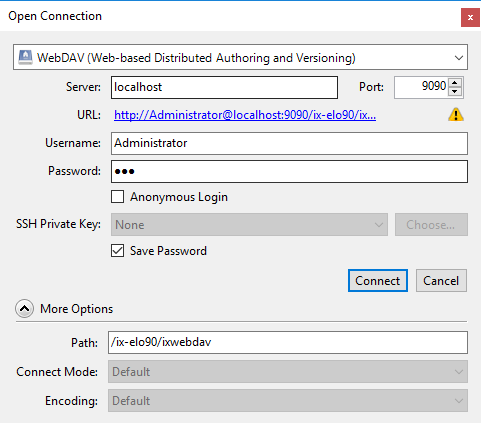
Select New connection.

- Enter the following settings:
| Field/option | Notes |
|---|---|
| Server | The server name |
| Port | The port used |
| User name | Name of the ELO account used |
| Password | Password of the ELO account used |
| Save password | Enabled |
| Path | The path to the respective WebDAV directory |