# ELO Sync in Azure
This chapter describes how to register ELO Sync in Azure. These actions are required for authentication with Microsoft Entra and access to Microsoft 365 resources.
In our guide, ELO Sync is available under https://elo-sync.local/ and registered as ELOSyncApp (replace as needed).
Create a new app registration in the Azure Management portal.
Navigate to App registrations (opens new window), then click New registration.

Enter the information required for the new application.
Enter the name EloSyncApp as the name for the application (or a name of your choice).
For supported account types, generally select Accounts in this organizational directory only (Single tenant), though the second option Multitenant may apply depending on the structure of your organization.
Under Redirect URI, select the Web platform and enter
https://<server name:port>/signin-oidc-custom.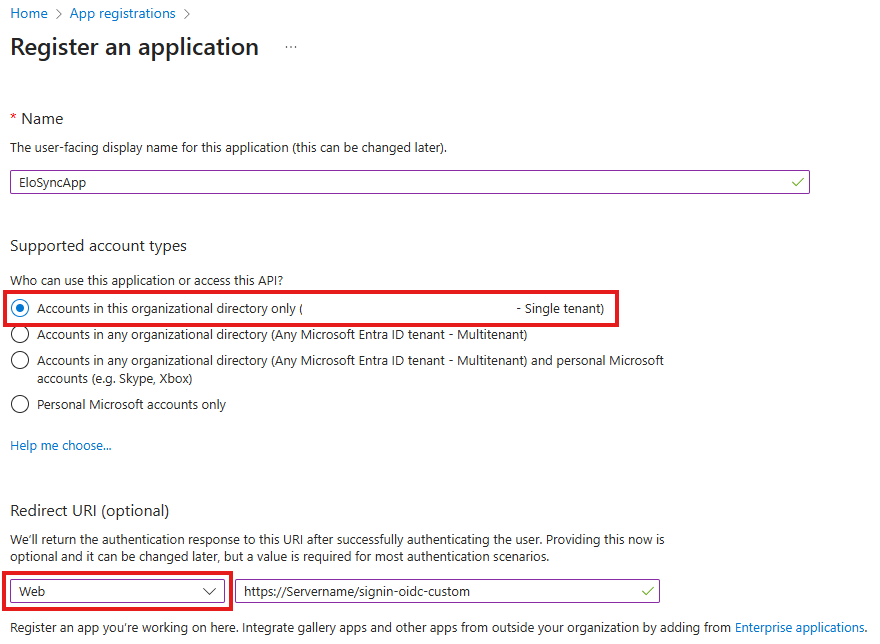
There are two options:
The ‘PublicUrl’ node in the 'appsetings.json' file is empty: enter the following values:
https://myserver:5063/signin-oidc-custom
The 'PublicUrl' node in the 'appsetings.json' file was set: enter the following value in the Redirect URI:
https://mydomain.com/signin-oidc-custom
Information
The path
/signin-oidc-customcan be changed in the appsettings.json file. See Configuration for more information.Important: When using the ELO Sync REST API, you must select Multitenant under Supported account types when generating the app (see screenshot).
Confirm the information and create the app registration.
While you are editing the appsettings.json file, go to the Overview for the application and copy the
ClientIdandTenantIdinformation.Open the newly created ELOSyncApp application and select the menu item Authentication.
Here, you have to change the settings under Implicit grant and hybrid flows and enable both Access tokens and ID tokens.
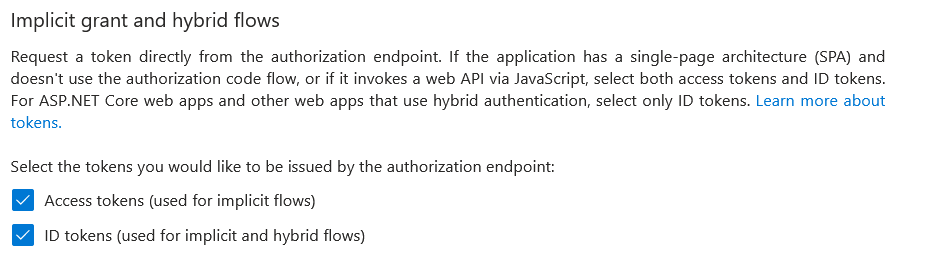
Once you have changed the settings, click Save.
Create a new app secret
Select the Certificates & secrets menu item.
Select the Client secrets tab.
Click New client secret.
Select a meaningful description and duration for the new secret and confirm with Add.
IMPORTANT: After you create the secret, it is only possible to copy the created secret. While you are editing the appsettings.json file, copy this value to
ClientSecret, otherwise copy it to a temporary, secure location where you can access it.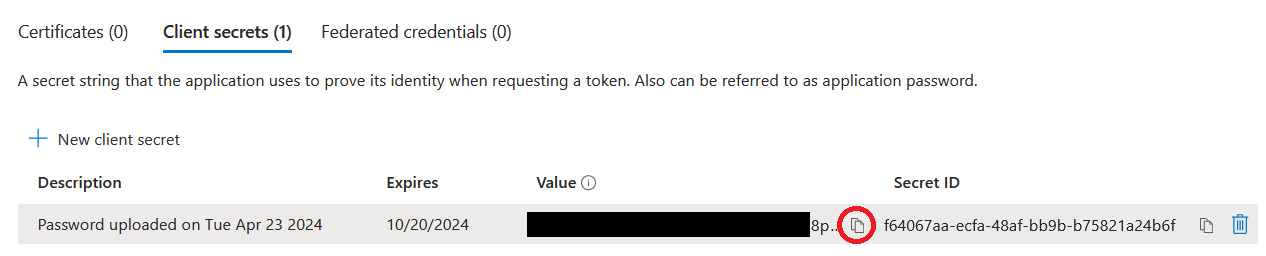
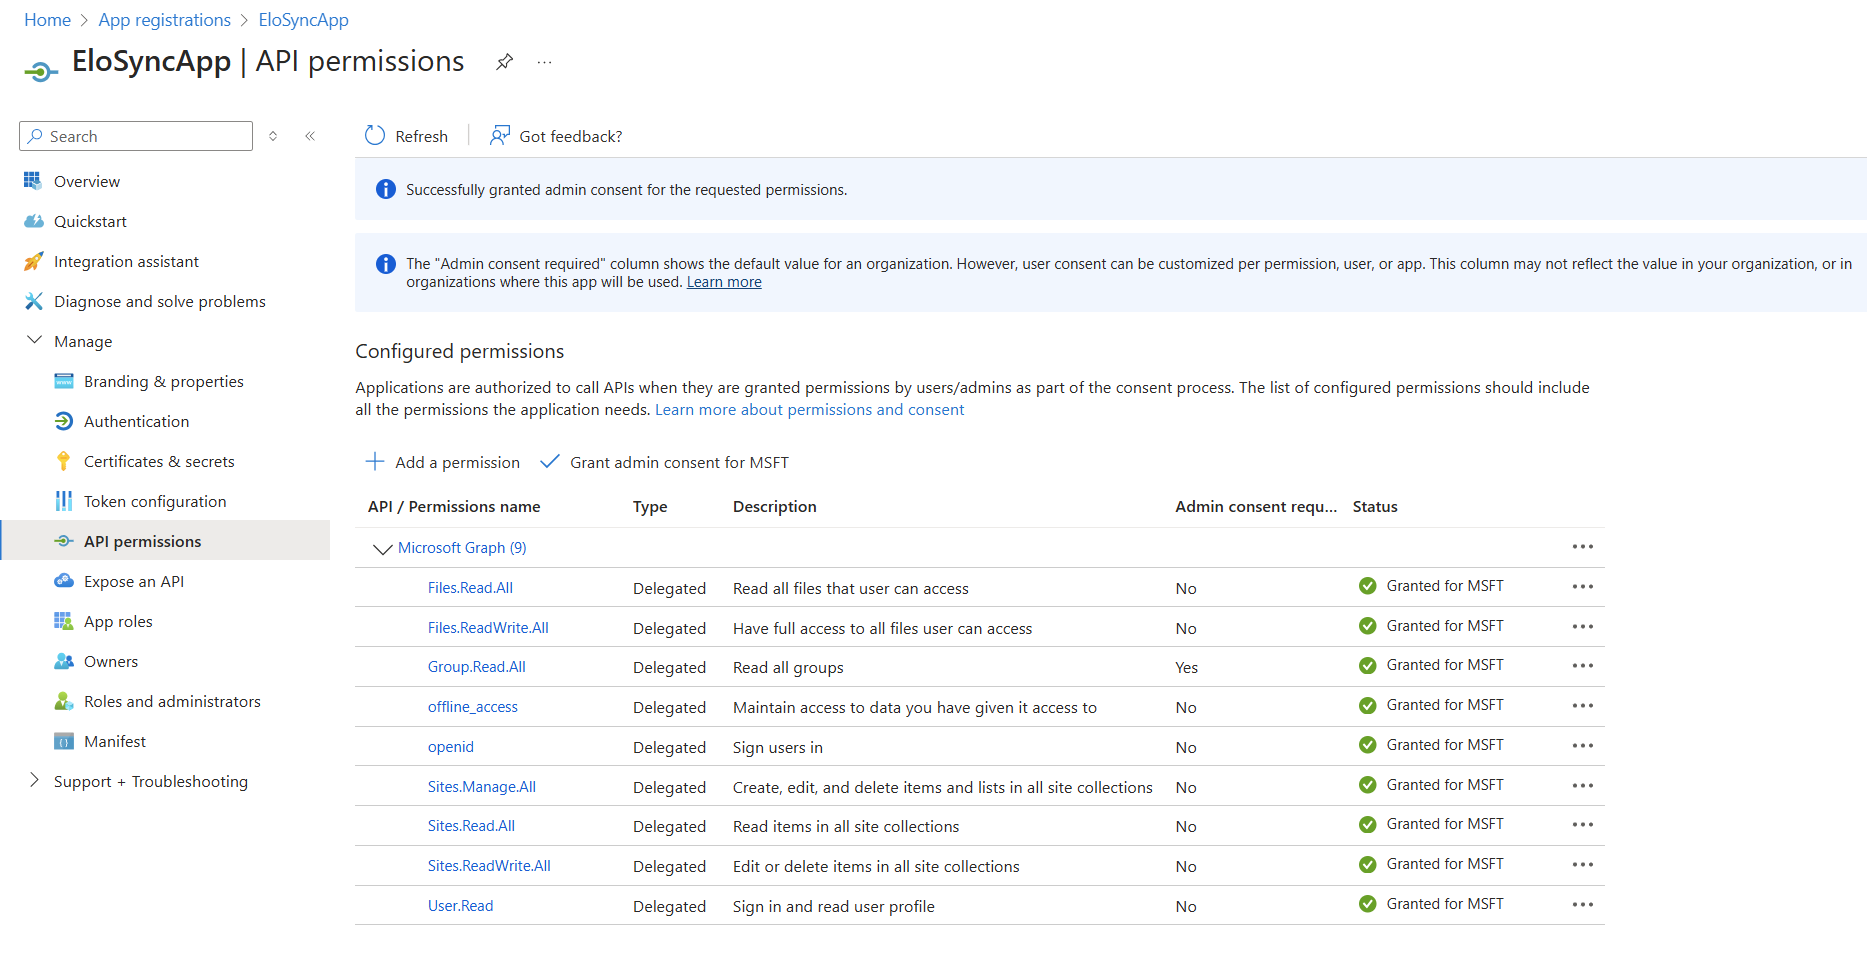
Add the required permissions for ELO Sync.
ELO Sync itself requires permissions to access data via the Microsoft Graph API, either for itself or on behalf of users.
Select the API permissions menu item.
Click Add a permission for the following:
Key Location Required for openid Microsoft Graph/Delegated/openid User authentication offline_access Microsoft Graph/Delegated/offline_access Retain access to the data you gave ELO Sync access to. User.Read Microsoft Graph/Delegated/User.Read Sign in and read user profile Please note
IMPORTANT: These are the only basic permissions. Additional permissions may be required depending on the application. You will find more information under Permissions.
Click Add a permission, then select APIs my organization uses
Search for and select ELOSyncApp. Add the newly created permission SyncJobs.ReadWrite.All.
Information
The permission may not be listed yet. This can take a few minutes for the changes to be synchronized across all systems in Azure. If this is the case, try again later.
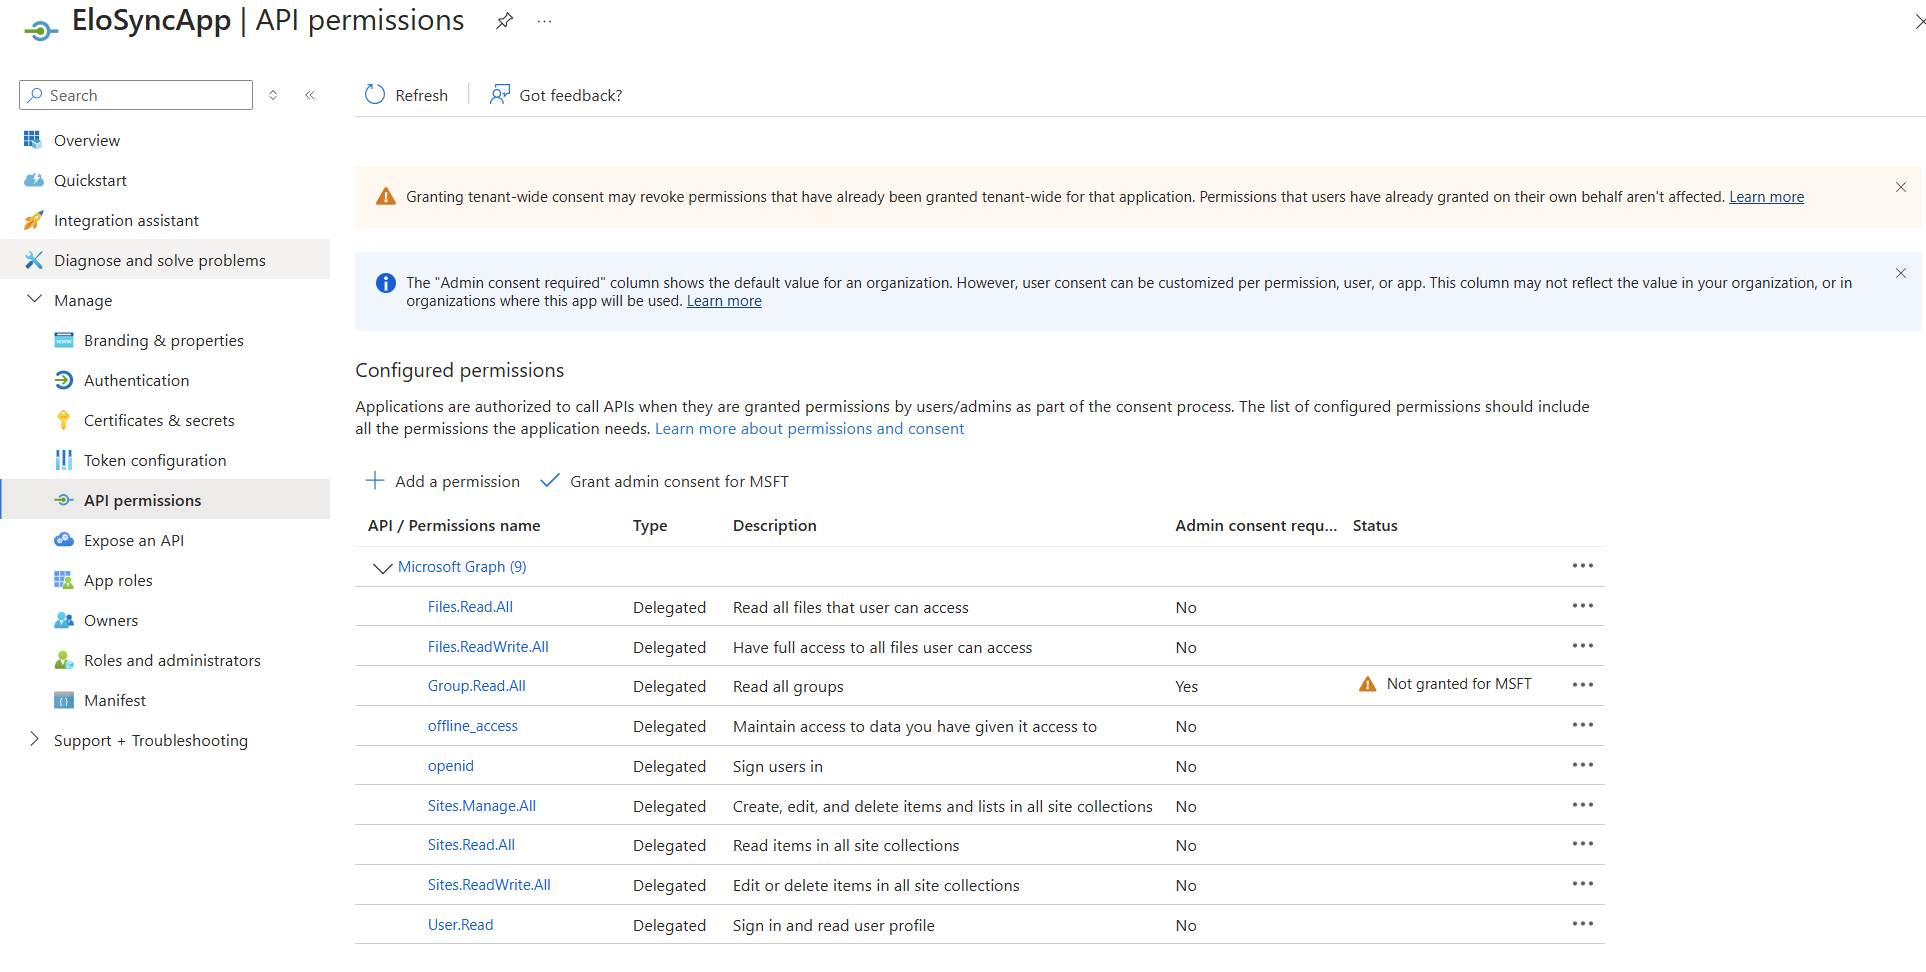
If required, you can grant admin consent for all configured permissions so that users do not have to grant individual access to their data.
Check that all permissions are correct. In the screenshot below you can see an example for using admin consent: